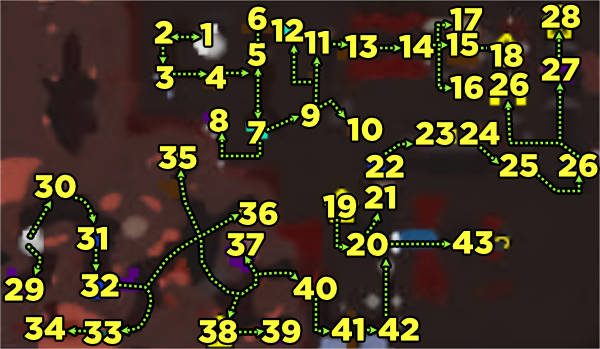
Twenty minutes later, inside the caverns of Stonetalon Peak…

YOUTUBE VIDEO
CUTSCENE
Cairne Bloodhoof: The path cuts off in different directions.
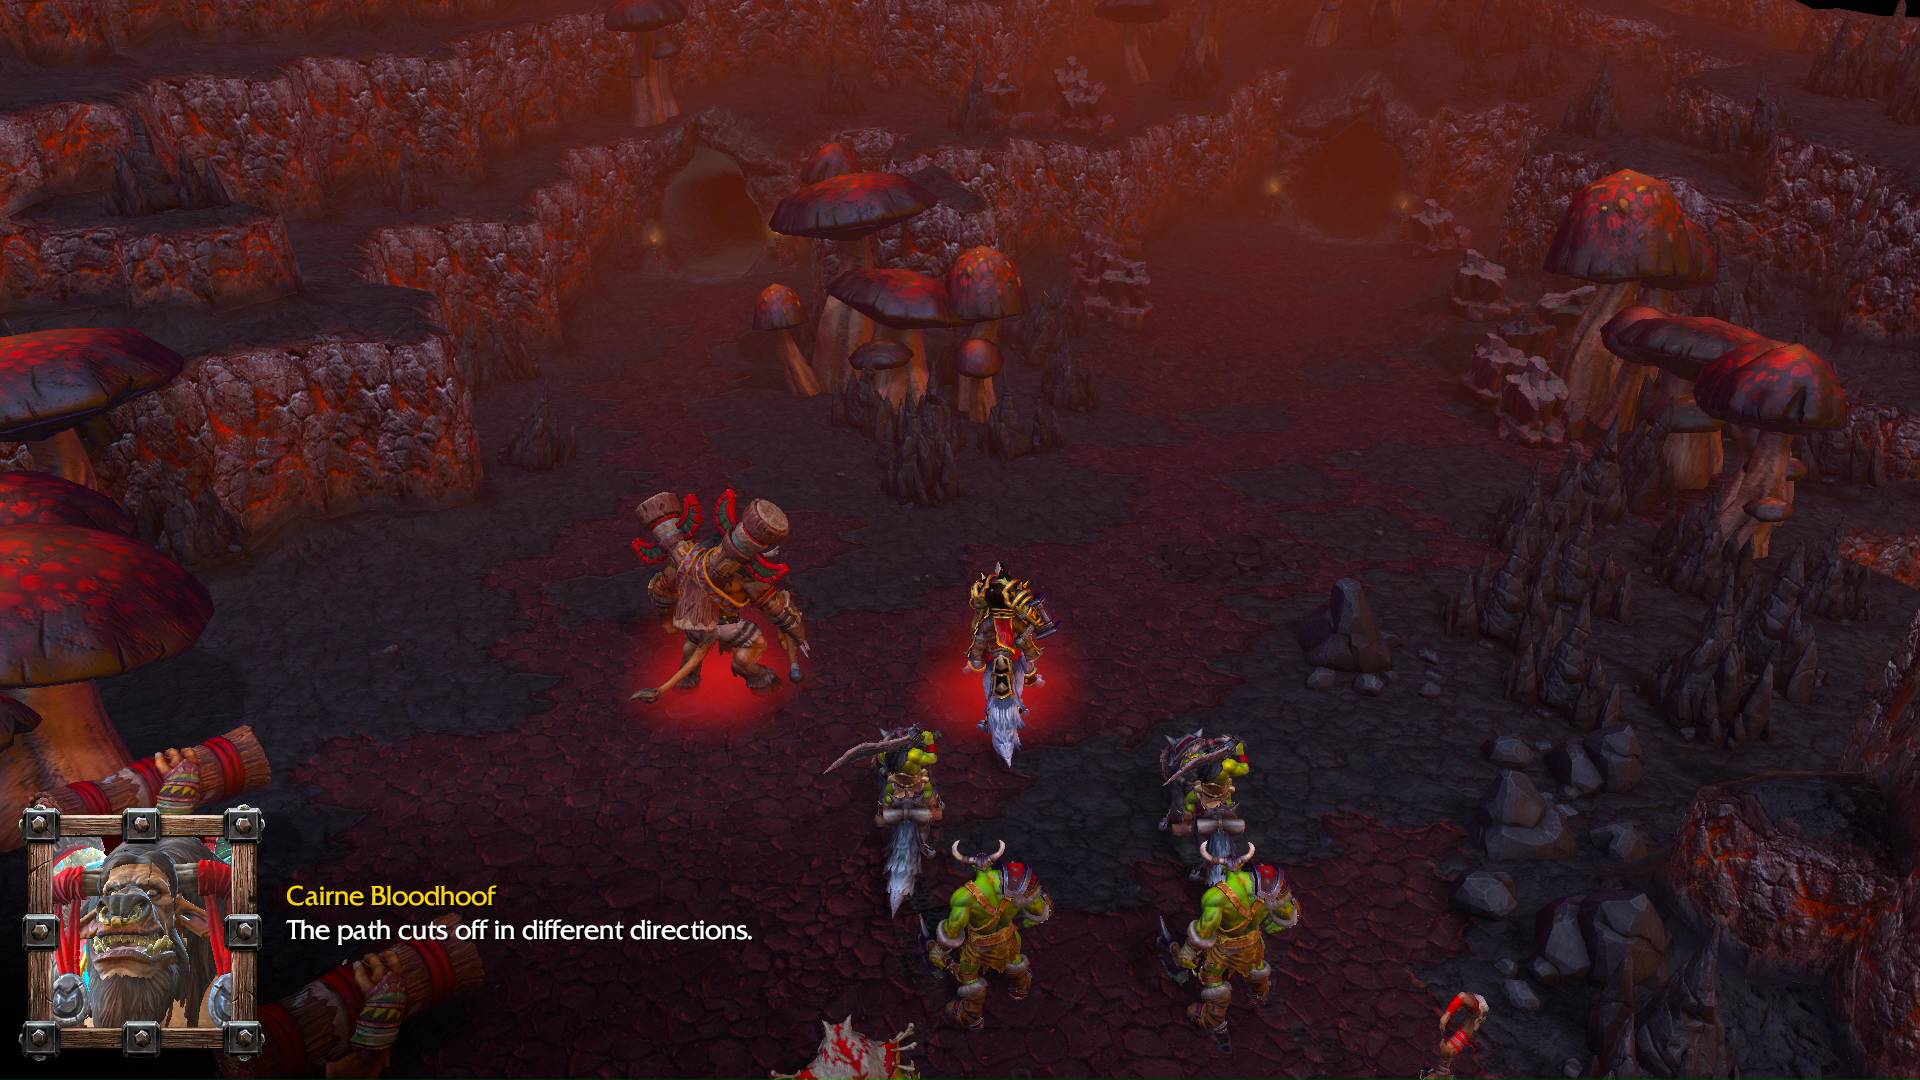
Thrall: Either of those caverns could stretch for miles. Perhaps we should split up?
Cairne Bloodhoof: Very well. Be careful, young one. There’s no telling what ancient creatures lie within the mountain’s depths.
Thrall: I will, Cairne. Good luck.
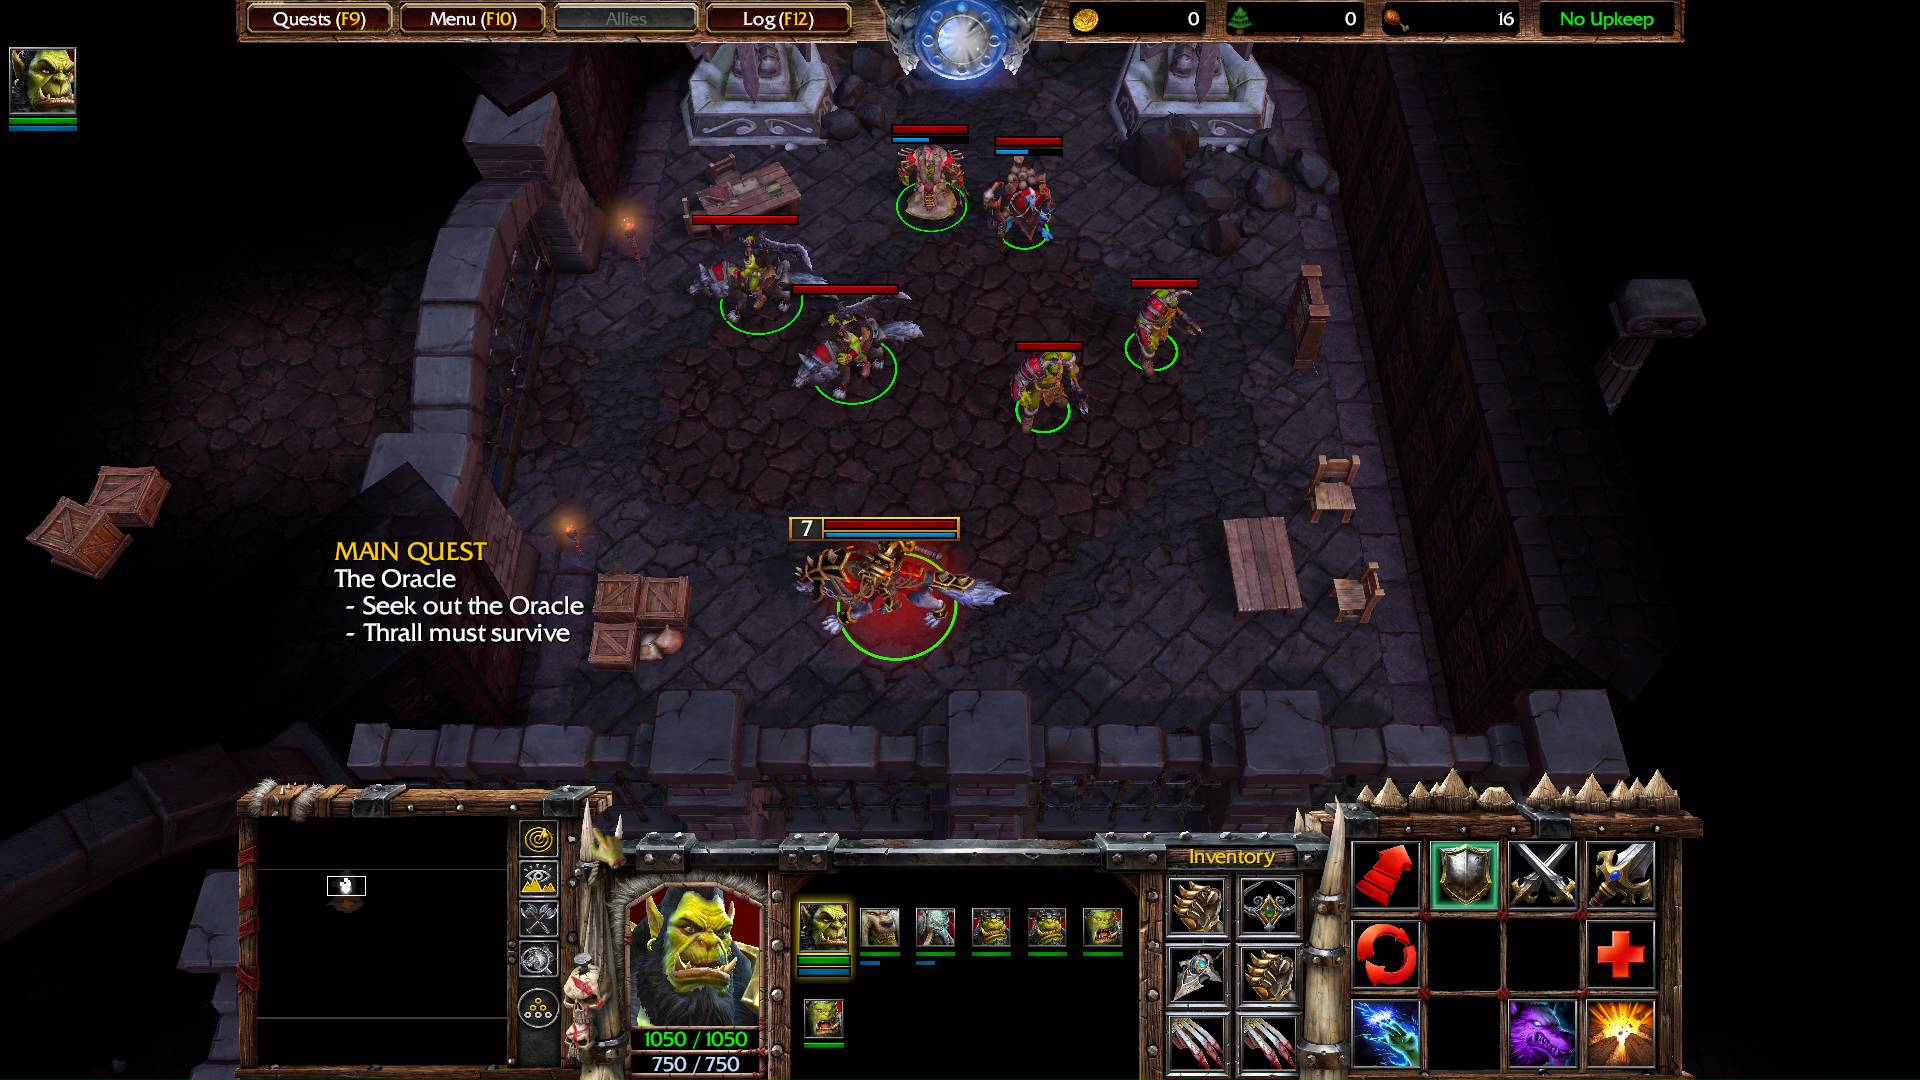
MAIN QUEST
The Oracle
- Seek out the Oracle
- Thrall must survive
STRATEGY
NOTICE – Thrall’s Far Sight spell is not available for us in underground caverns.
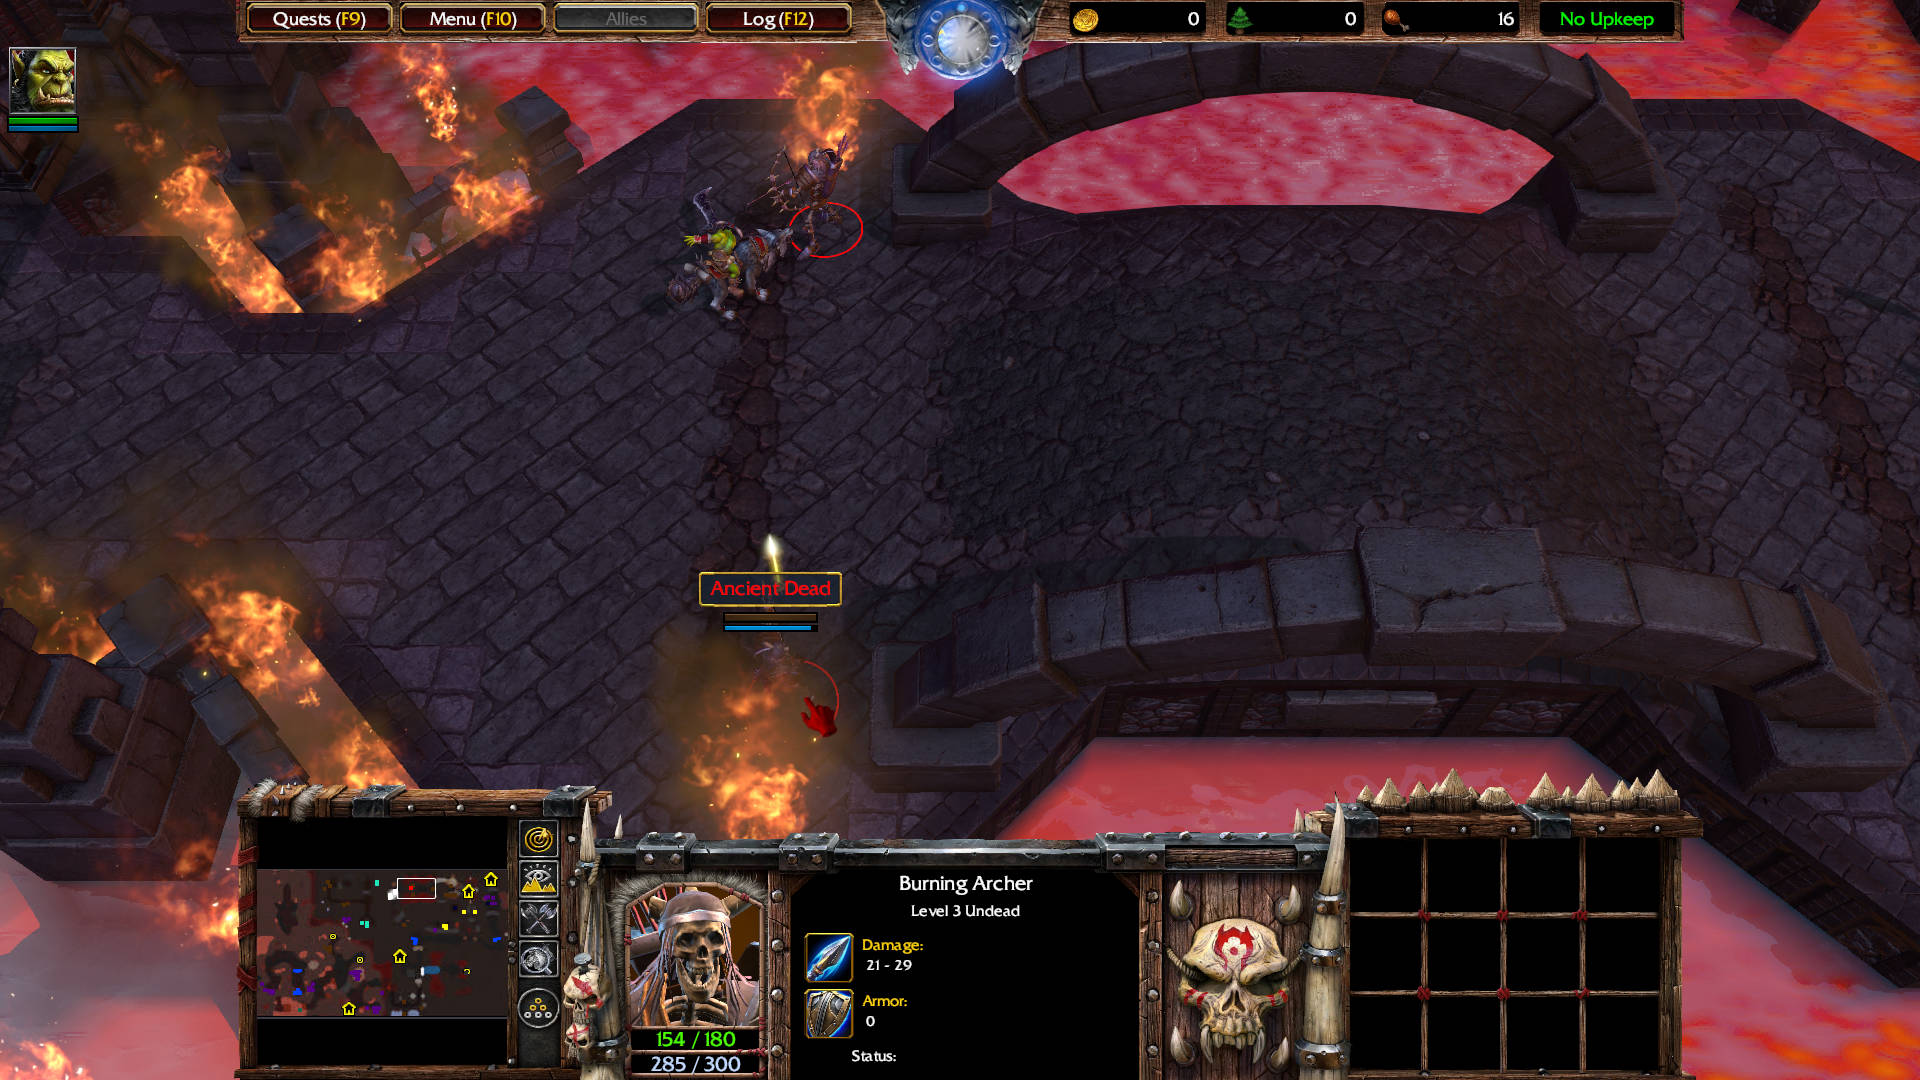
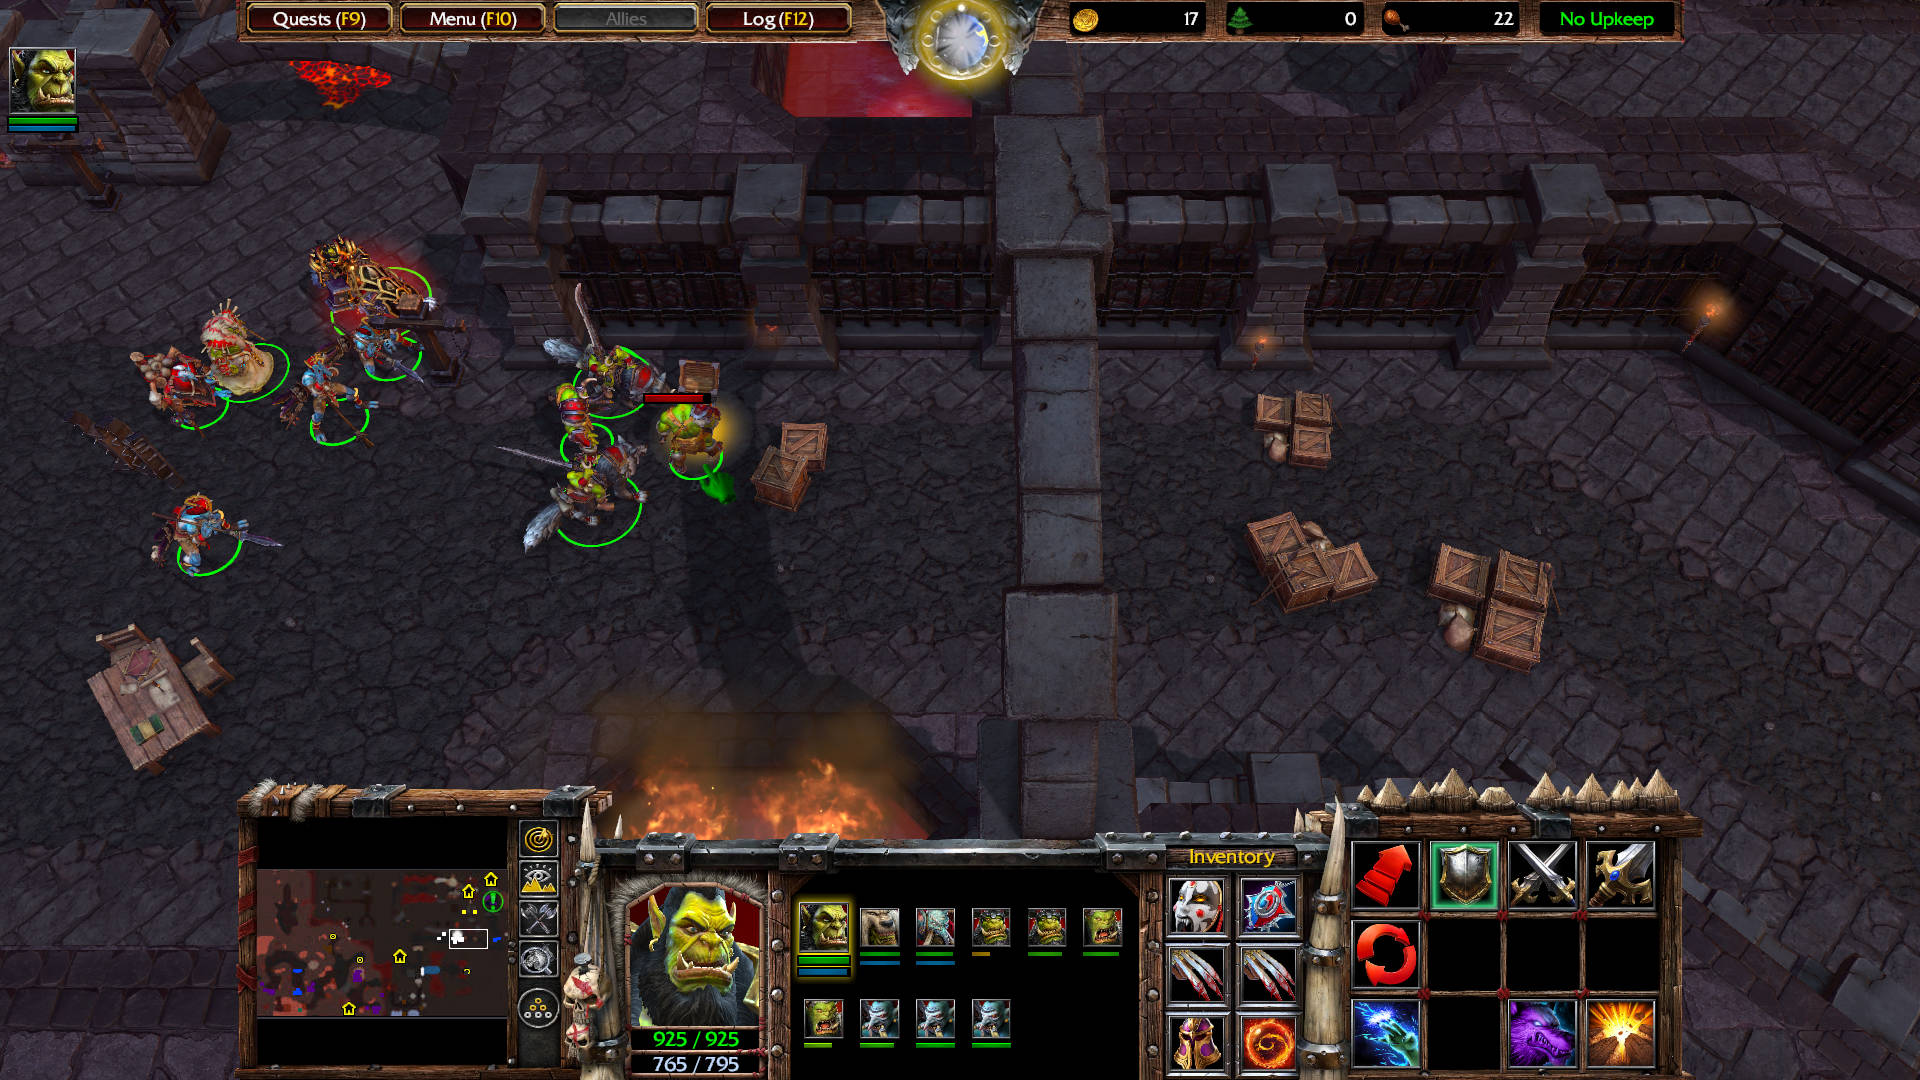
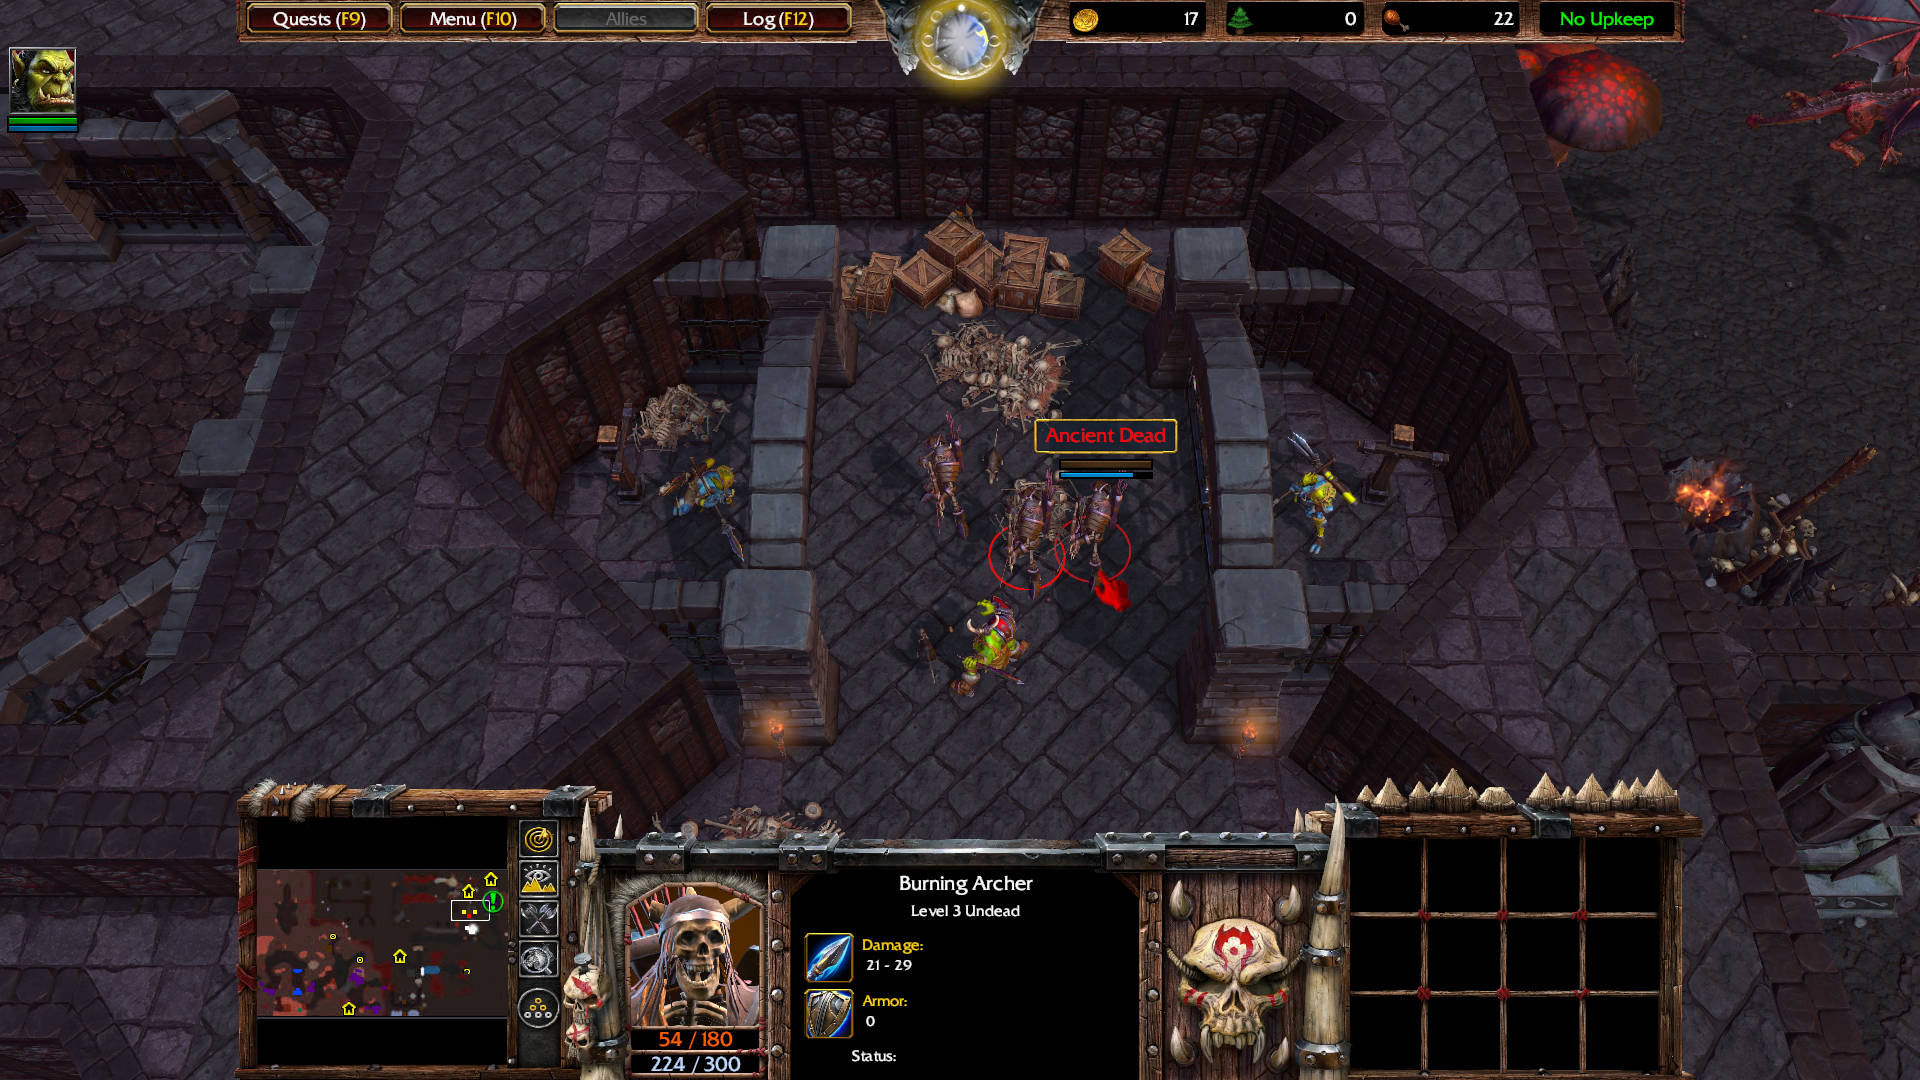
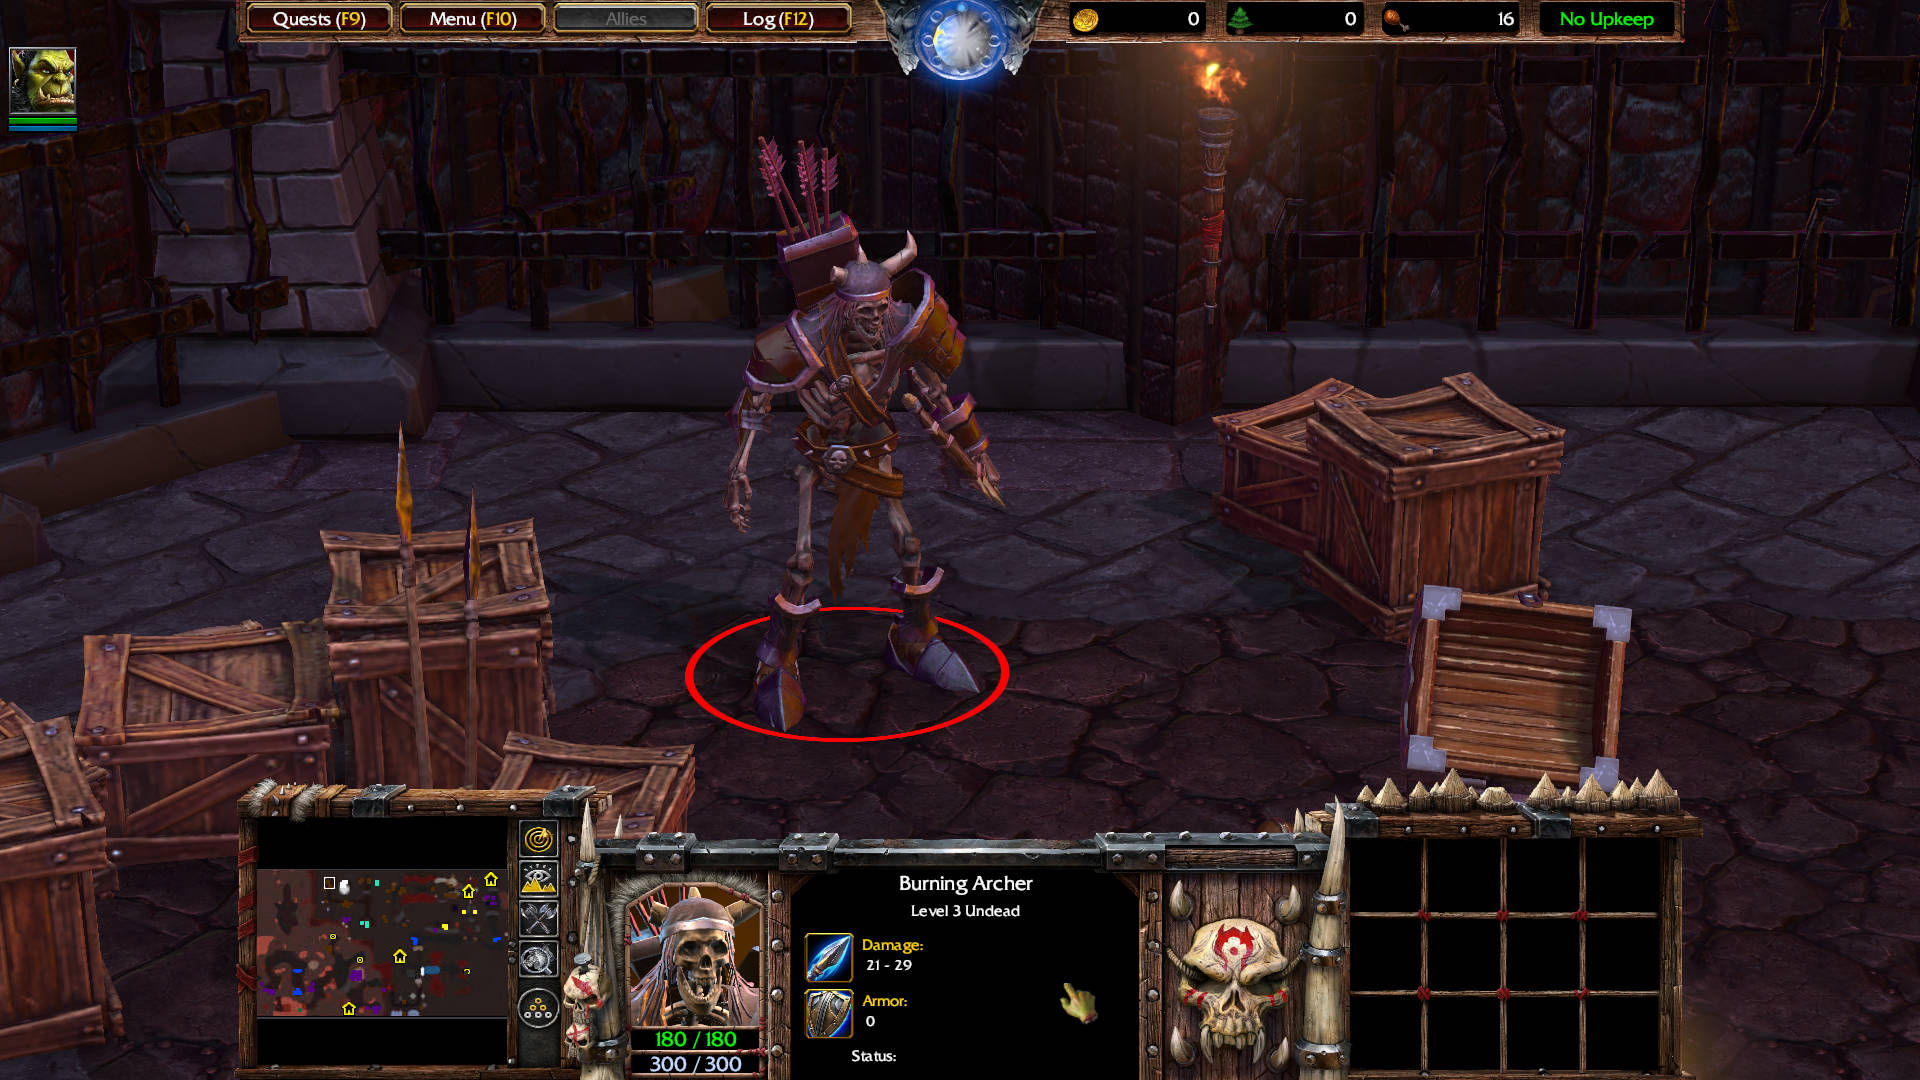
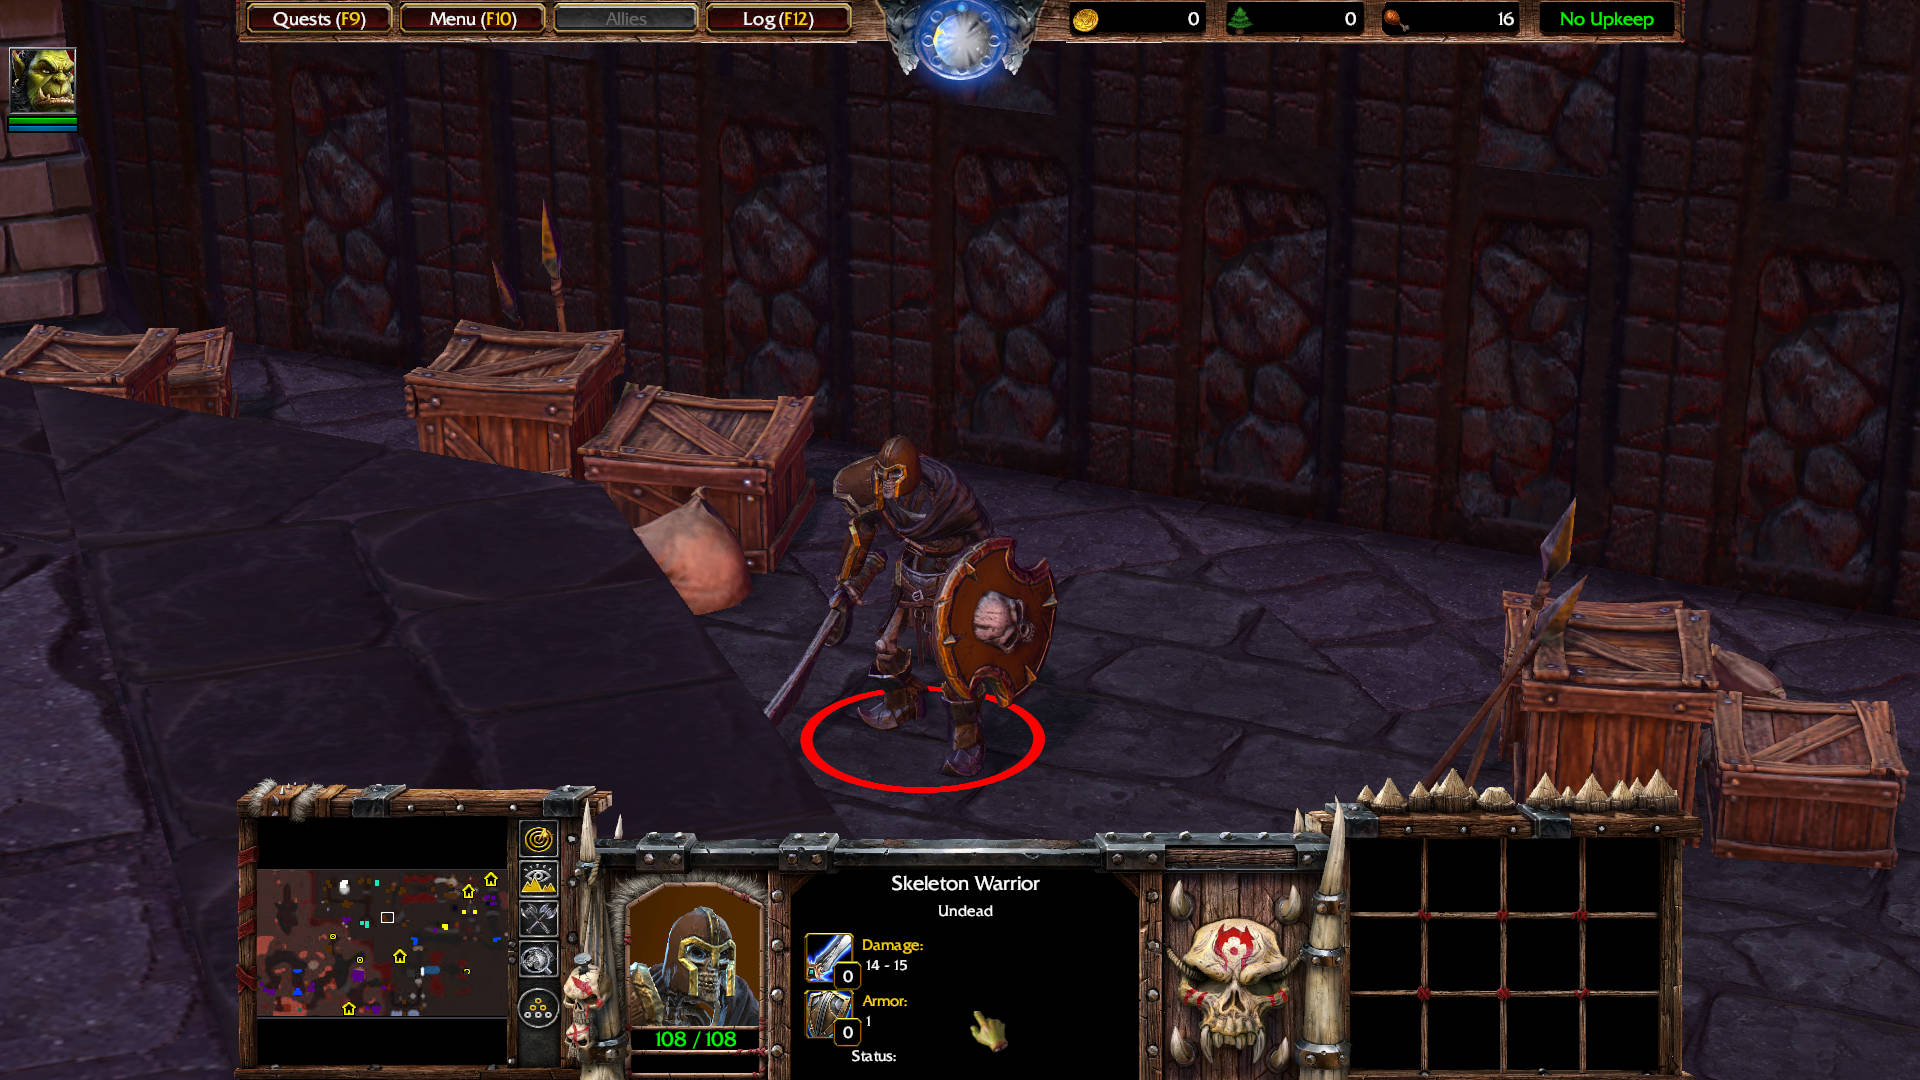
Kill the Burning Archer level 3, and the two Skeleton Warriors. The archer drops an interesting item — Tome of Retraining: Unlearns all of the Hero’s spells, allowing the Hero to learn different skills. The crates drop:
- Potion of Mana: Restores 150 mana when used.
- Scroll of Healing: Heals 150 hit points to all friendly non-mechanical units around the Hero when used.
HINT – Using a Tome of Retraining will reset all of your Hero’s abilities – allowing you to reassign the Hero’s skill points.
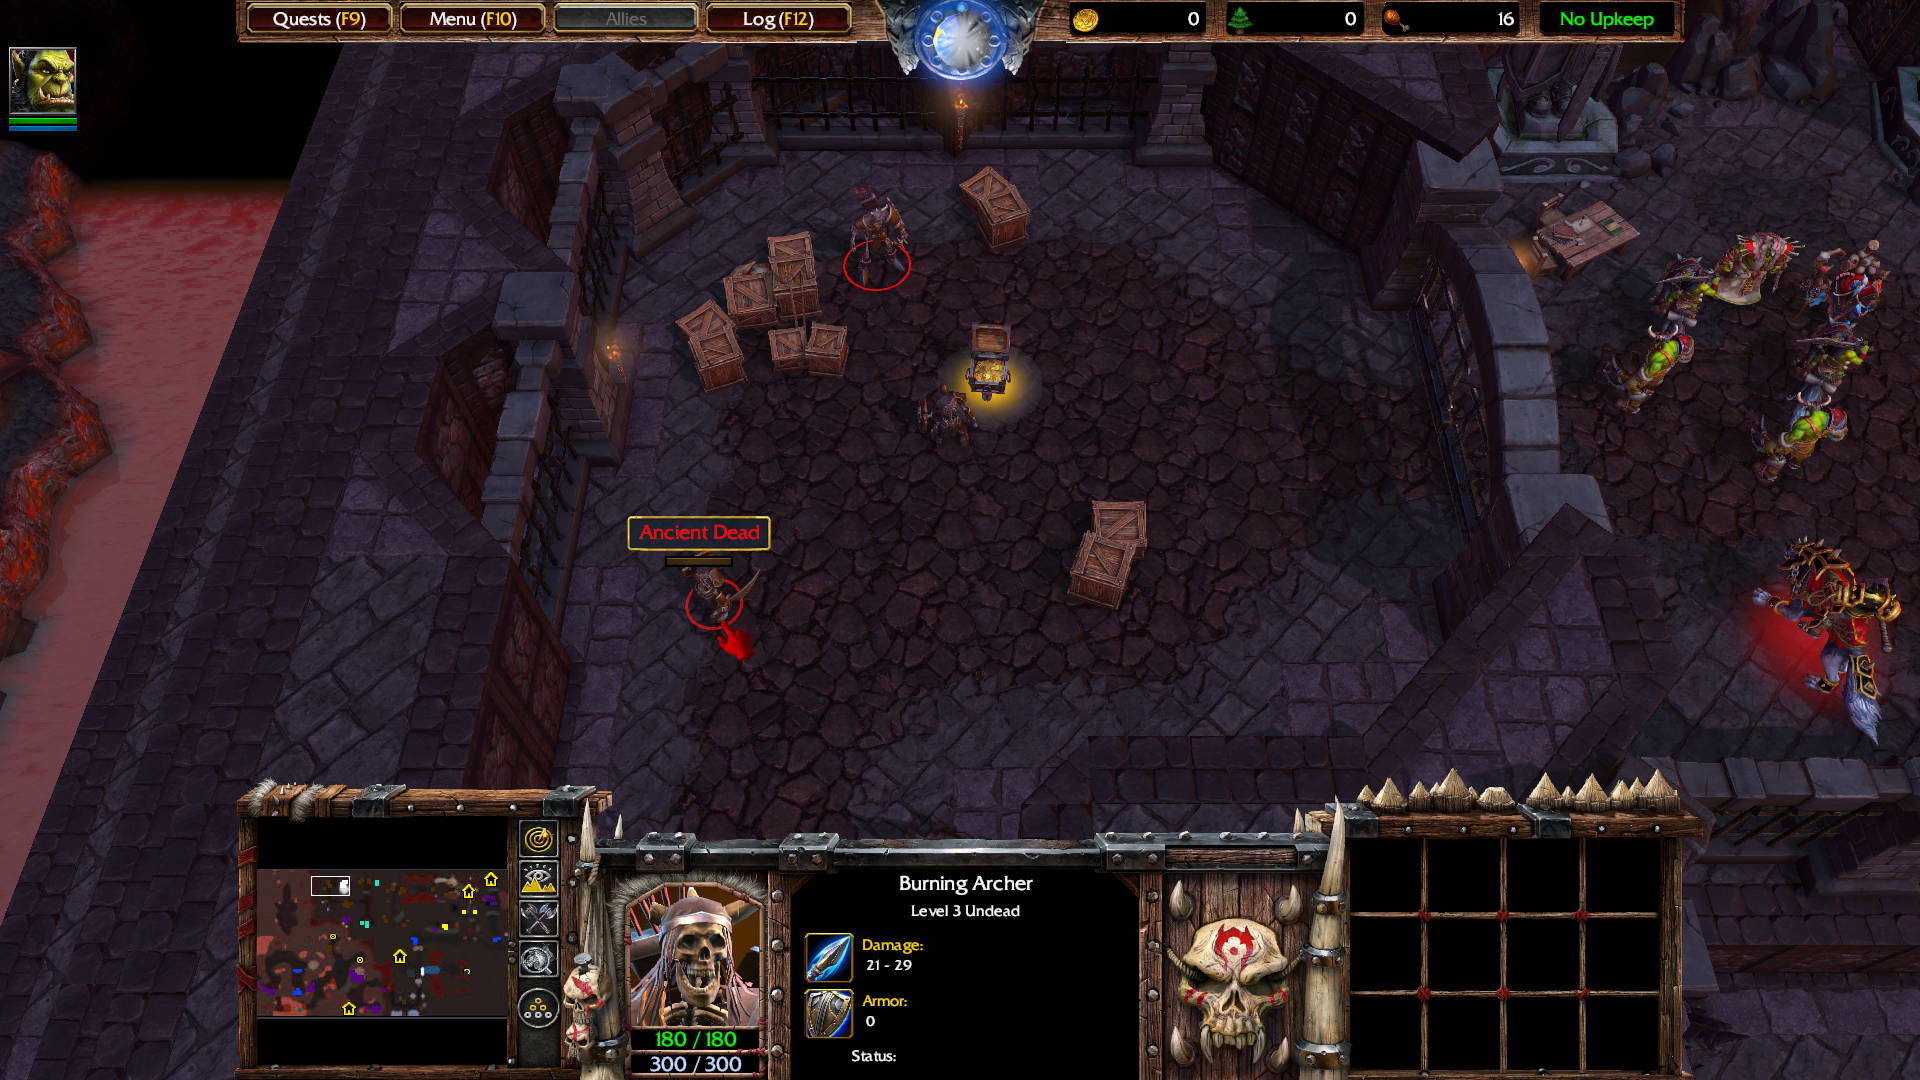
The next room has a single Burning Archer level 3.
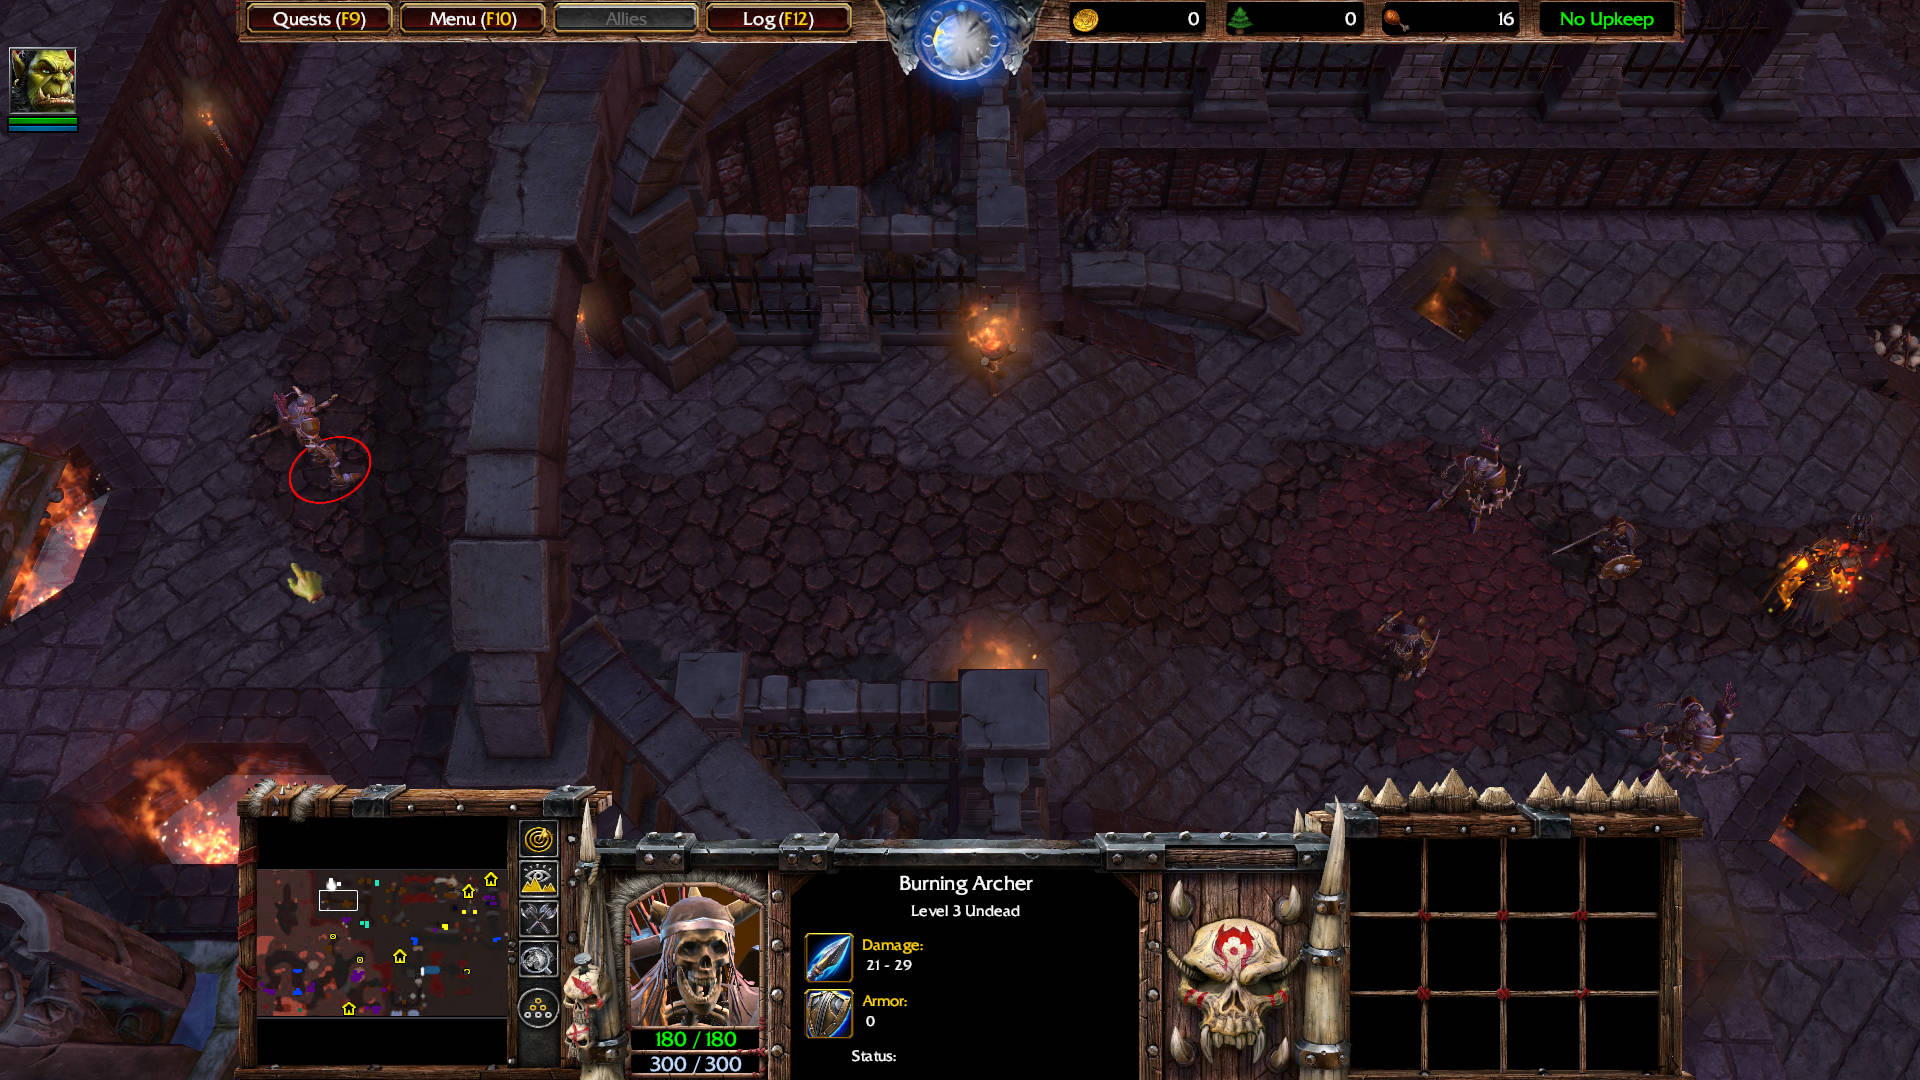
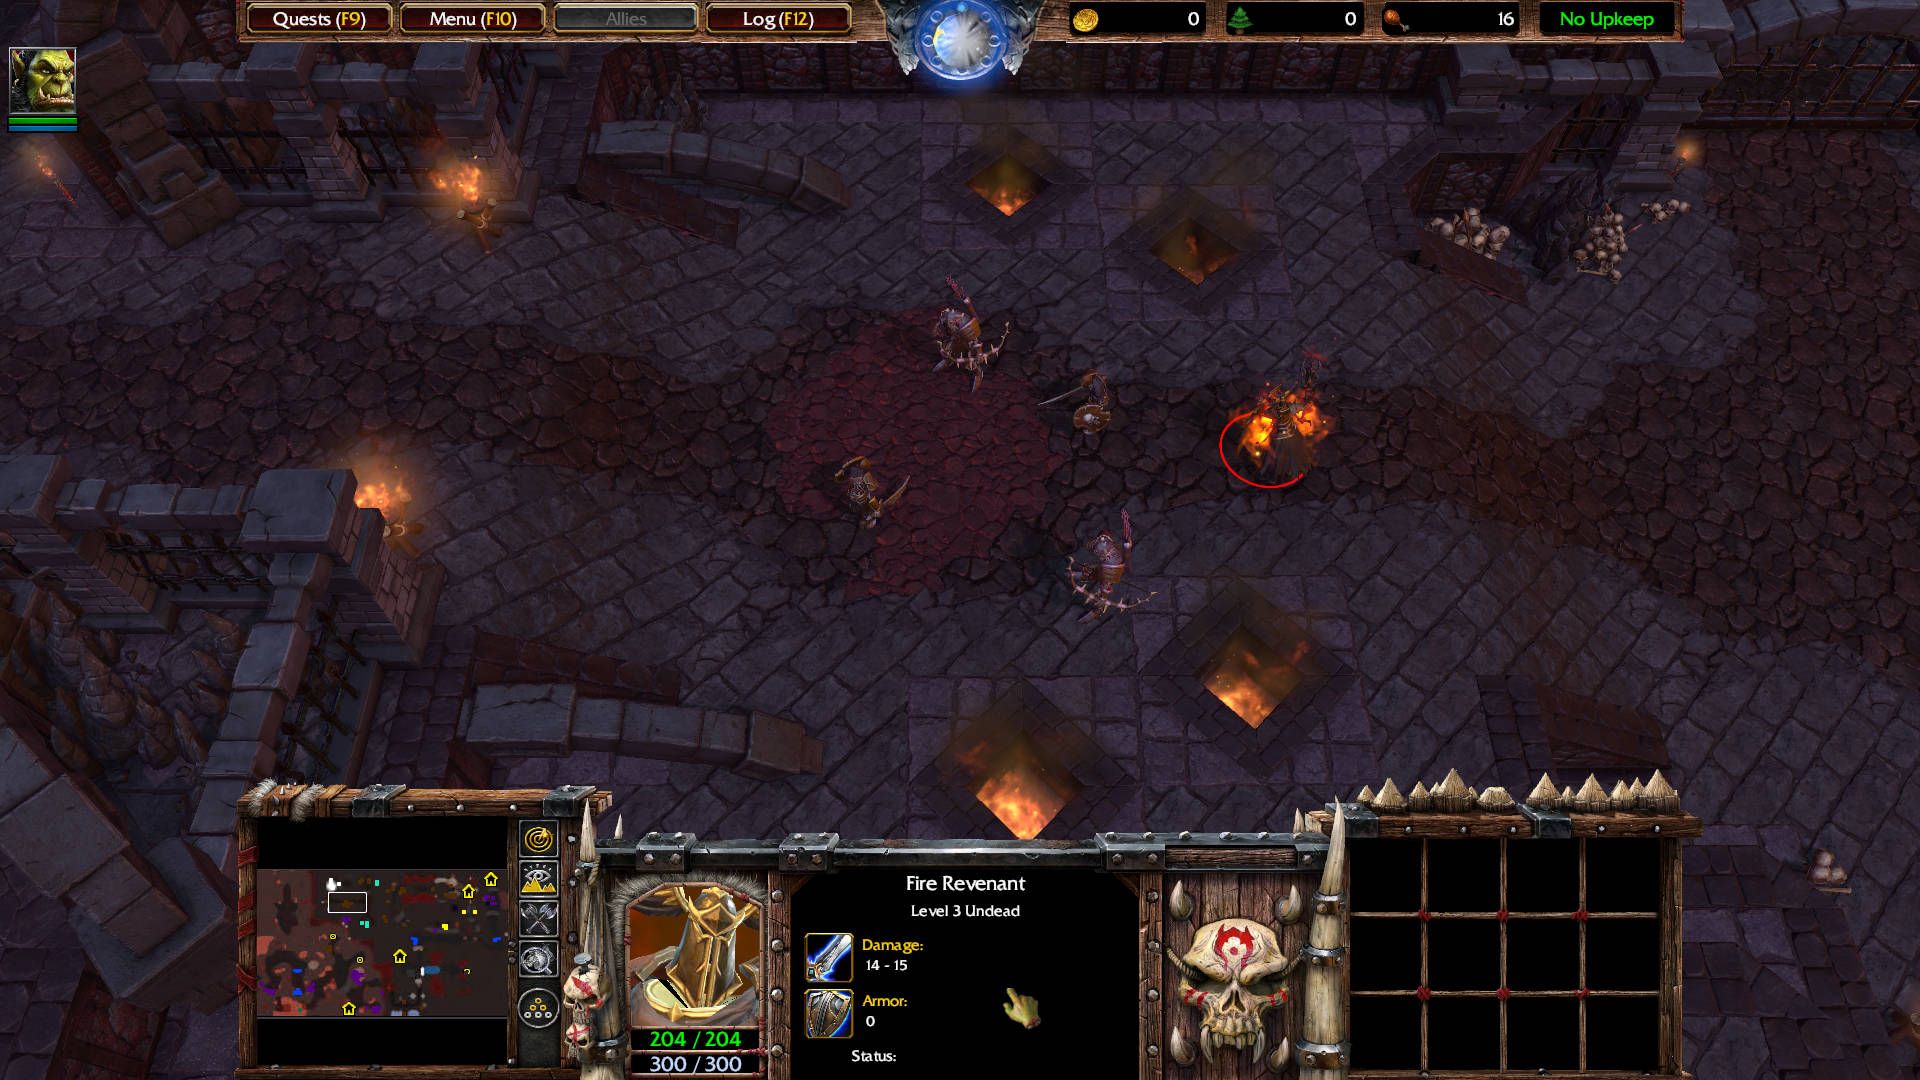
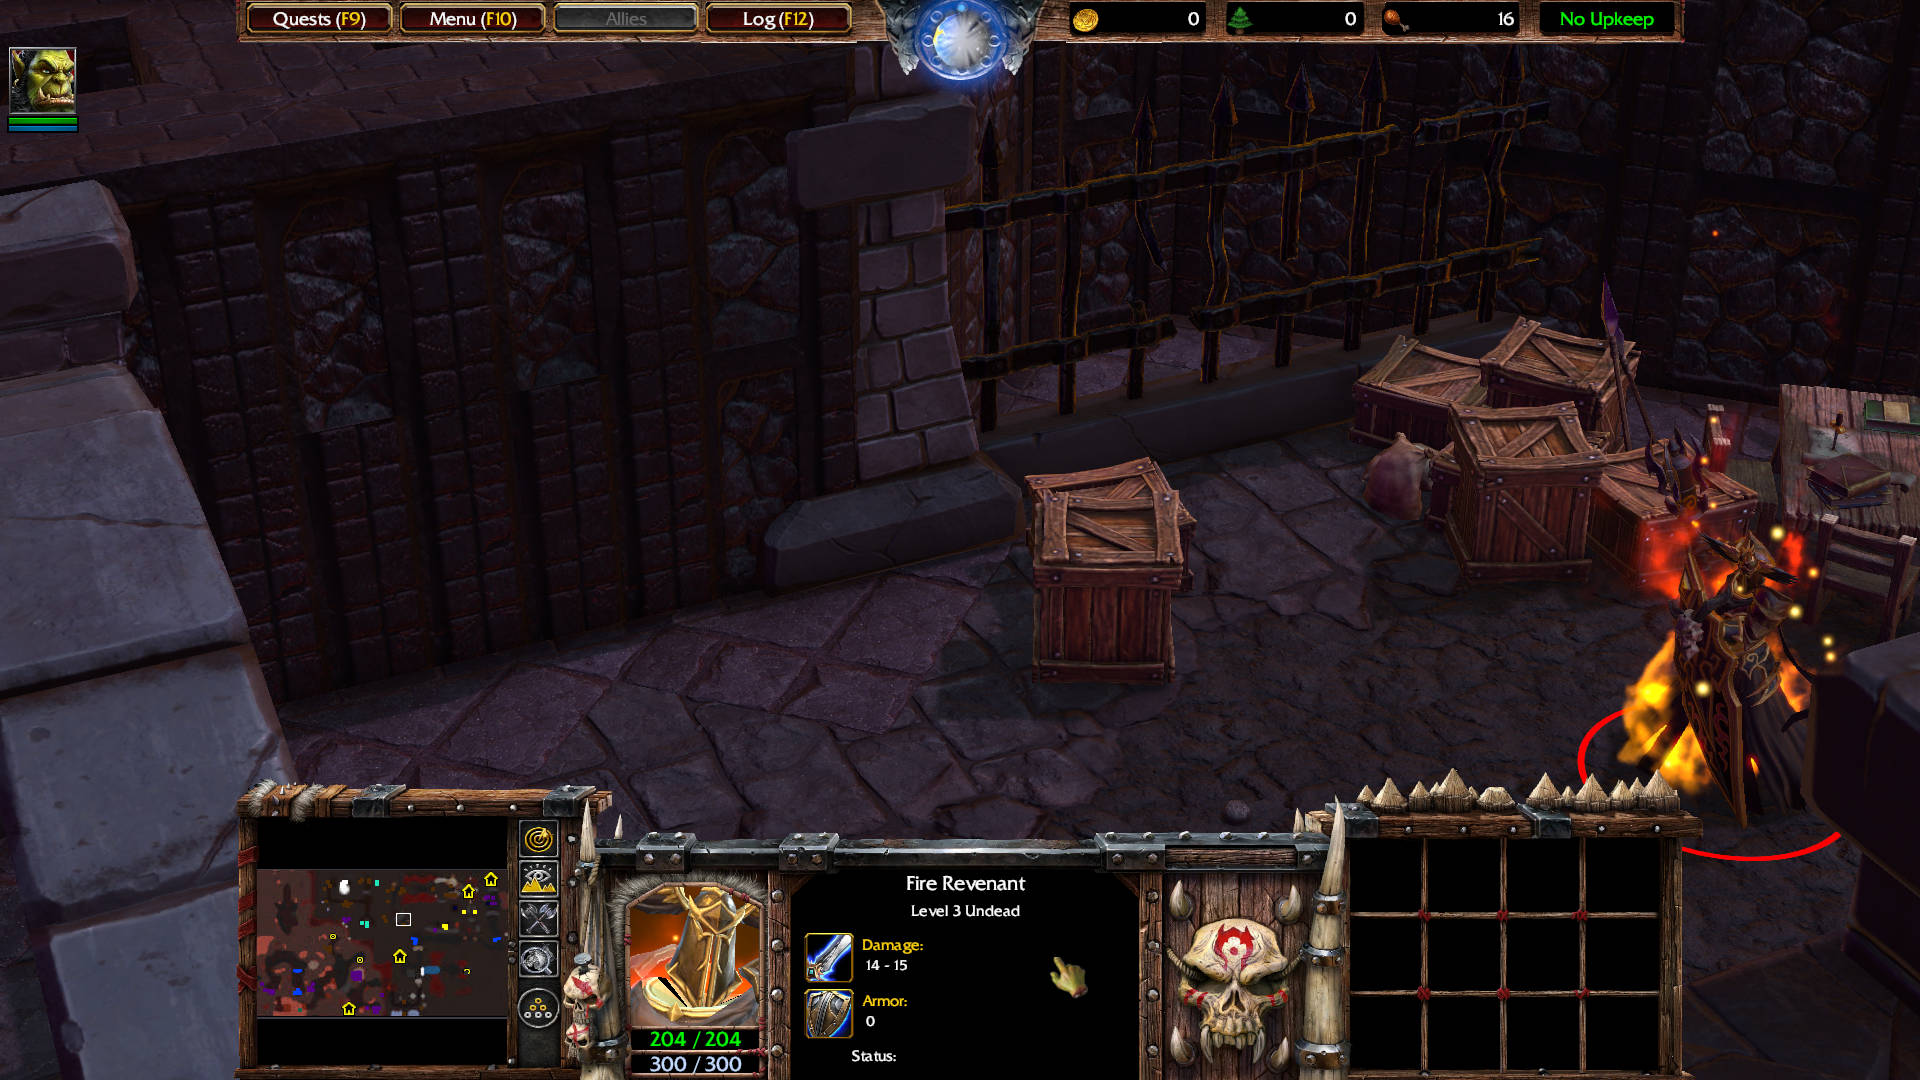
Beyond the arch, there is a Fire Revenant level 3, Burning Archer level 3 (2), and Skeleton Warrior (2).
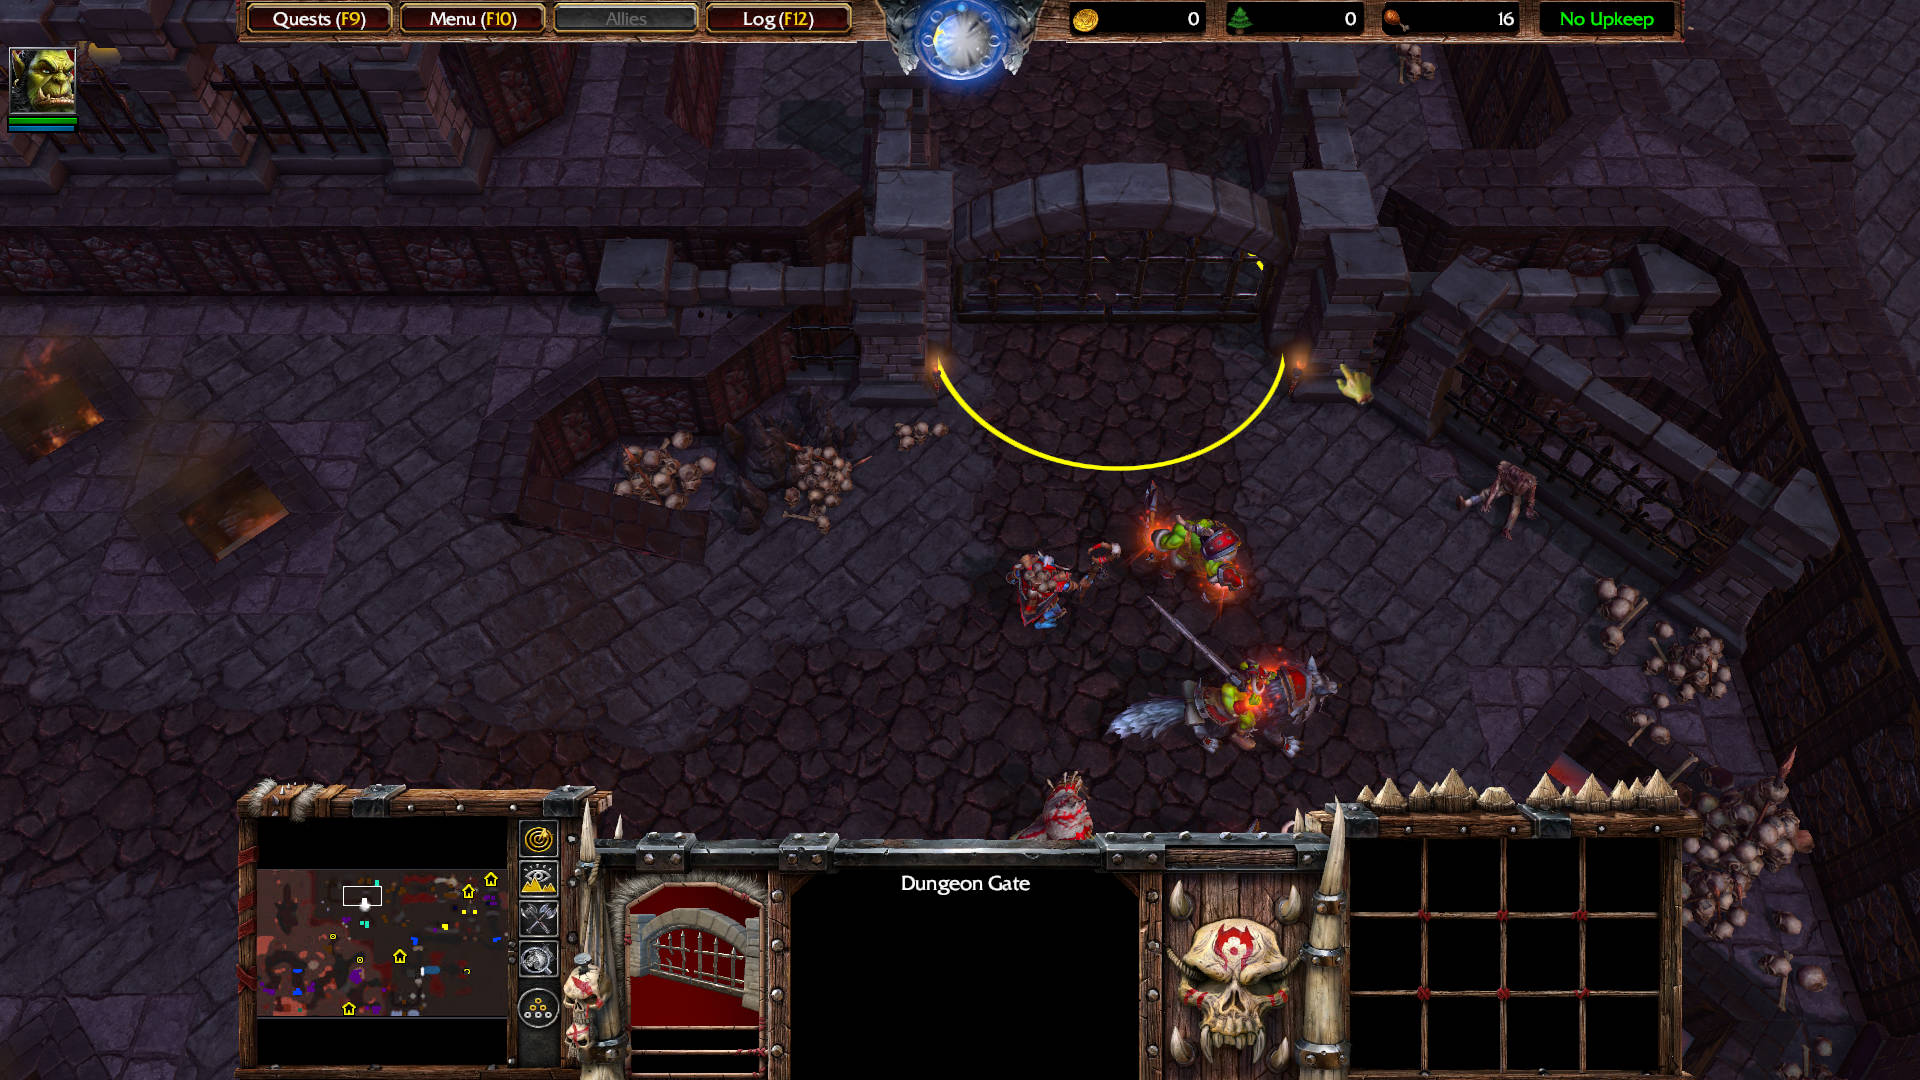
Destroy this Dungeon Gate.
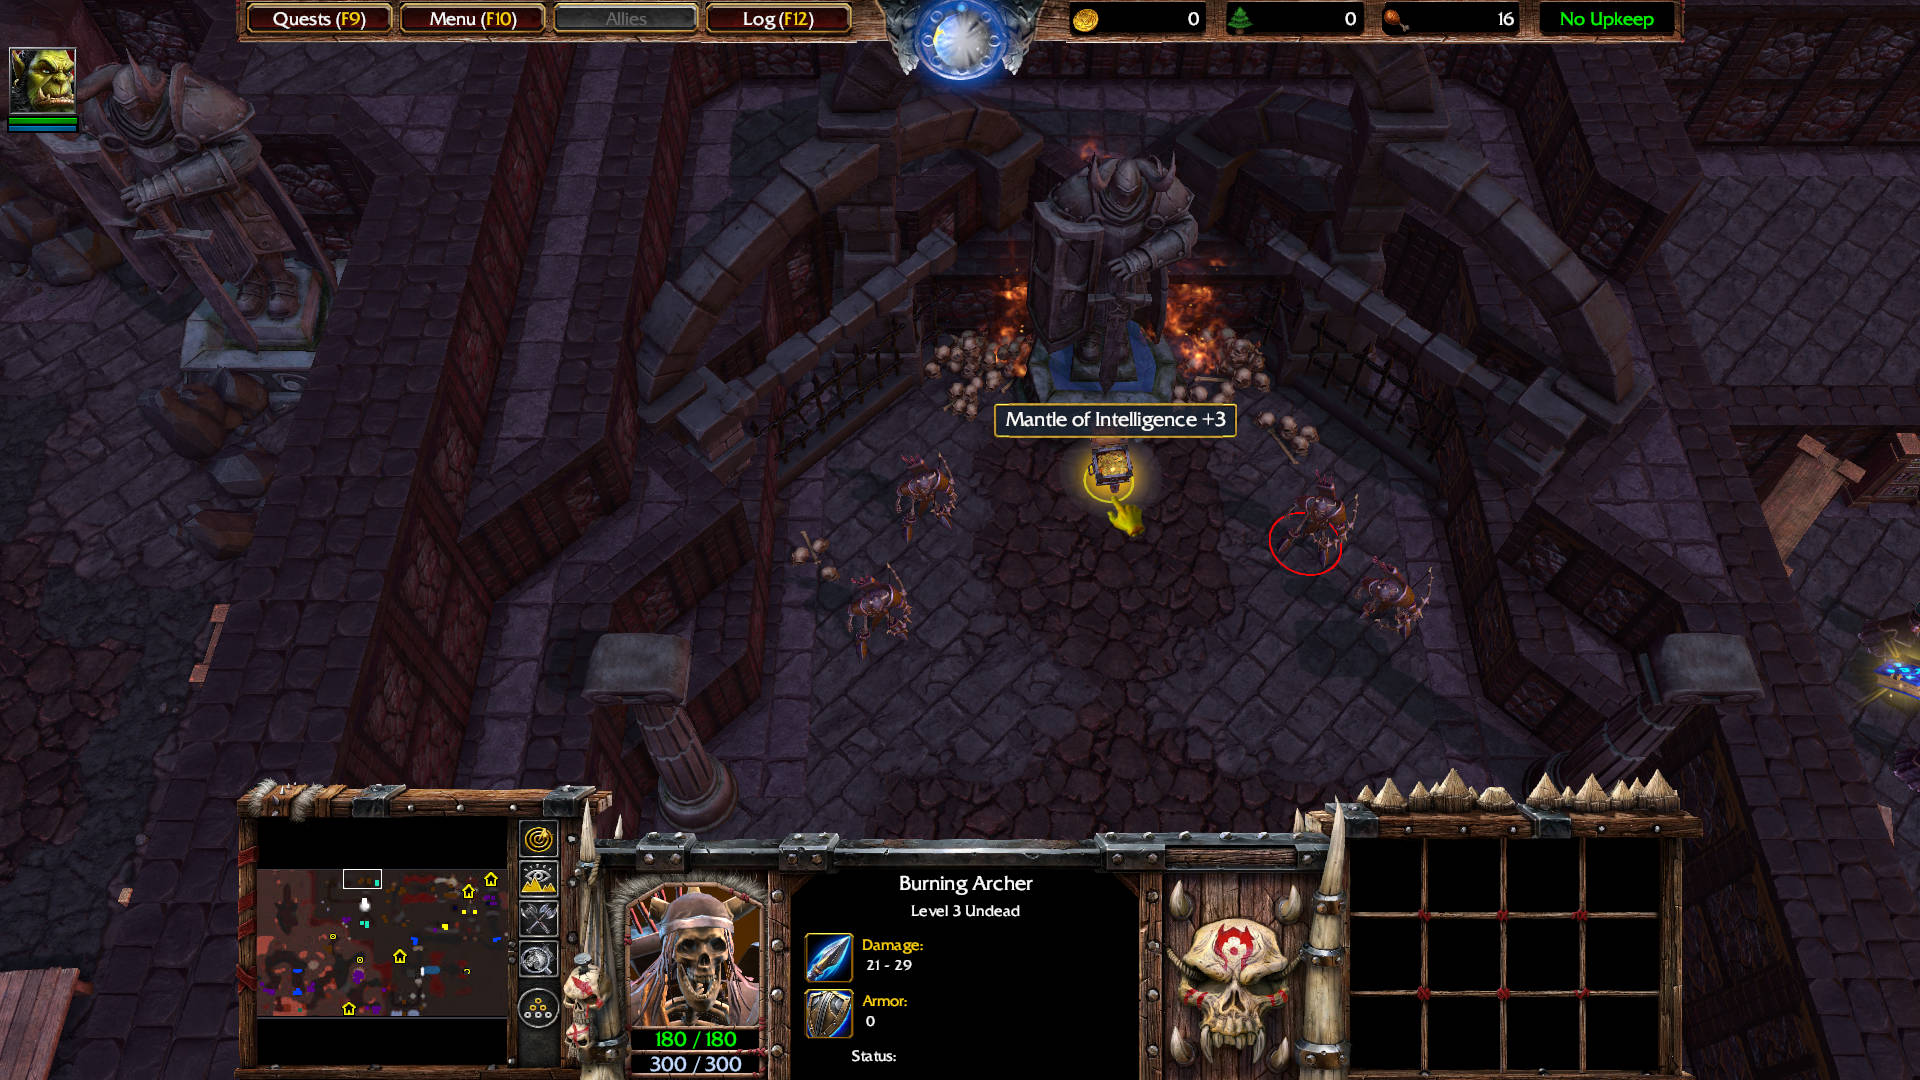
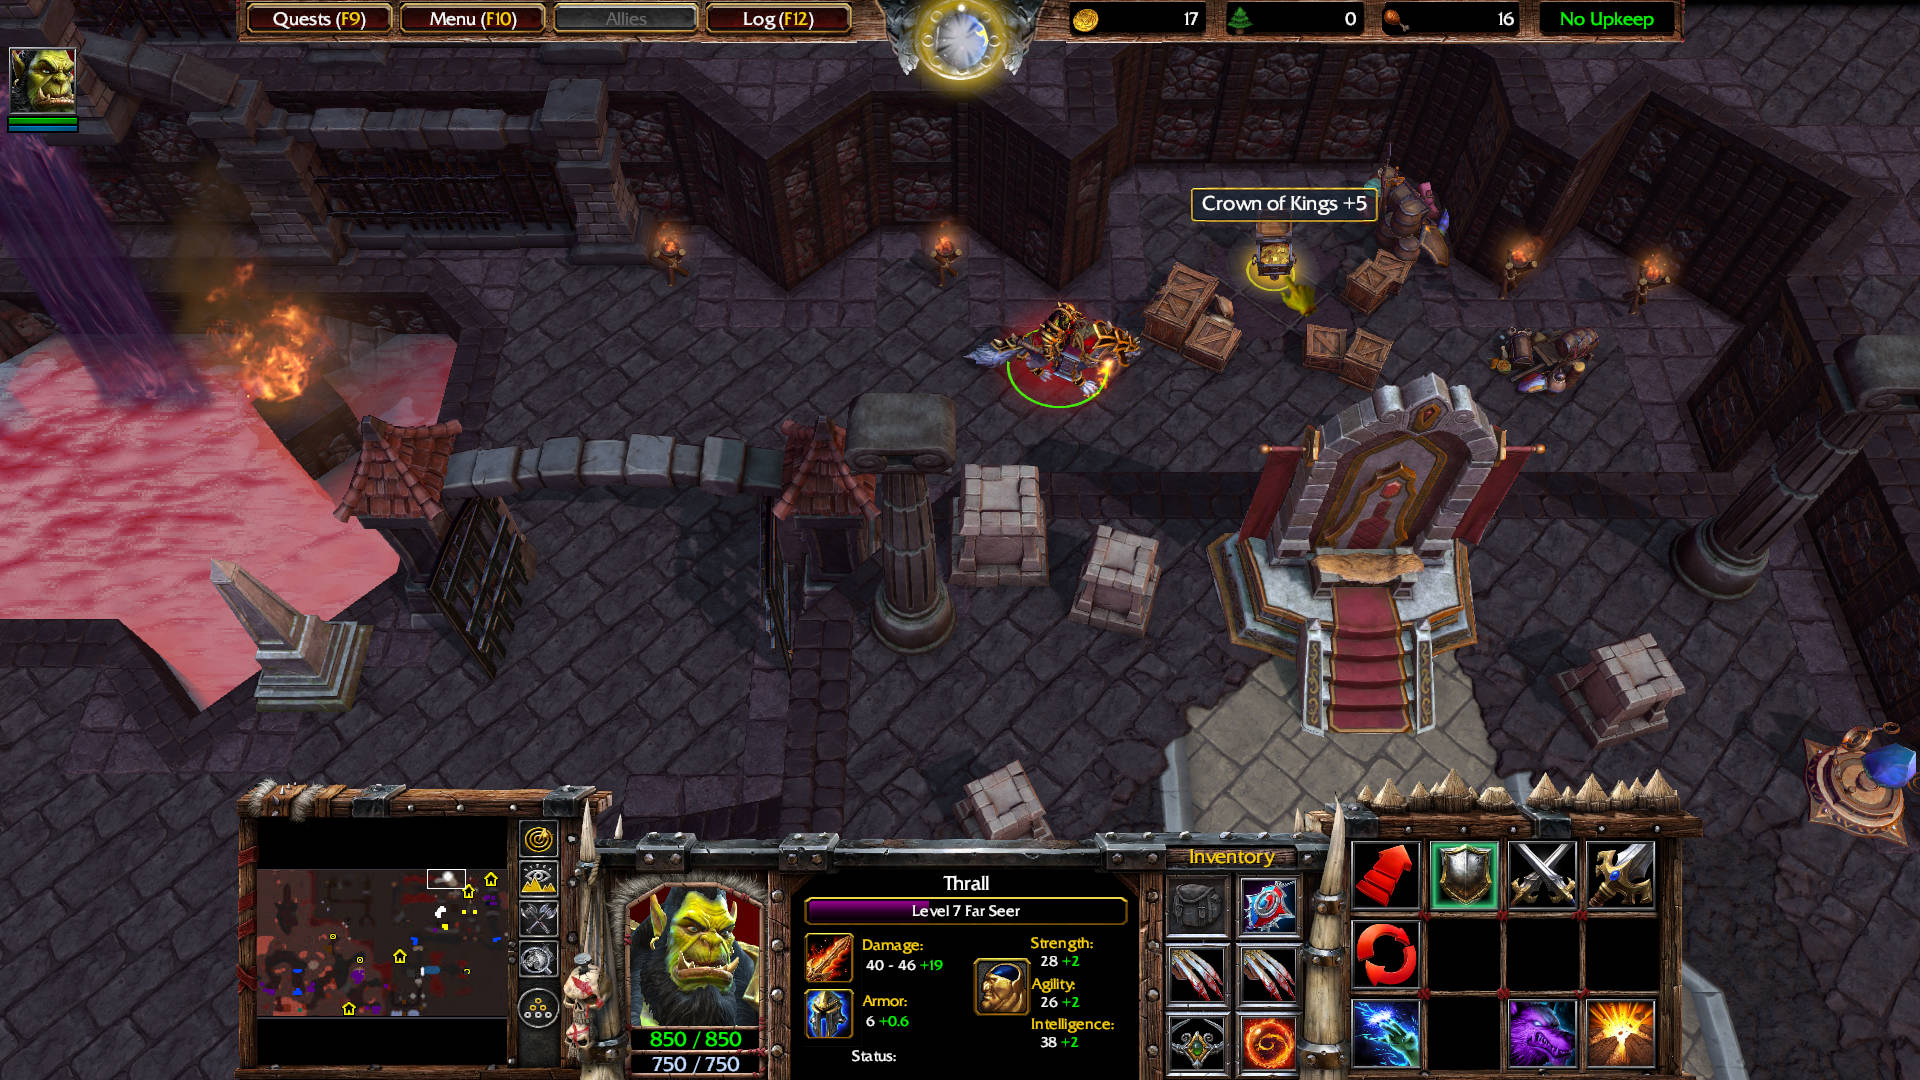
That room has Burning Archer level 3 (4) guarding a treasure chest that contains Mantle of Intelligence: Increases the intelligence of the Hero by 3 when worn.
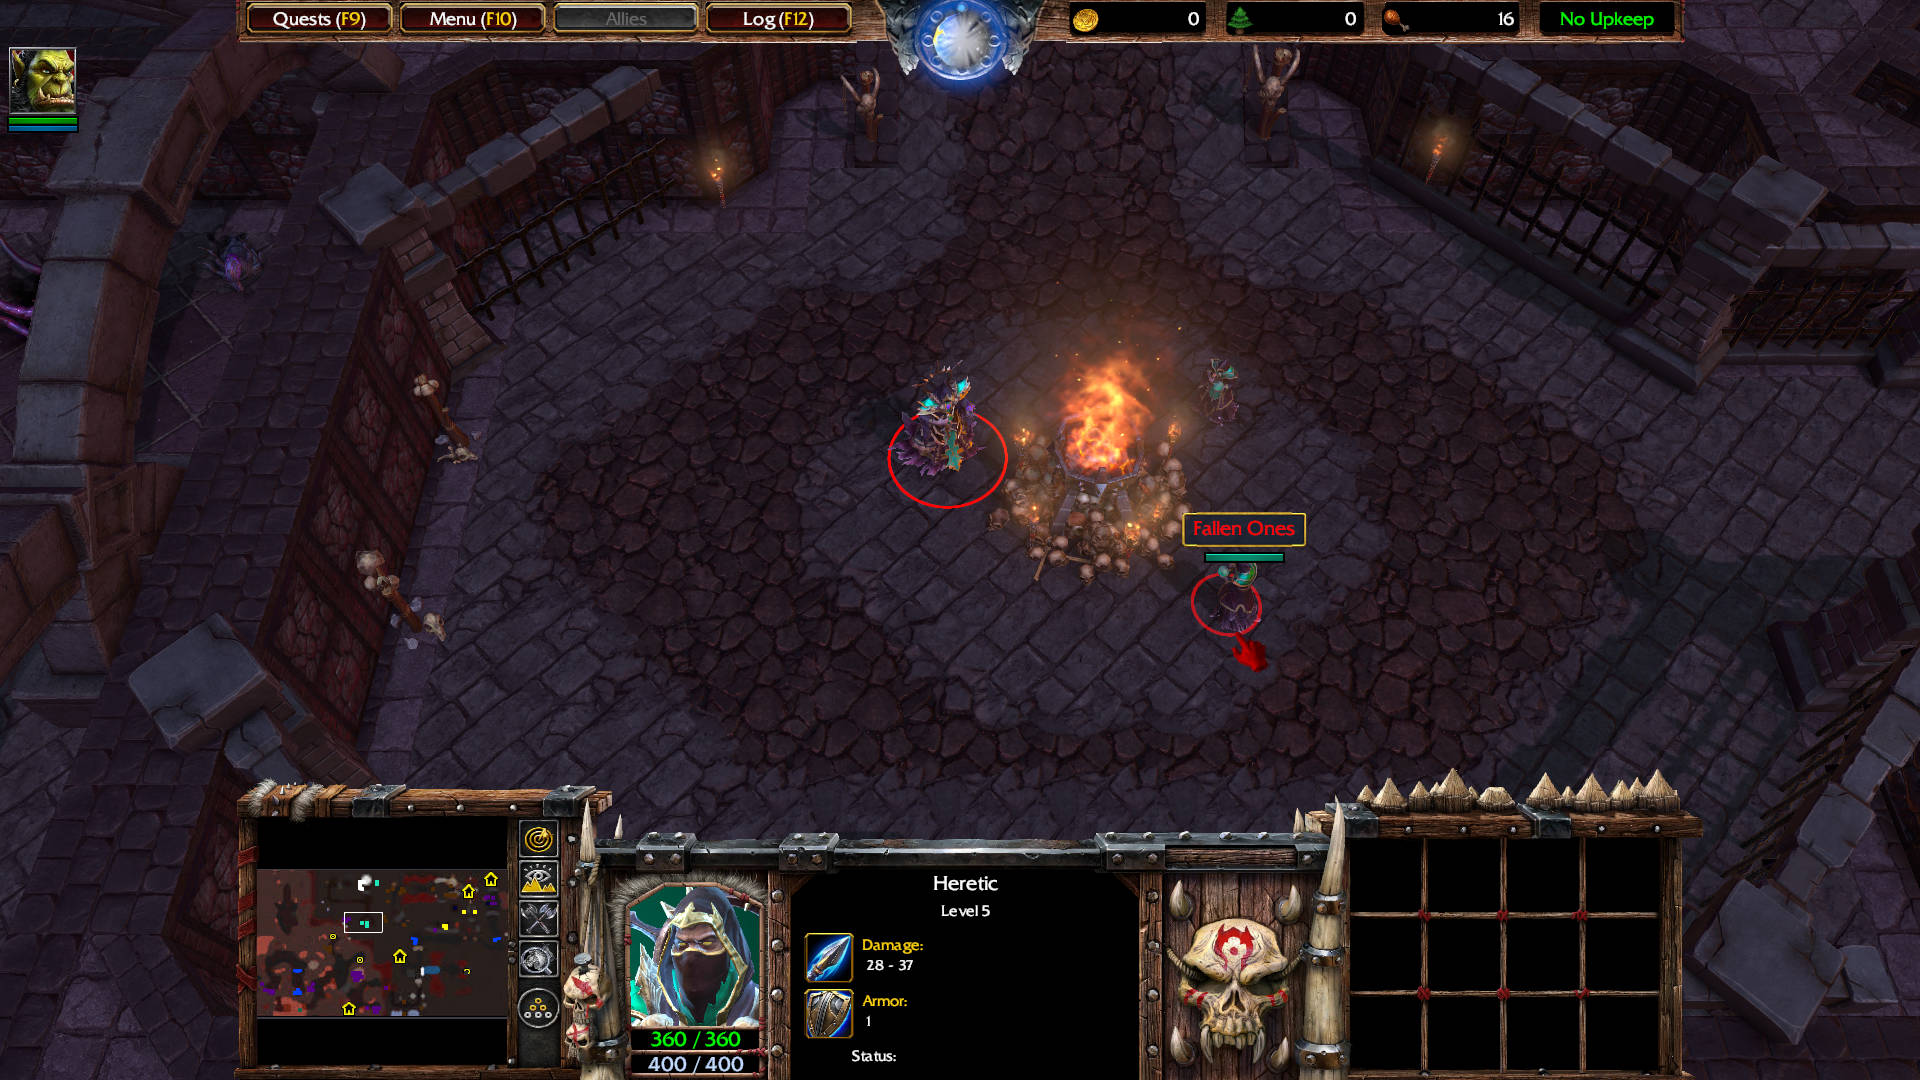
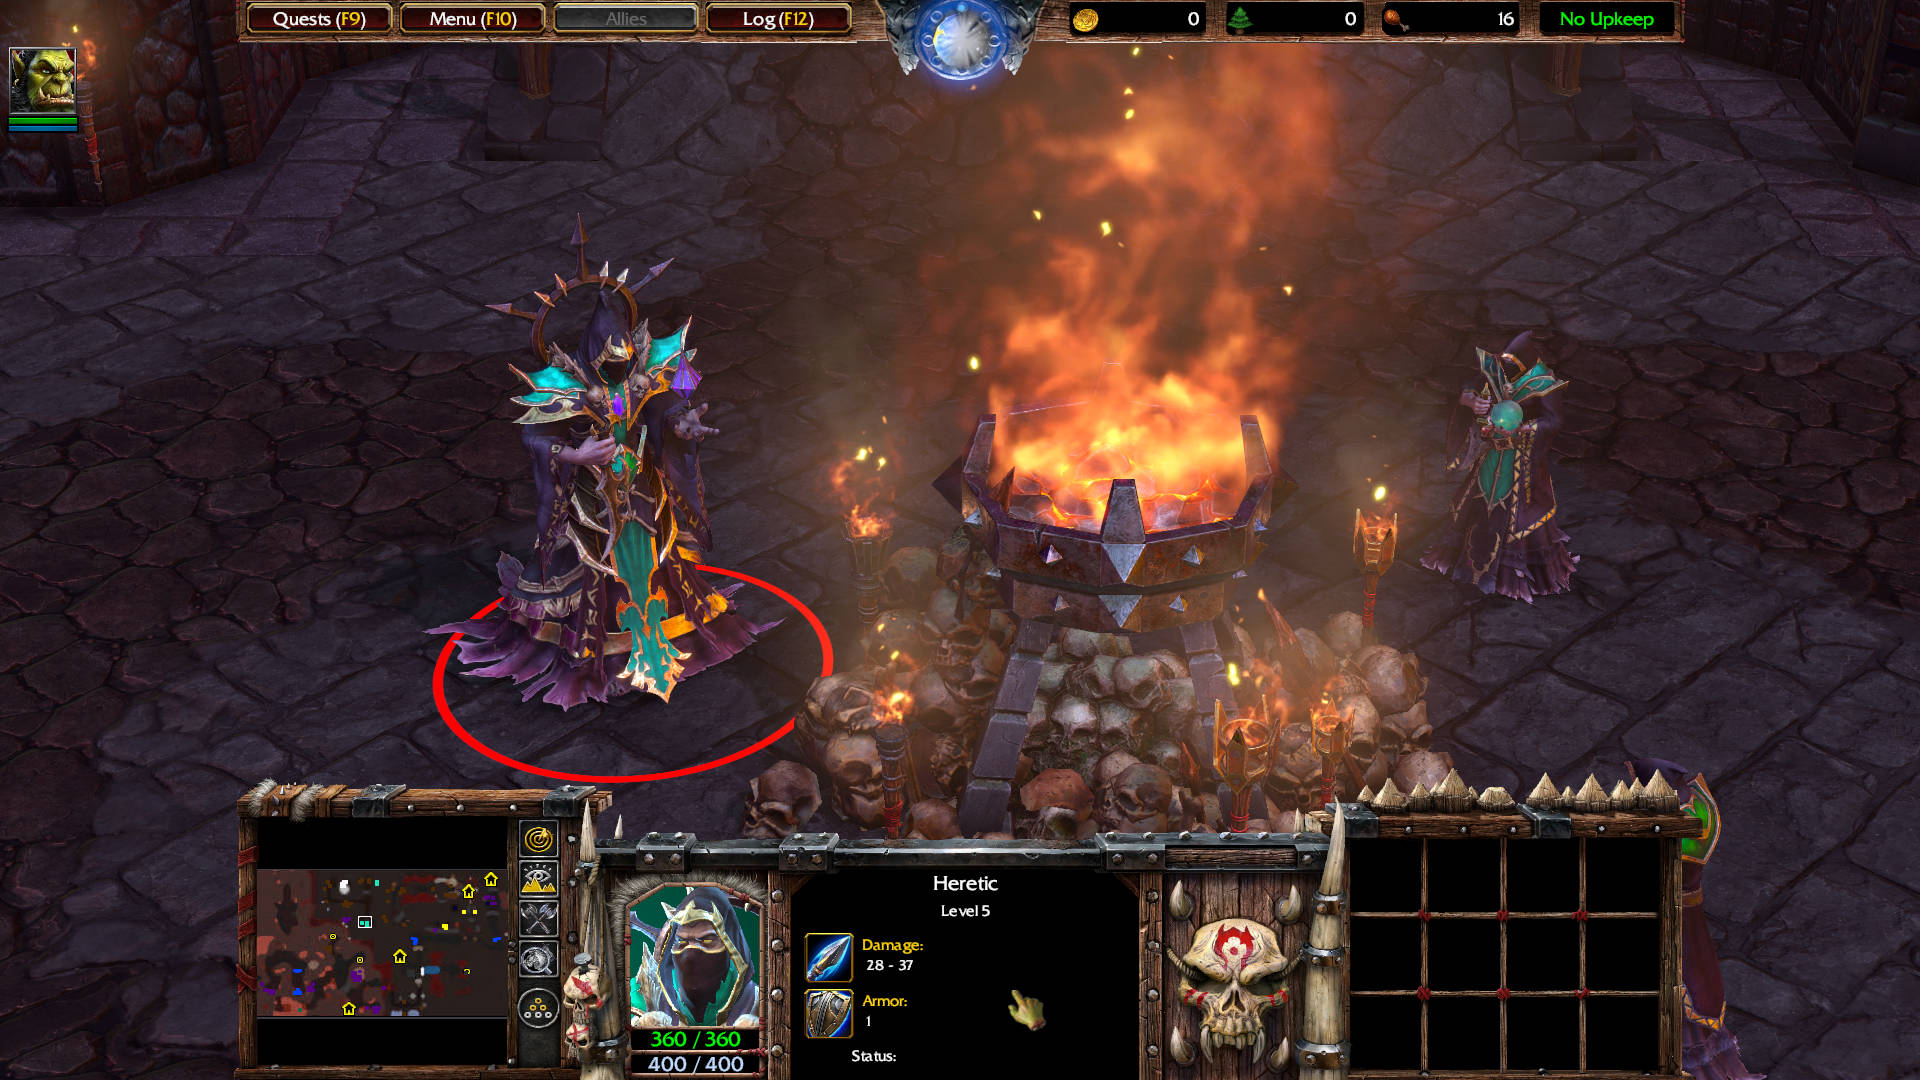
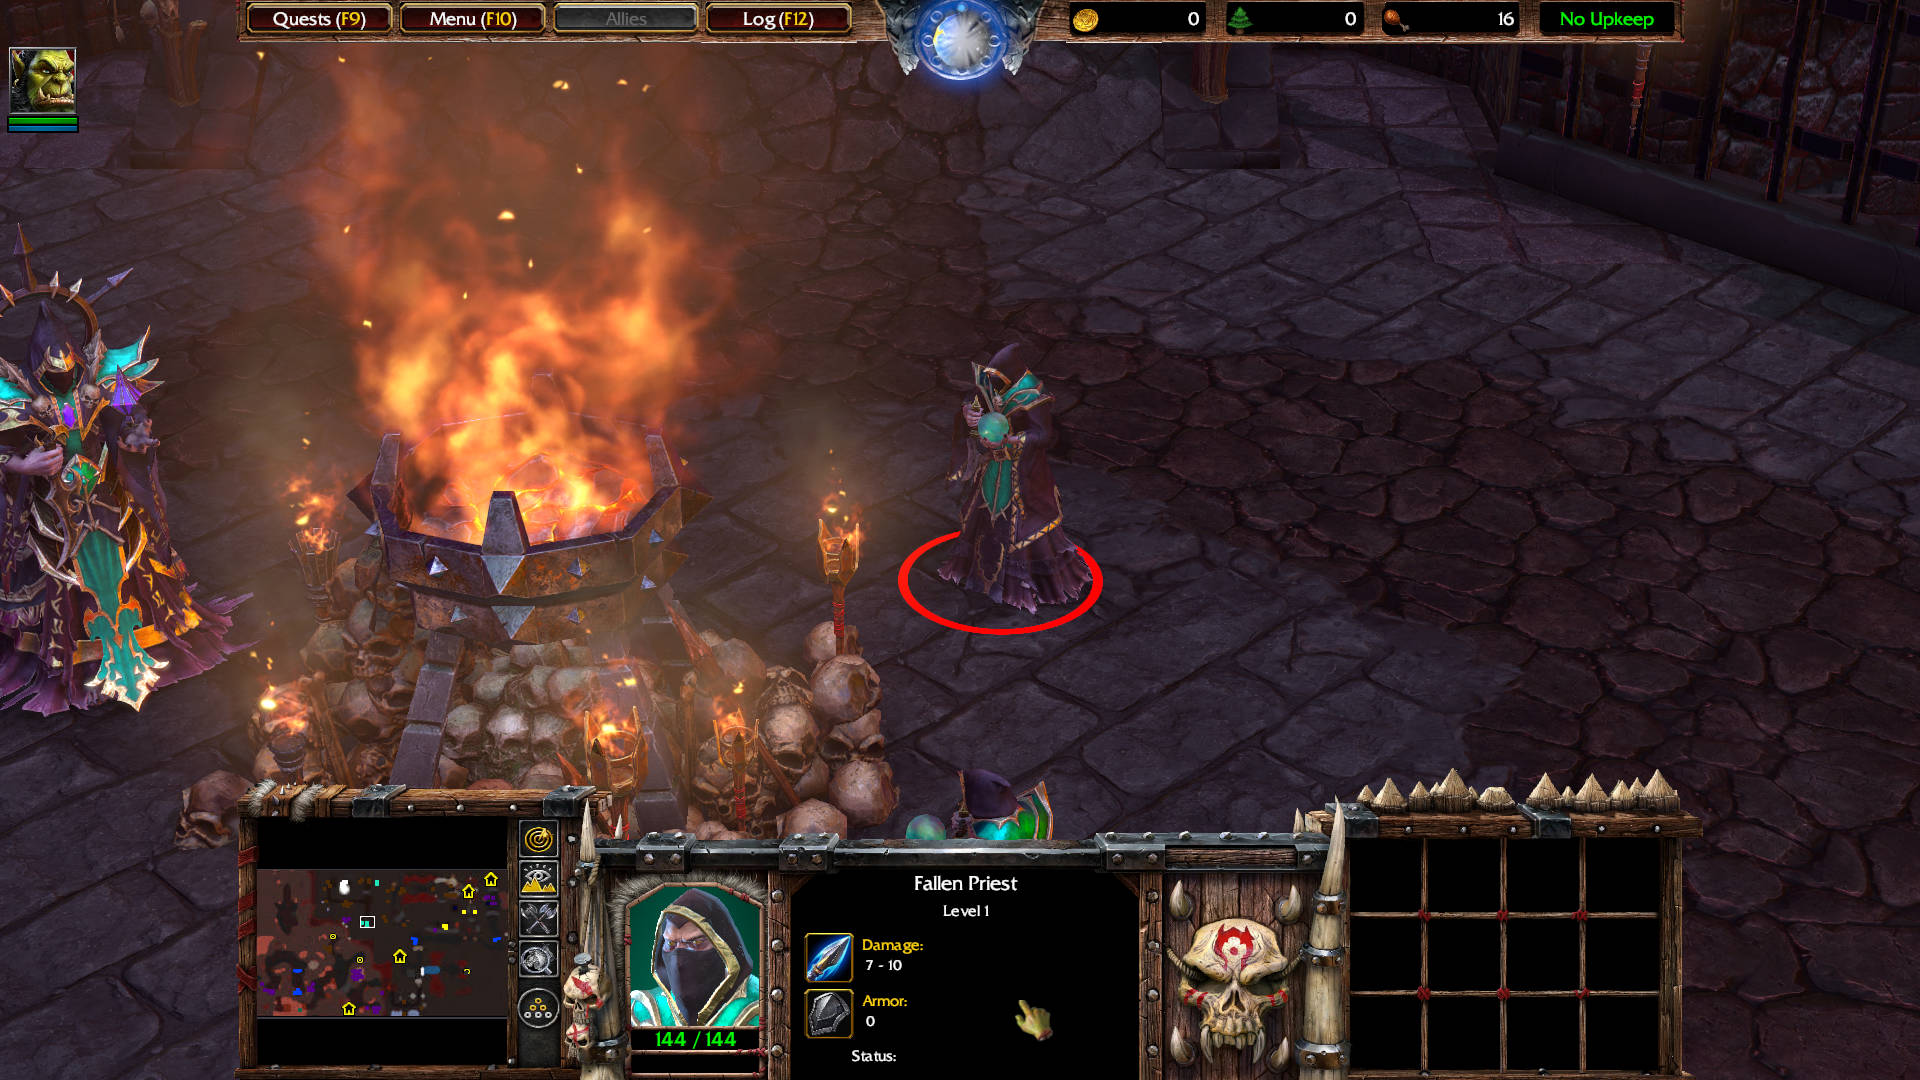
Next room has a Heretic level 5, and two Fallen Priest level 1. They are tagged as “Fallen Ones.” Unknown if these are members of the Cult of the Damned or Twilight’s Hammer, or a different faction.
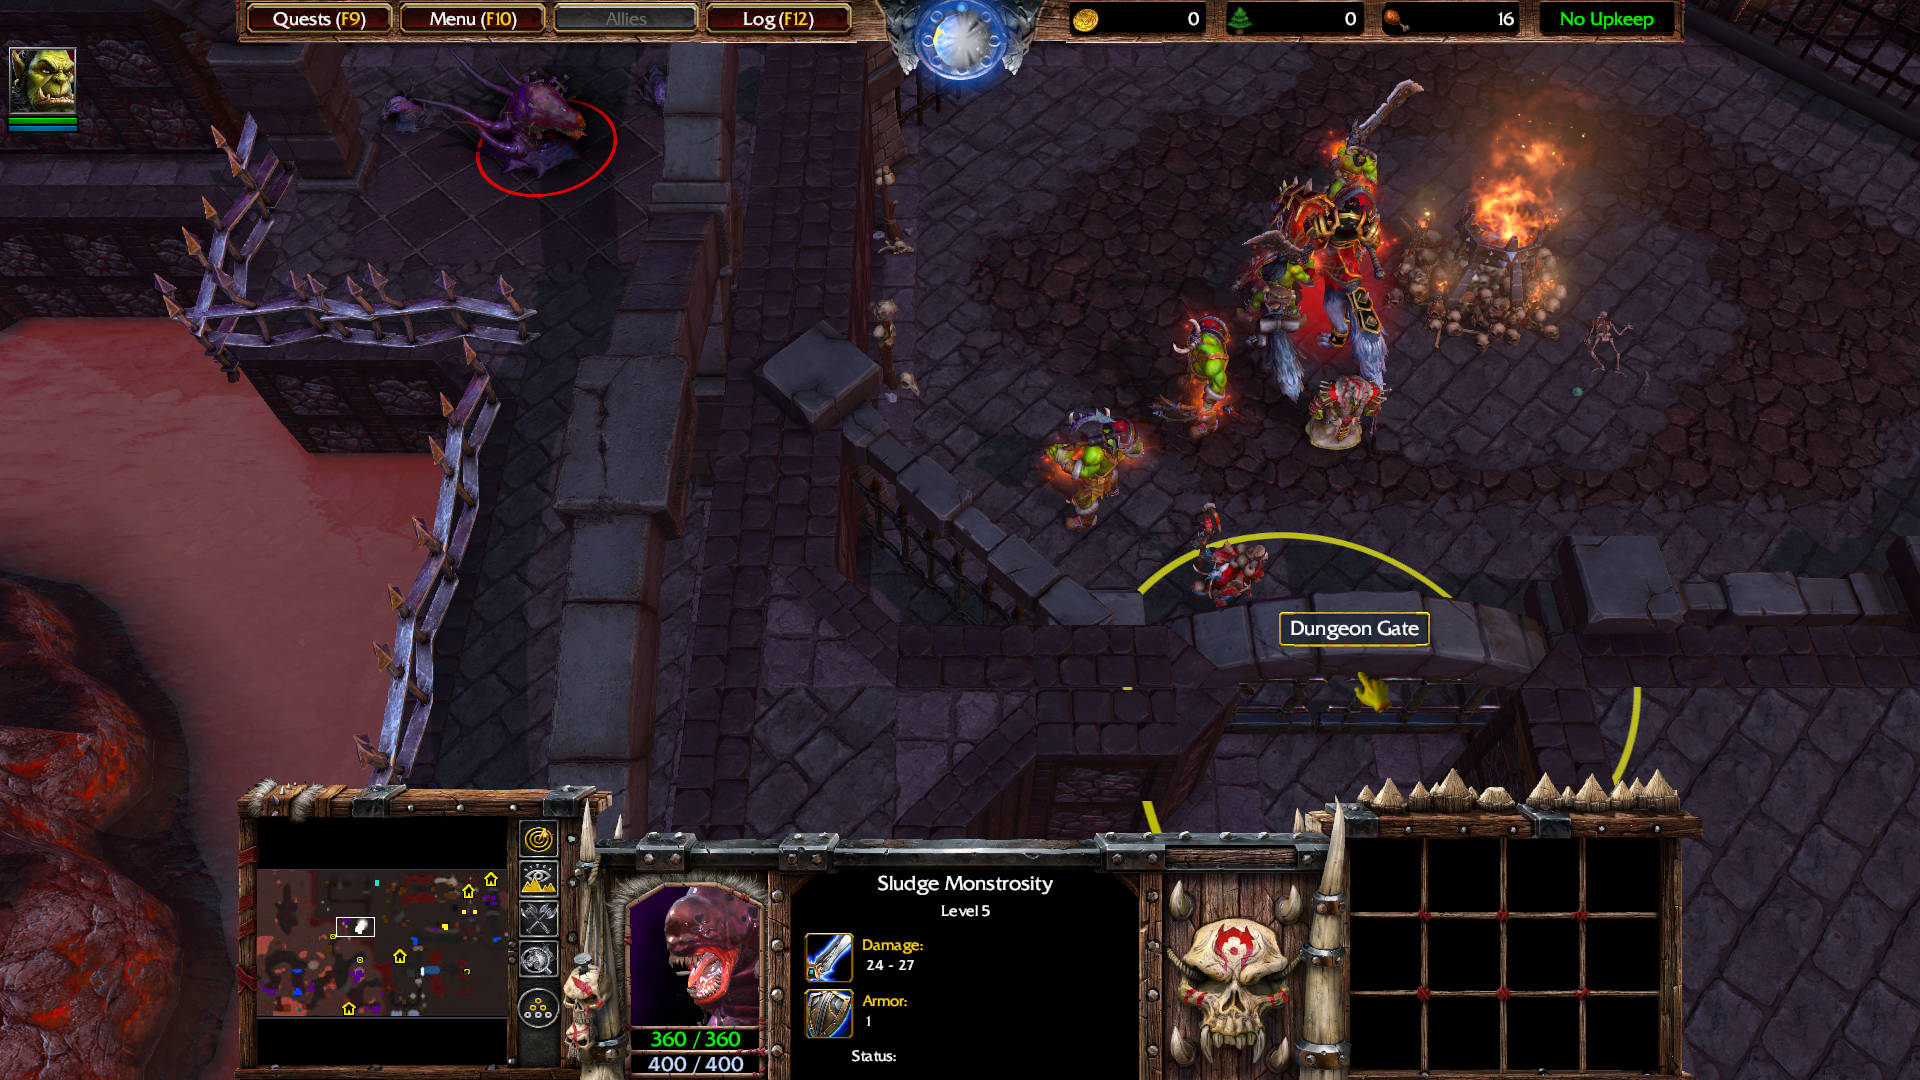
Just south of that Heretic is a Dungeon Gate. Destroy it and enter the very narrow hallway. At the end, you will find a Sludge Monstrosity level 5 and two Slude Minion level 1 — drops Ring of Regeneration: Increases the Hero’s hit point regeneration by 2 hit points per sec.
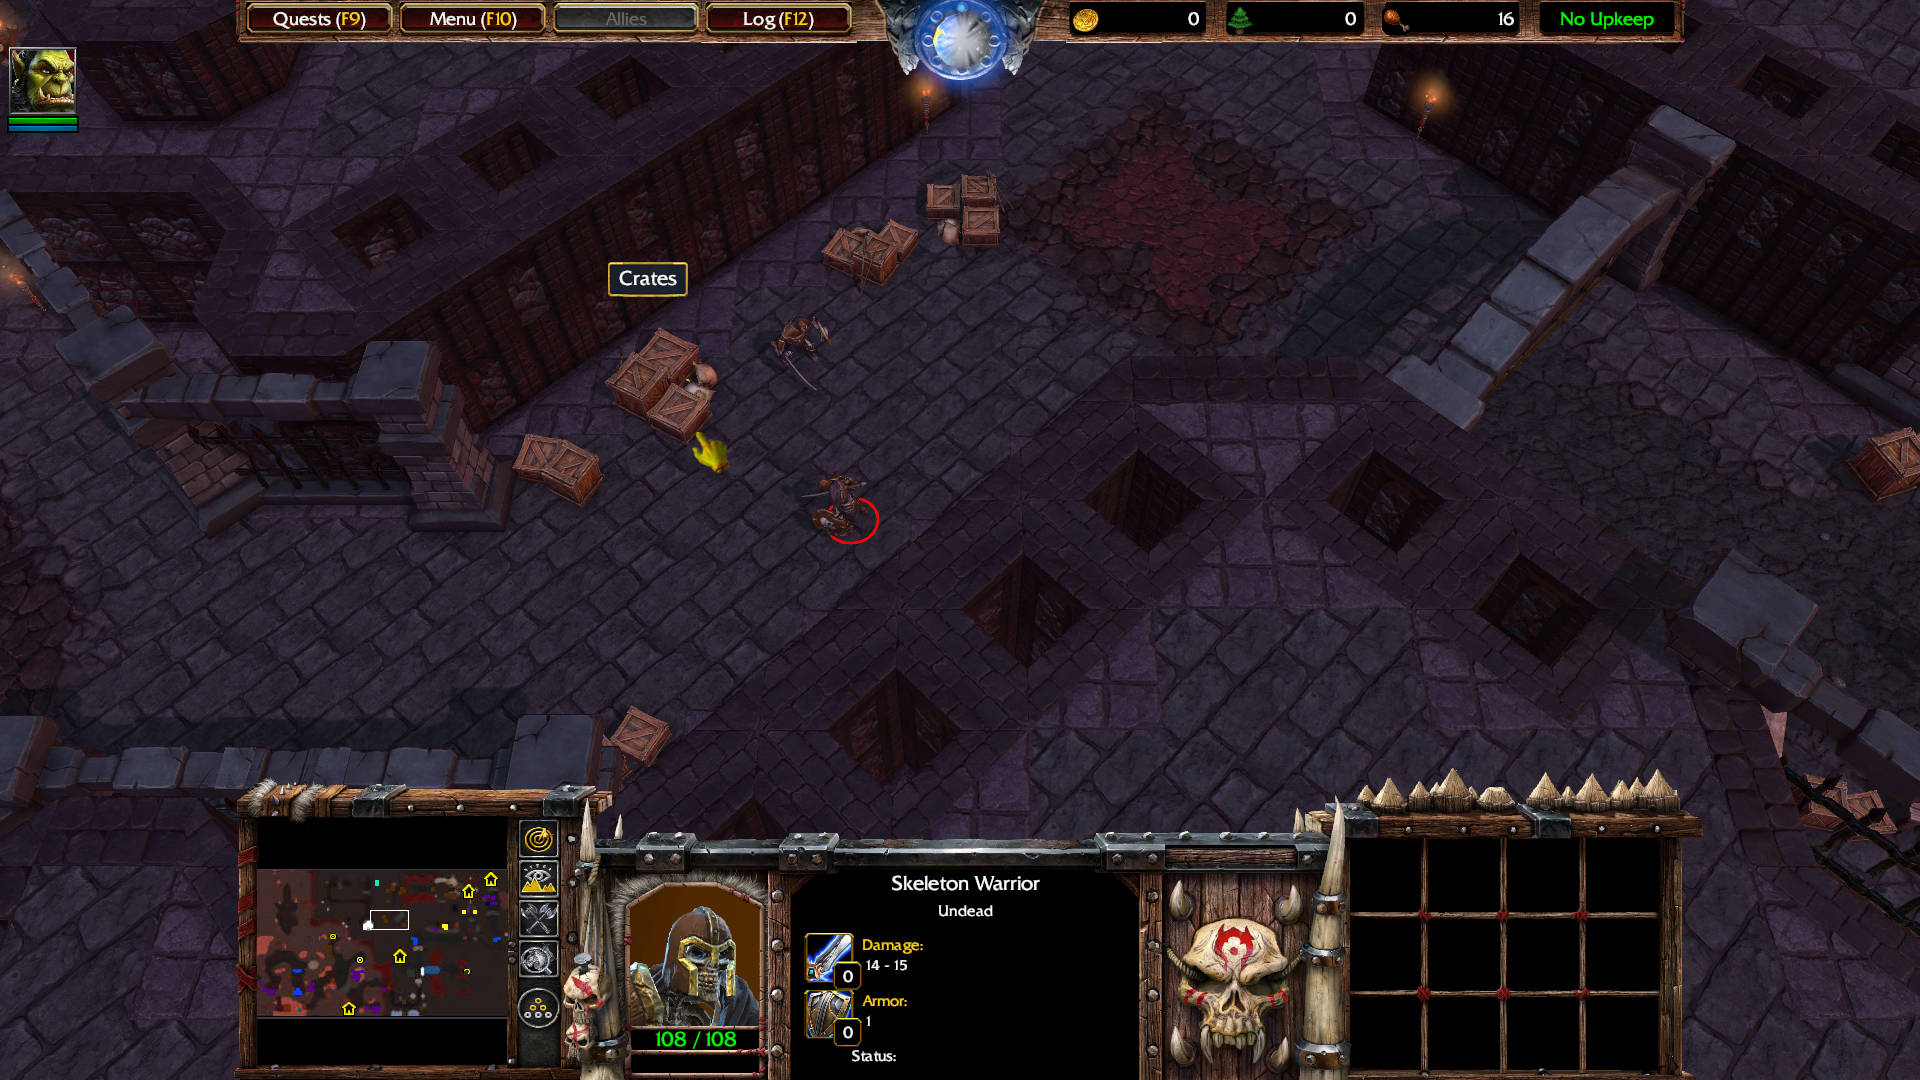
Go through this hallway, and kill the two Skeleton Warrior. Destroy the crates. One spawns a Wraith level 6 and a treasure chest that contains Scroll of Healing: Heals 150 hit points to all friendly non-mechanical units around the Hero when used. Another crate drops a Potion of Greater Mana: Restores 300 mana when used.
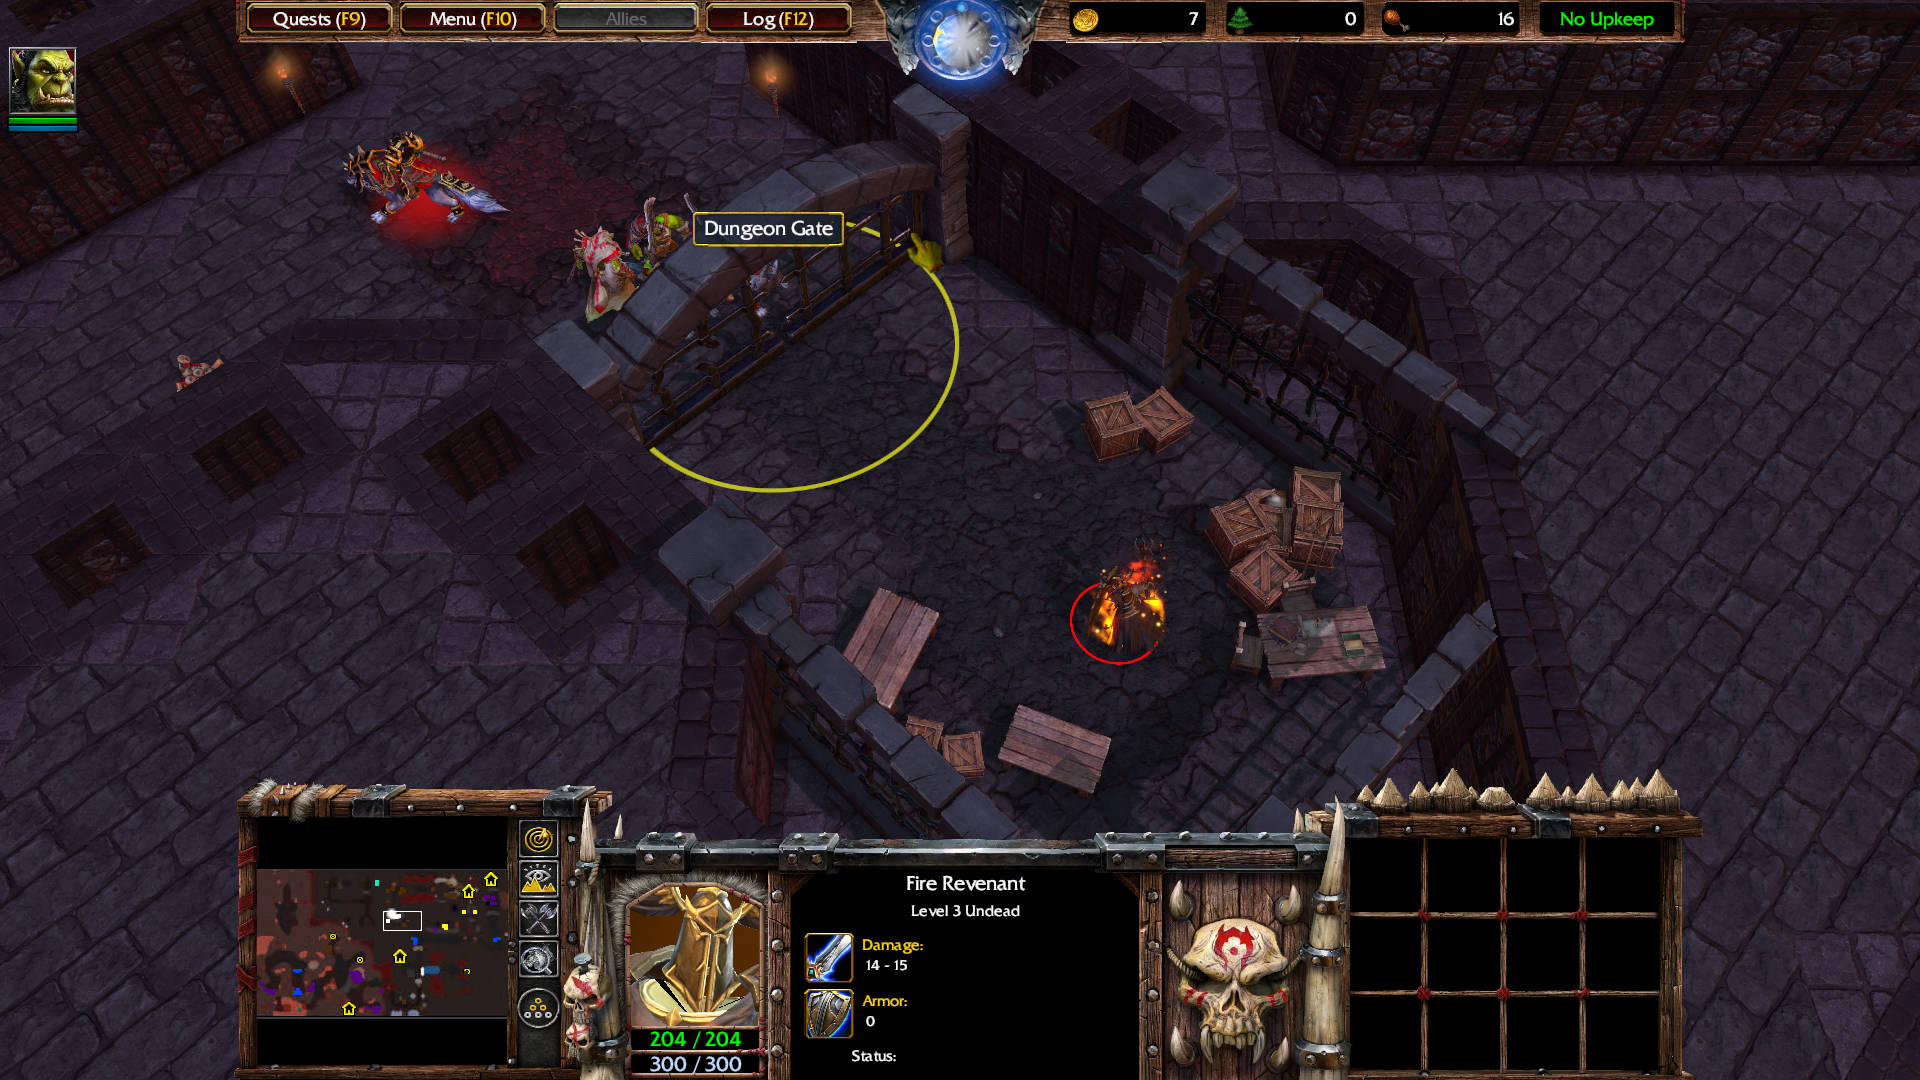
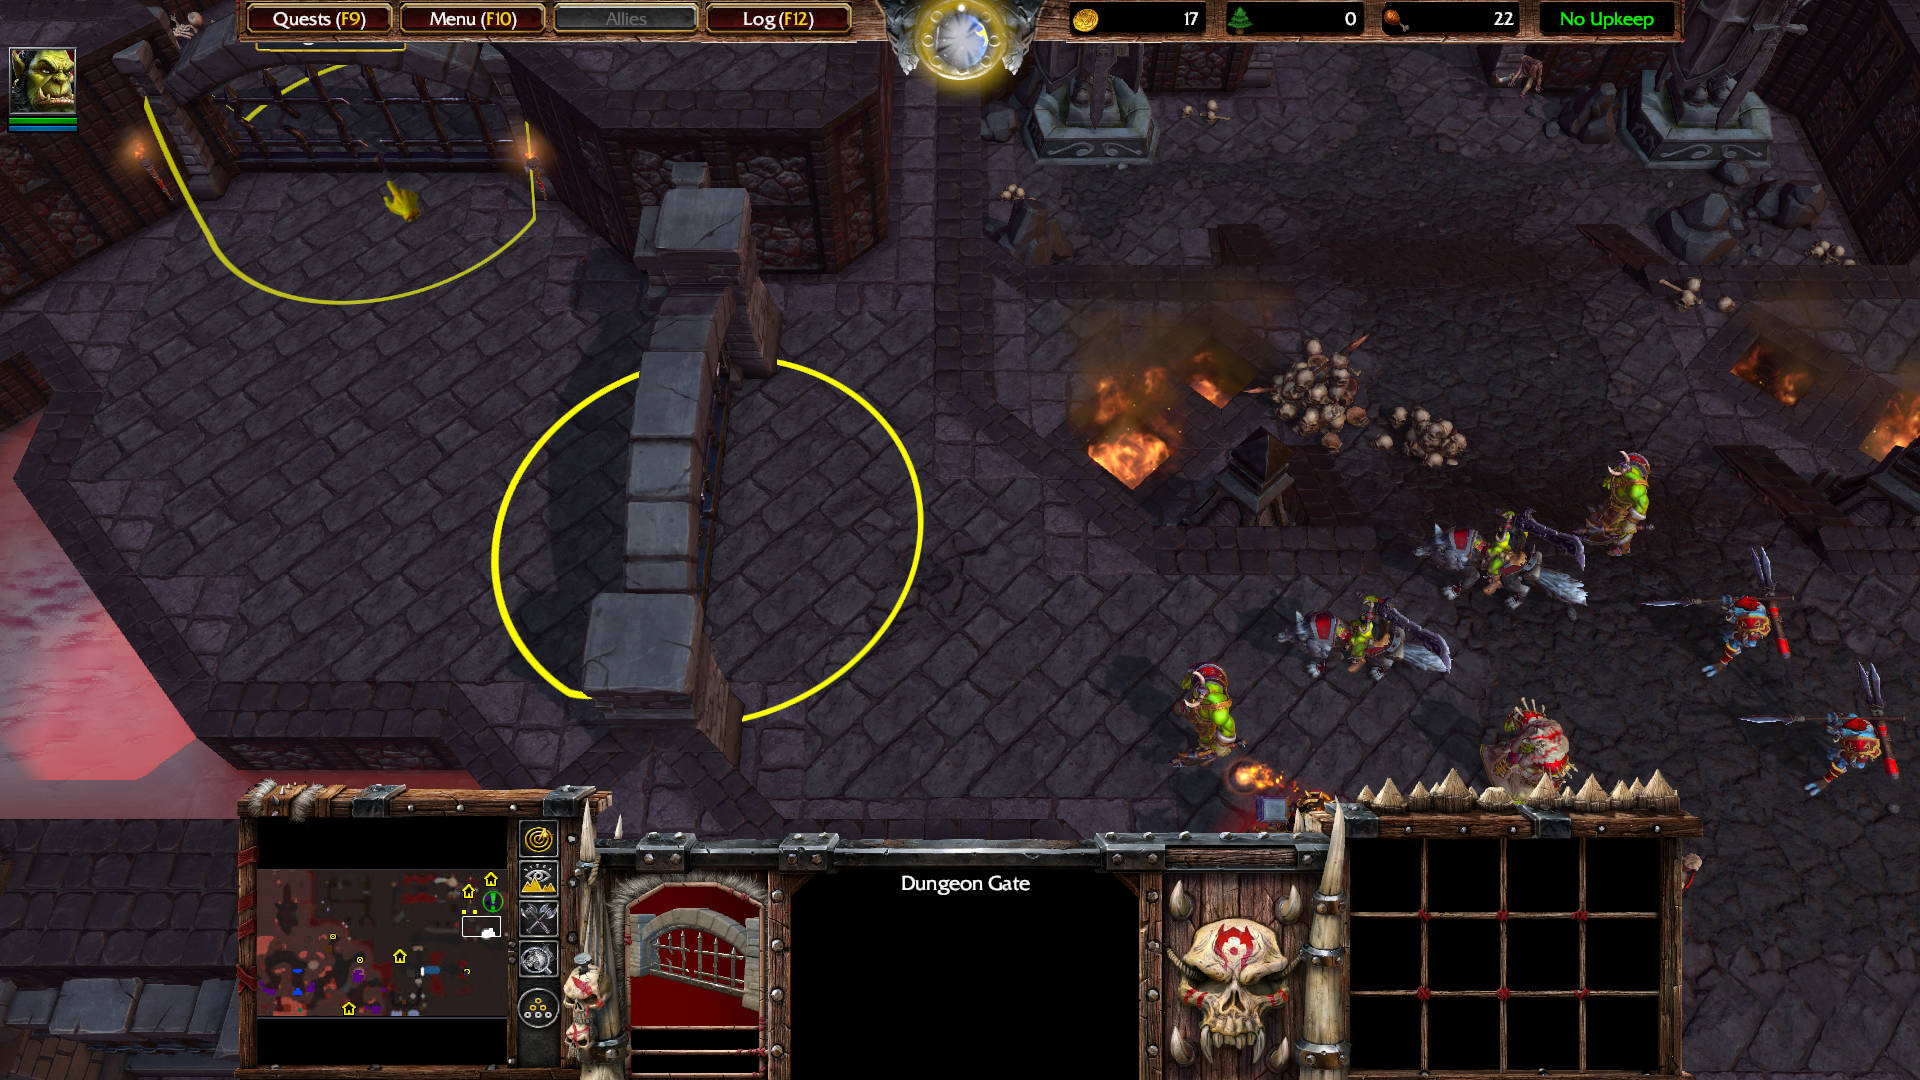
As seen in the image above, there is a Dungeon Gate here. Destroy it to access a Fire Revenant level 3. Destroy all the crates in that room. They drop Scroll of Animate Death: Raises 6 nearby dead units to fight for 40 sec.; and a Tome of Agility: Permanently increases Agility by 1.
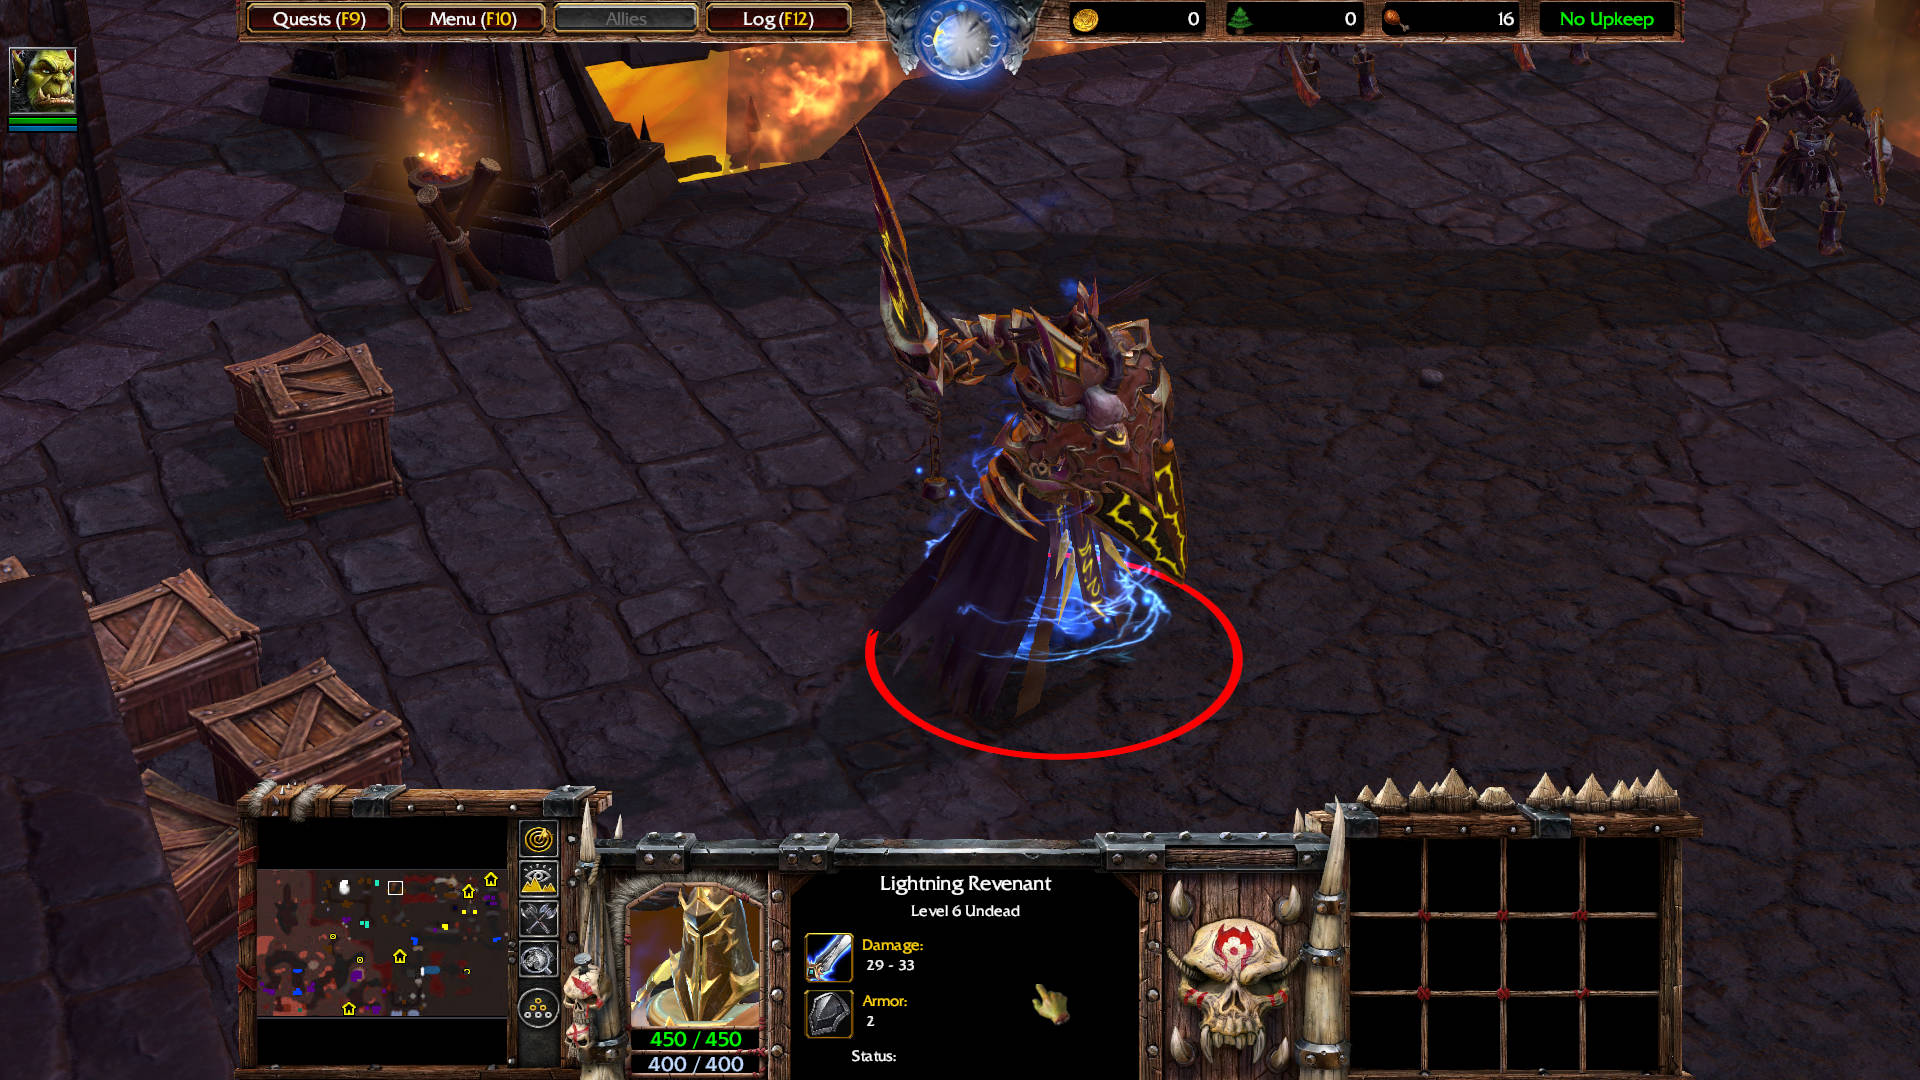
Head north to kill a Lightning Revenant level 6, two Burning Archer level 3, and three Skeleton Warrior. The revenant drops Orb of Fire: Adds 5 bonus fire damage to the attack of a Hero when carried. The Hero’s attacks also become ranged when attacking air and do splash damage to nearby enemy units.
Destroy the crates behind the Revenant. These drop Potion of Greater Healing: Heals 500 hit points when used; and Potion of Greater Mana: Restores 300 mana when used.

Go back a few yards south and go through this side hallway.

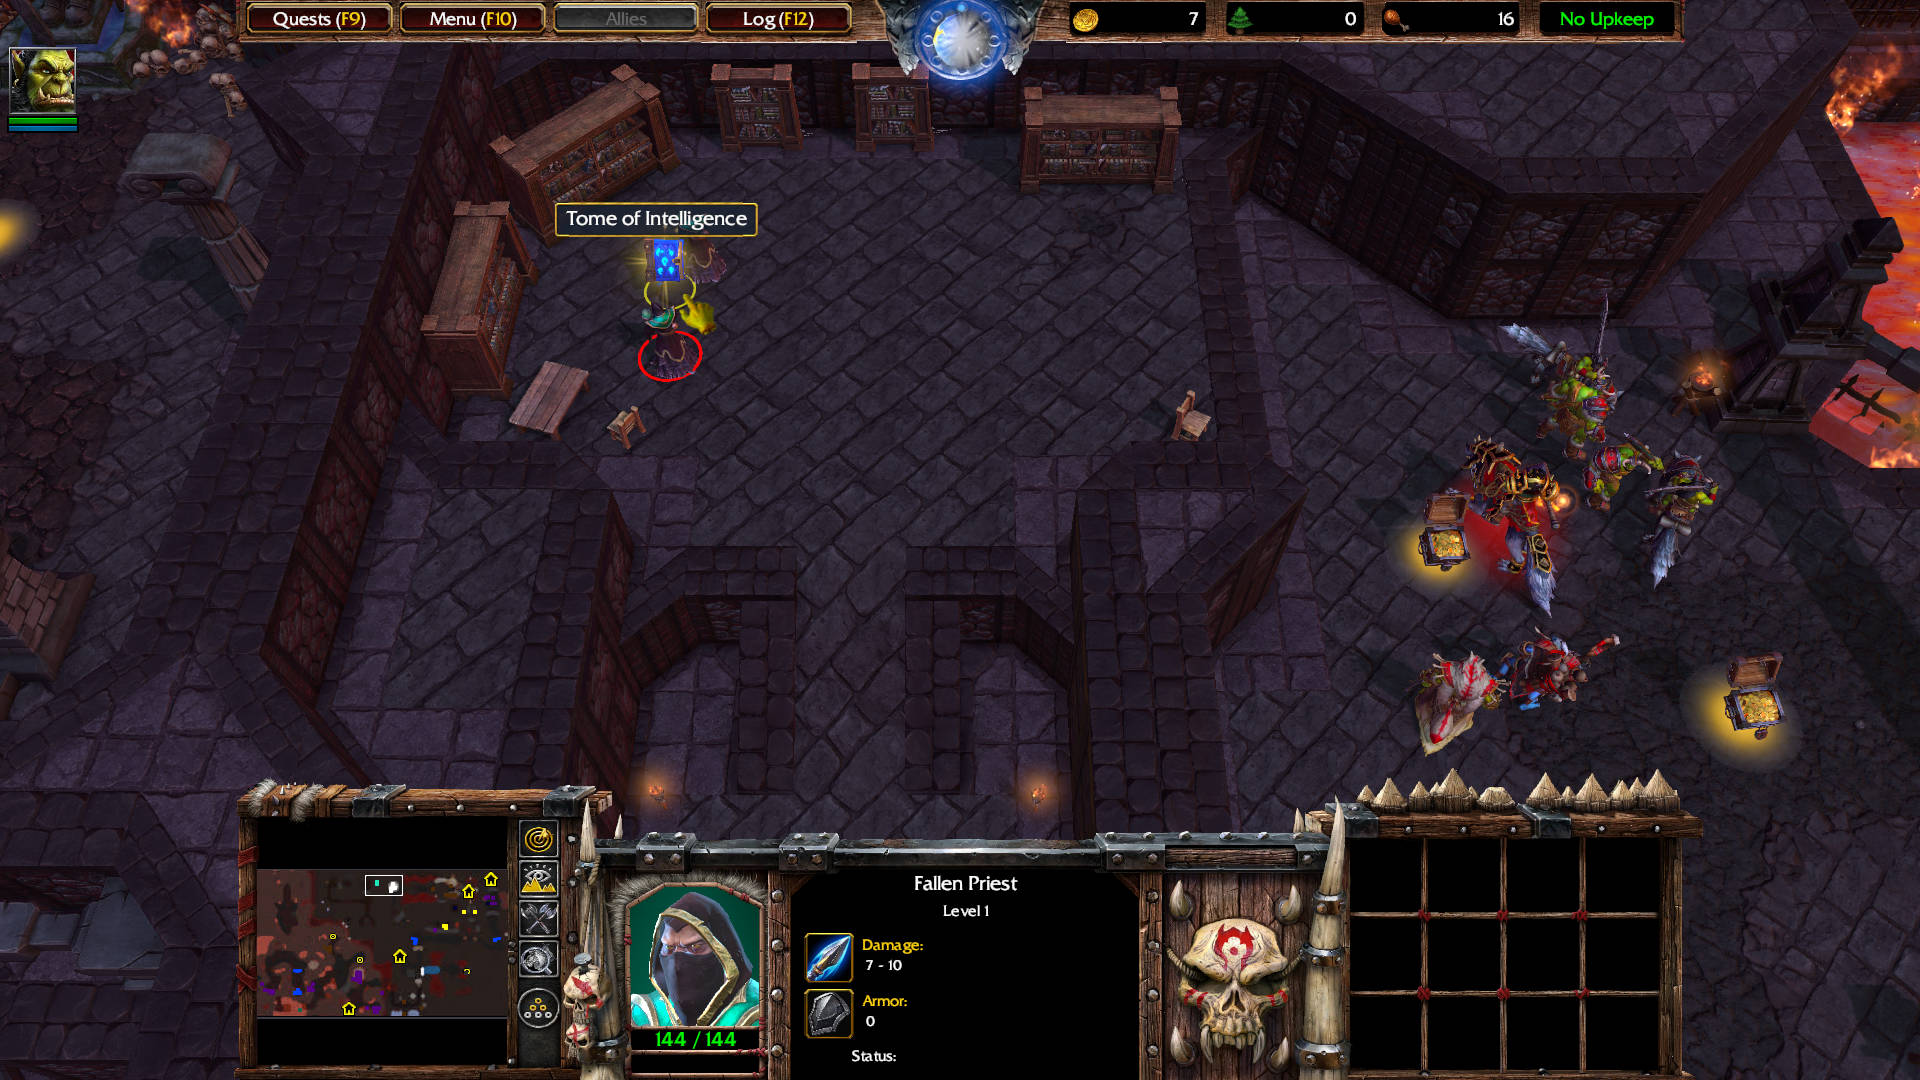
There are two Fallen Priest level 1 guarding a Tome of Intelligence: Permanently increases intelligence by 1.
Go back out that hidden room, then kill the two Burning Archers guarding the bridge.
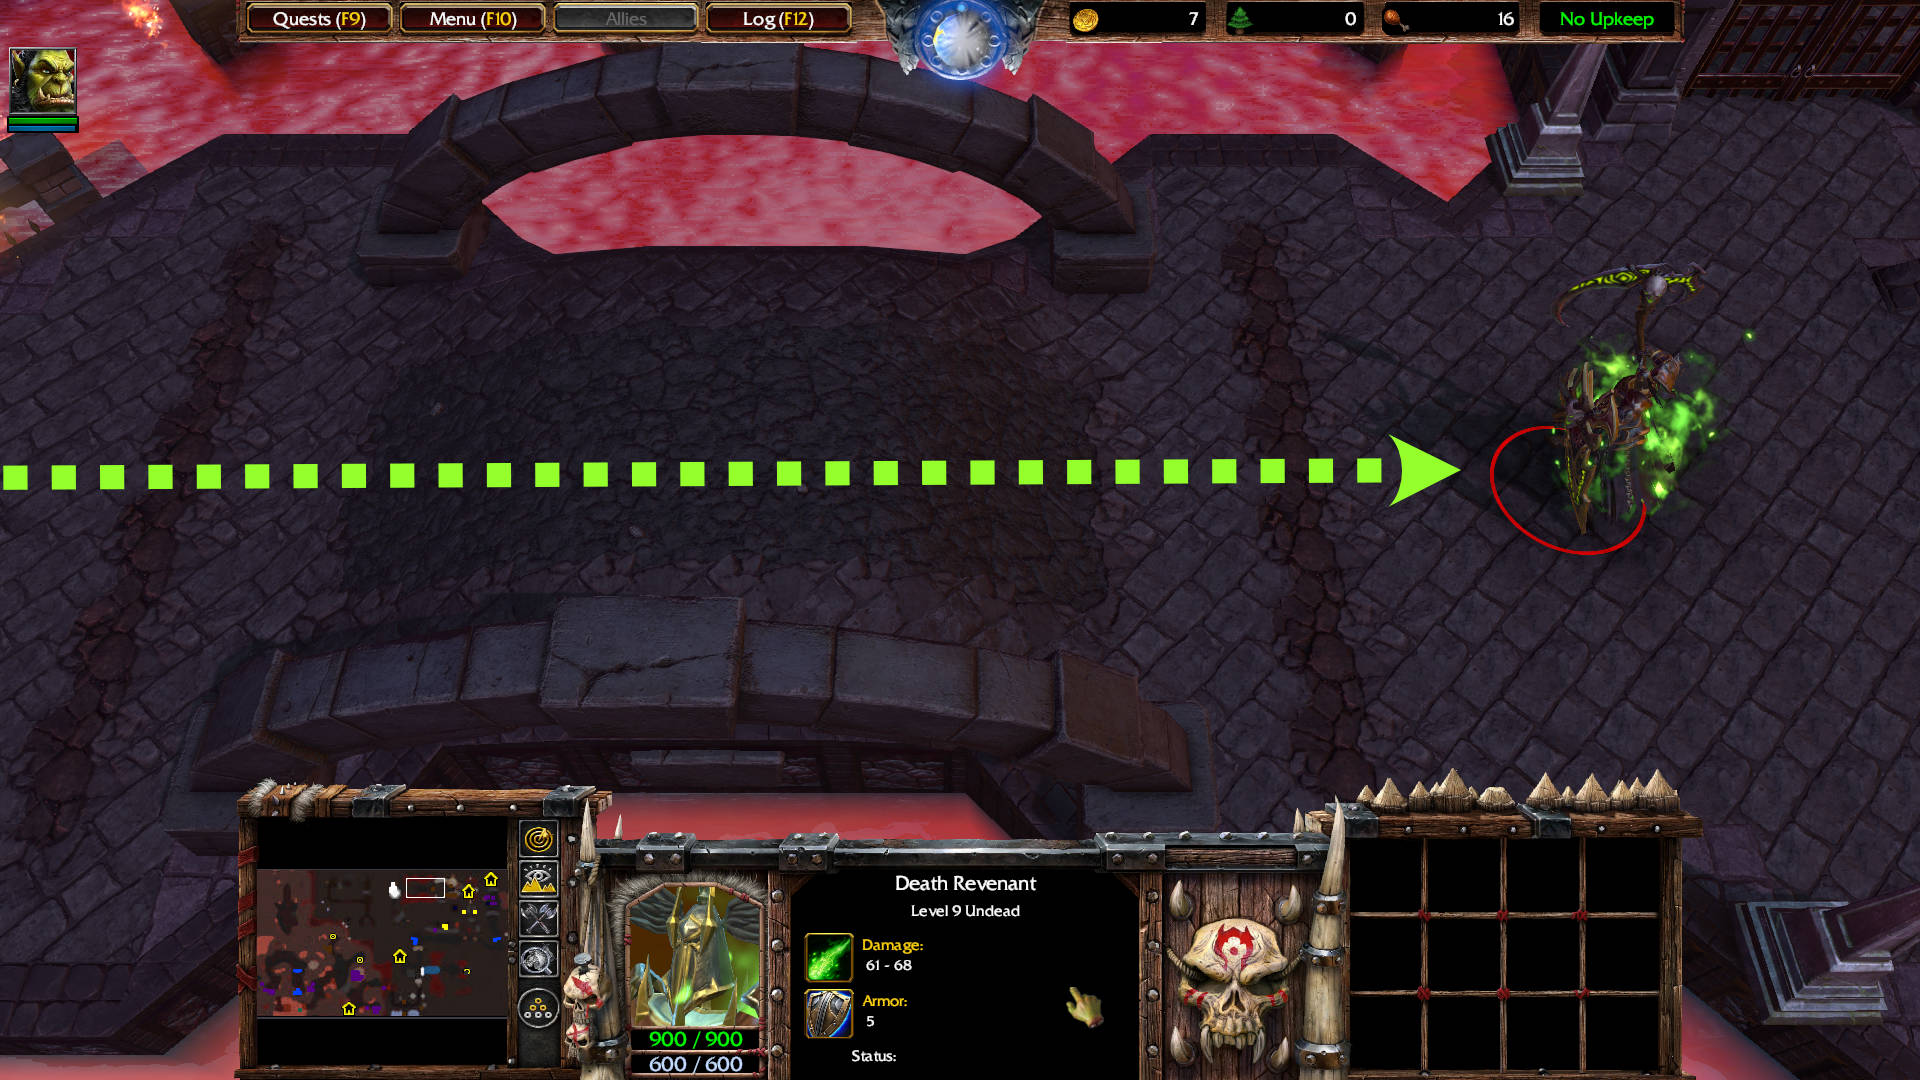
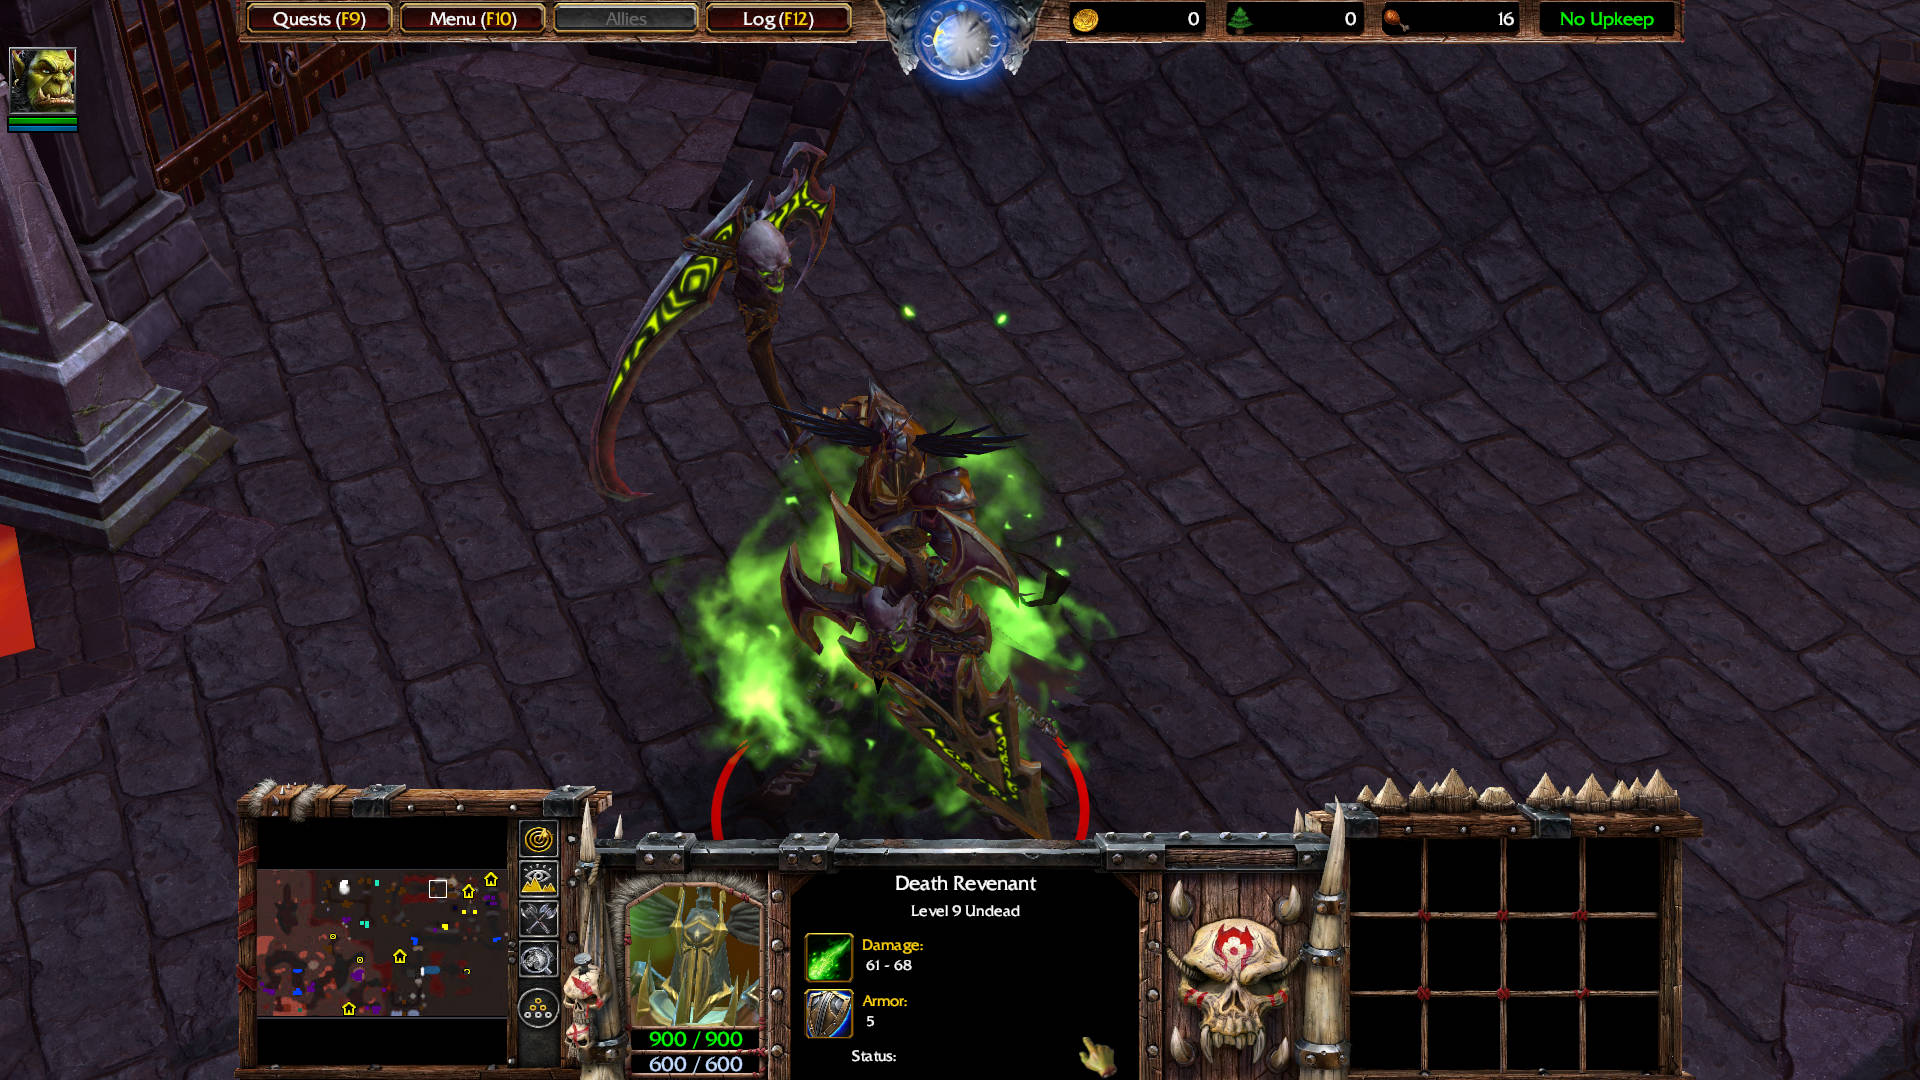
Go past the bridge to kill the Death Revenant level 9. Two stealthed Burning Archers level 3 stand at the end of the bridge and engage when you approach.
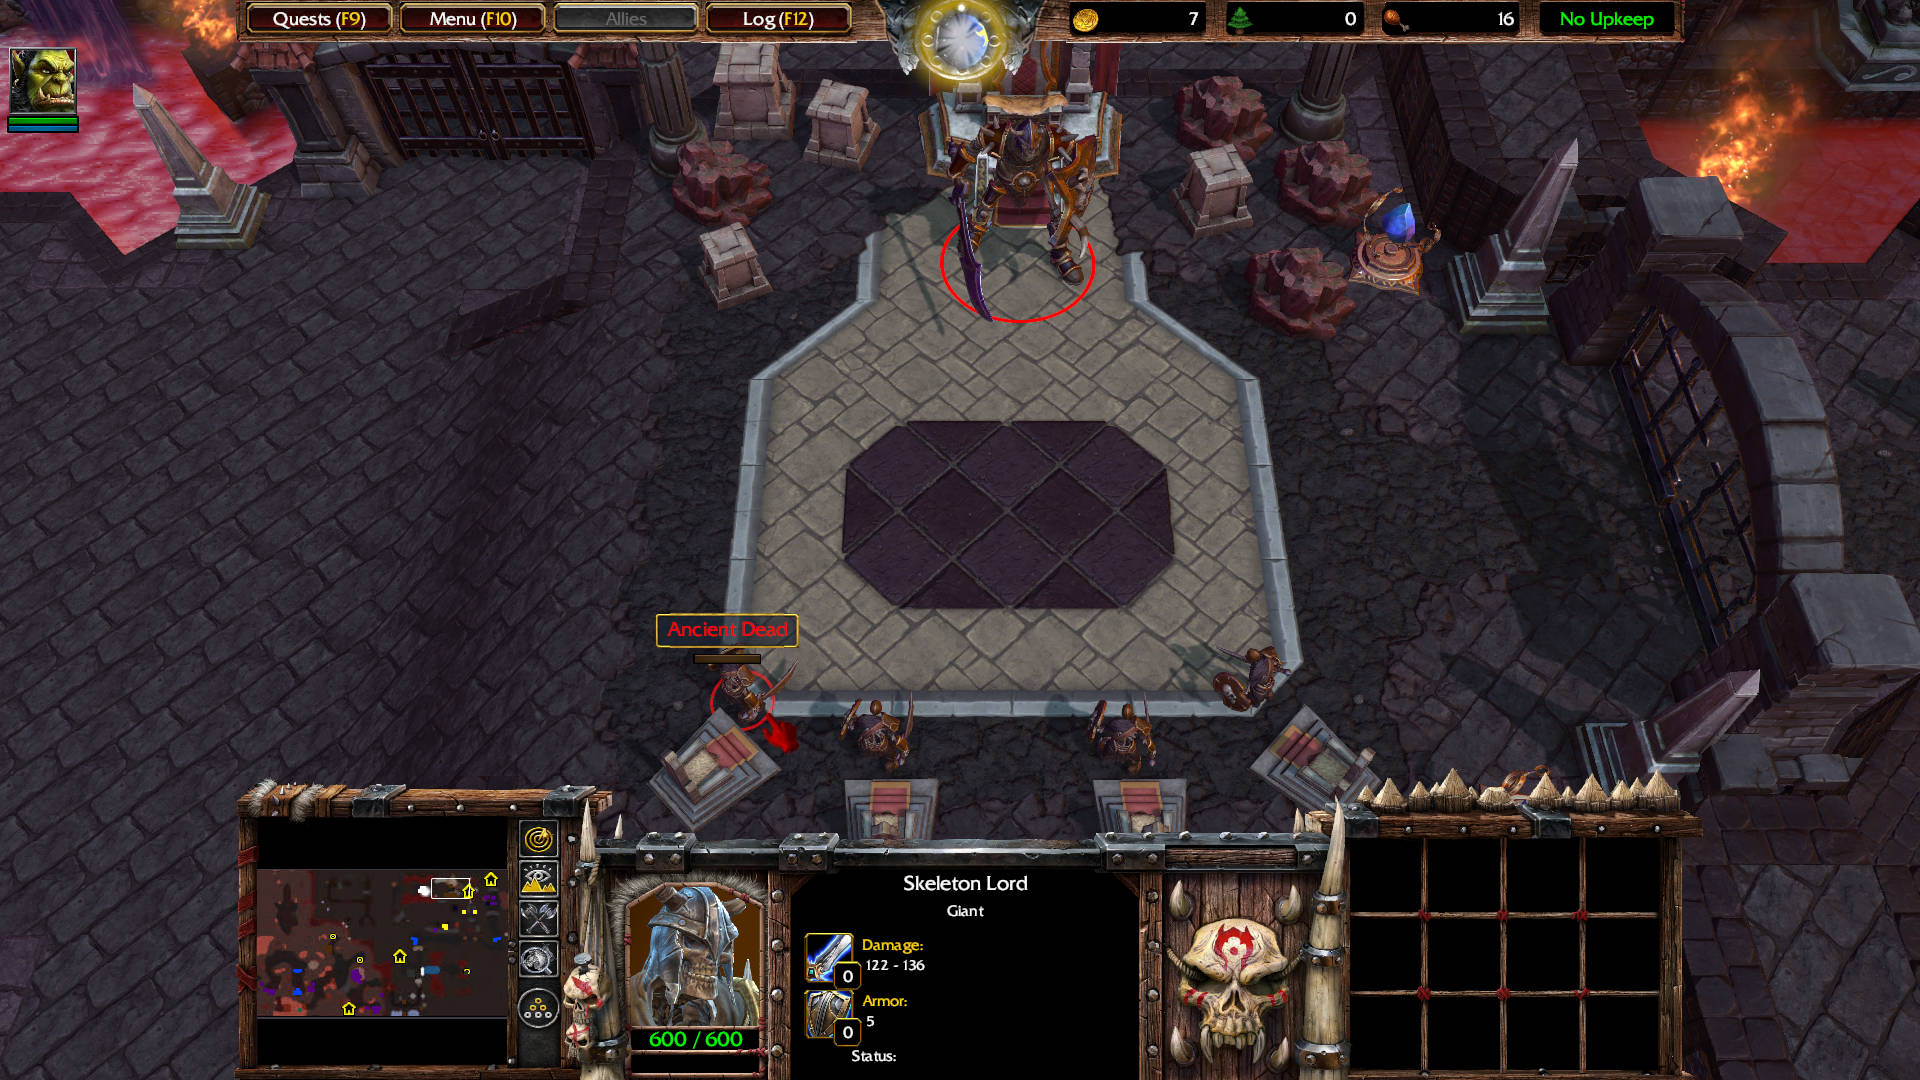
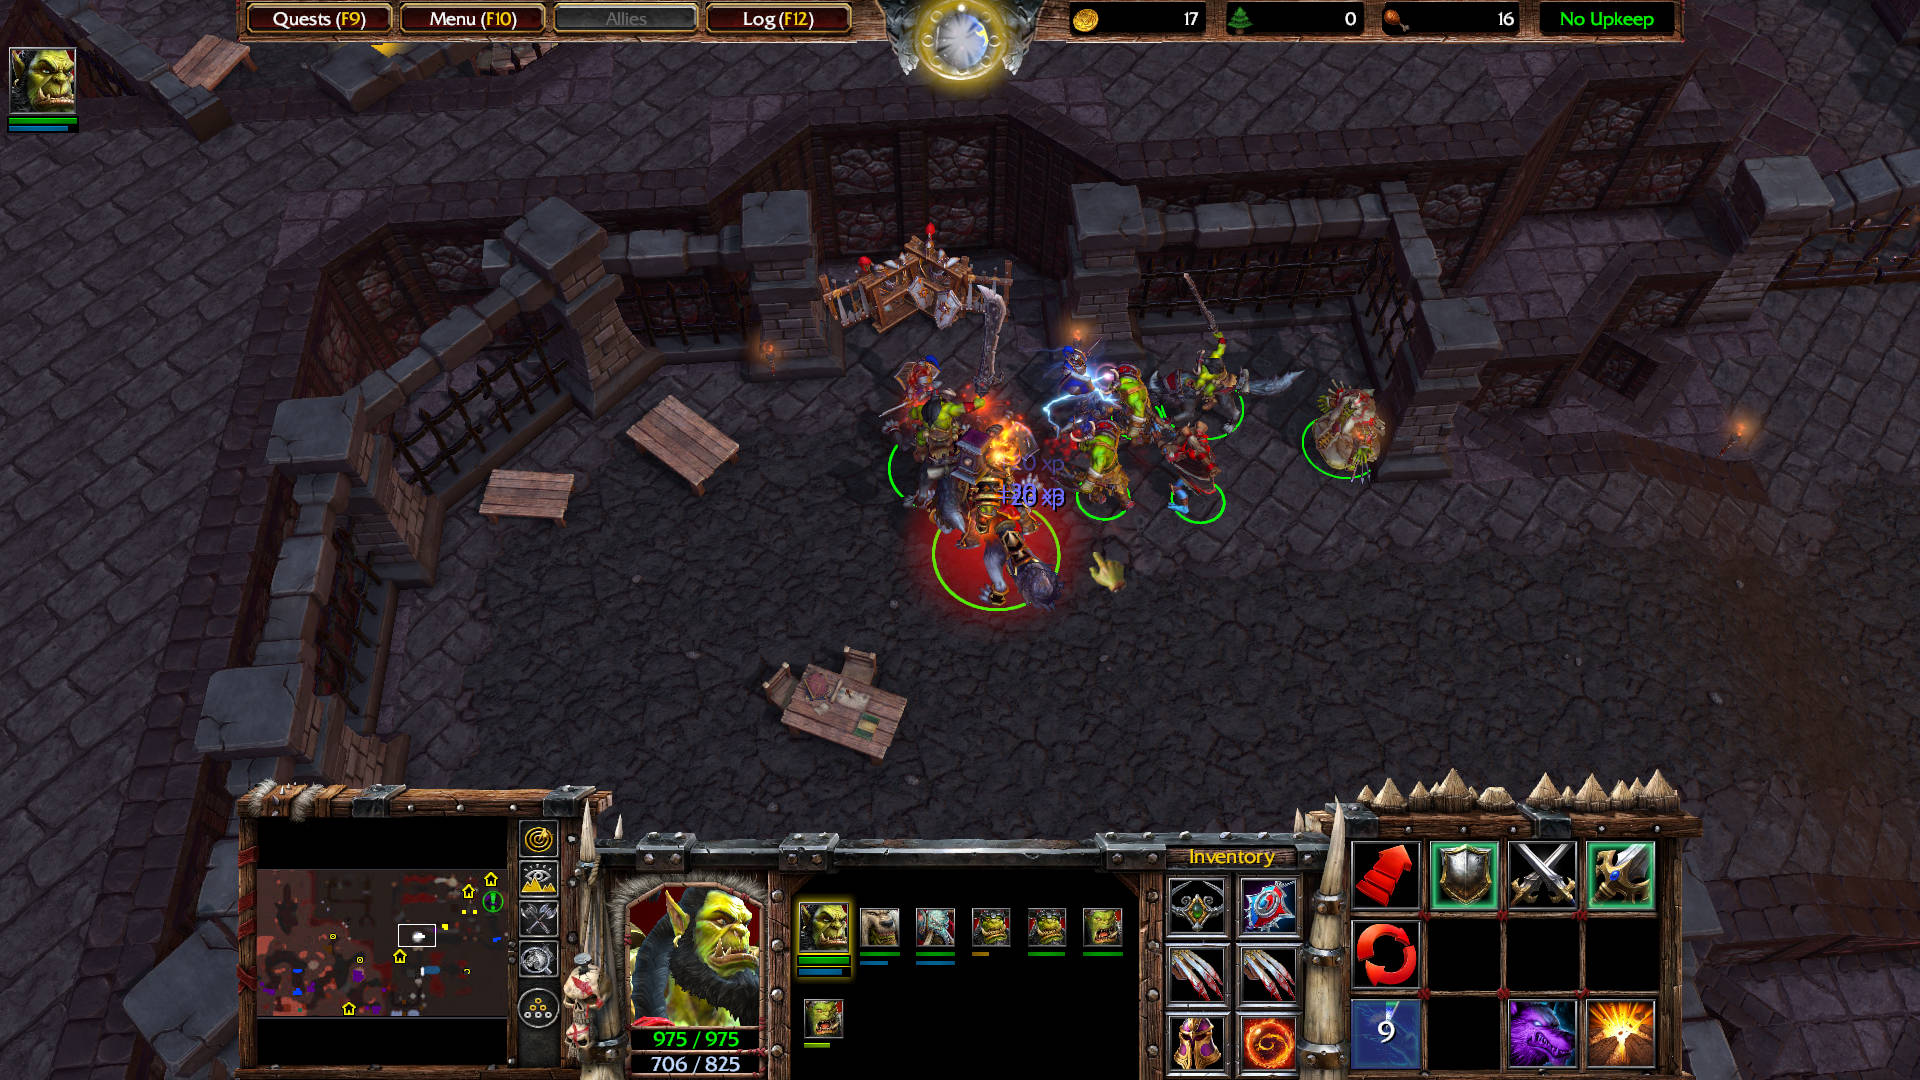
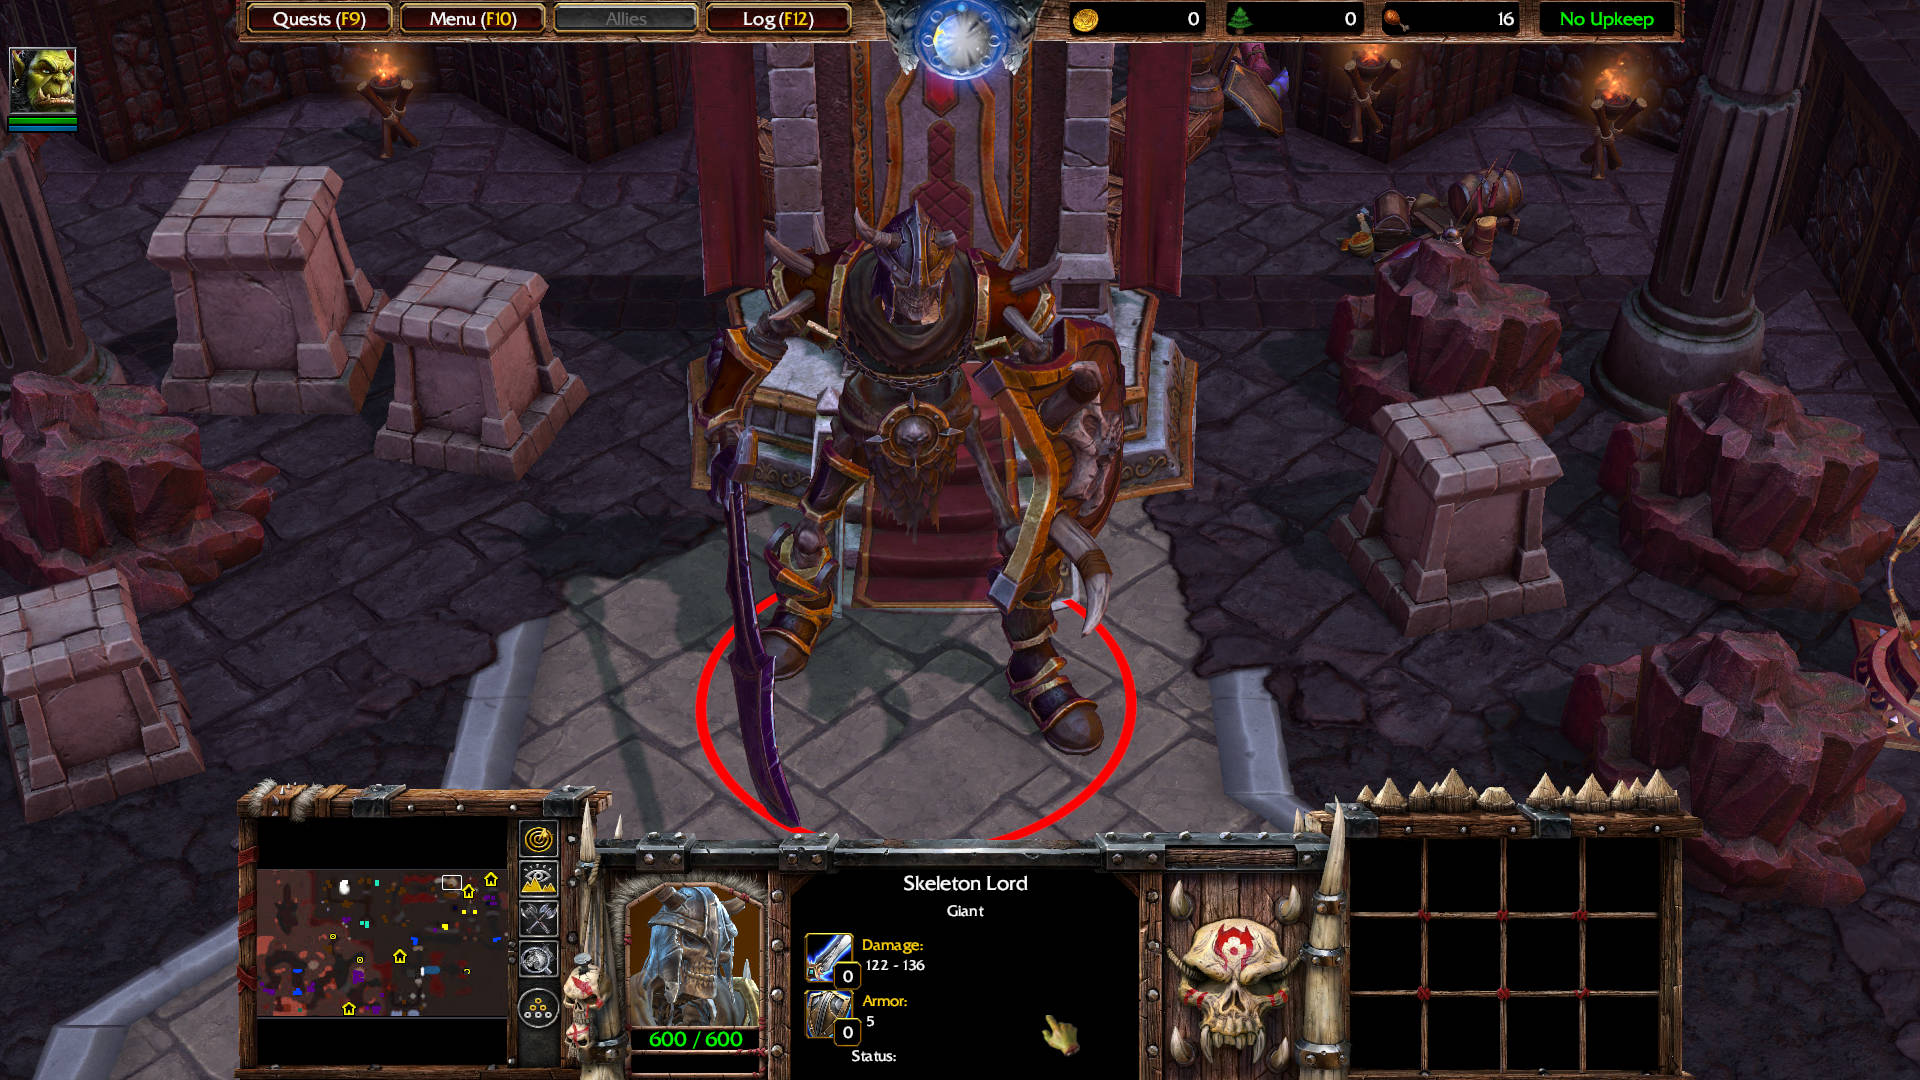
The next room has a Skeleton Lord and four Skeleton Warrior.
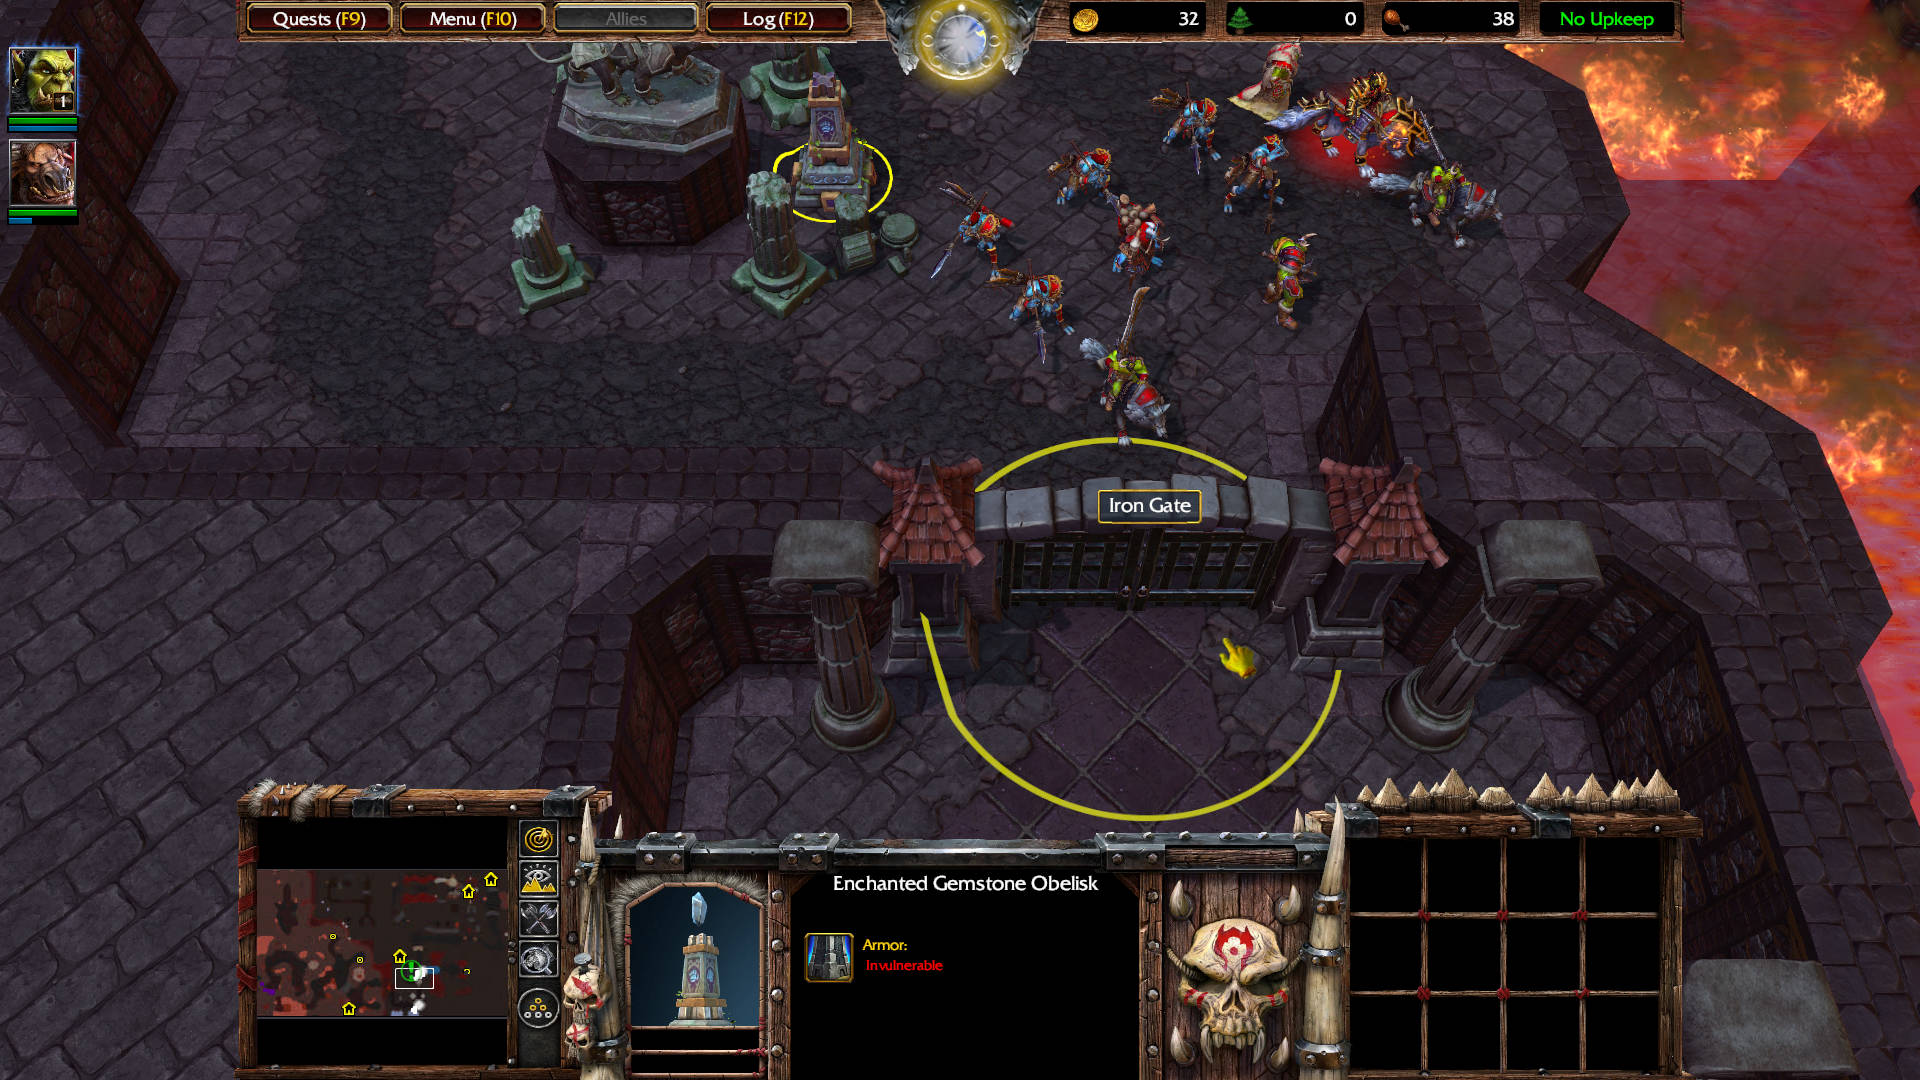
This room has 3 doors. The one to the north is an Iron Gate and it is locked. You get this message when you approach it:
KING’S DOOR – The door to the treasure room is locked.
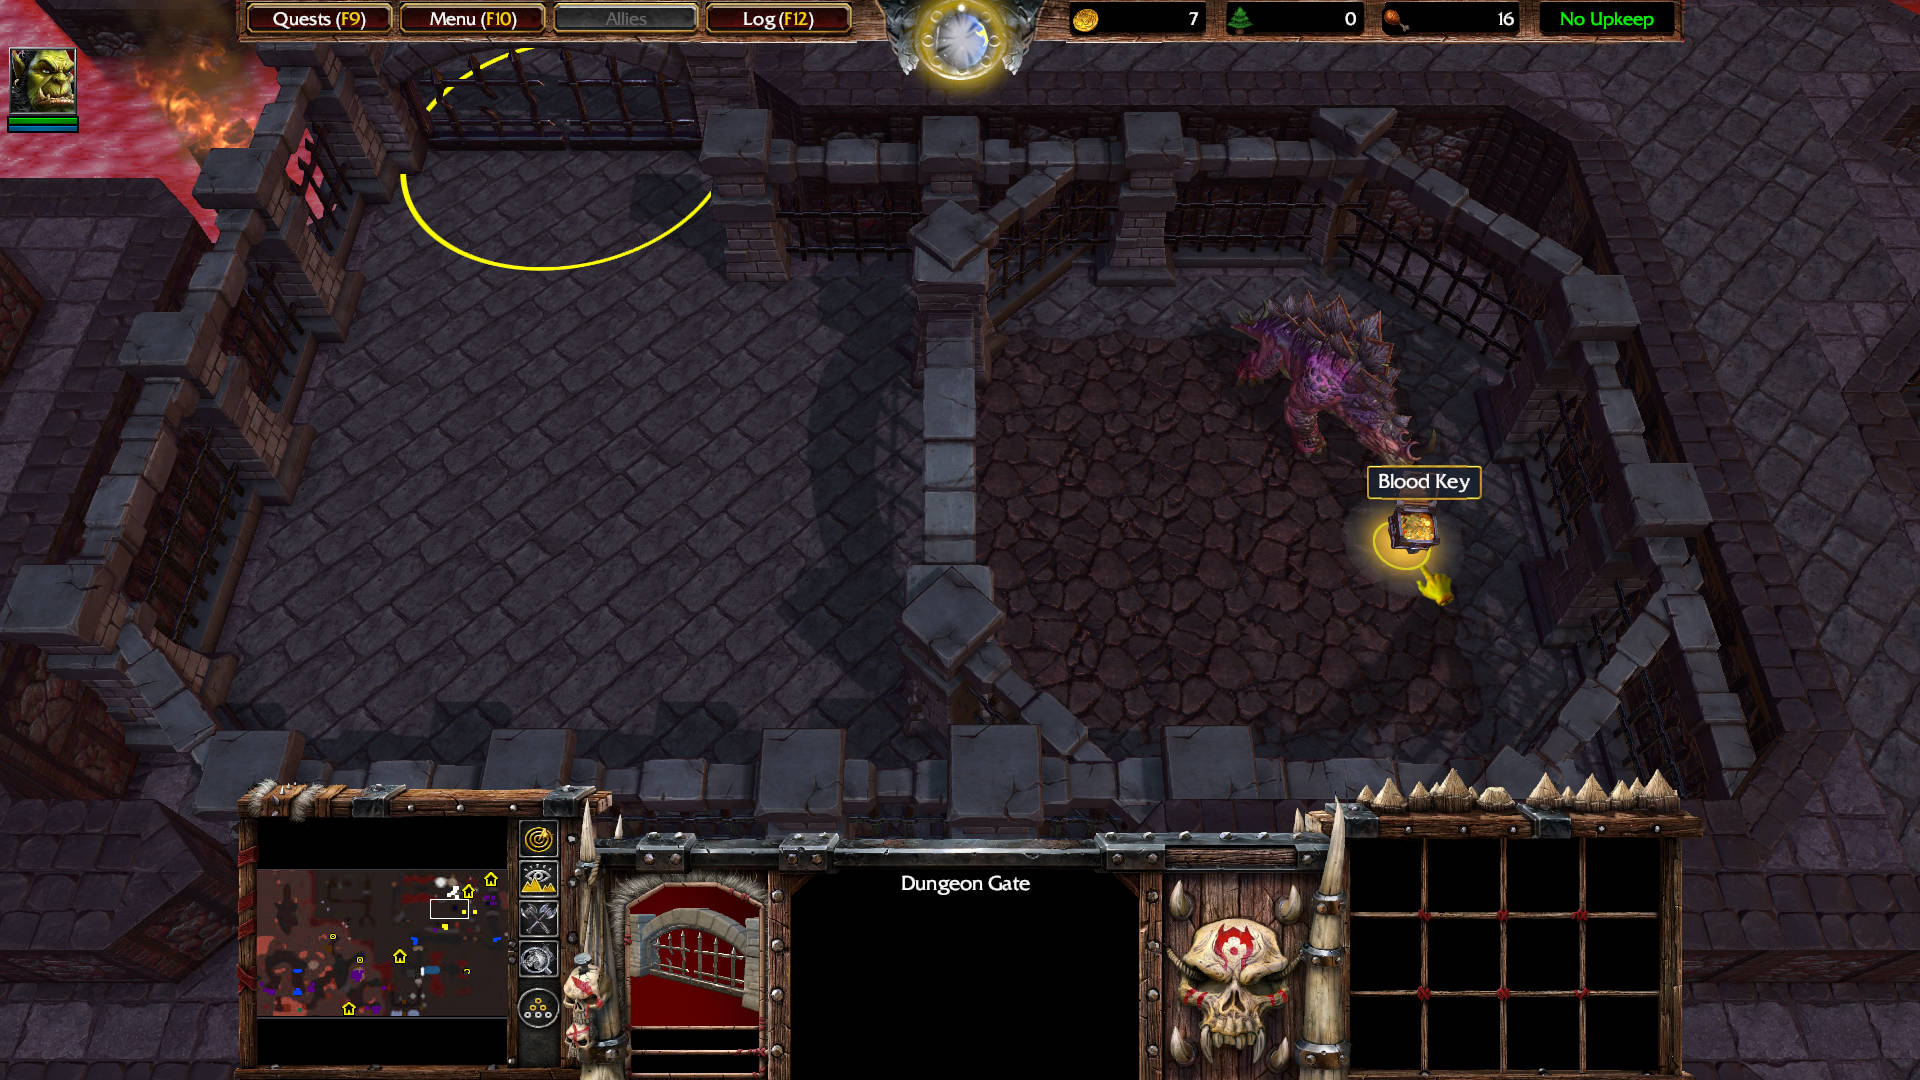
To open that Iron Gate, destroy the Dungeon Gate to the south. Kill the Salamander Vizier level 7 and loot the Blood Key from the Treasure Chest he guards.
Once the Bloody Key is in your inventory, go back to the Iron Gate. It will automatically open on proximity and now you can loot the Crown of Kings: Increases the Strength, Intelligence, and Agility of the Hero by 5 when worn.
Destroy the crates — which contain:
- Scroll of Healing: Heals 150 hit points to all friendly non-mechanical units around the Hero when used.
- Scroll of Protection: Increases the armor of all friendly units in an area around your Hero by 2 for 30 sec
- Scroll of Mana: Restores 100 mana to all friendly units in an area around your Hero.
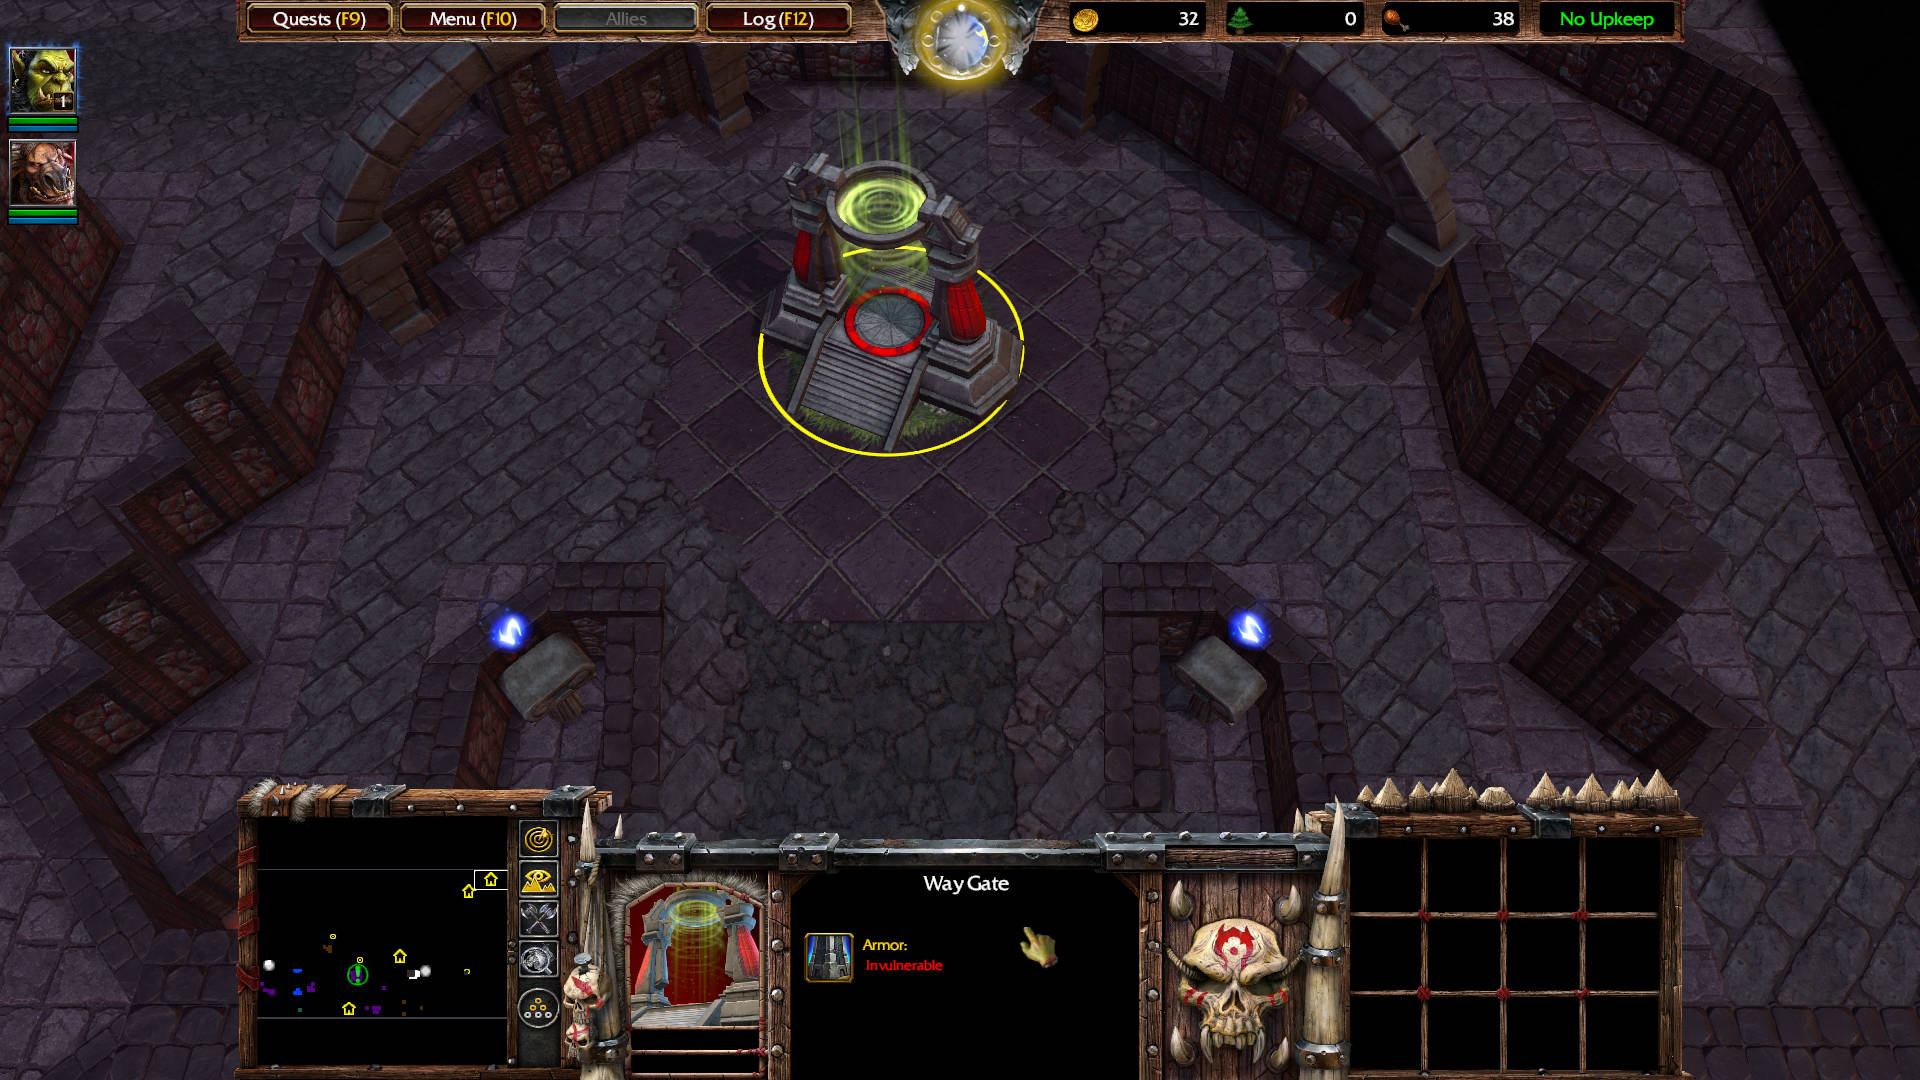
Destroy the Dungeon Gate to the east to access the Way Gate.
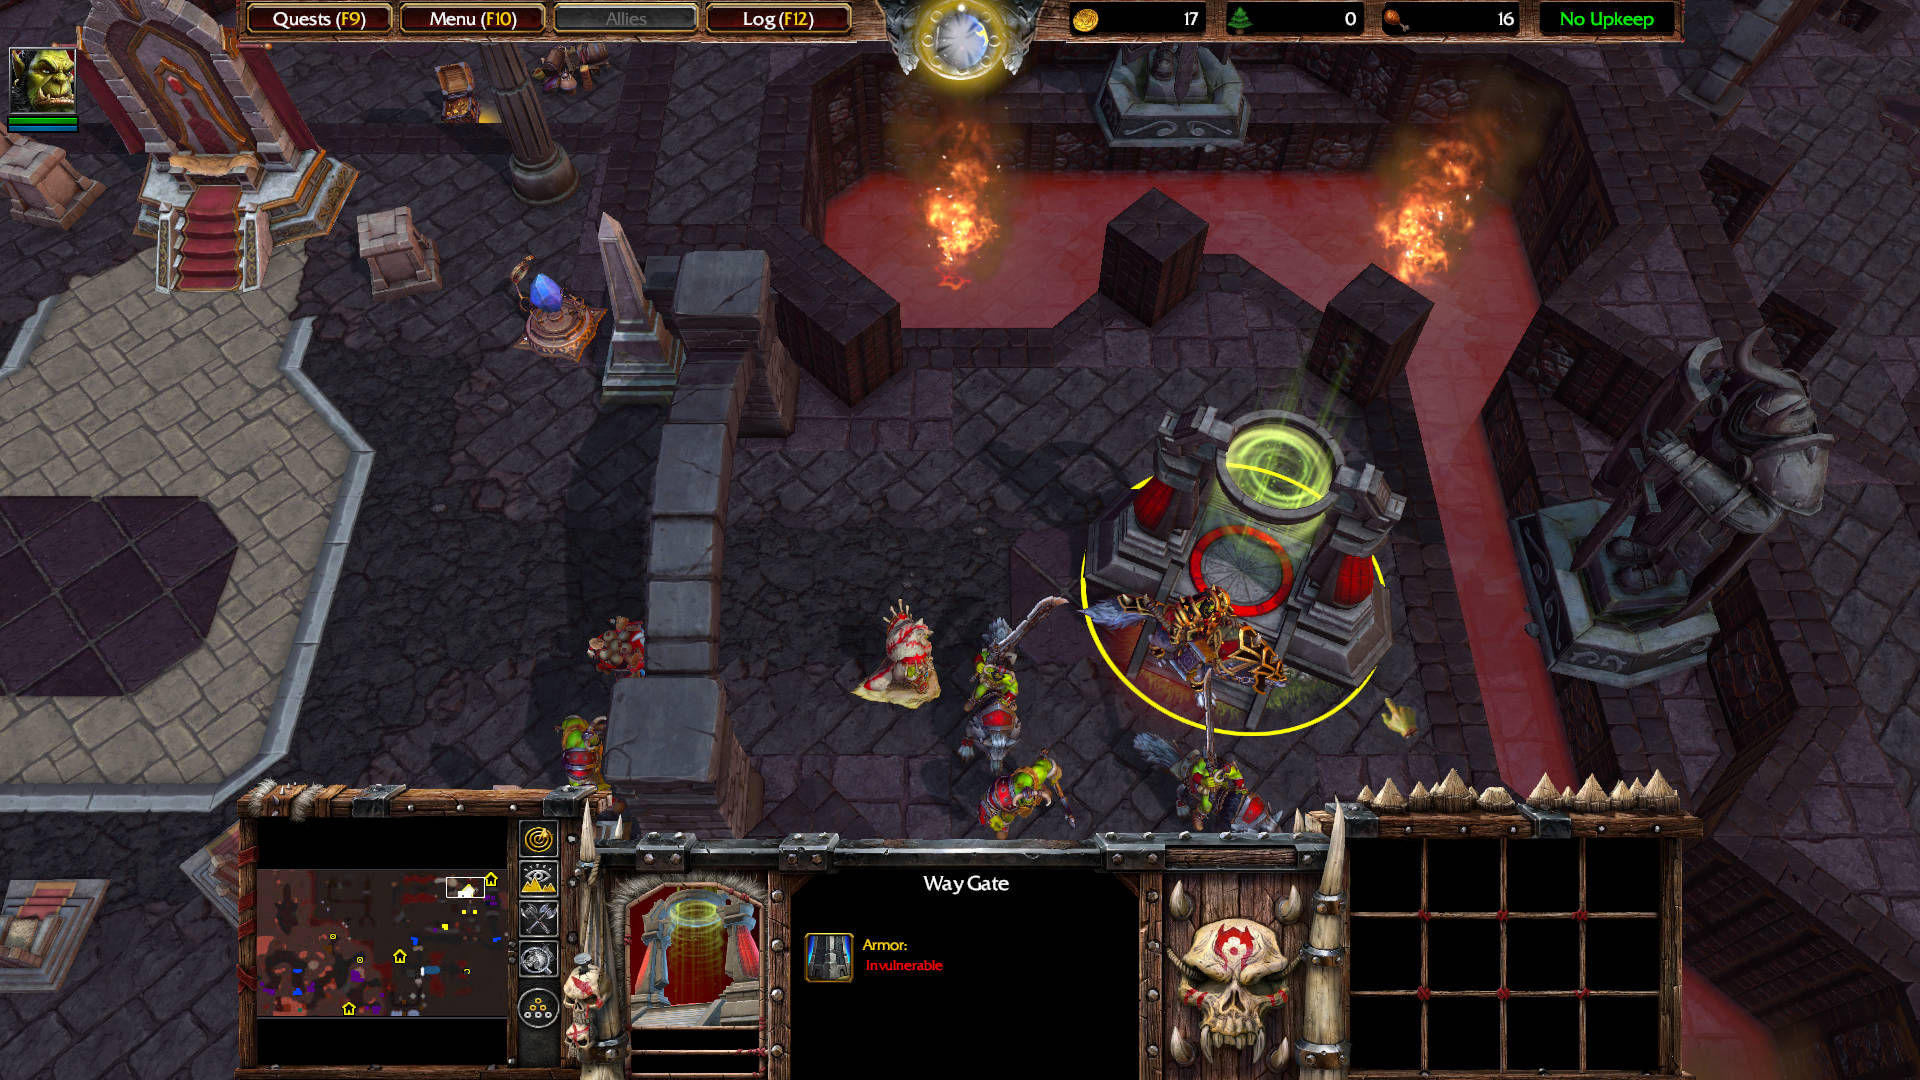
That Way Gate teleports you to this Way Gate near the middle of the map.

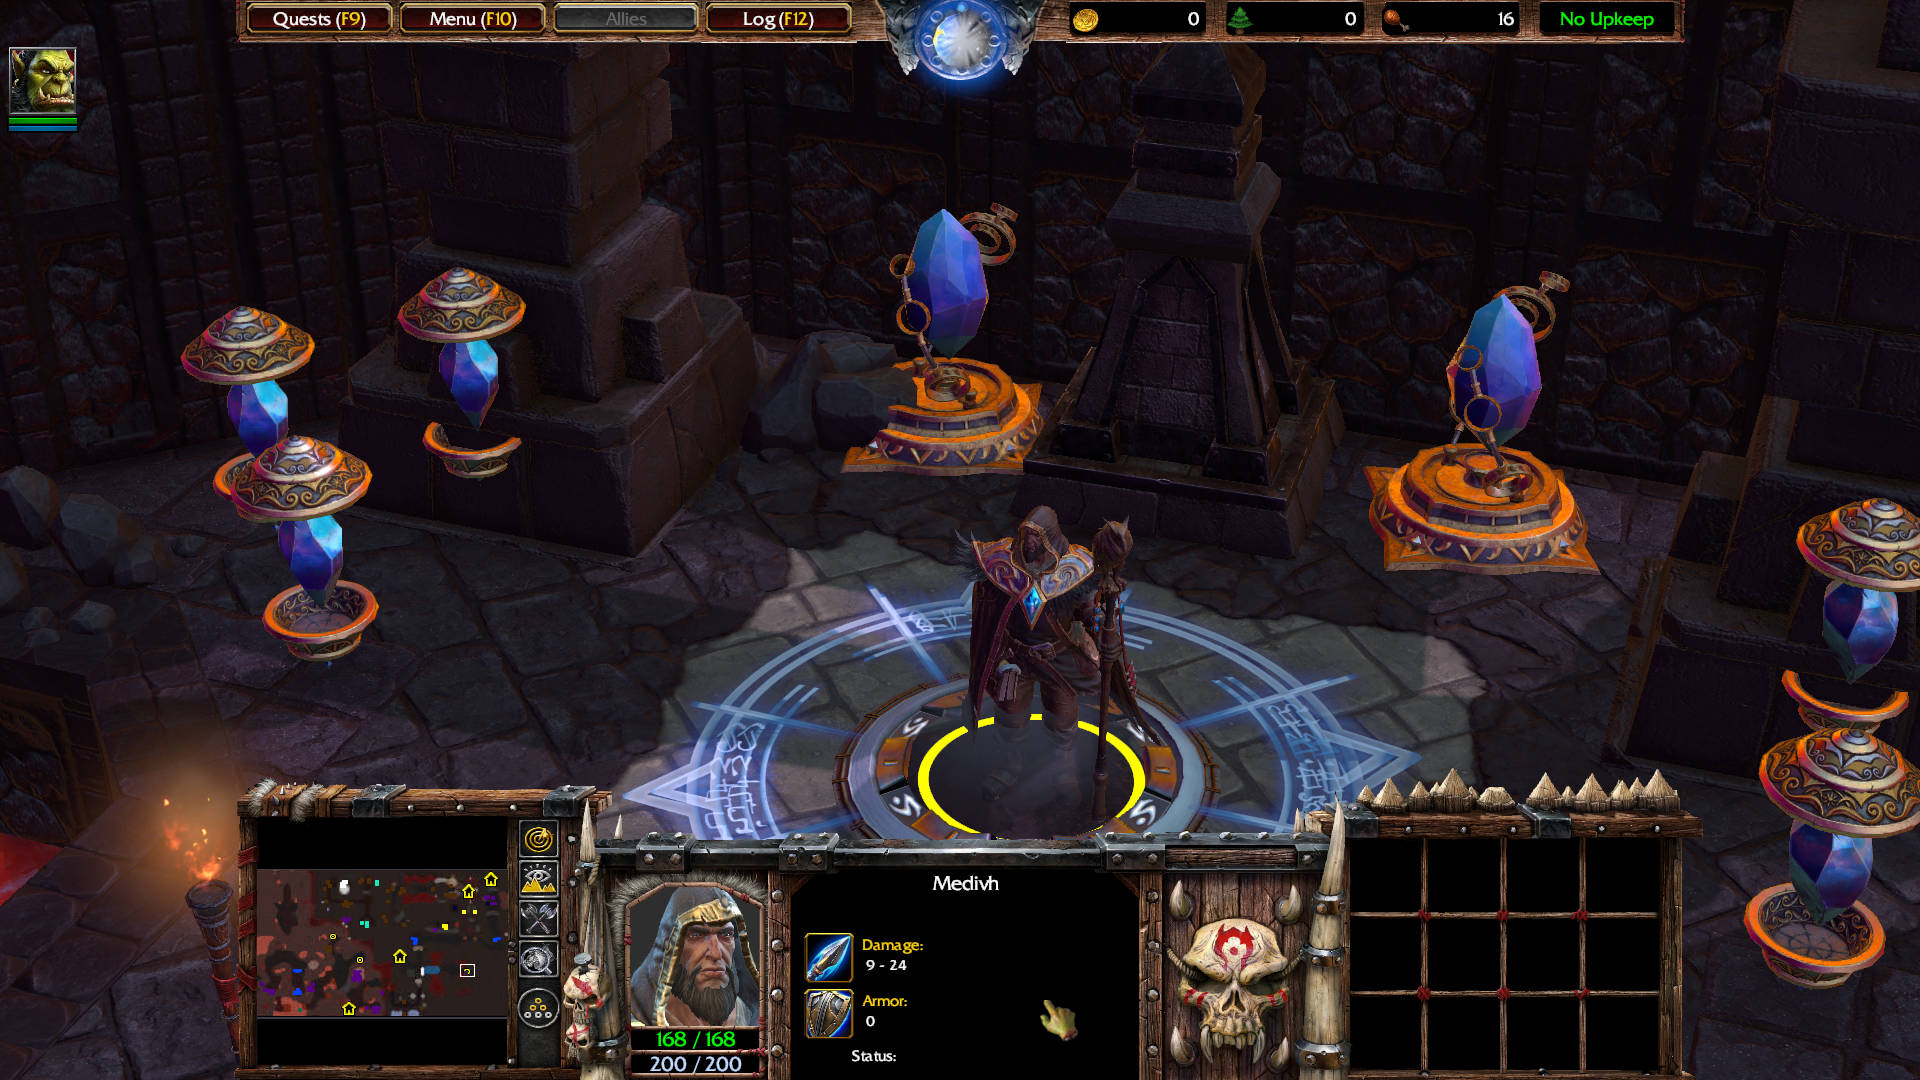
After teleporting, you will find this large statue and an Enchanted Gemstone Obelisk. A dialogue is triggered upon proximity. The name might ring a bell.
Aszune: I am Aszune, ancient princess of the moon-children. None may pass until my heart is returned to me.
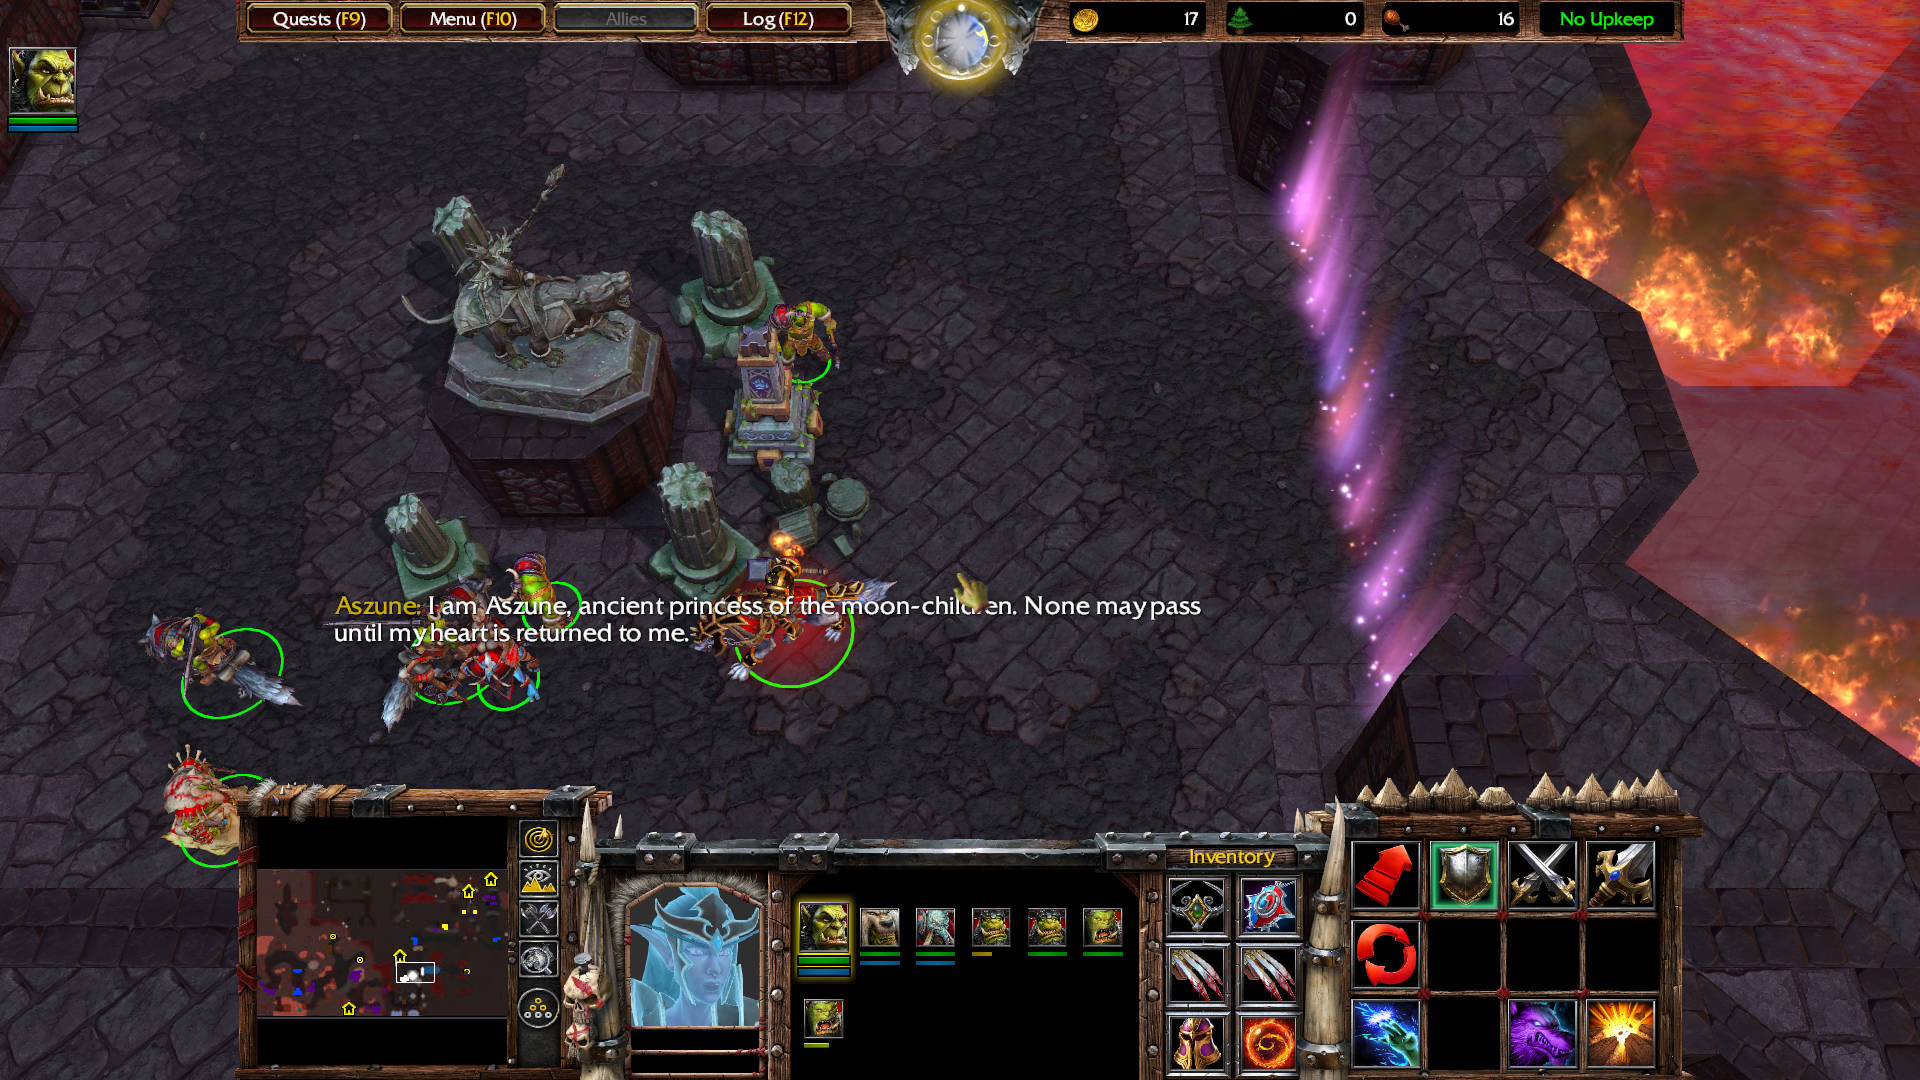
Thrall: The statue’s magic has created an impassable barrier. I wonder what it means by its heart?
MAIN QUEST
The Heart of Aszune
- Find the Heart of Aszune
- Return the Heart of Aszune
Destroy the Elven Gate to the north of the Enchanted Gemstone Obelisk.

The 3 Peasants will run north to the weapons rack to transform into Footmen.
Footman: Orcs! Arm yourselves!
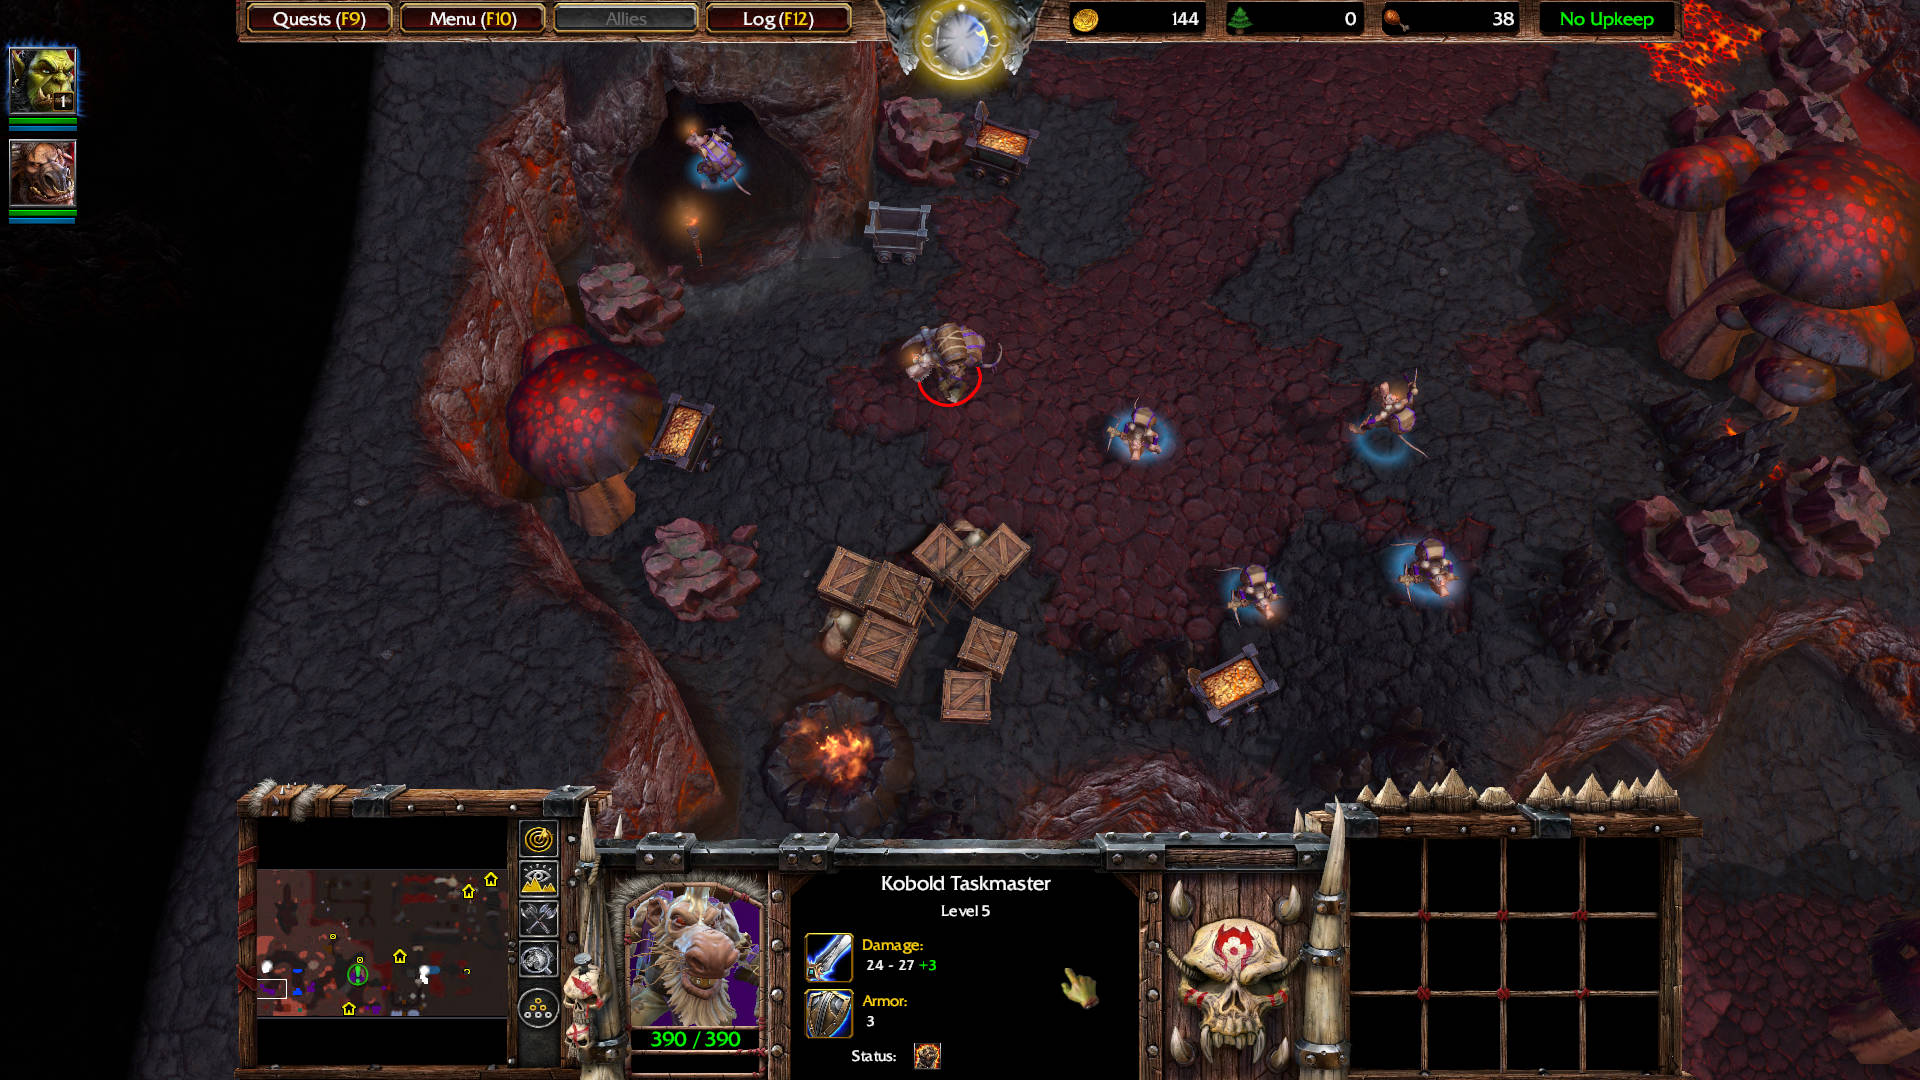
To the right there are two prison cells: one has a Kobold Taskmaster level 5 with a Command Aura (increased damage). Destroy the Dungeon Gate.

Destroy the second Dungeon Gate to free the captive Headhunters who join your team.

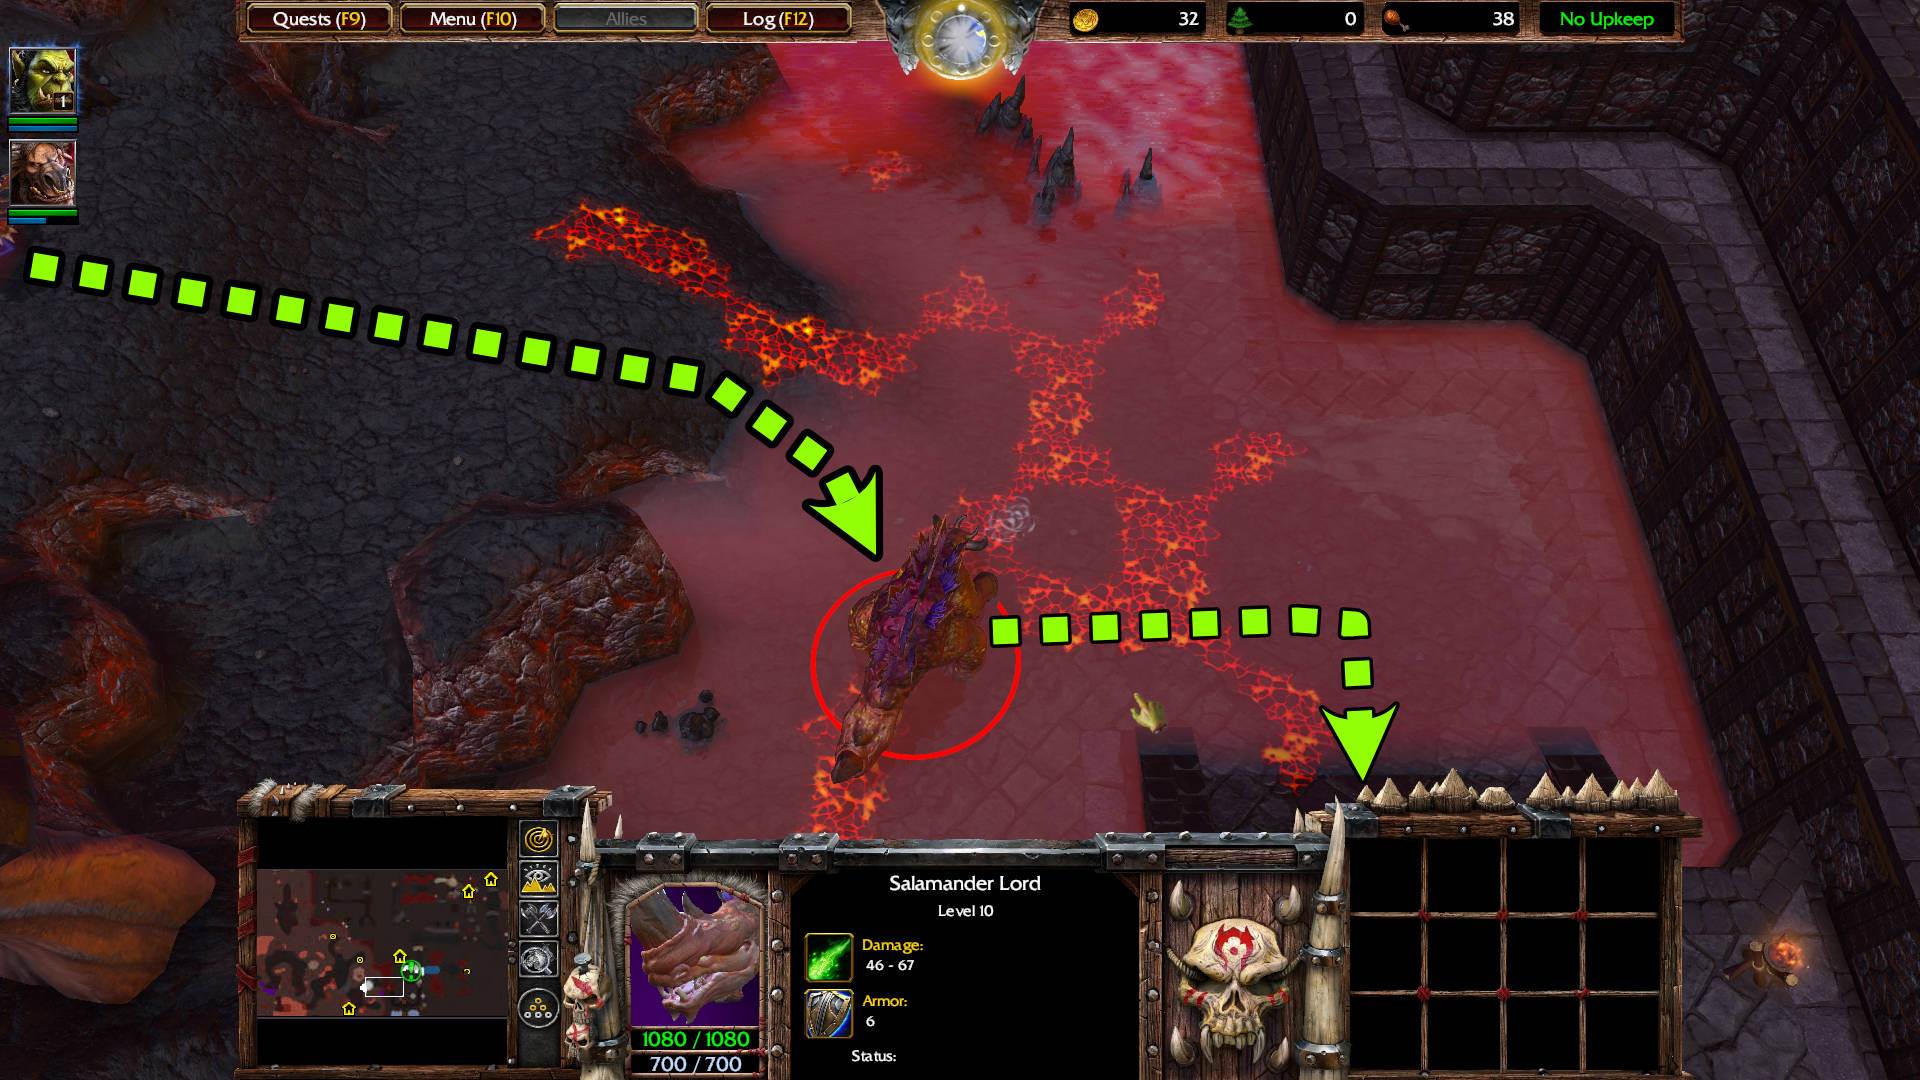
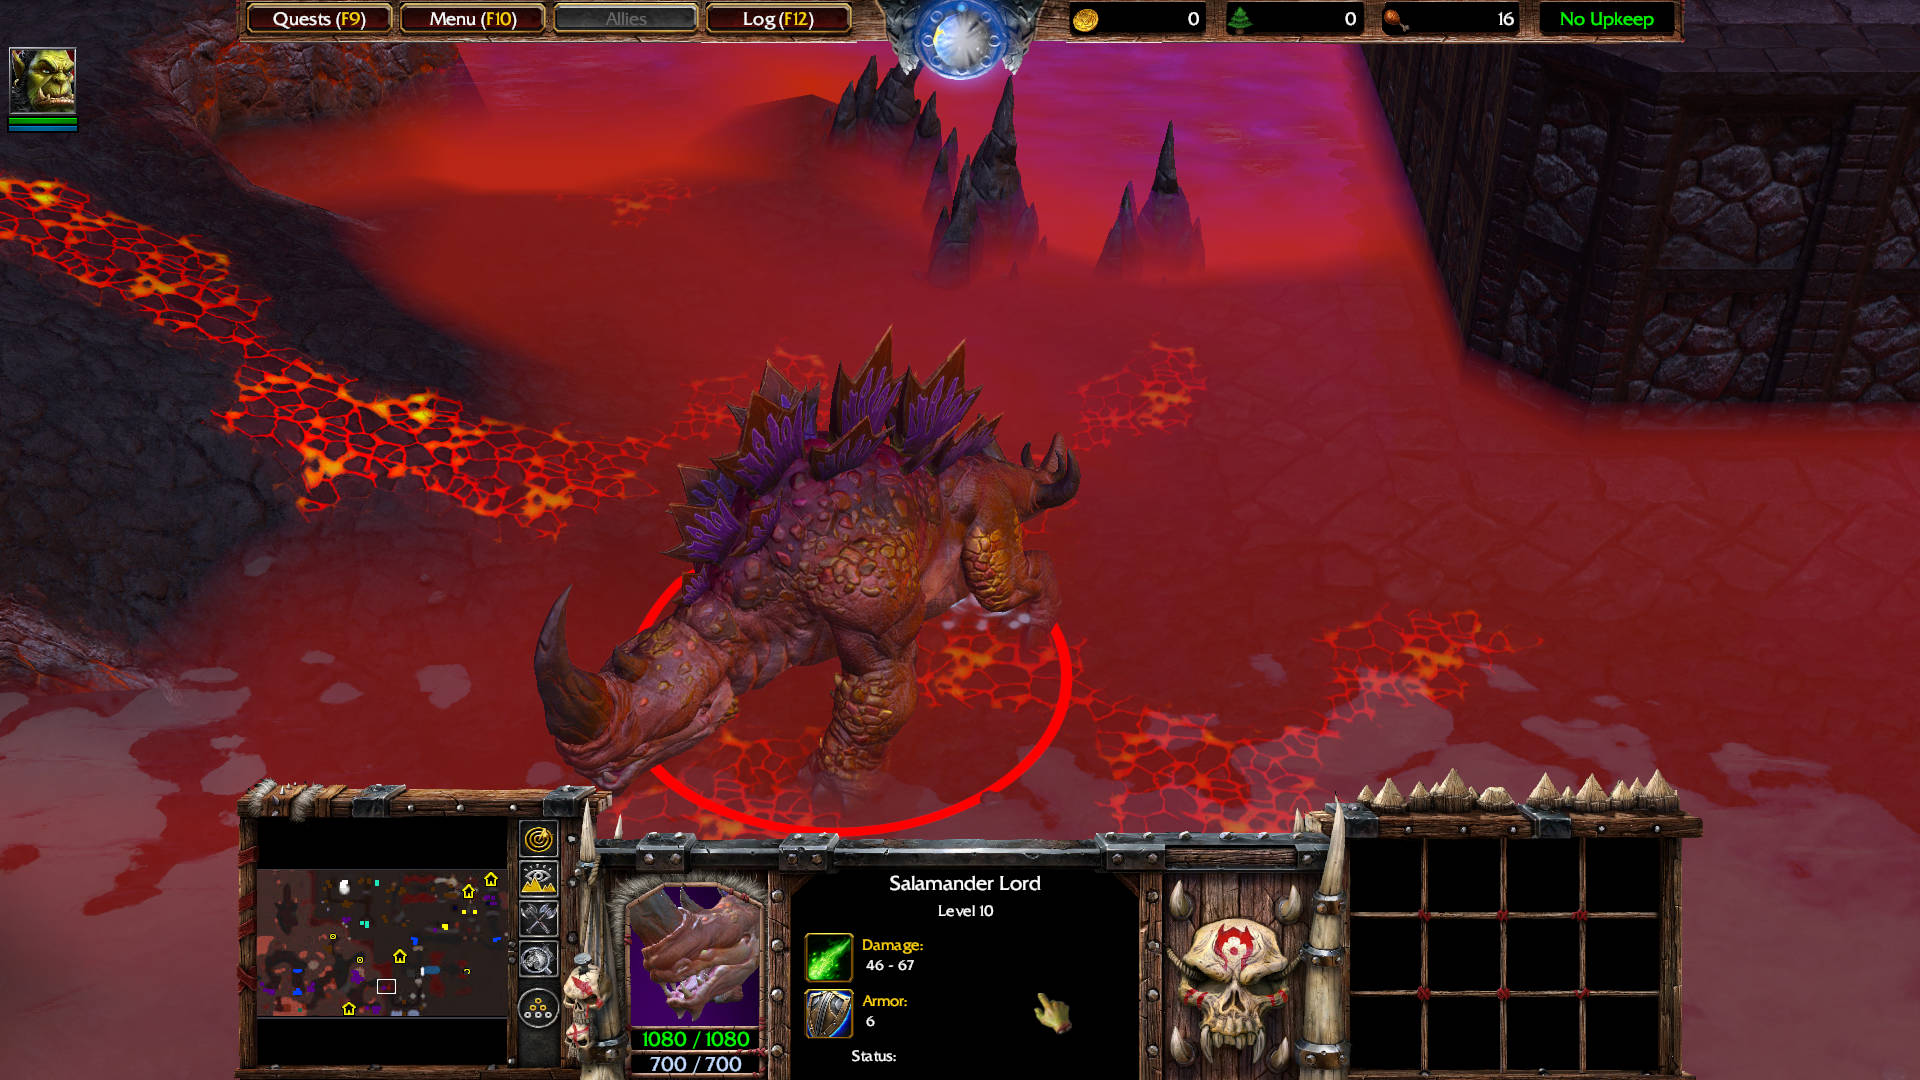
Notice the third prison cell has a lava pit? Normally you would ignore it because you see nothing inside. If you destroy the Dungeon Gate there, a Salamander Lord level 10 emerges from the lava pit. It drops Sobi Mask: Increases the Hero’s rate of mana regeneration by 50% when worn.

Heading to the east, you will find a long corridor with crates. Destroy the crates — which contain:
- Scroll of Mana: Restores 100 mana to all friendly units in an area around your Hero.
- Scroll of Healing: Heals 150 hit points to all friendly non-mechanical units around the Hero when used.
- Potion of Greater Mana: Restores 300 mana when used.
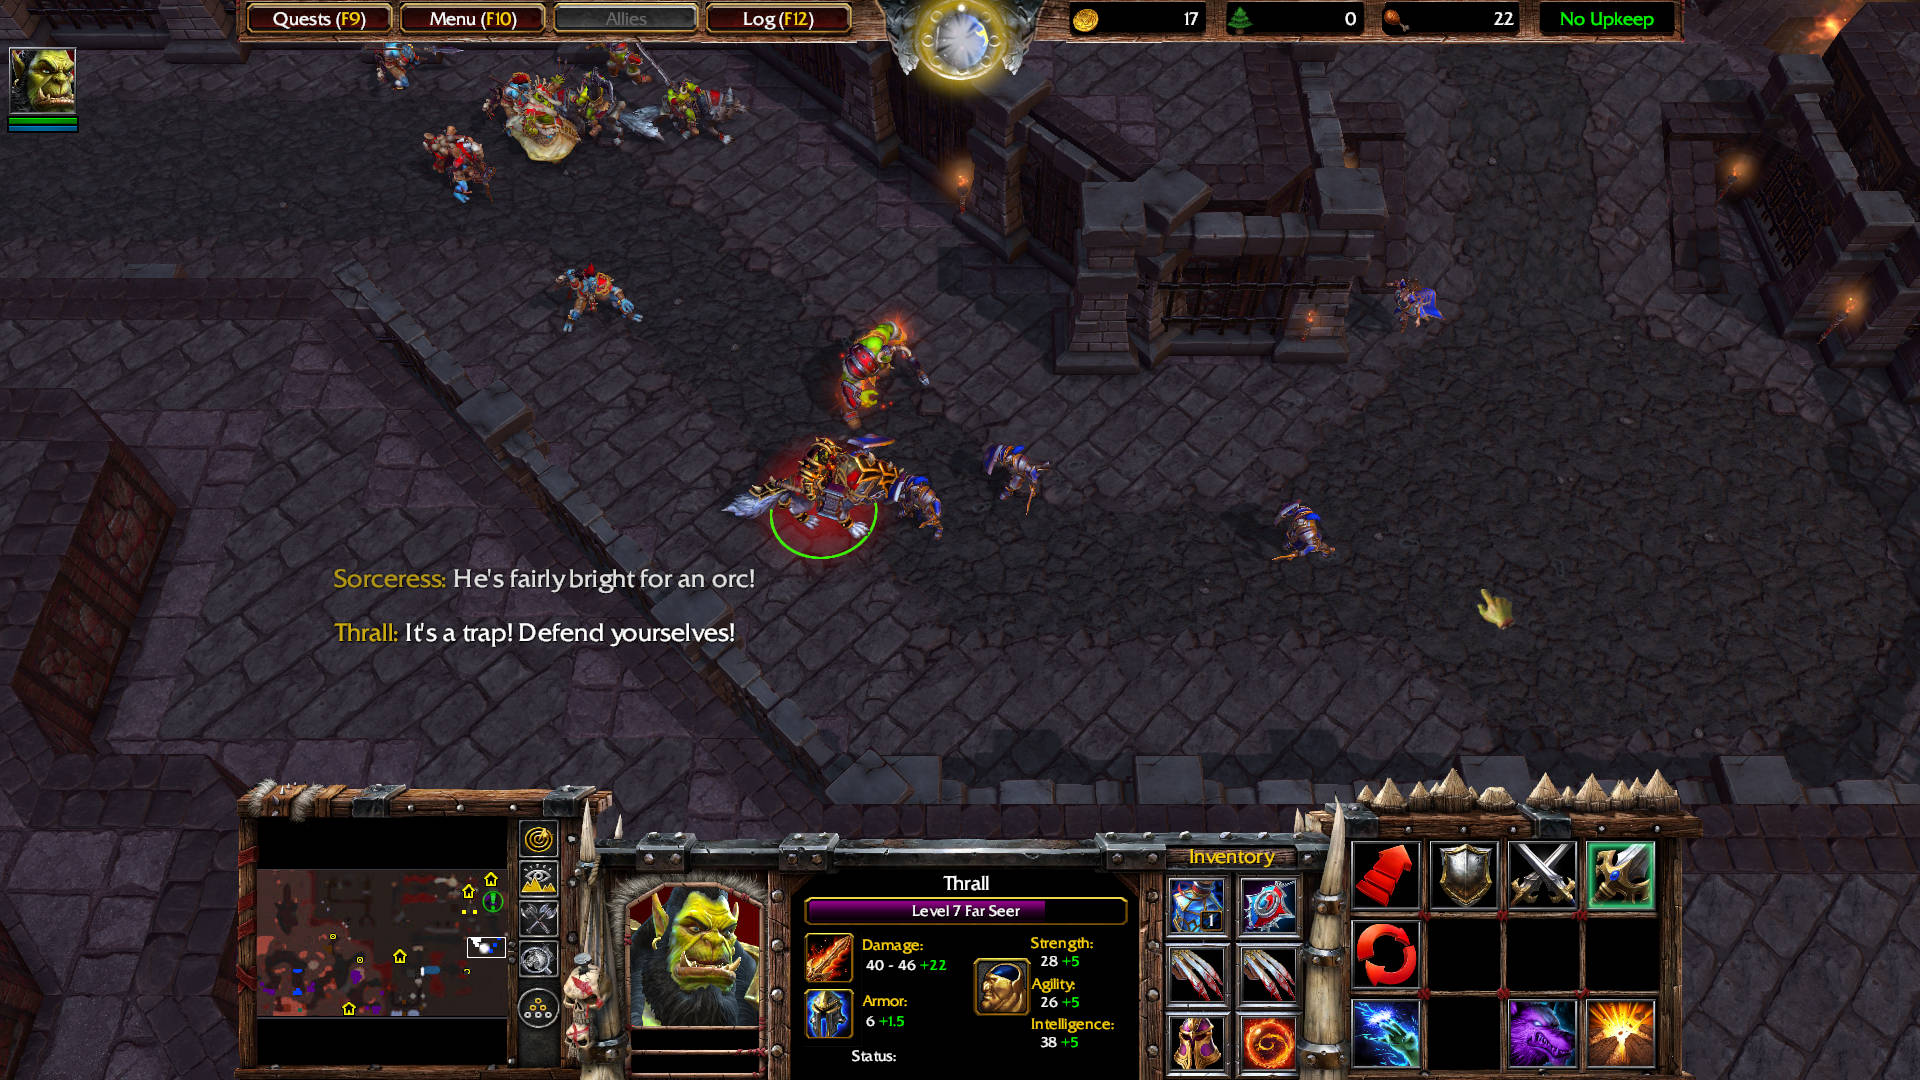
Further to the east you will encounter 4 sheeps and 2 Sorceress.
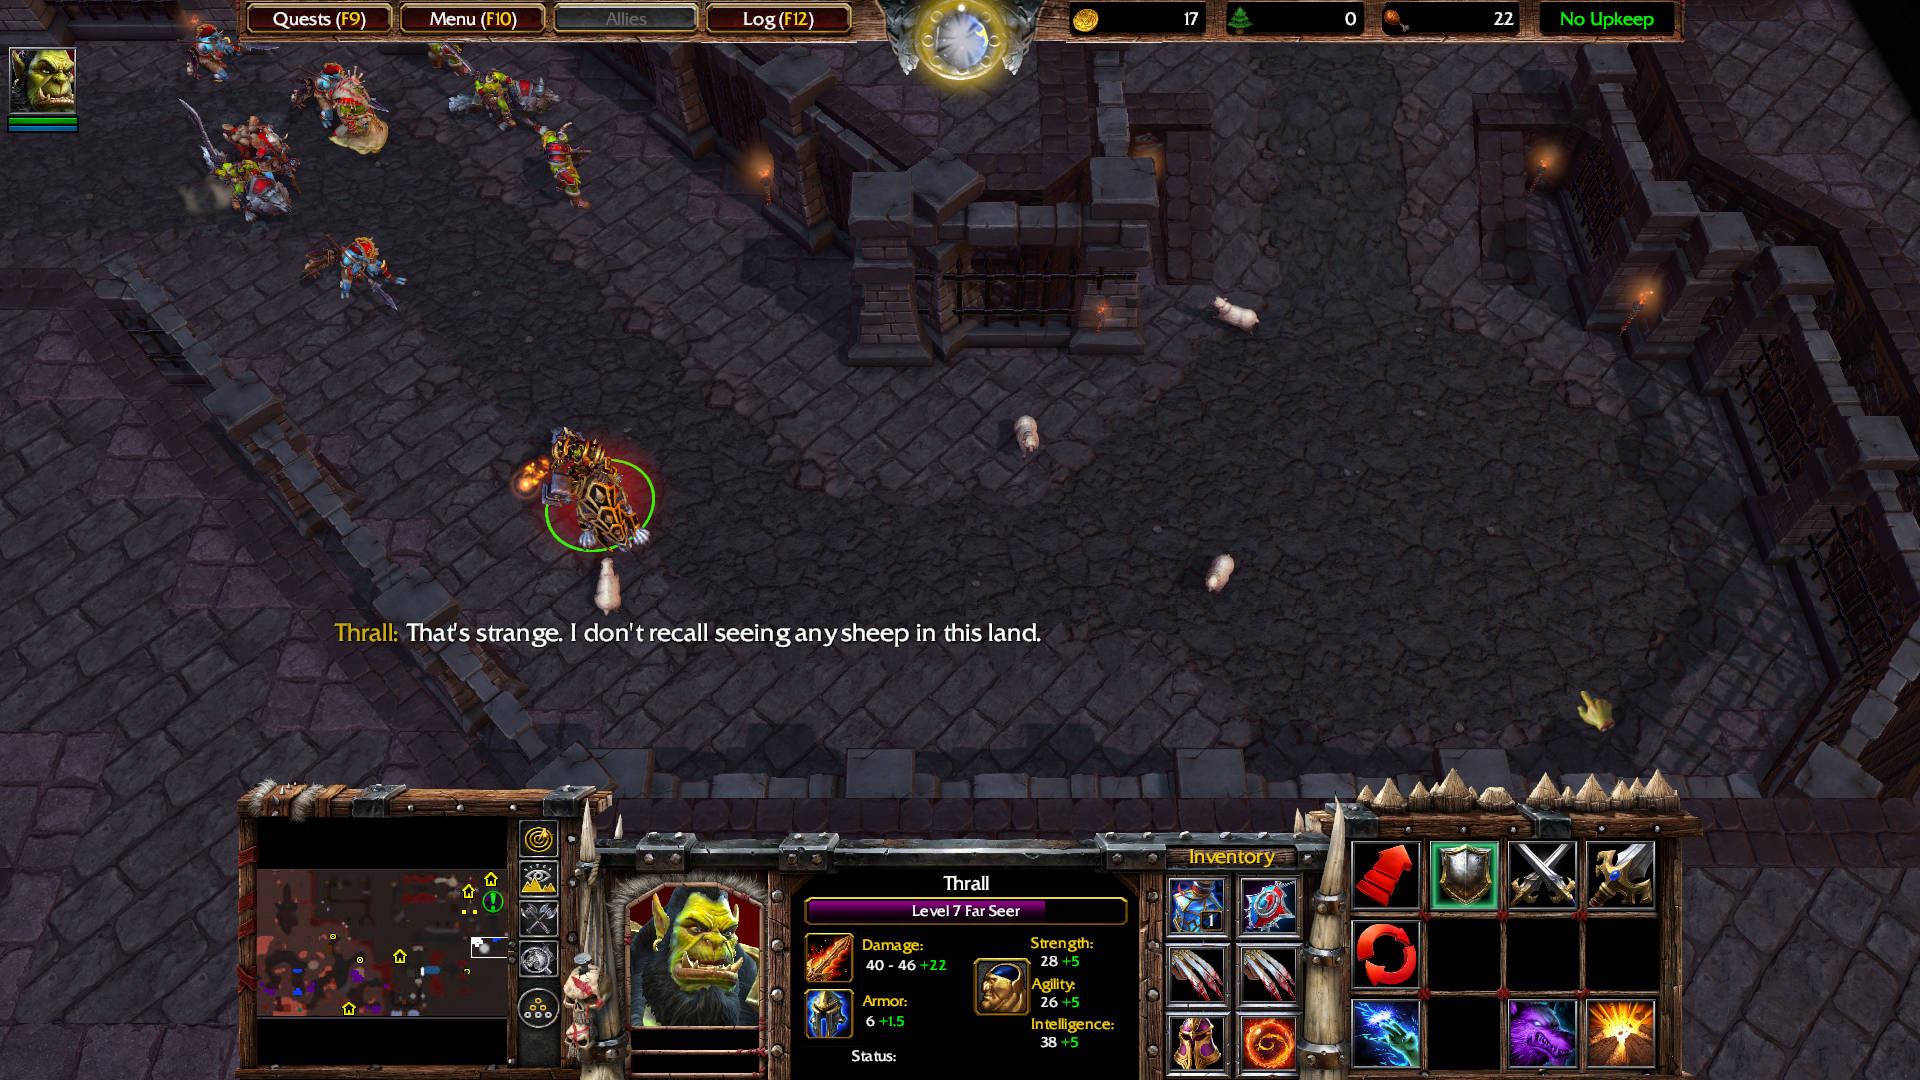
Thrall: That’s strange. I don’t recall seeing any sheep in this land.
Sorceress: He’s fairly bright for an orc!
Thrall: It’s a trap! Defend yourselves!
Note: The 4 sheeps transform into Footmen.
Destroy this Dungeon Gate on the left side. There you will find two prison cells.
Approaching the prison cells, three Burning Archer level 3 spawn. After killing them, the prison cells automatically open allowing the 2 captive Headhunters to join your team.
Destroy the crates in the back (seen in the image below) to loot Scroll of Resurrection: Brings 6 of your nearby friendly dead units back to life.
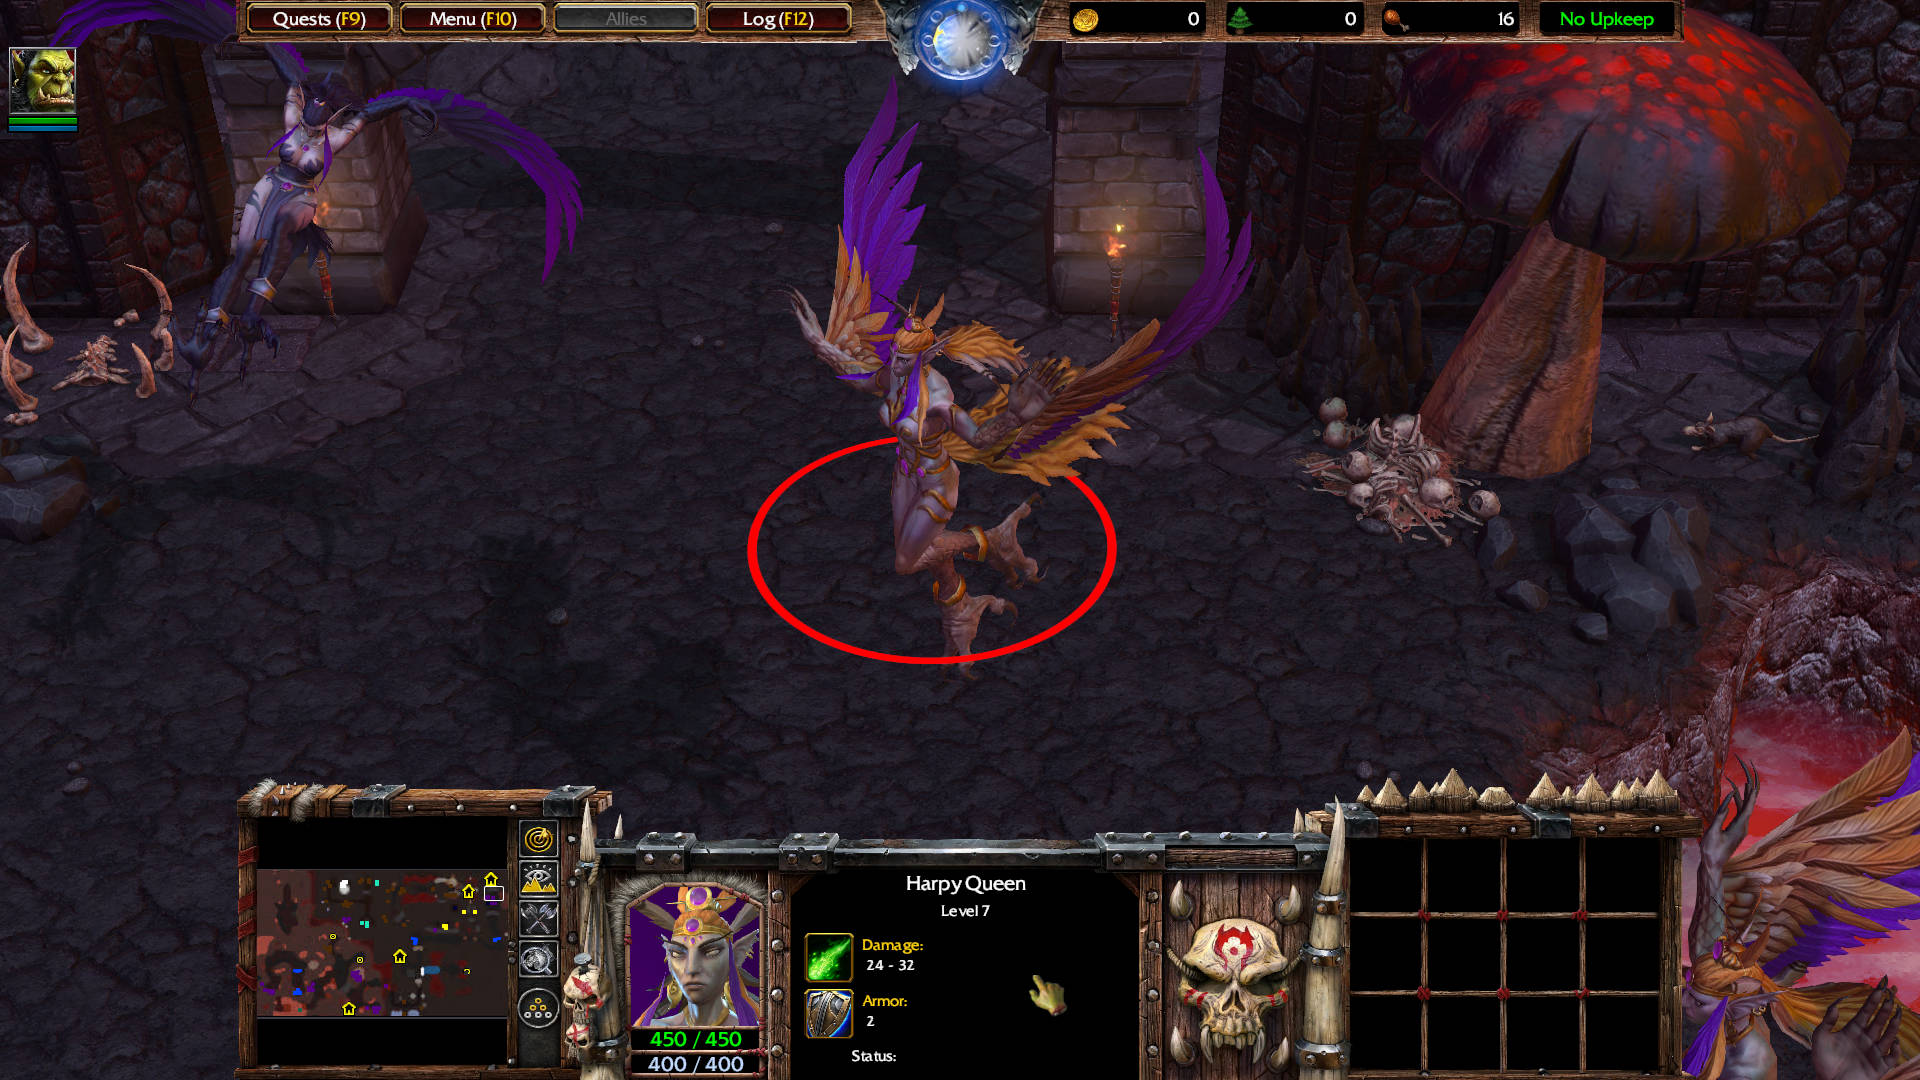
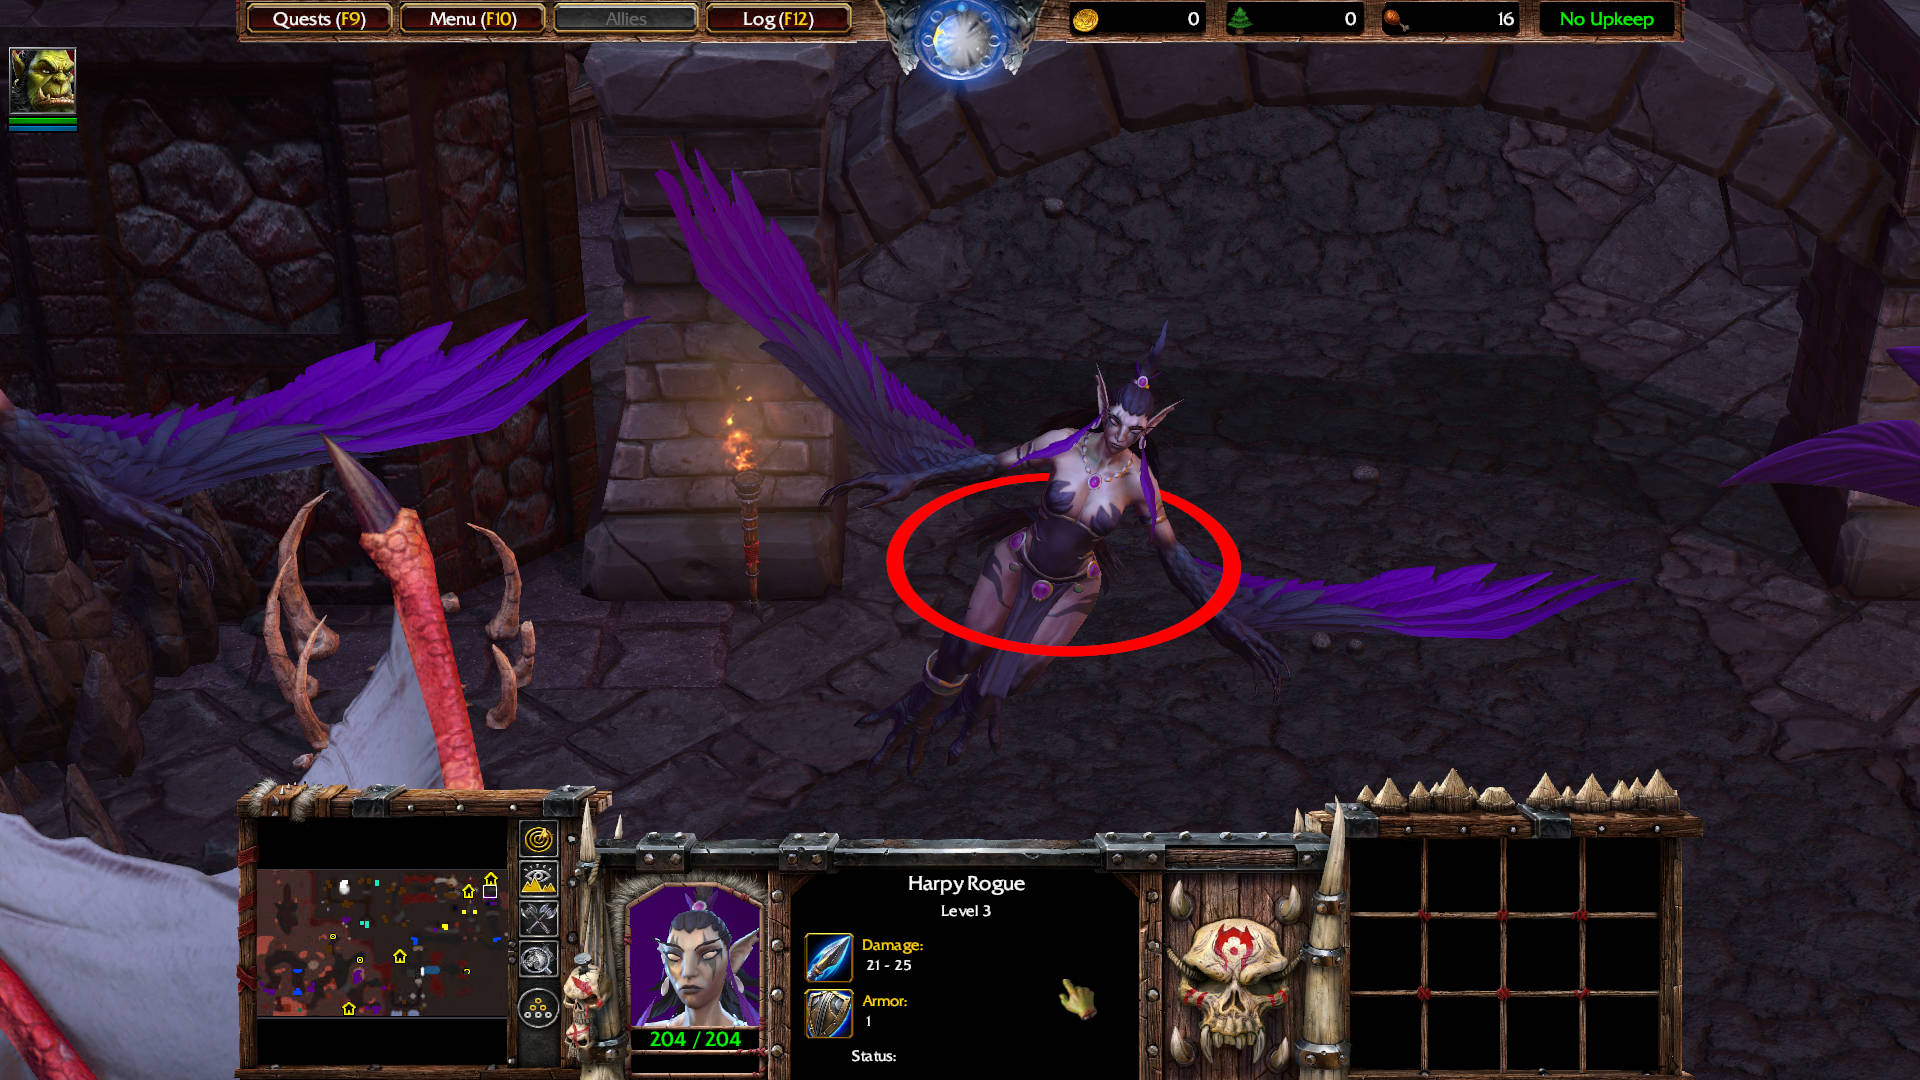
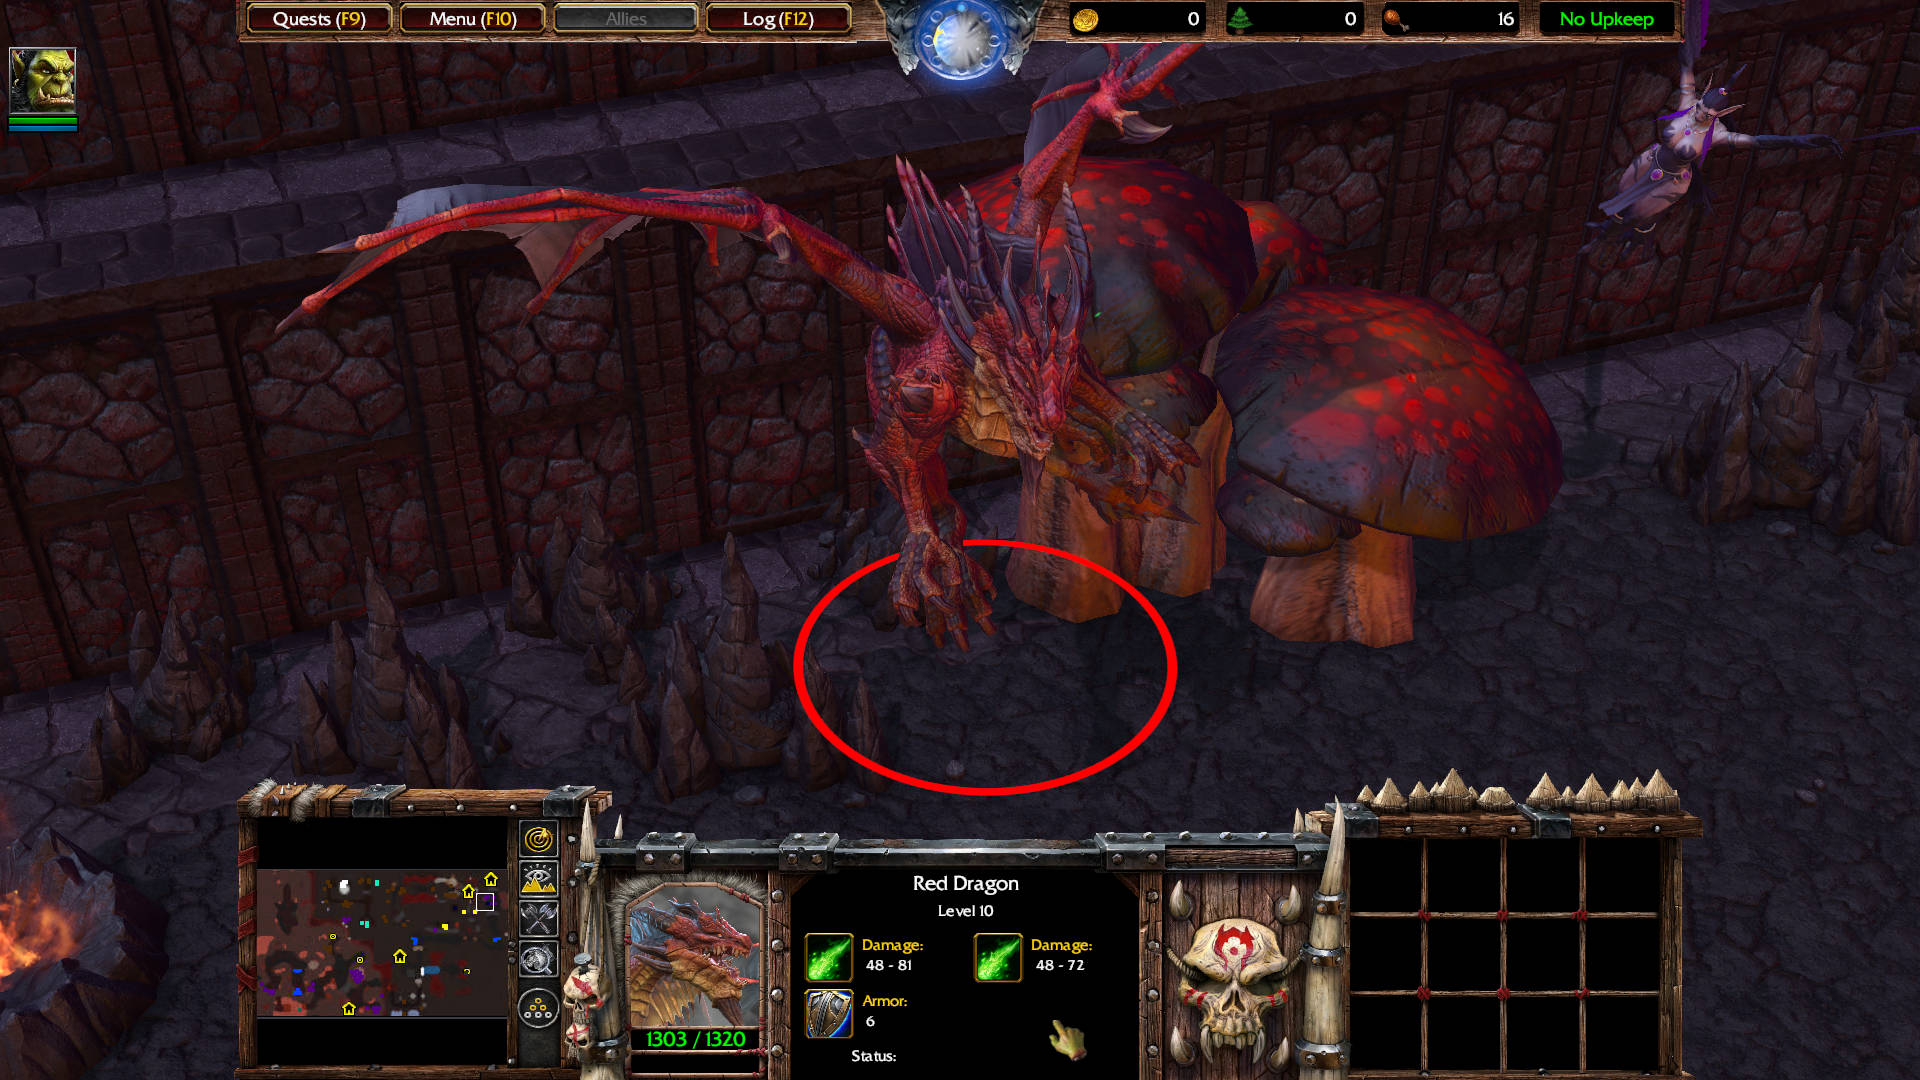
To the north, back in the main road, there are two Harpy Queen level 7, and three Harpy Rogue level 3 attacking a Red Dragon level 10.
Thrall: Those harpies have nearly killed that wretched creature! It looks as if they’re after its treasure! Kill them all, and we’ll take what’s left for ourselves!
Note: Kill the harpies first, then leave the Red Dragon for the end. Only the Headhunters can attack it, but if you use the two Raiders’ Ensnare, you can bring it down to the ground briefly.
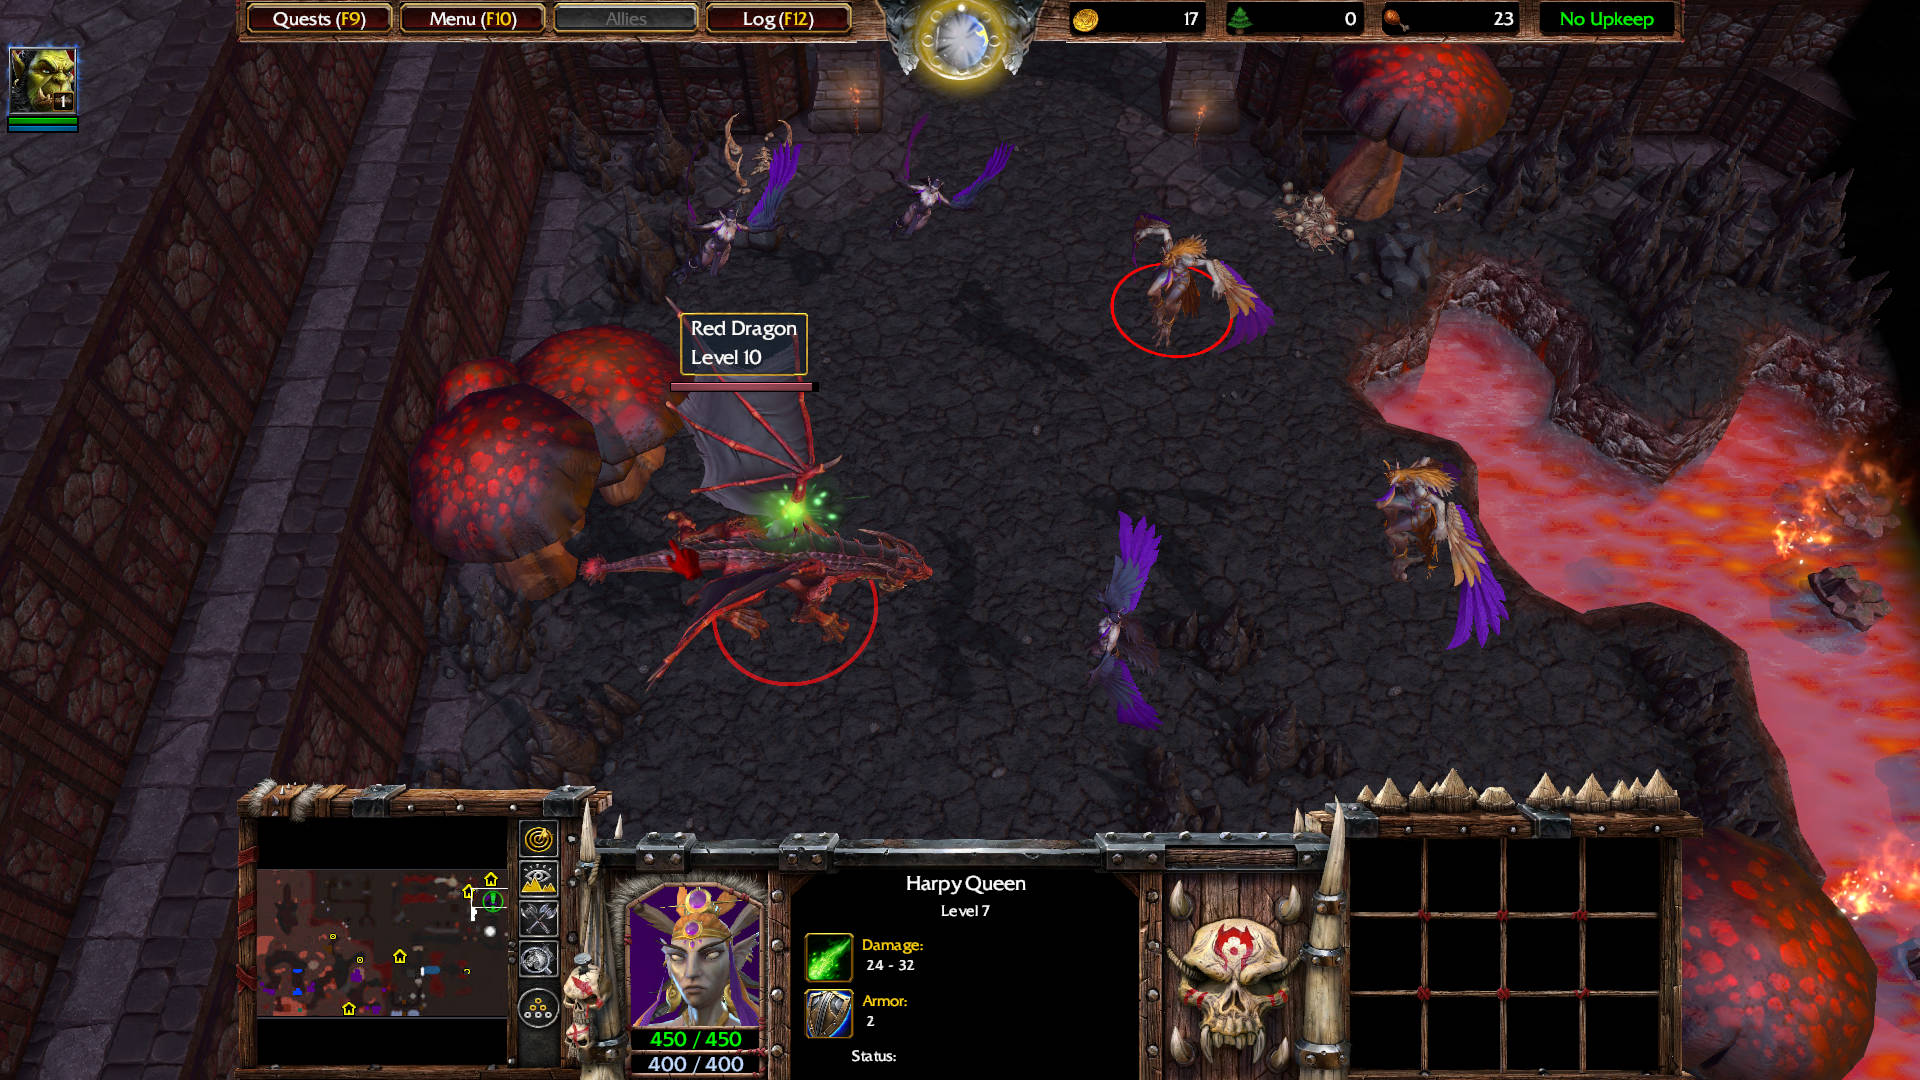
The Red Dragon level 10 drops the Heart of Aszune. Loot it.
Thrall: The great beast was protecting a magical amulet. I’d better hold on to this.

MAIN QUEST UPDATE
Heart of Aszune
Find the Heart of Aszune(Completed)- Bring the Heart to Aszune
Head north to use the Way Gate.
That teleports you back to the previous Way Gate near the statue of Aszune.
Thrall: Here is your heart, Aszune. Now, grant us passage to the Oracle.
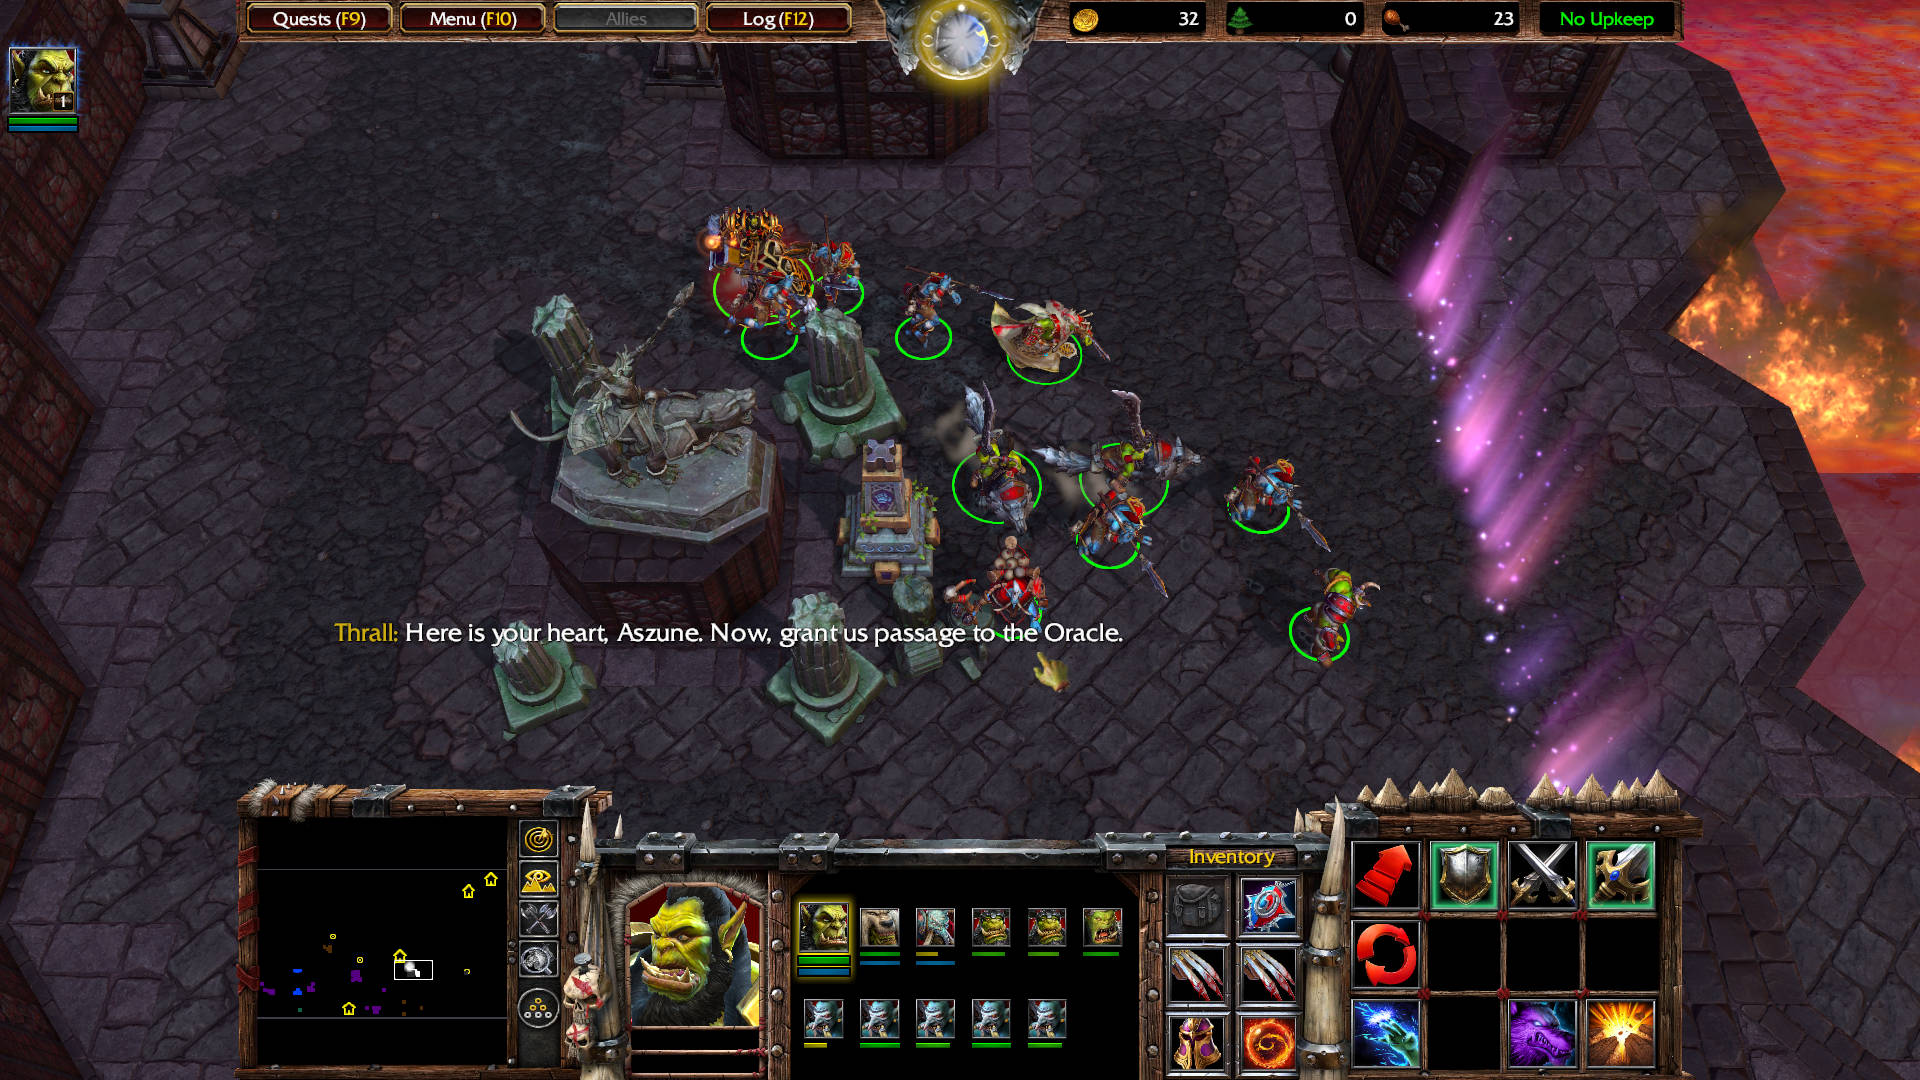
Thrall: Apparently, this is some kind of spectral bridge. But the enchanted gemstone that powers it is missing. With any luck, Cairne will find it for us.
MAIN QUEST
Enchanted Gemstone
- Find the Enchanted Gemstone
- Bring the Enchanted Gemstone to the Spectral Bridge
- Cairne must survive
The camera moves to the west, where you now control Cairne Bloodhoof and his three Tauren for the next part of the mission: find the Enchanted Gemstone.

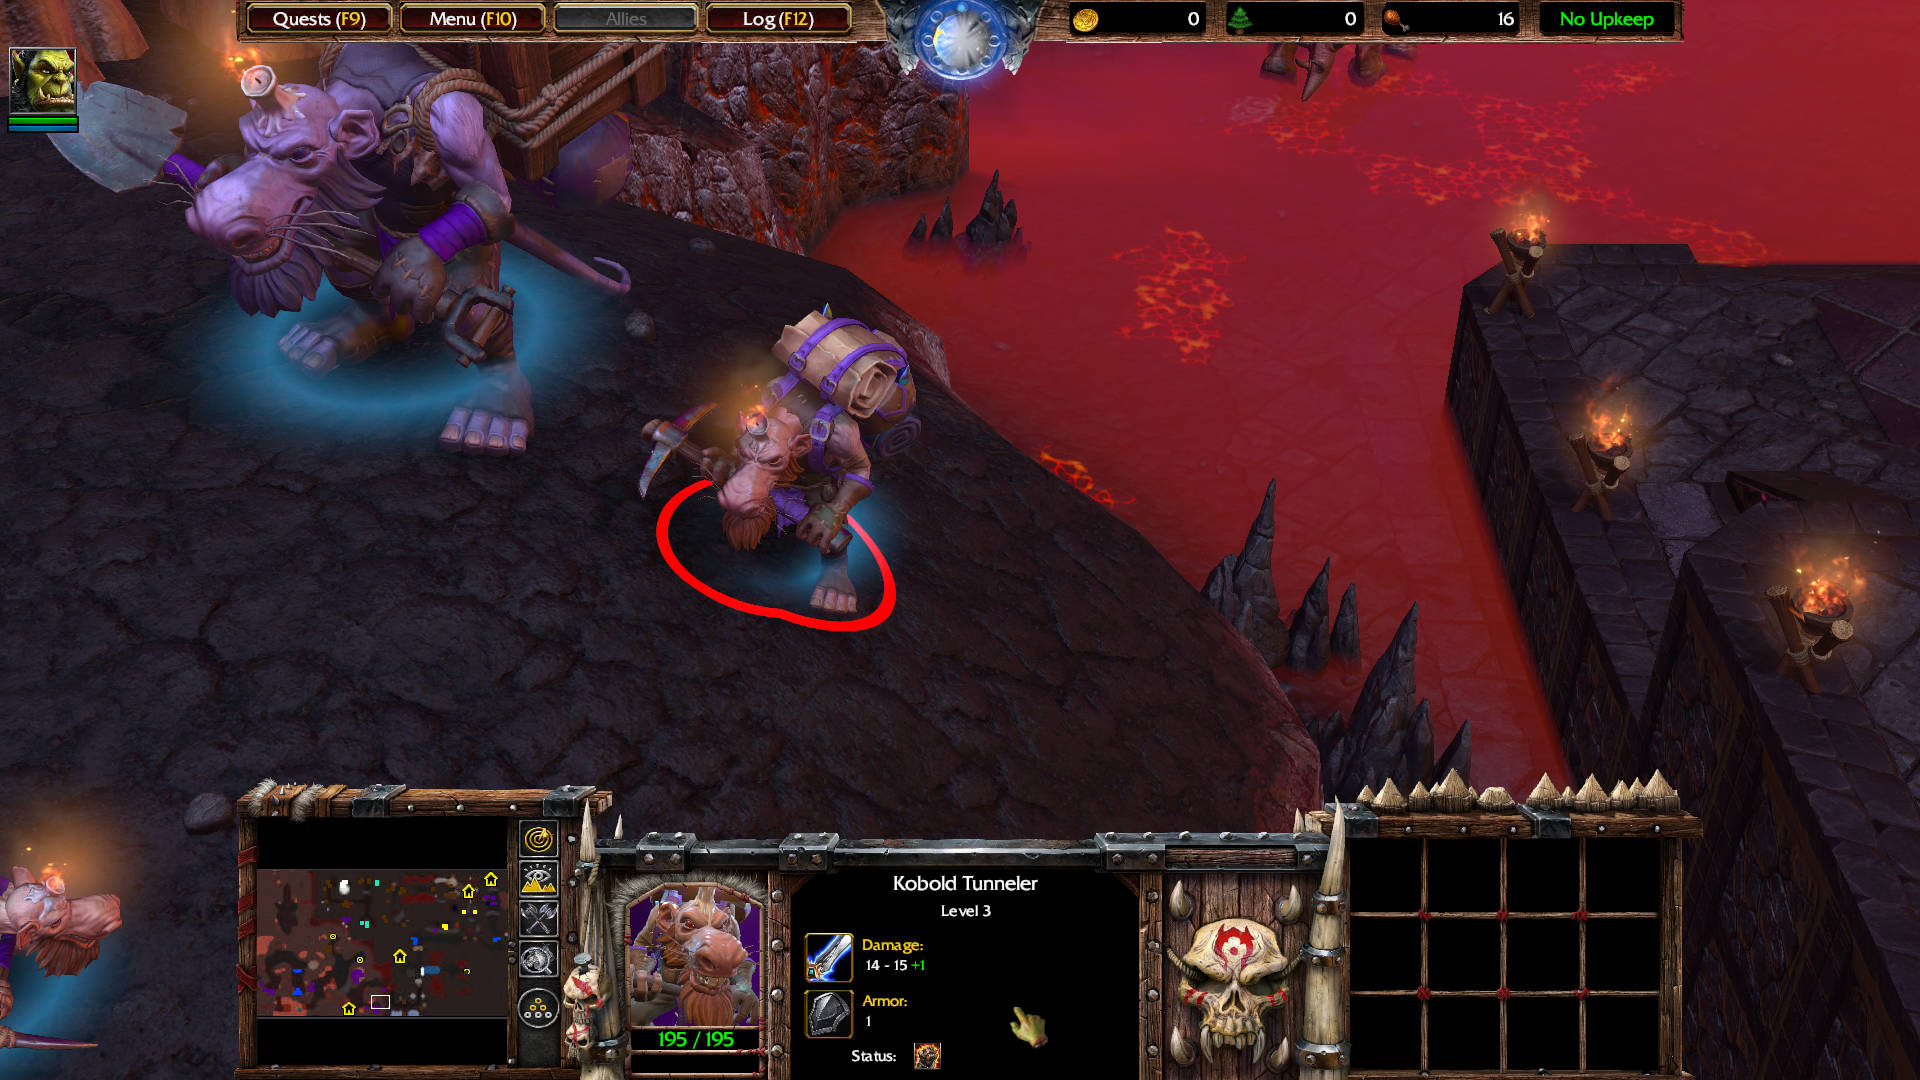
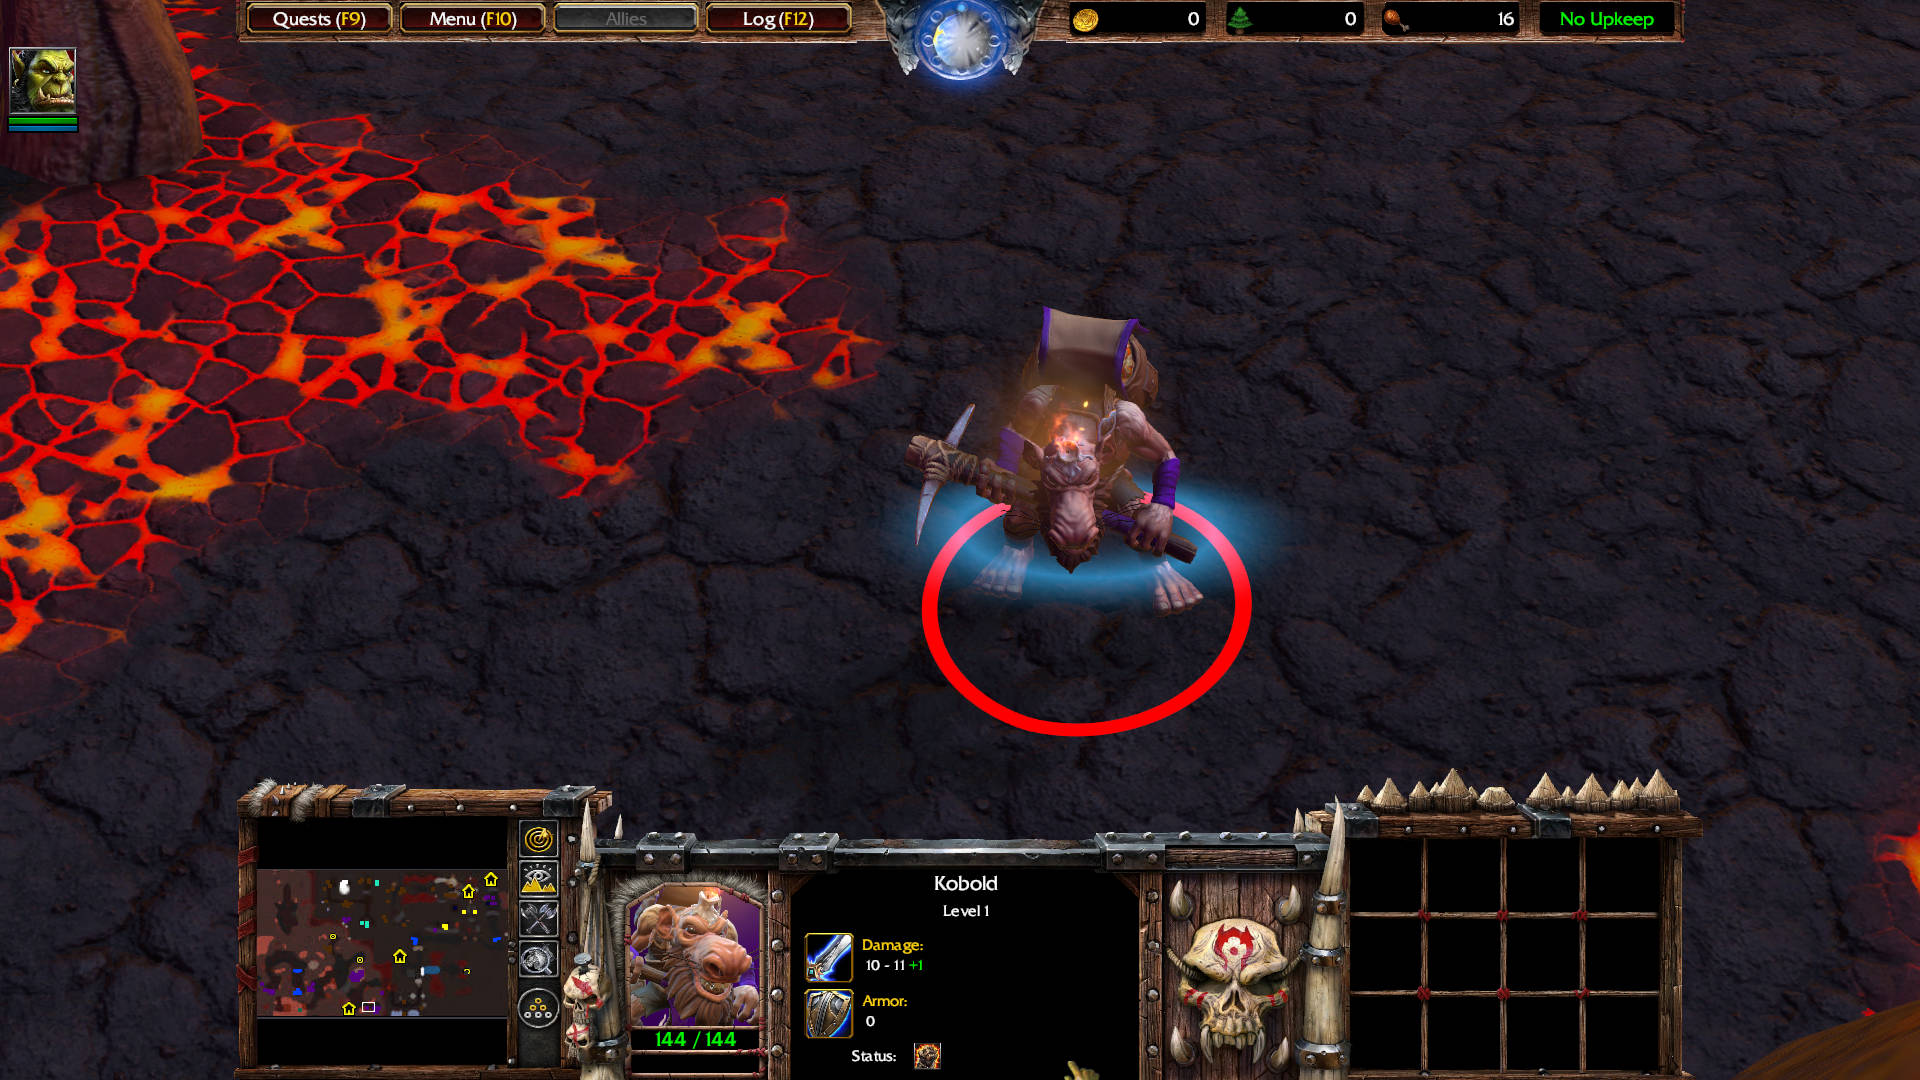
Go south to kill a Kobold Taskmaster level 5. Kobold Tunneler level 3. Kobold level 1 (4) — drops Scroll of Healing: Heals 150 hit points to all friendly non-mechanical units around the Hero when used. Destroy the nearby crate — drops Potion of Greater Mana: Restores 300 mana when used.
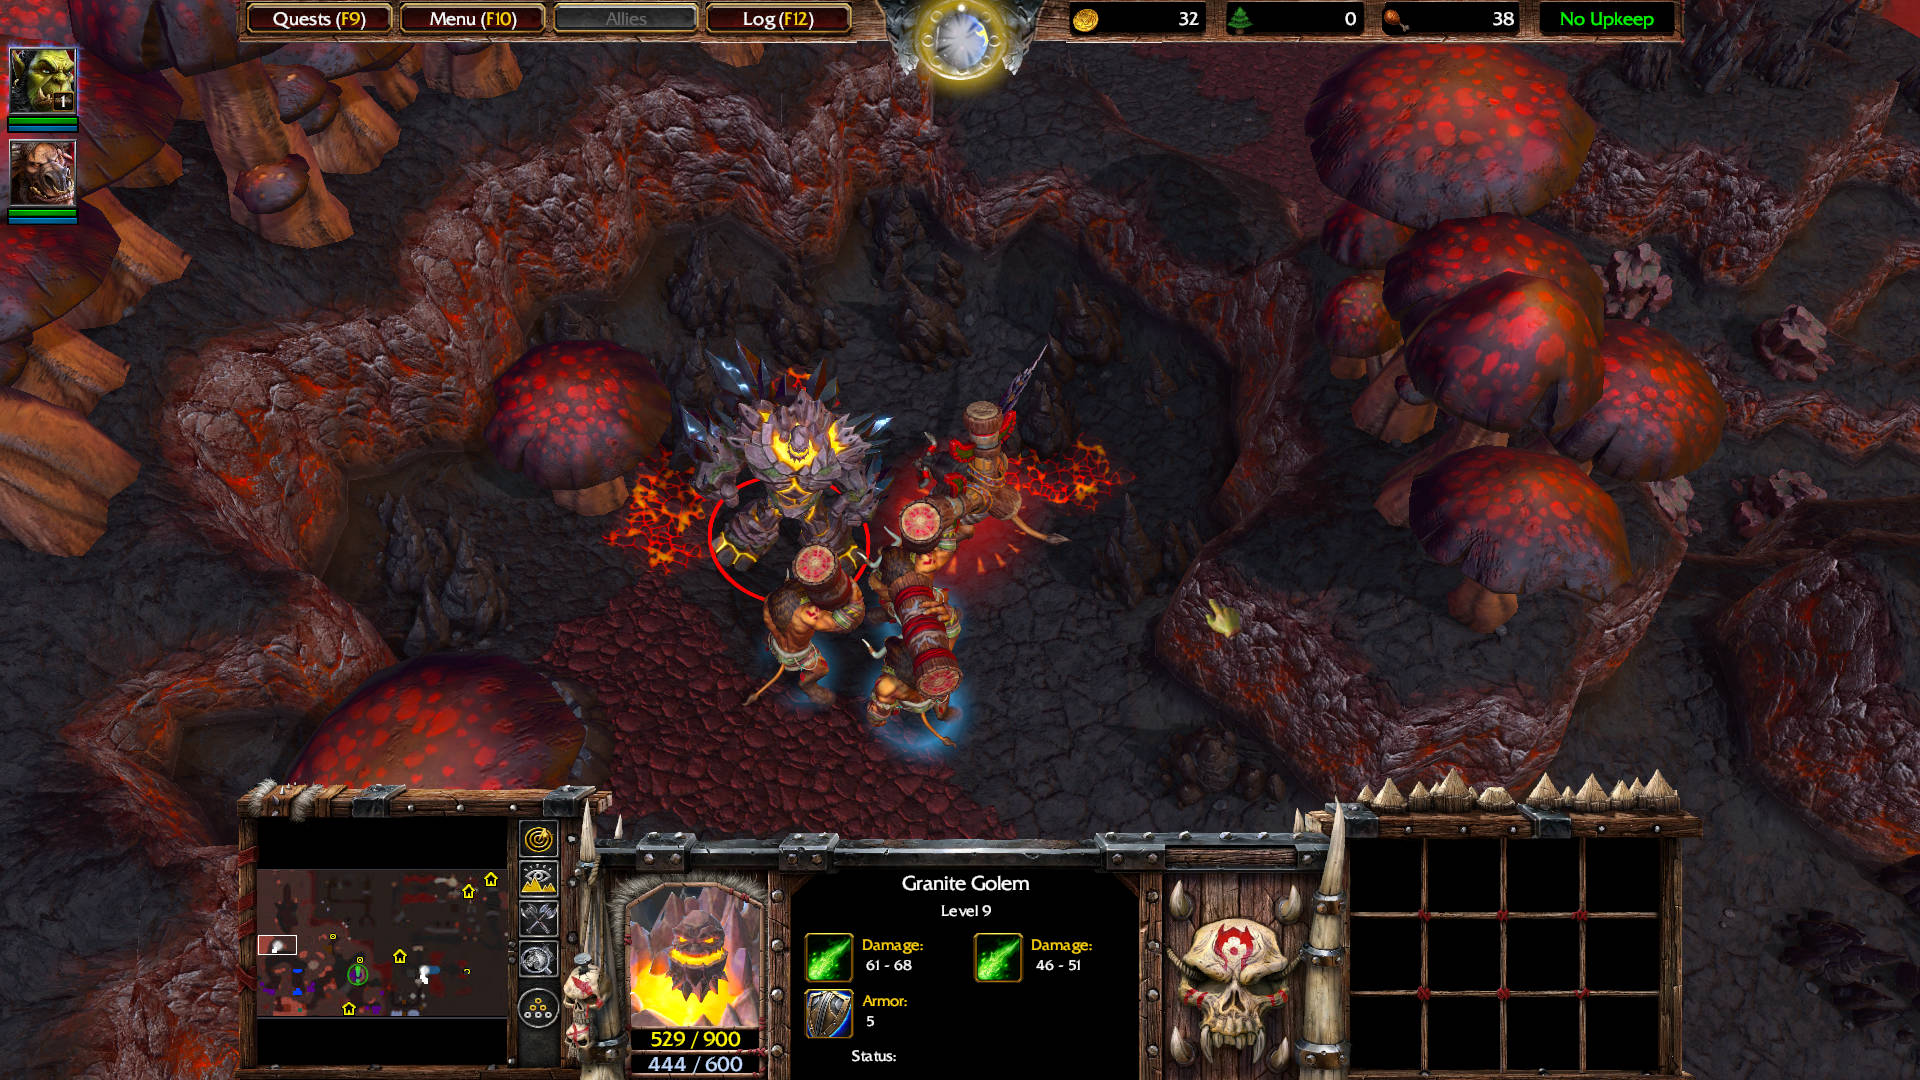
Go north to destroy the Rock Chunks. That will spawn a Granite Golem level 9 — drops Healing Salve: Non-Combat Consumable – Regenerates a target unit’s hit points by 400 over 45 sec when used. Contains 3 charges.
Head southeast. The Rifleman and the 3 Footmen will run toward the pit of skulls and get impaled by dozens of spikes.
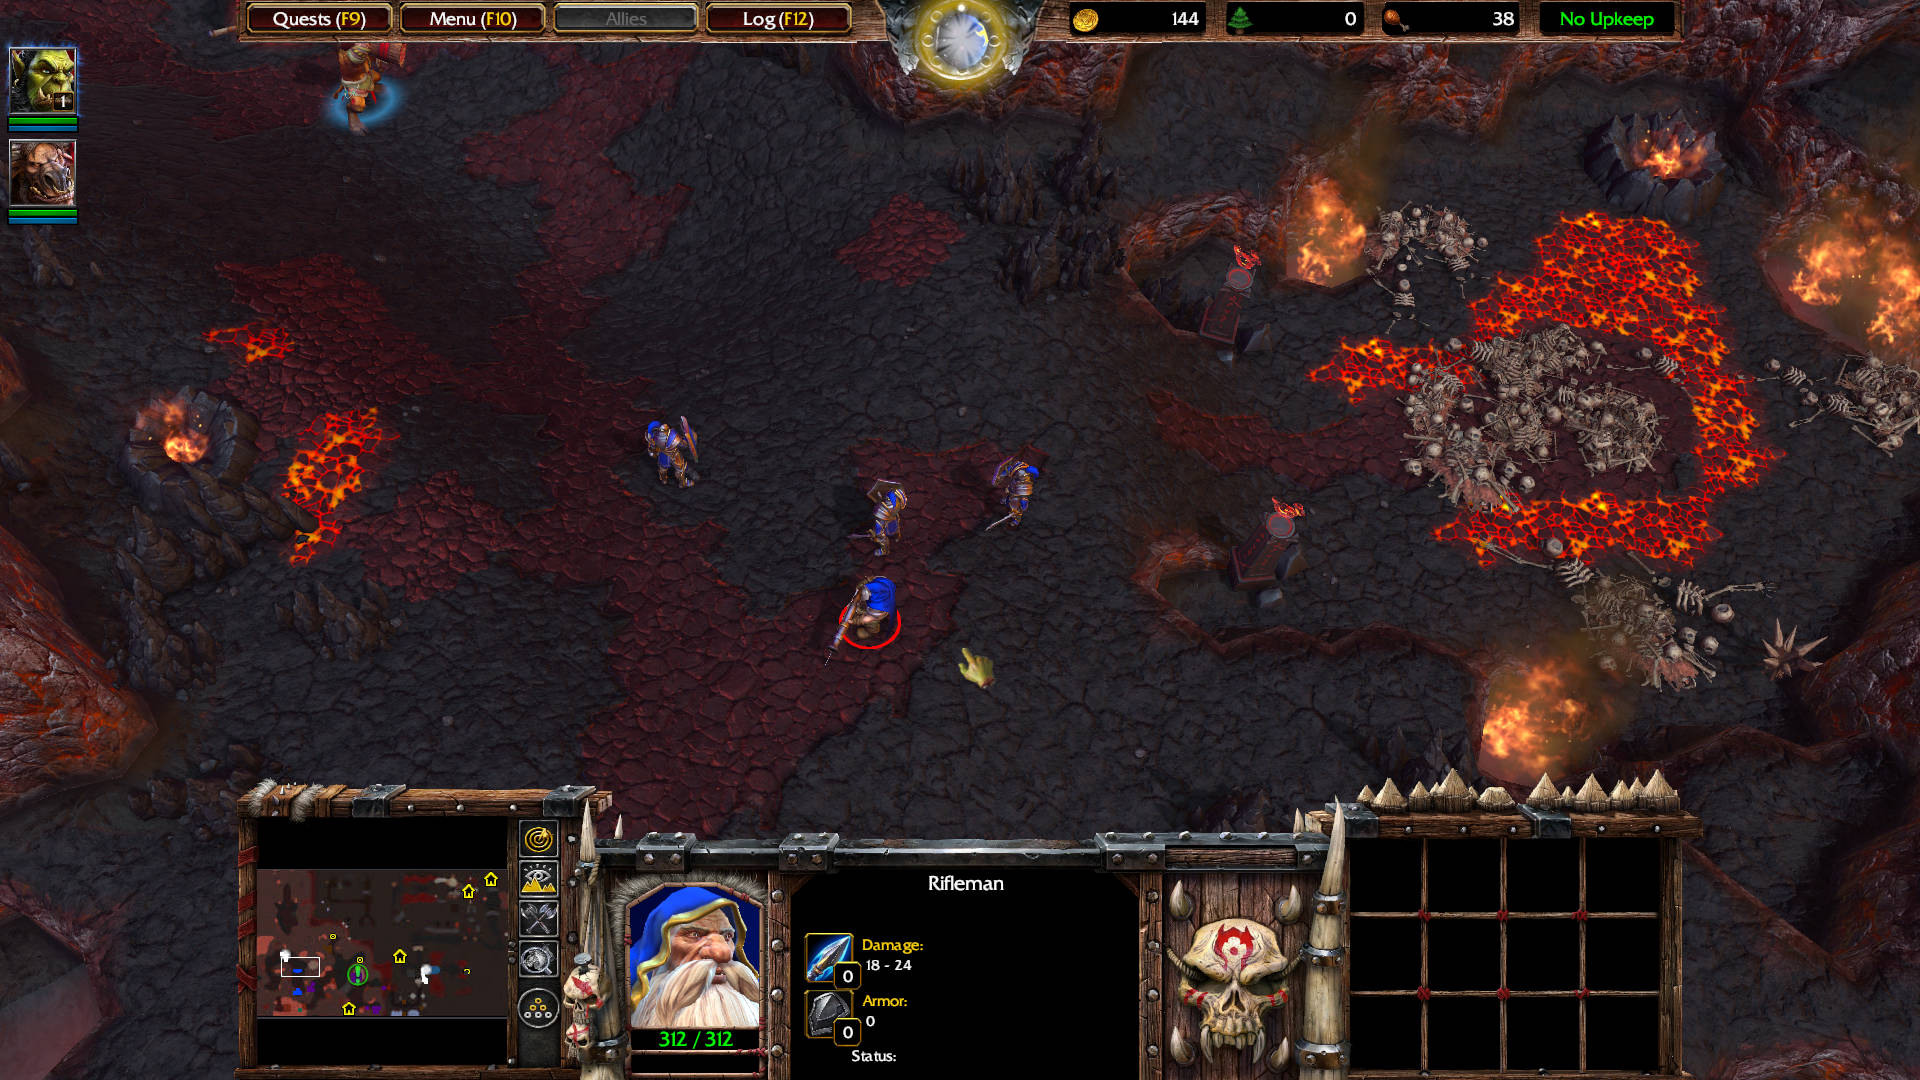
Footman: Let’s get the hell out of here!
Footman: No, not that way!

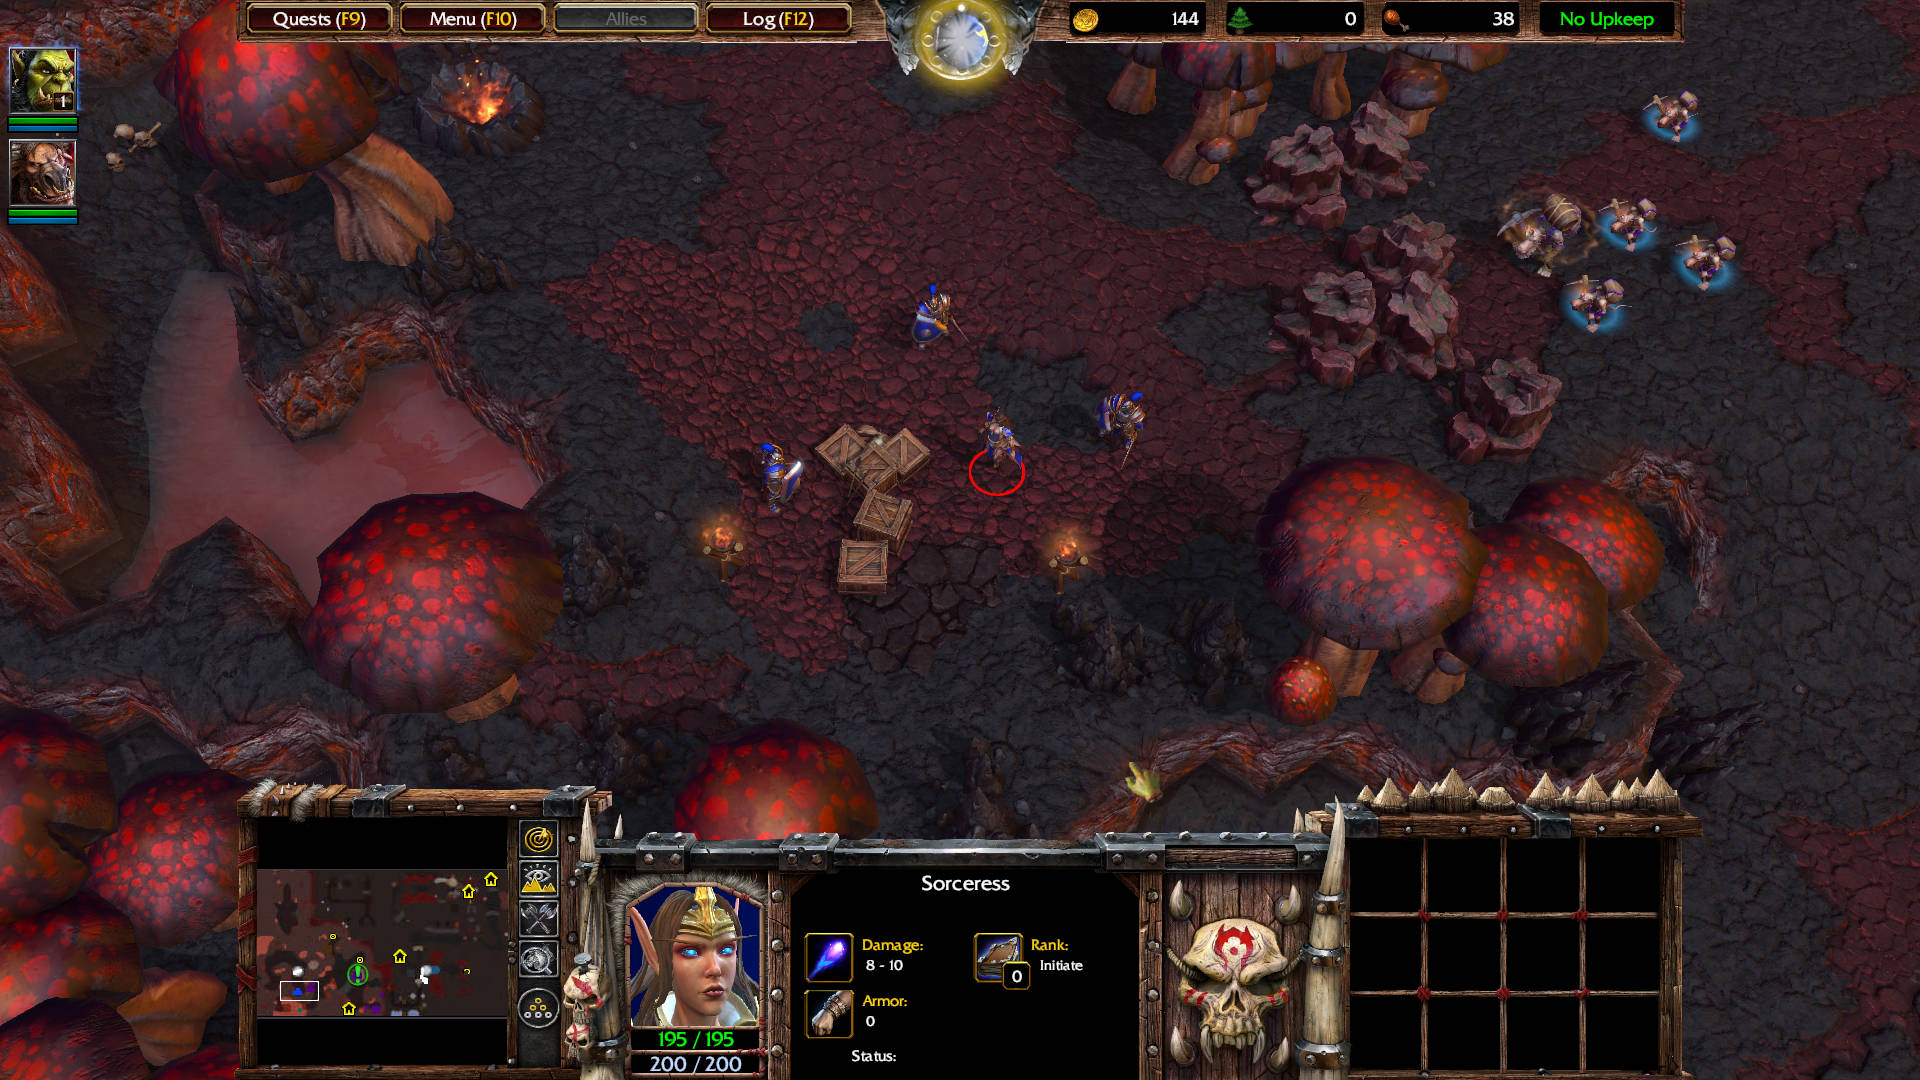
Head south to kill a Sorceress, and 3 Footman. The sorceress drops Tome of Strength: Permanently increases Strength by 1. Destroy the crates to loot:
- Potion of Mana: Restores 150 mana when used.
- Scroll of the Beast: Gives friendly nearby units a 25% bonus to damage for 45 sec.
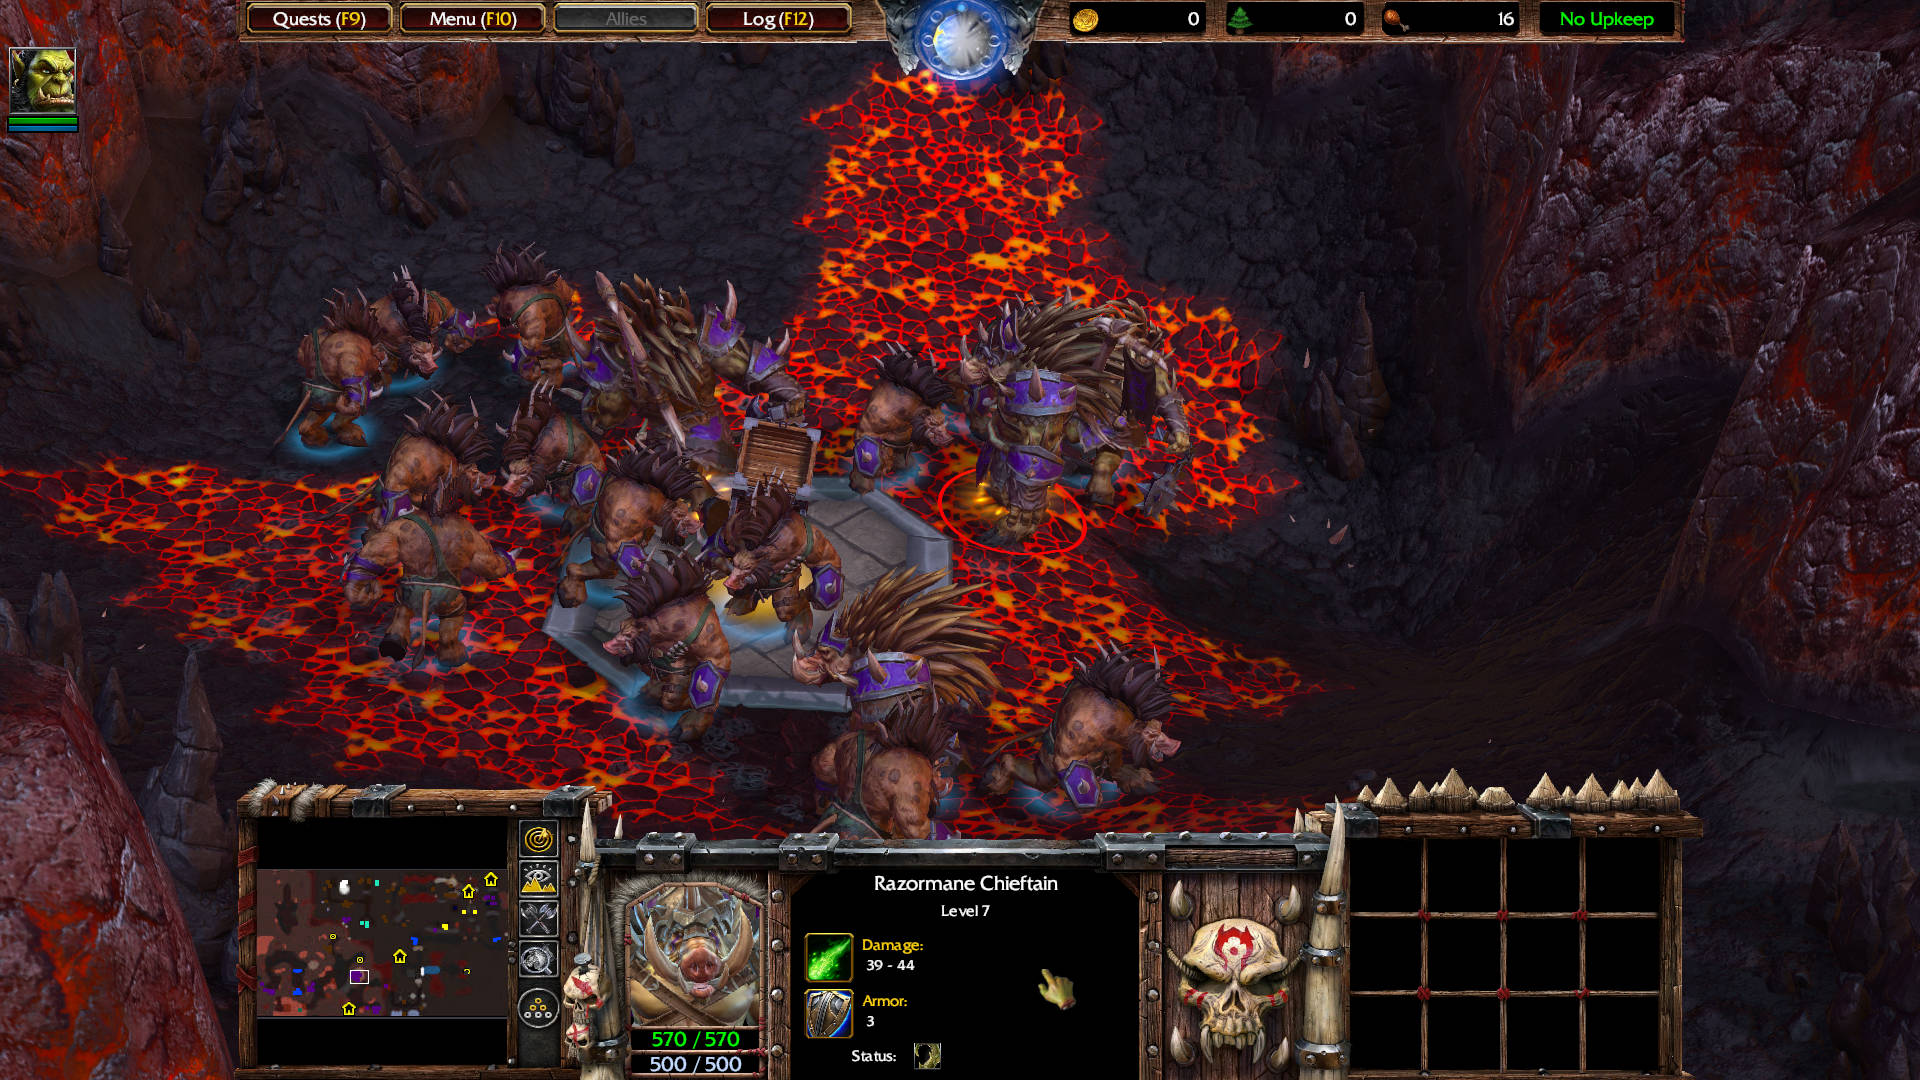
A few seconds later, the kobolds destroy the rock chunks to ambush you. Kill the Kobold Taskmaster level 5 with command aura and four Kobold level 1. The taskmaster drops Talisman of Evasion: Causes attacks against the wearer to miss 15% of the time. Does not stack with Evasion or Drunken Brawler.
SECRET
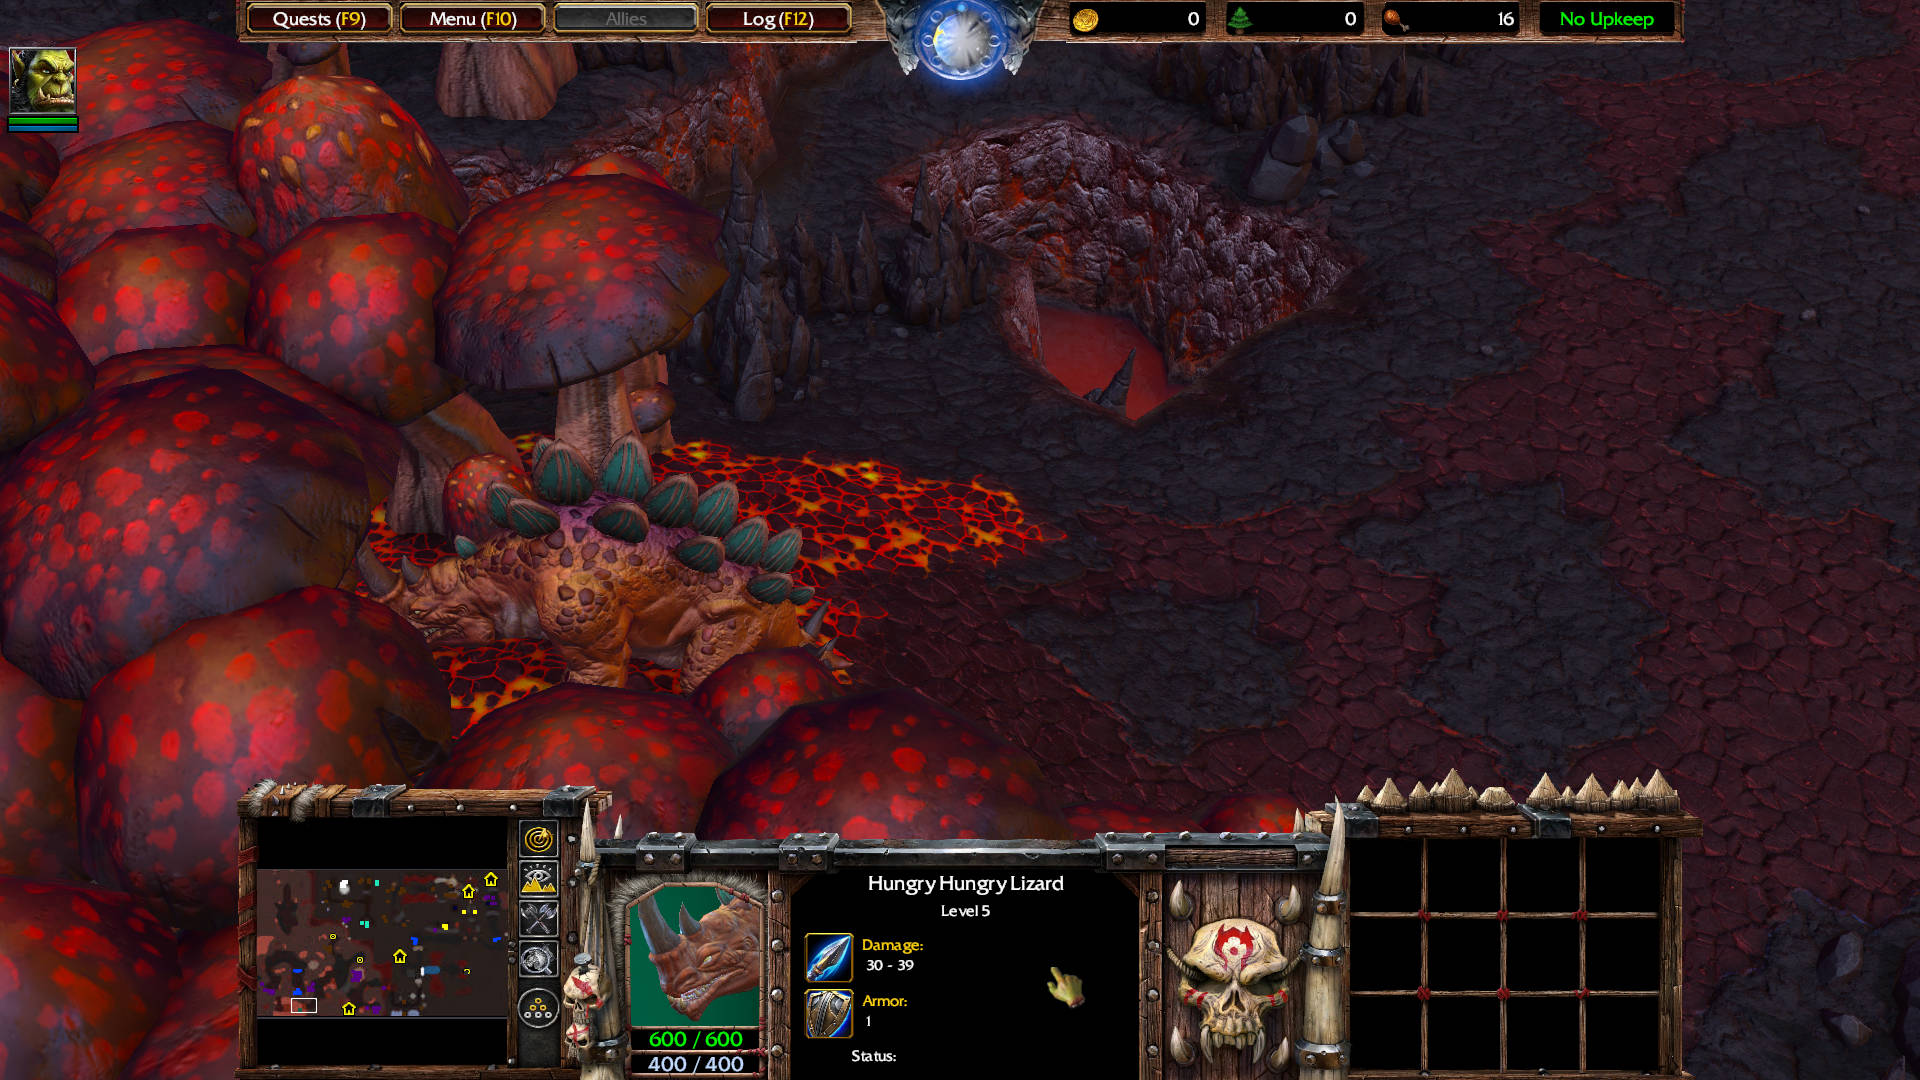
Head south to find the Hungry Hungry Lizard level 5 — sorta a pop culture reference to the 80s Hungry Hungry Hyppo game. As soon as you move Cairne near the lizard, it will start eating the giant mushrooms.
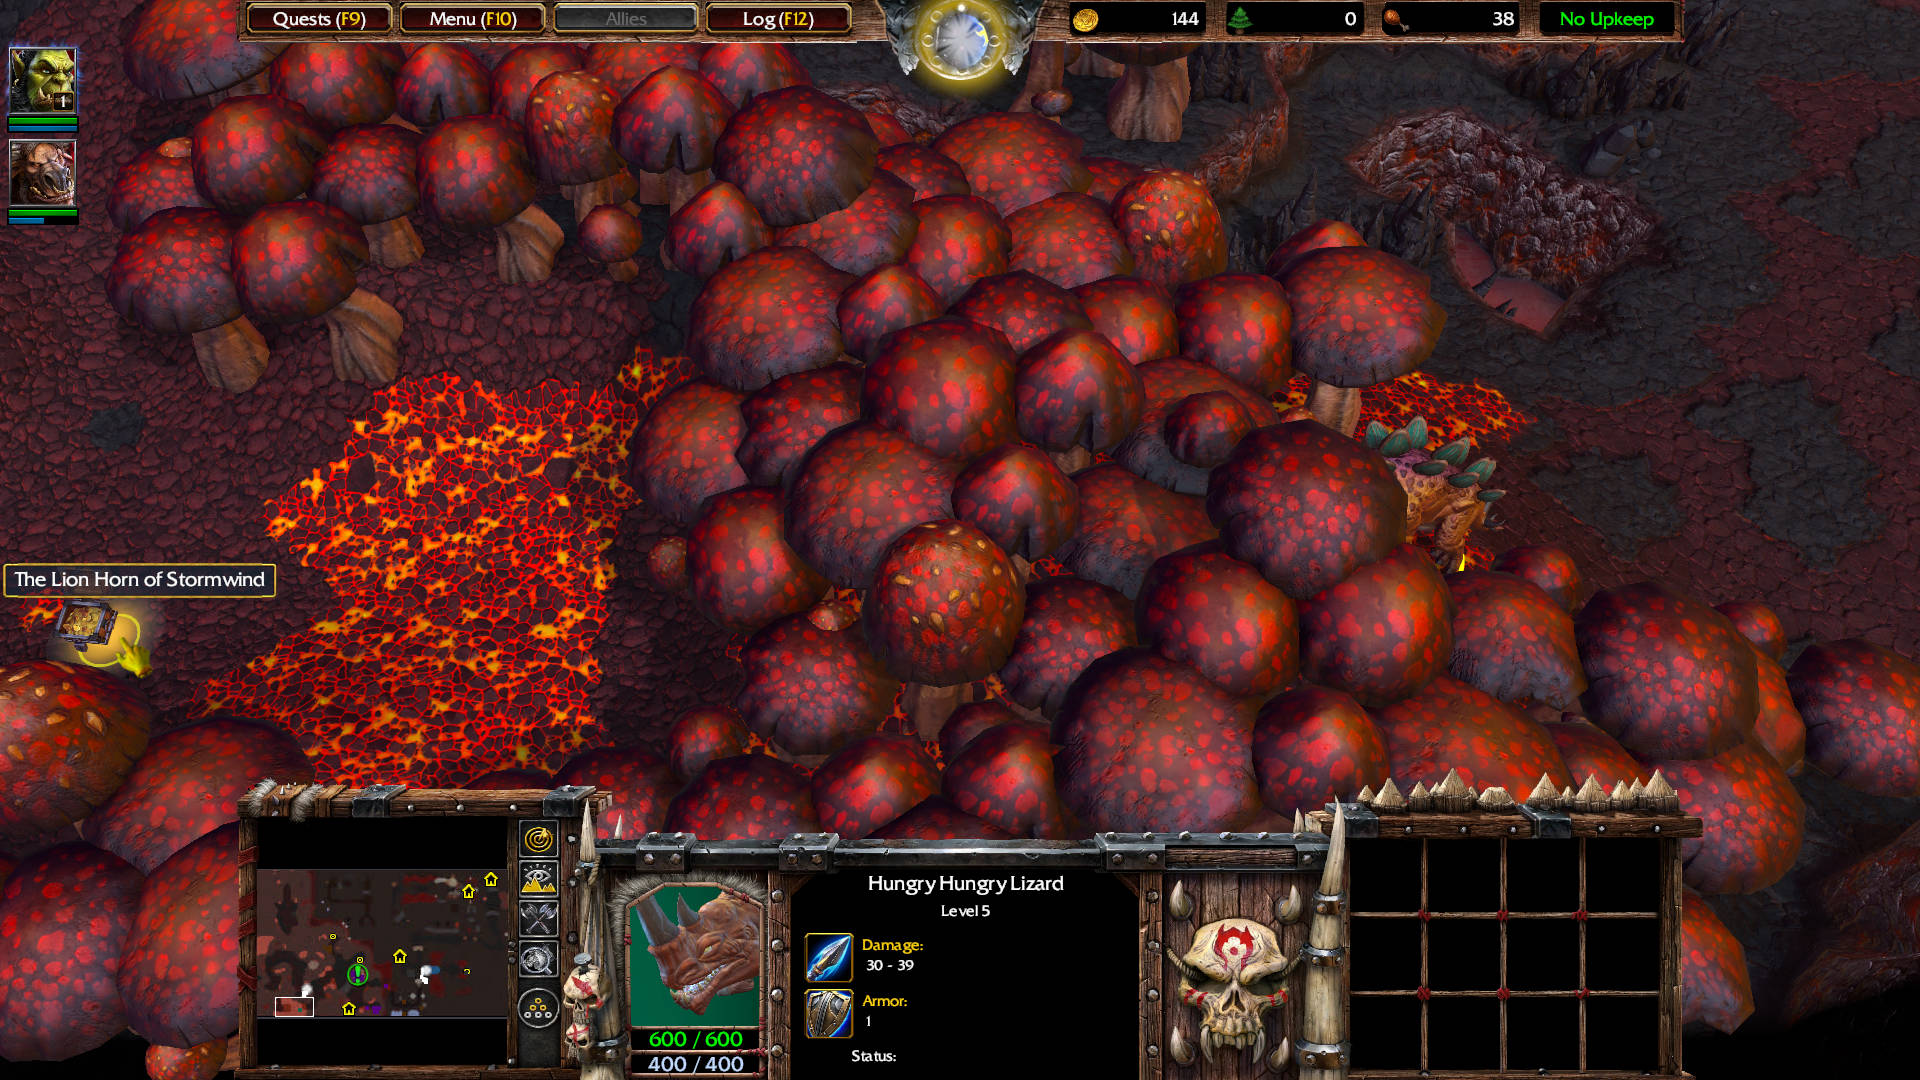
Wait until it is done eating all of them — making a path to the other side where you can loot a treasure chest that contains The Lion Horn of Stormwind:
Note: There is a sort of bug that makes him eat the last mushroom in the path but he stops and blocks the way. You can actually kill him to take him out of the way.
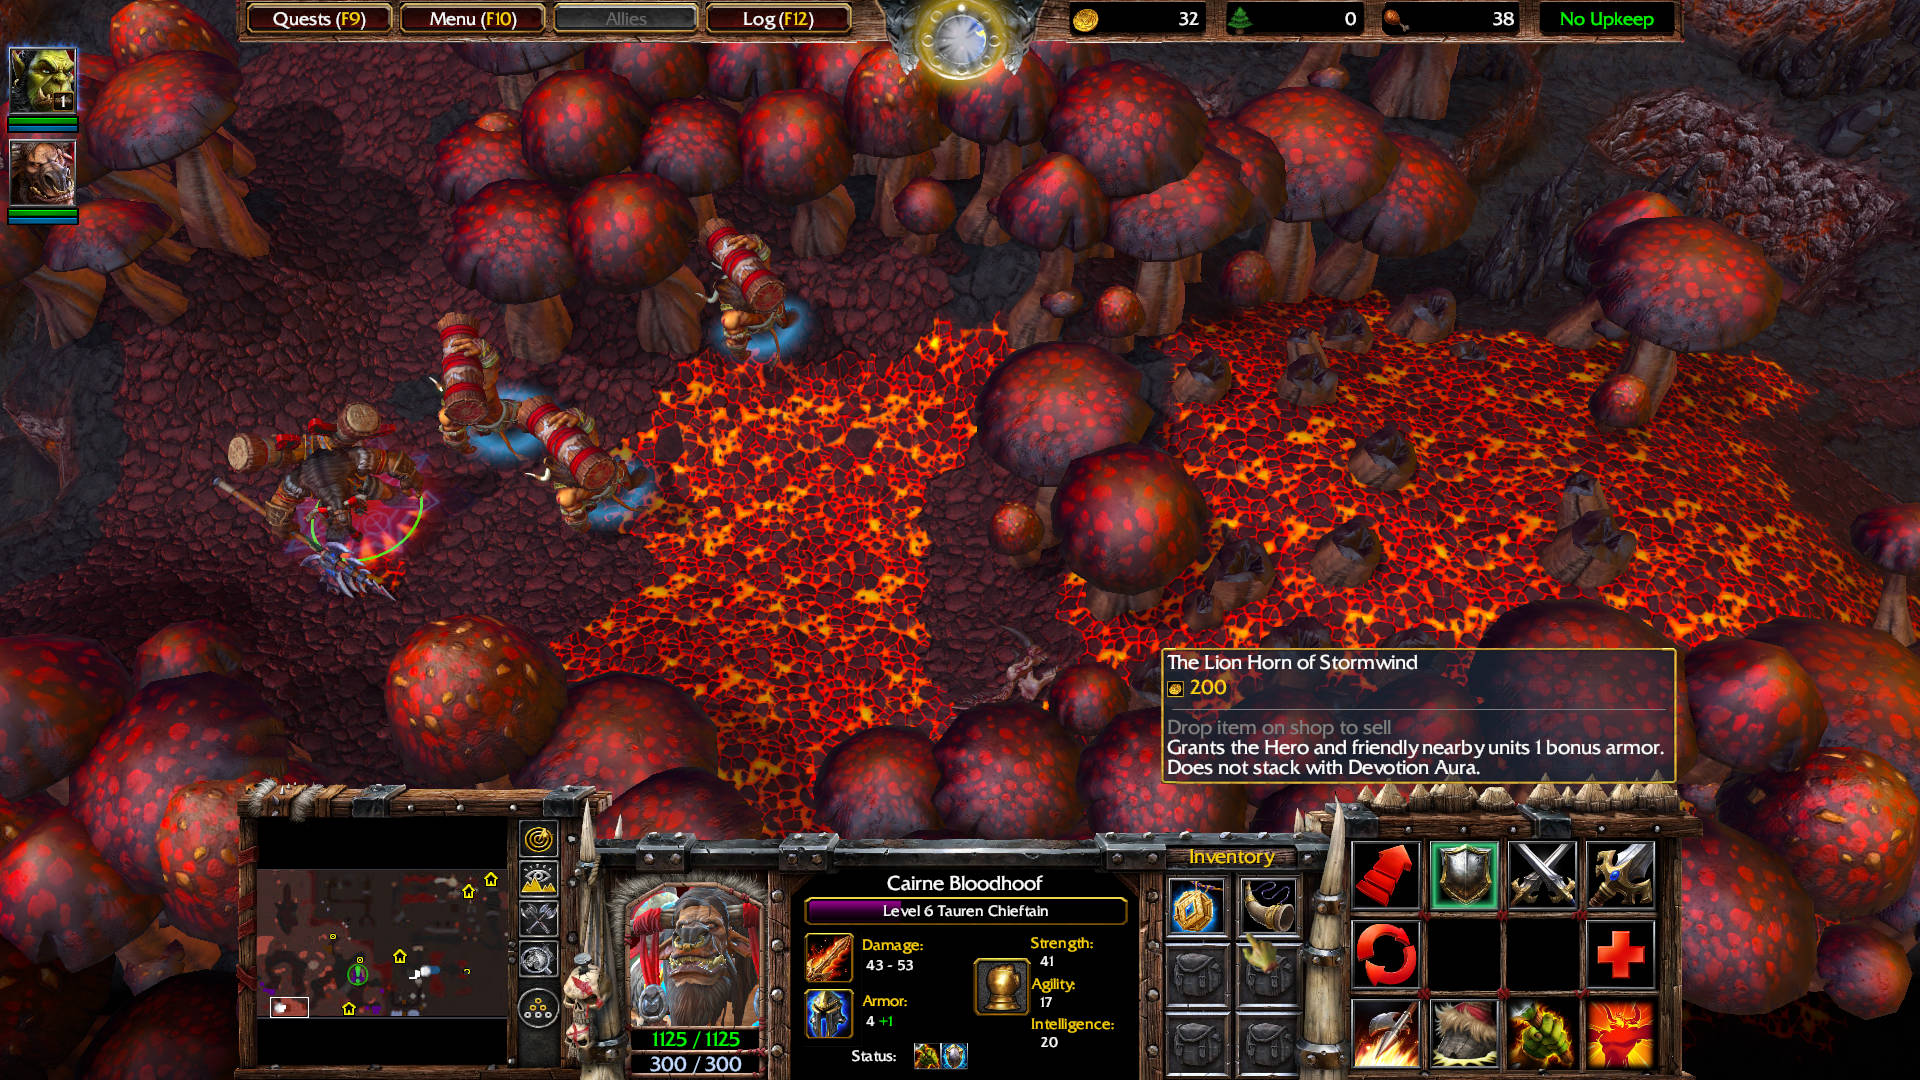
Loot The Lion Horn of Stormwind: Grants the Hero and friendly nearby units 1 bonus armor. Does not stack with Devotion Aura.
Go back to the main road, then go north. Kill the two Burning Archer level 3 and the three Skeleton Warriors. One of them drops Tome of Knowledge: Permanently increases Strength, Agility and Intelligence by 1.
Now place a Tauren on the Circle of Power.

That Circle of Power opens the invulnerable Dungeon Gate to the south, that was blocking the path.
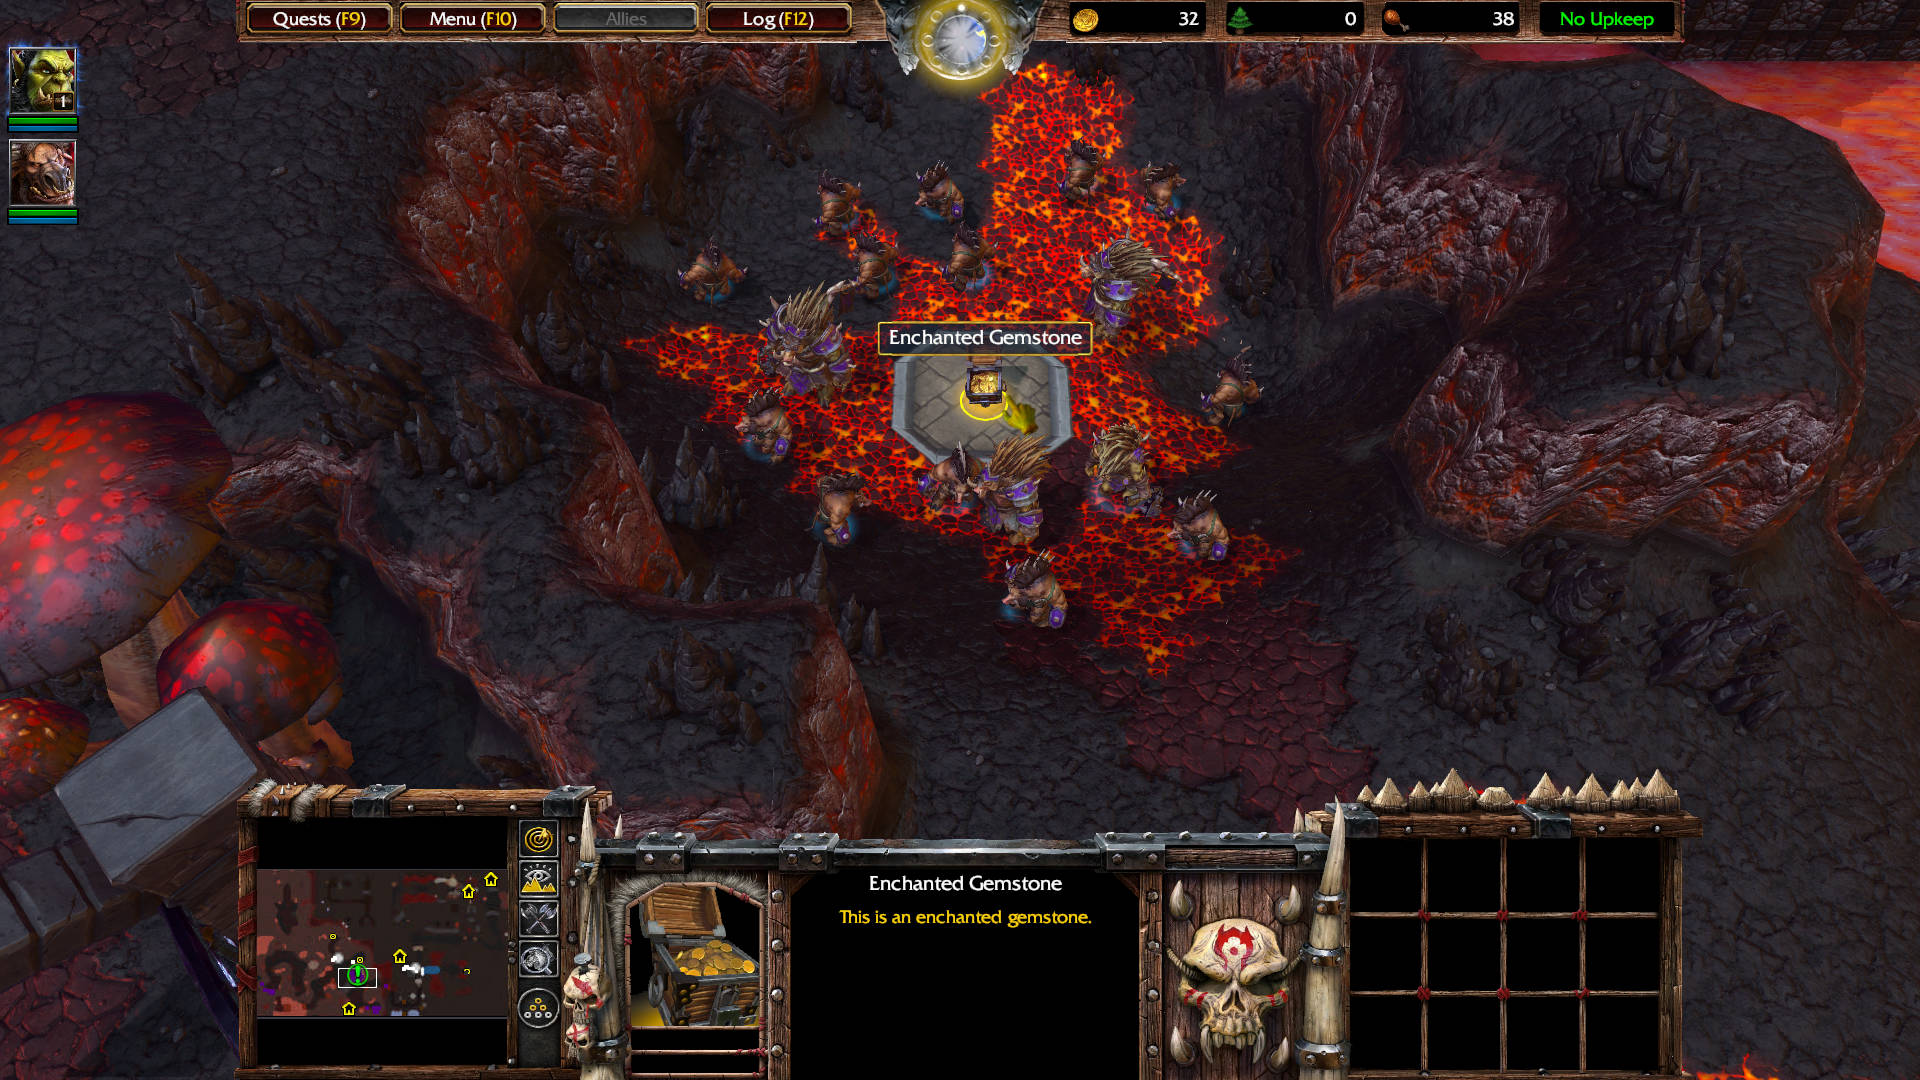
Now move another Tauren to the second Circle of Power to the east.

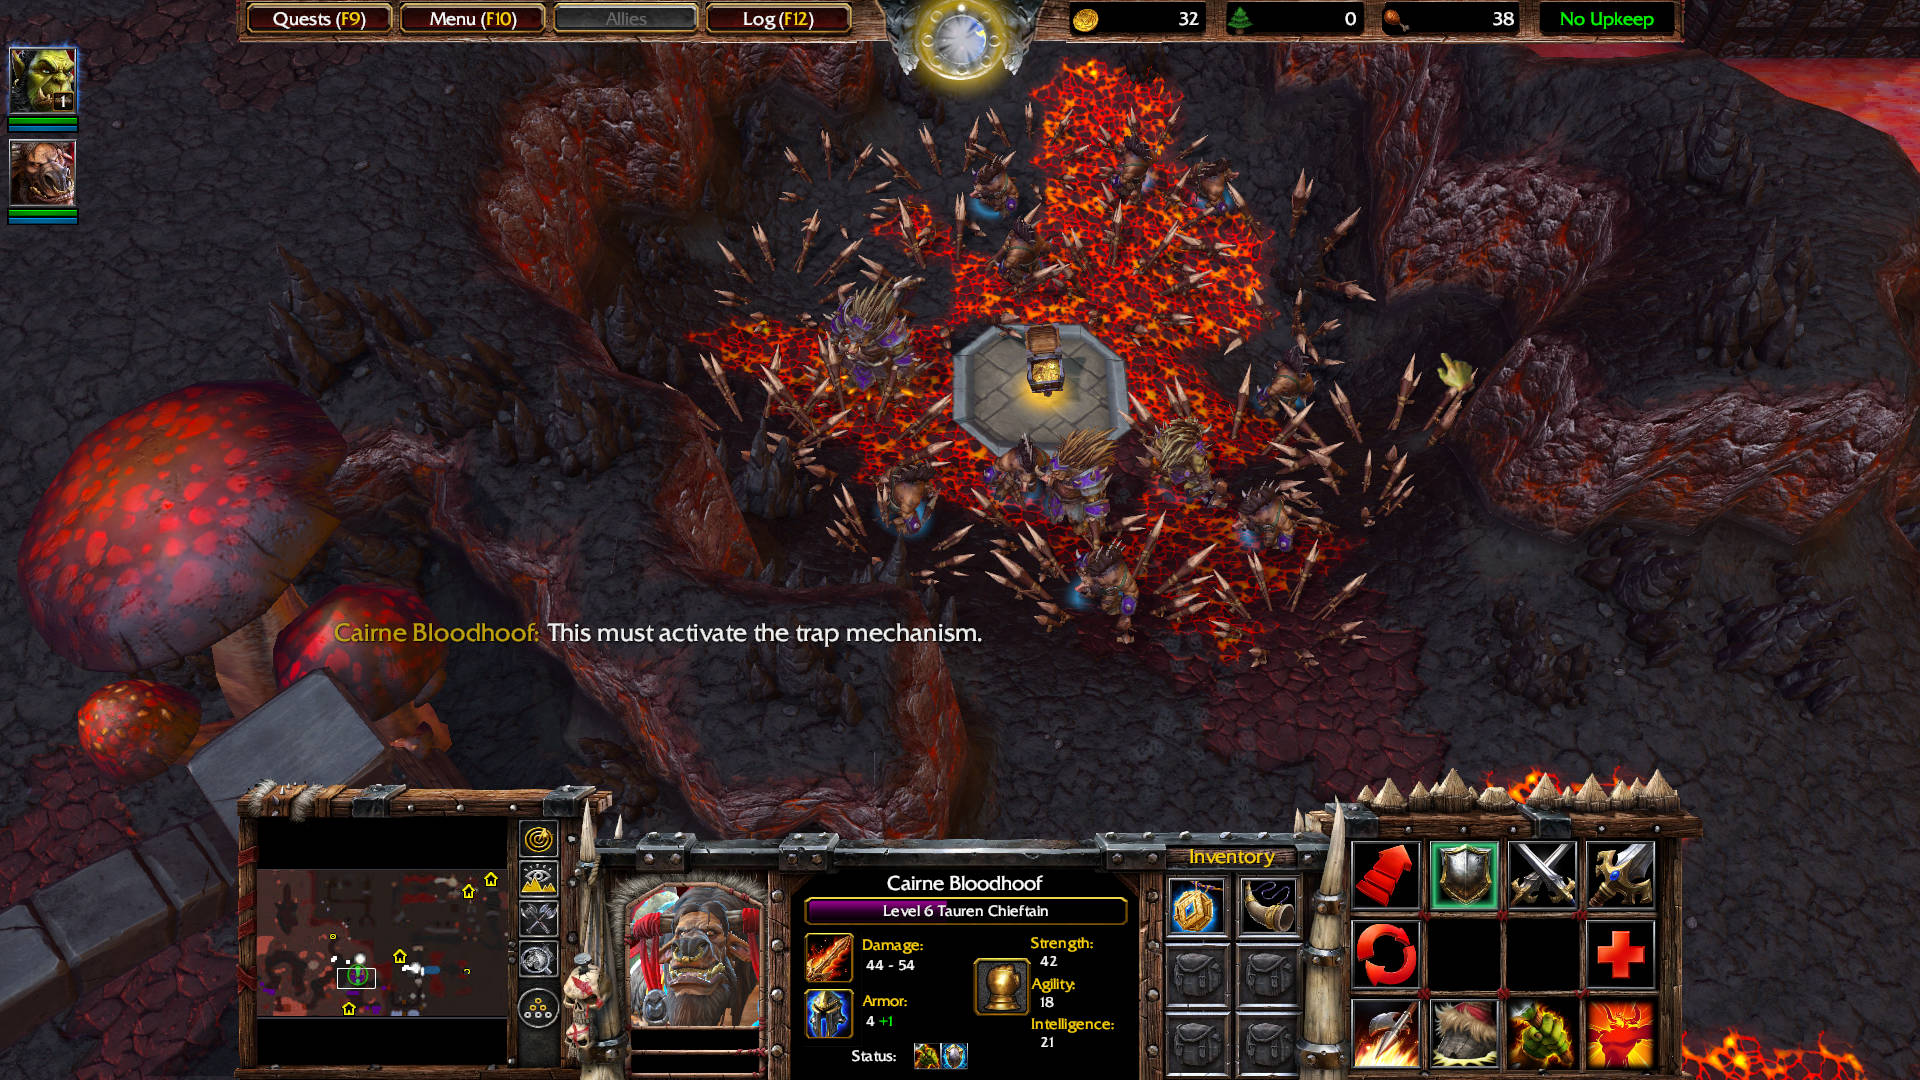
That Circle of Power triggers the spikes mechanism to kill all of the Quillboar surrounding the Enchanted Gemstone.
Cairne Bloodhoof: The spiked pit is filled with quillboars. It looks as if they’re protecting some kind of gemstone. This must activate the trap mechanism. A gruesome death.
Cairne Bloodhoof: The gemstone has an inscription on its base. Ah… this is the spirit stone of Stonetalon Chasm. If the legends are true, then this will activate the spirit bridge that leads to the Oracle!
Enchanted Gemstone: This artifact of the Kelani Magi is said to hold the power to make constructs out of pure energy. When the Kelani fell to ruin, the Razormane Quillboars were quick to scavenge and covet these beautiful and powerful objects.
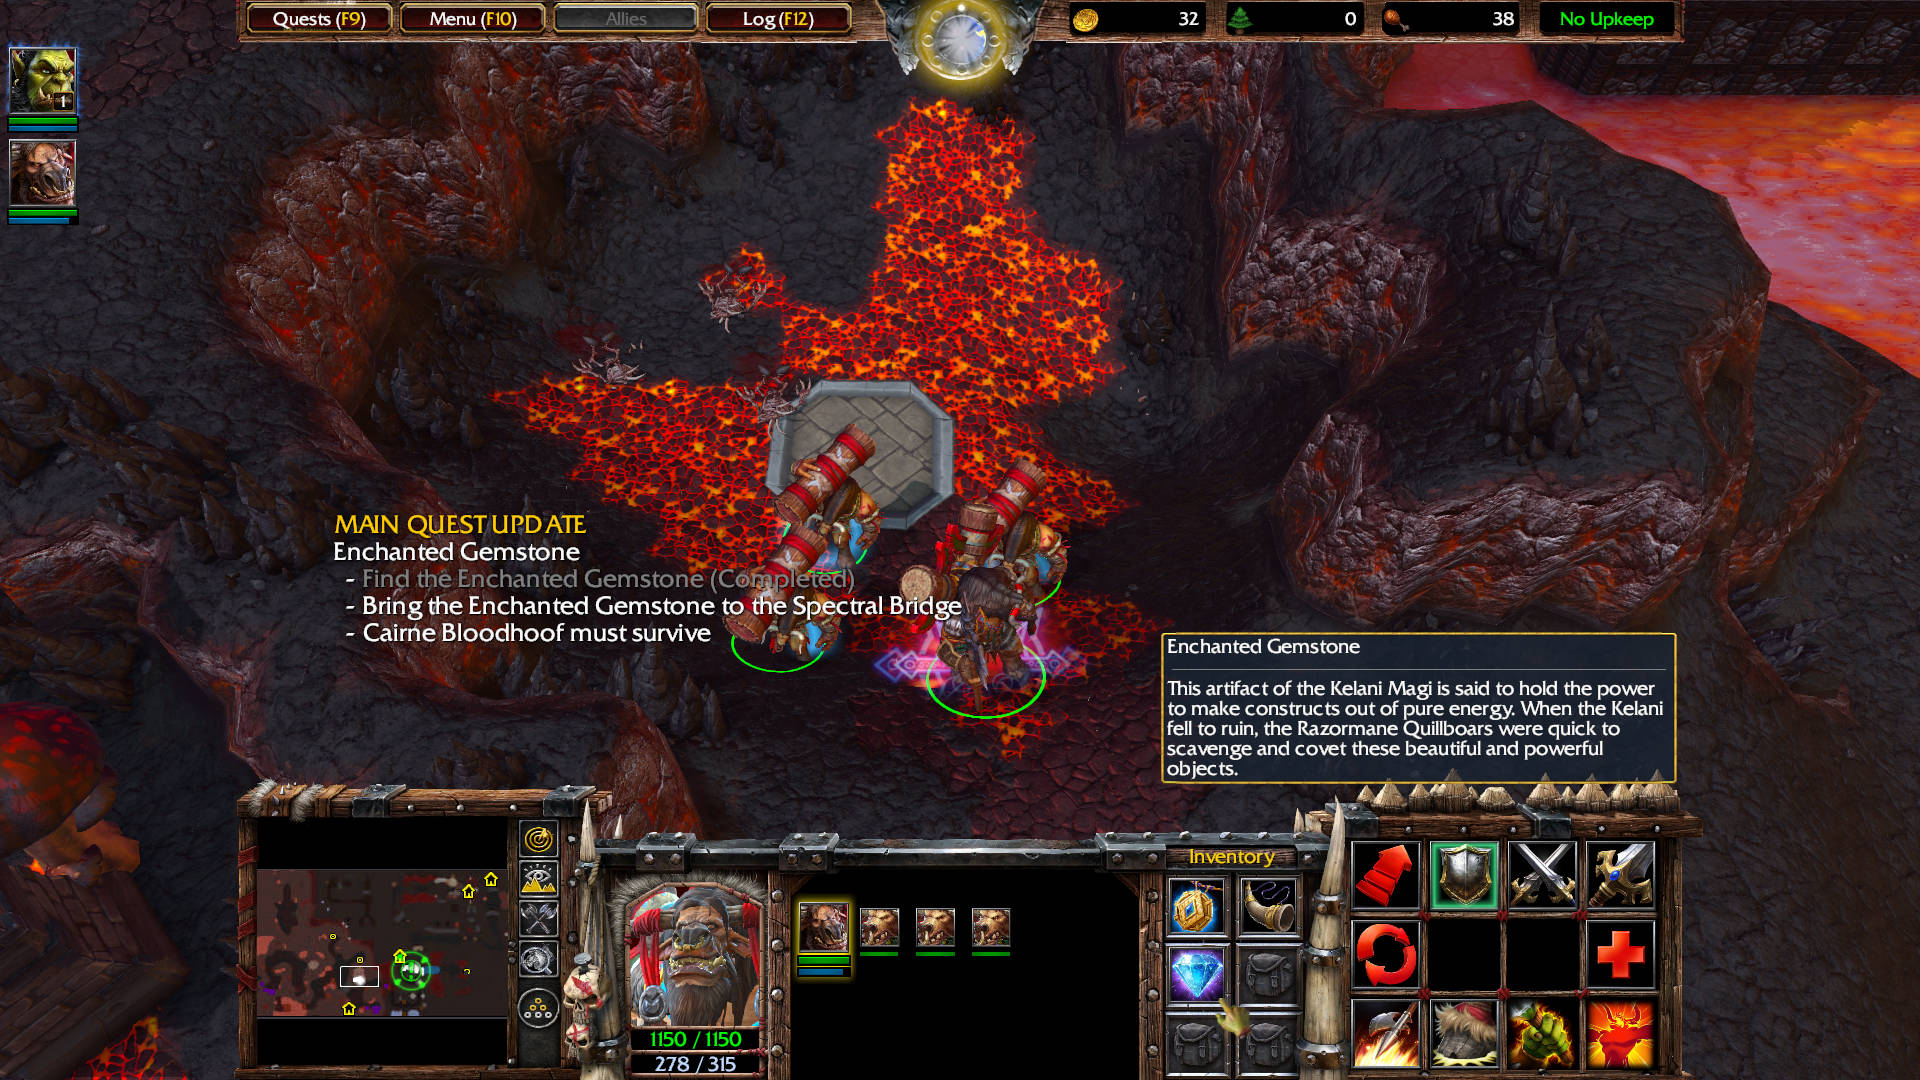
MAIN QUEST UPDATE
Enchanted Gemstone
Find the Enchanted Gemstone(Complete)- Bring the Enchanted Gemstone to the Spectral Bridge
- Cairne Bloodhoof must survive
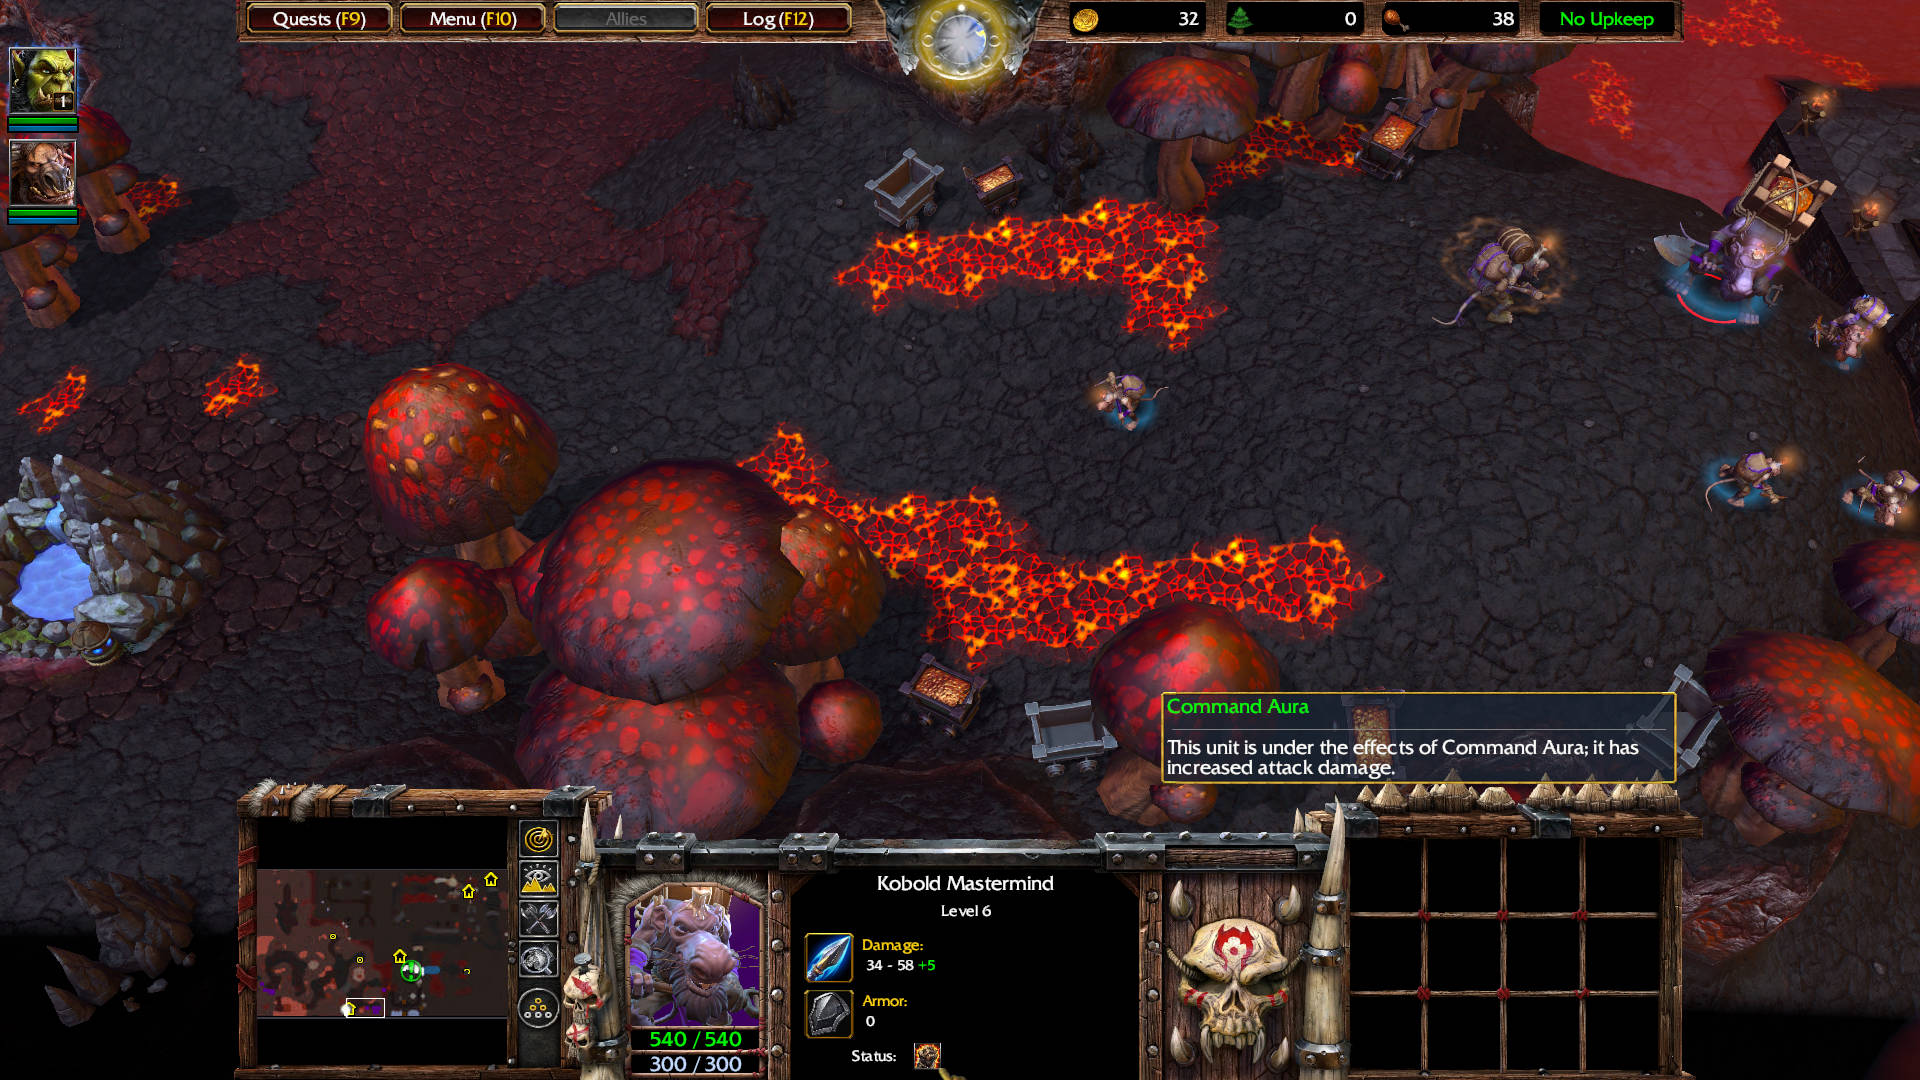
Go all the way south to kill these: Kobold Mastermind level 6 with Command Aura. Kobold Taskmaster level 5. Kobold Tunneler level 3. Kobold level 1 (3) — drops Claw of Attack: Increases the attack damage of the Hero by 12 when worn.
Now go back to where you got the Enchanted Gemstone from — and head east to kill this Samalander Lord level 10 — drops Belt of Giant Strength: Increases the Strength of the Hero by 6 when worn. You can walk into the river.
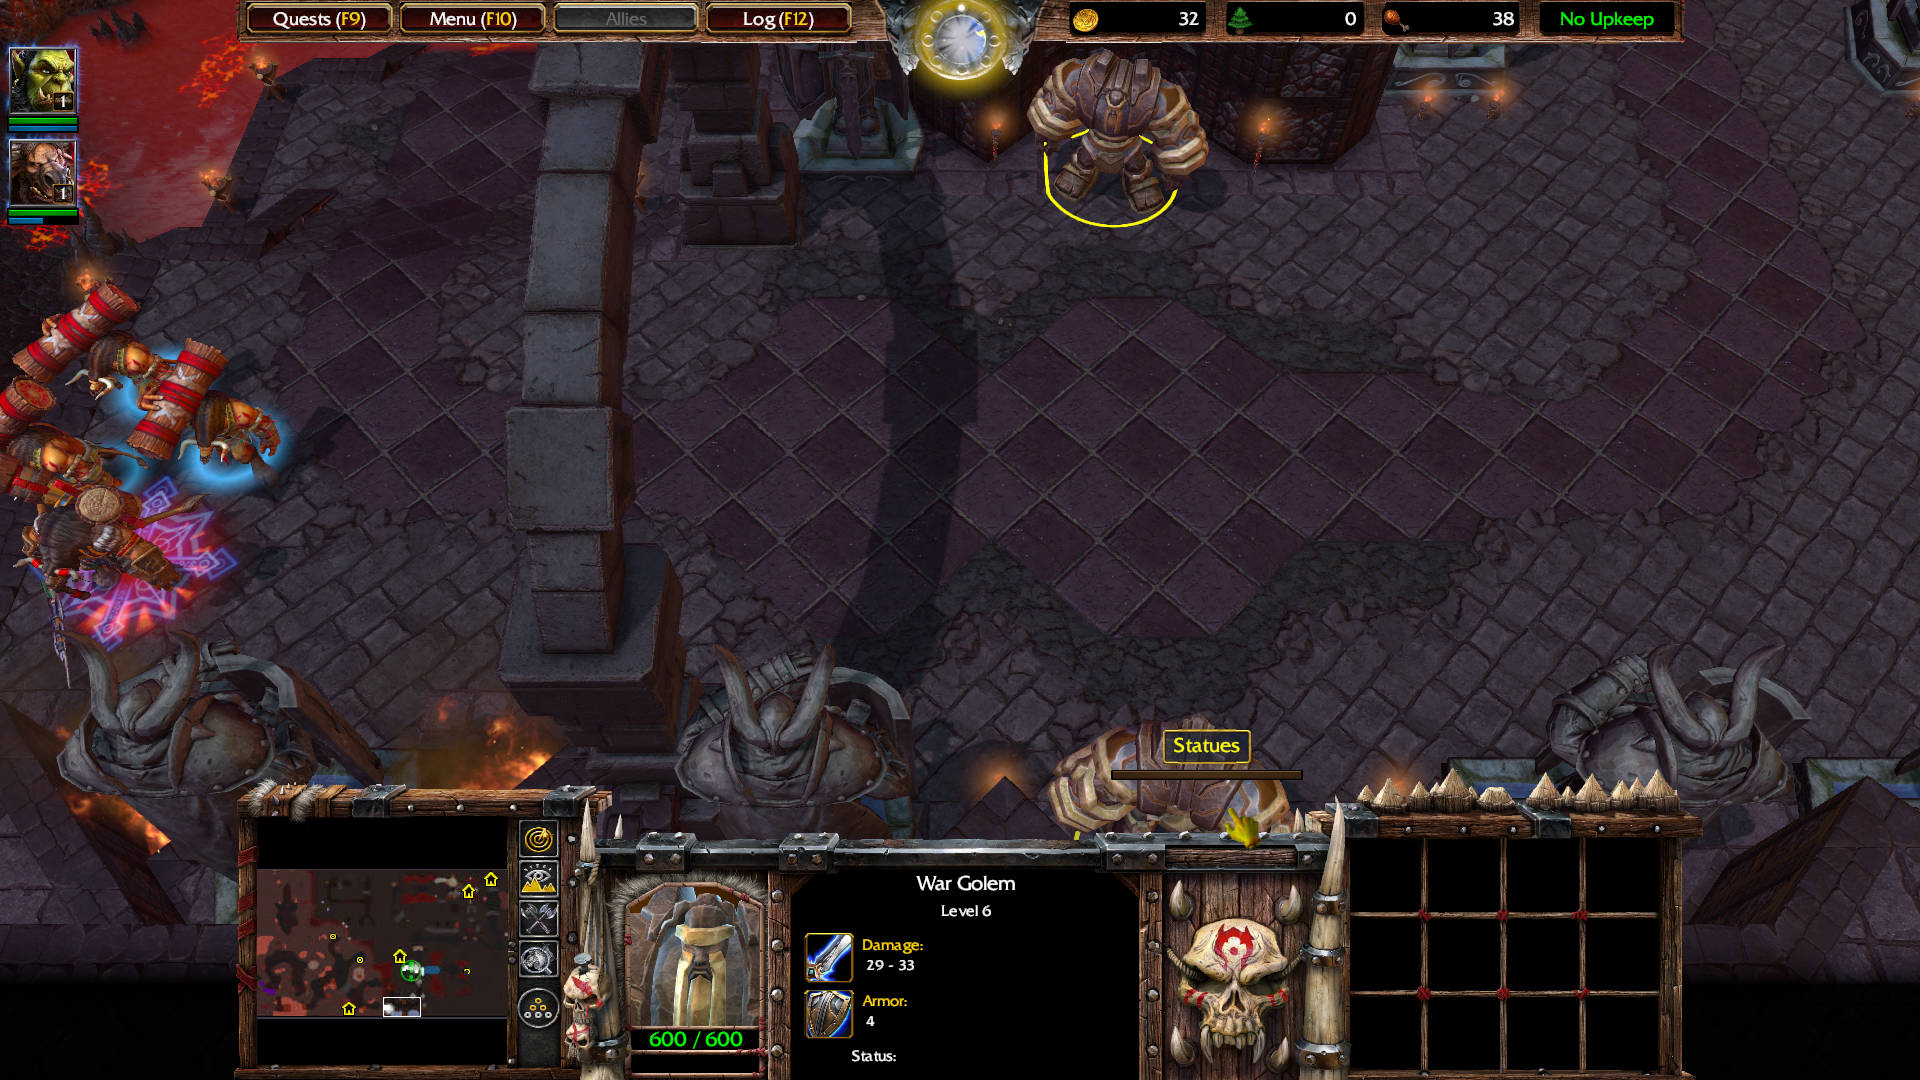
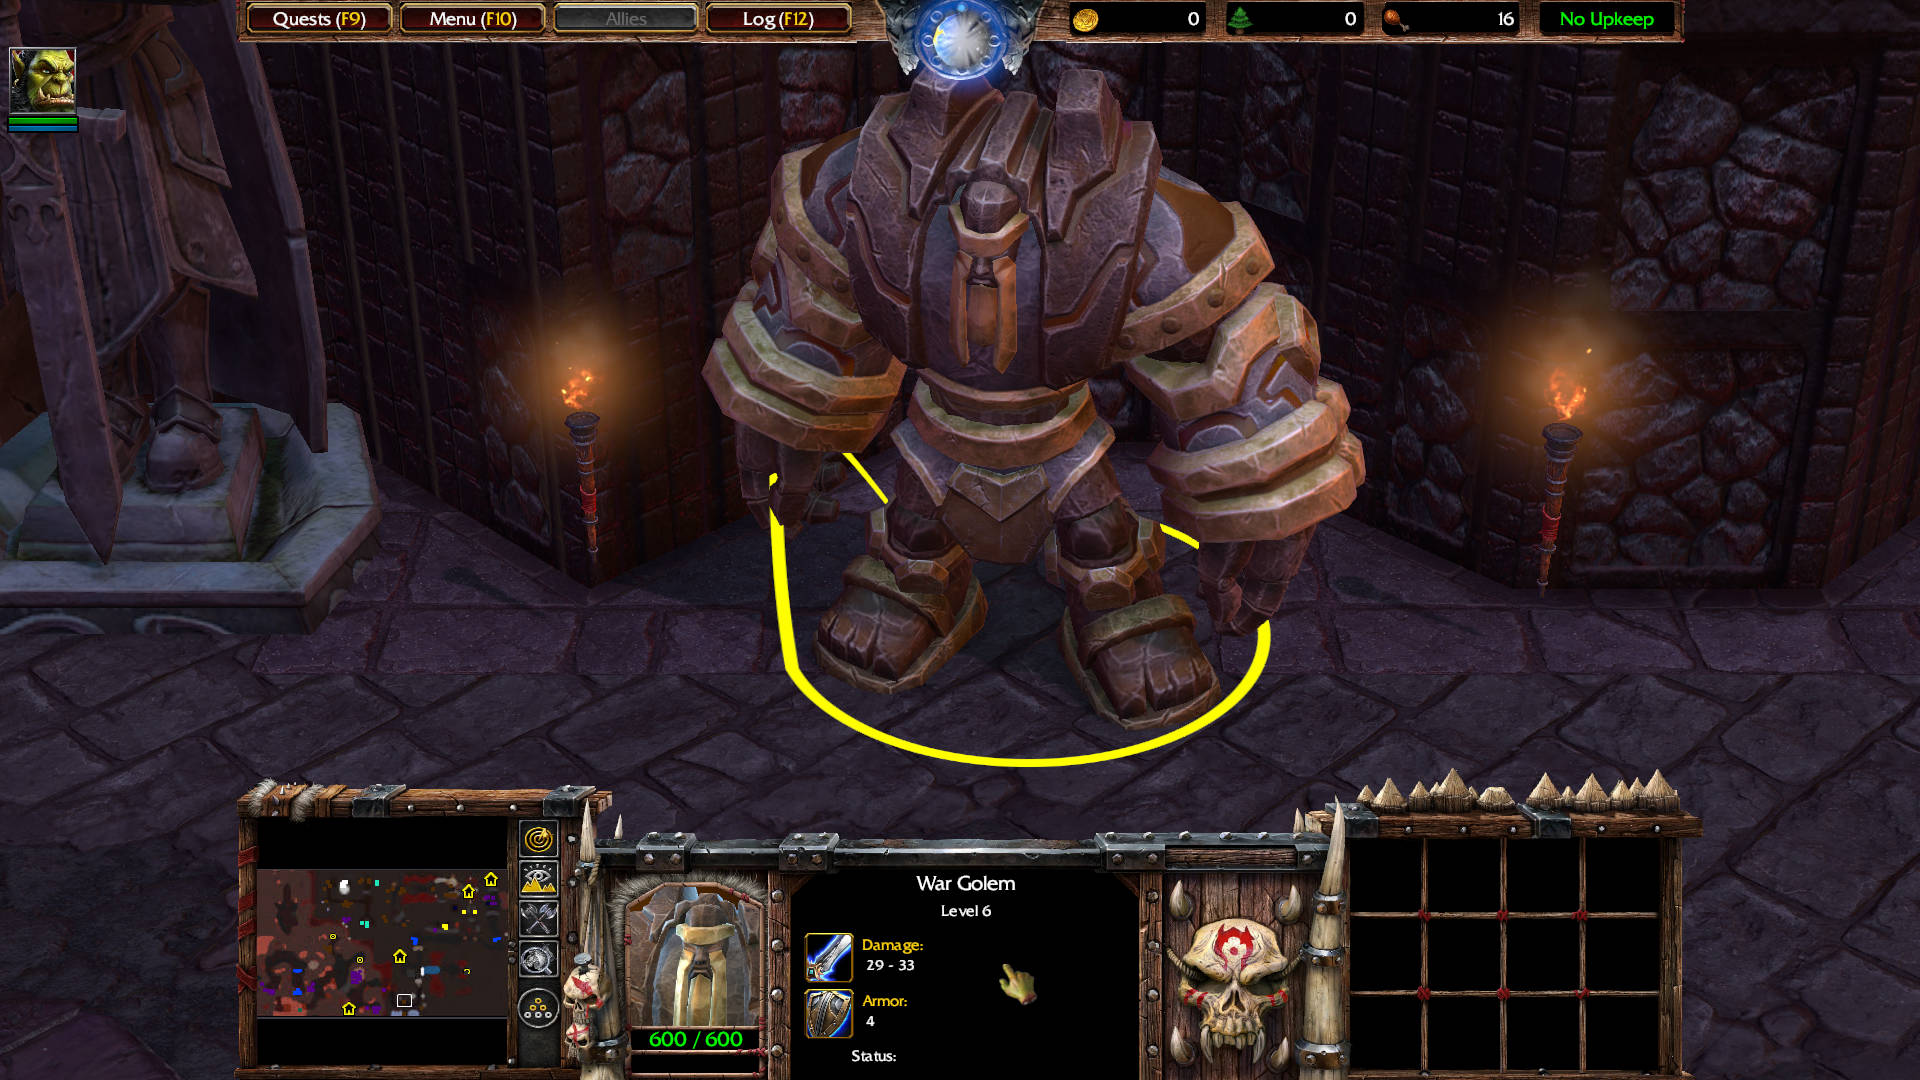
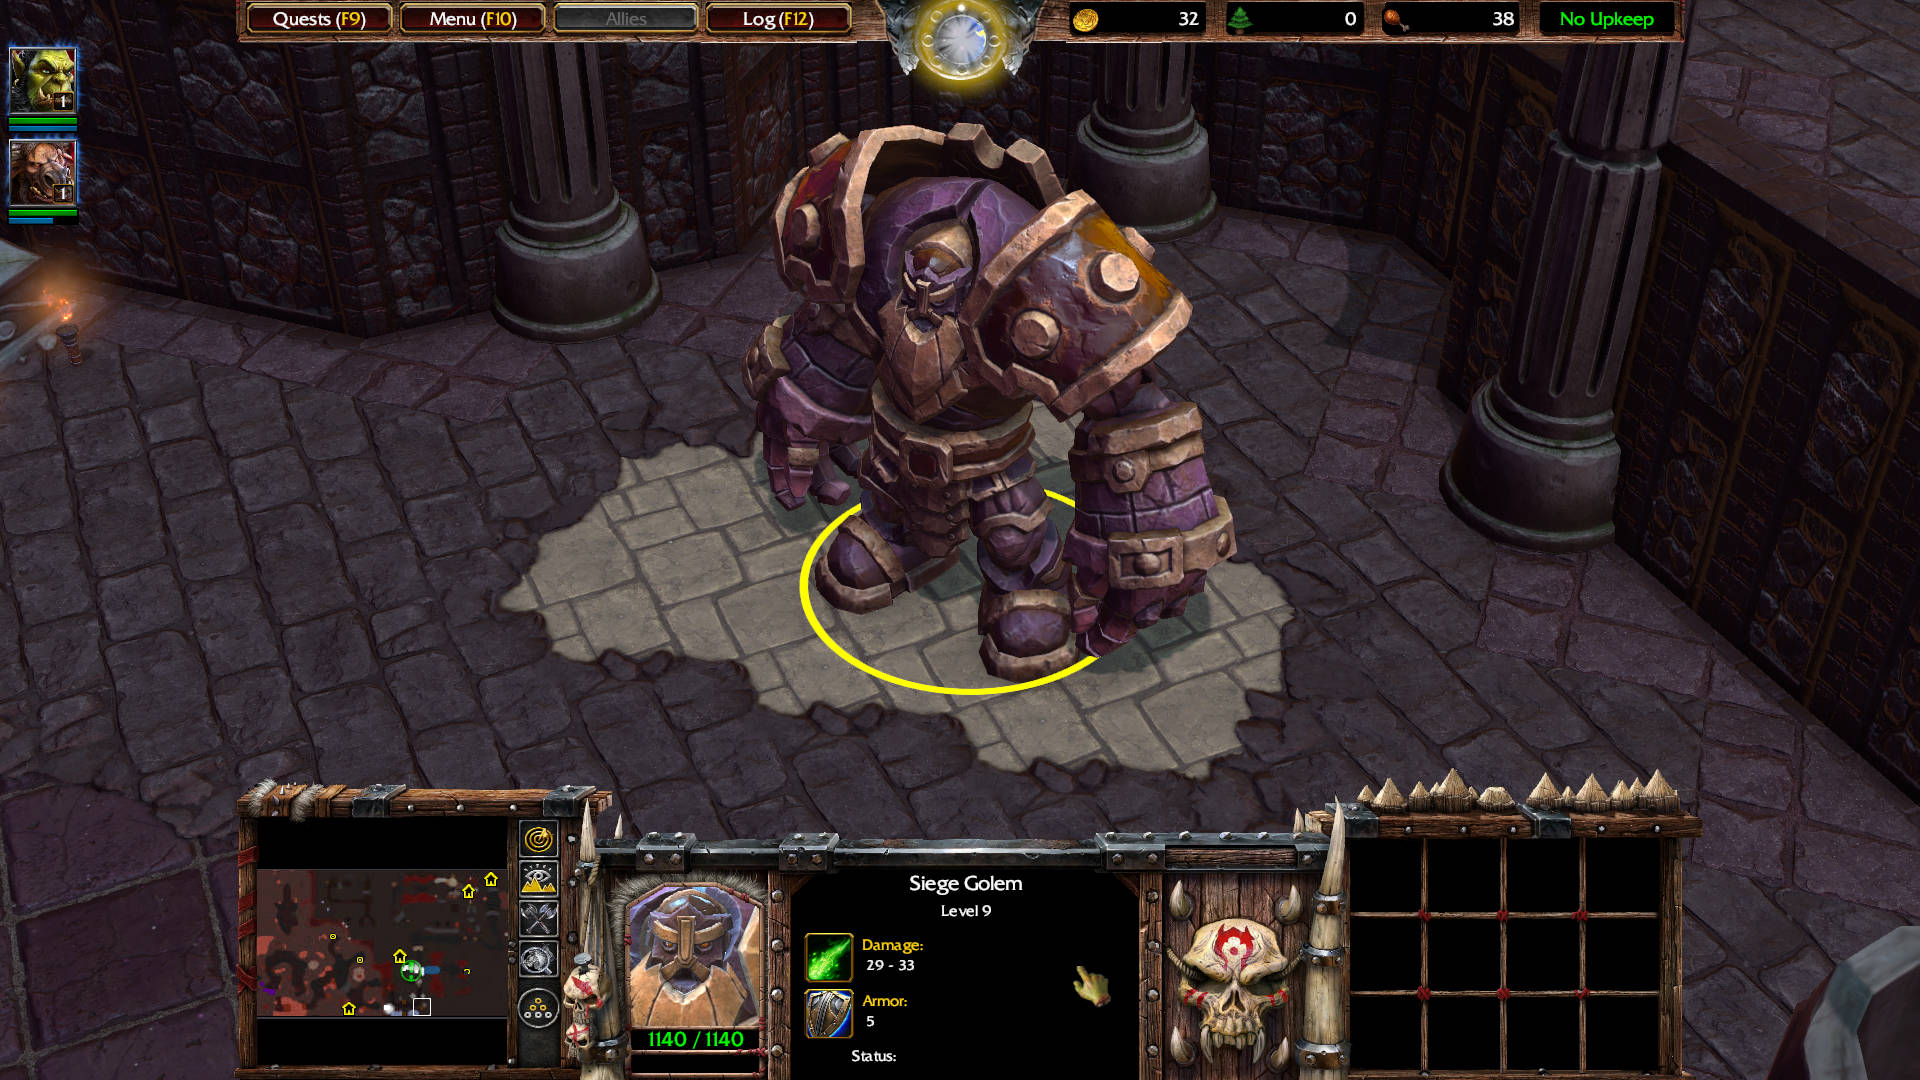
Go across the river and up the ramp. The following room has two War Golem level 6 — drops Healing Wards: Summons an immovable ward that heals 2% of nearby friendly non-mechanical unit’s hit points per sec. Contains 3 charges. Lasts 30 sec.
Cairne Bloodhoof: The statues are coming to life! Defend yourselves!
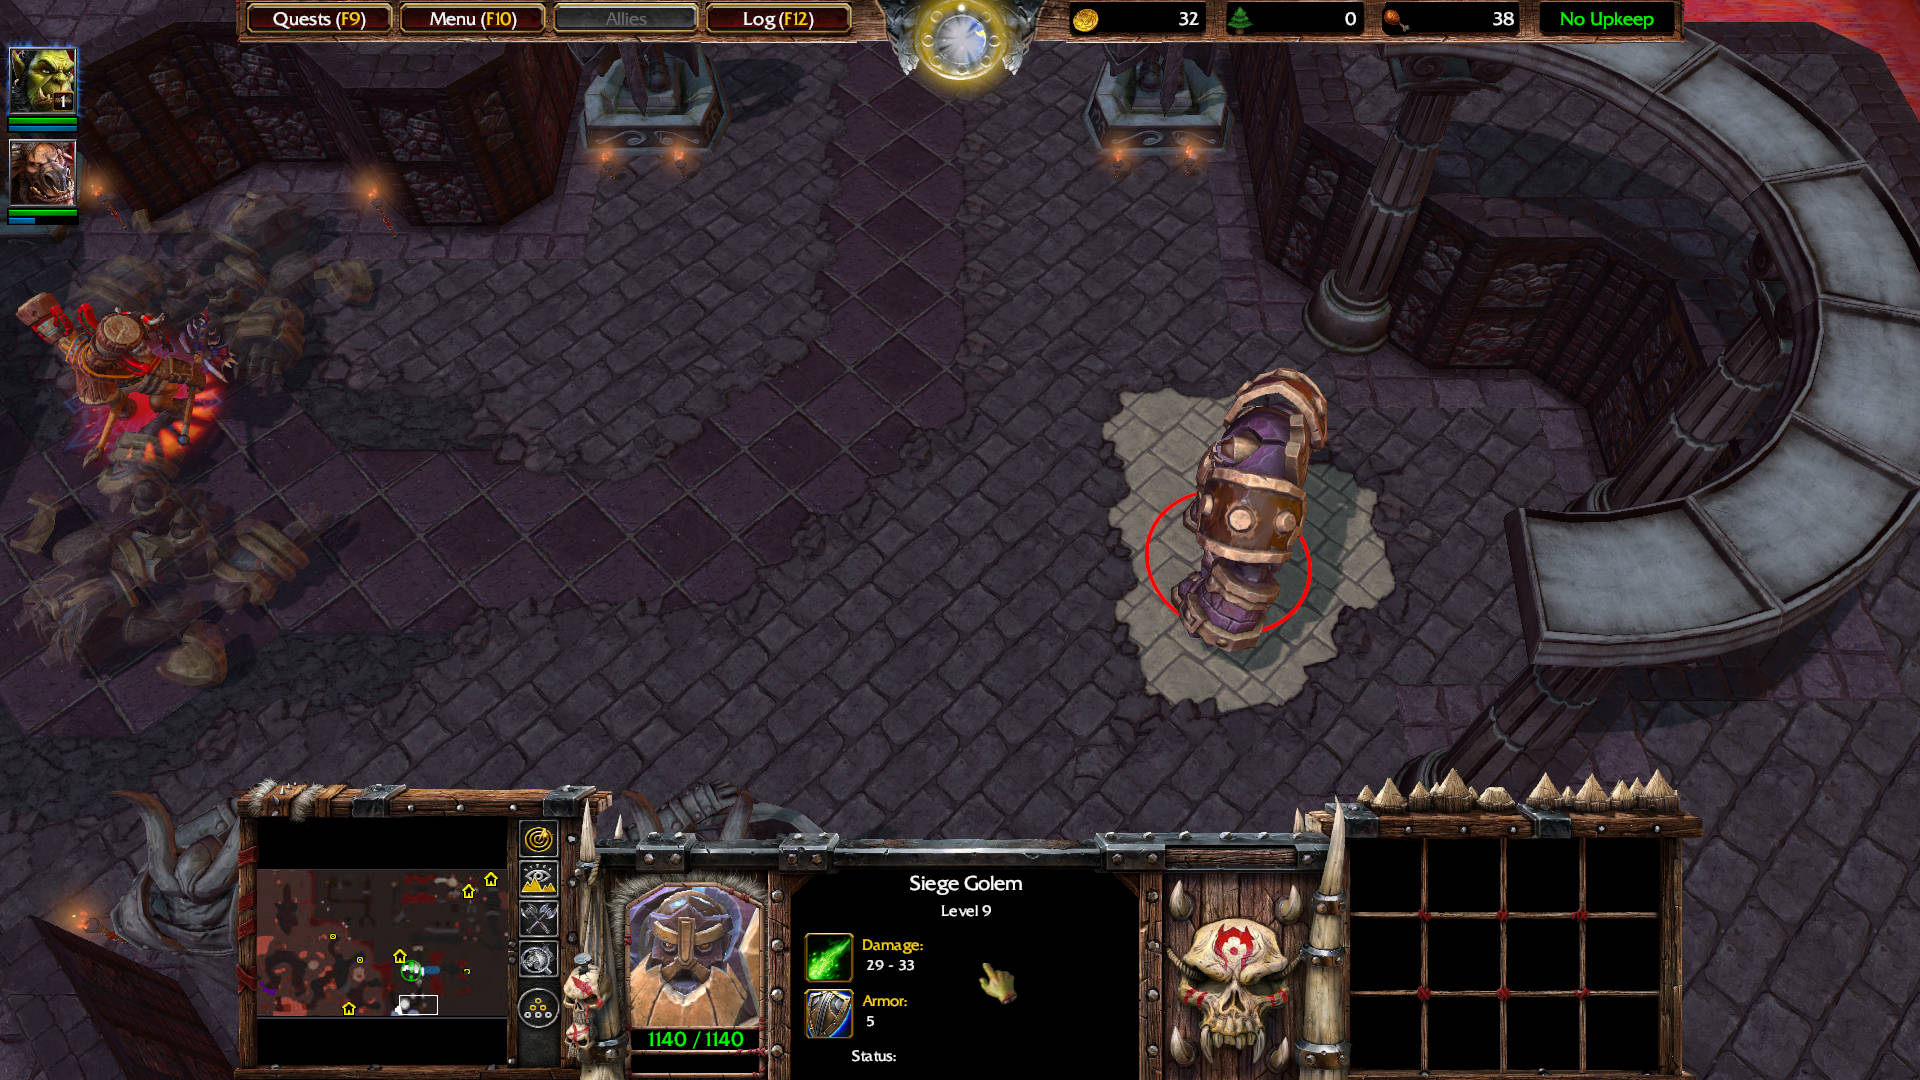
To the right of those War Golems is a single Siege Golem level 9 — drops Ghost Key: The key is rather unsubstantial.
Now you can head north to open the invulnerable Iron Gate to join Thrall at the Statue of Aszune.
Cairne Bloodhoof: Ah, the Spirit’s Bridge… just as the legends described it. Now, young warchief, the path to the Oracle is revealed!
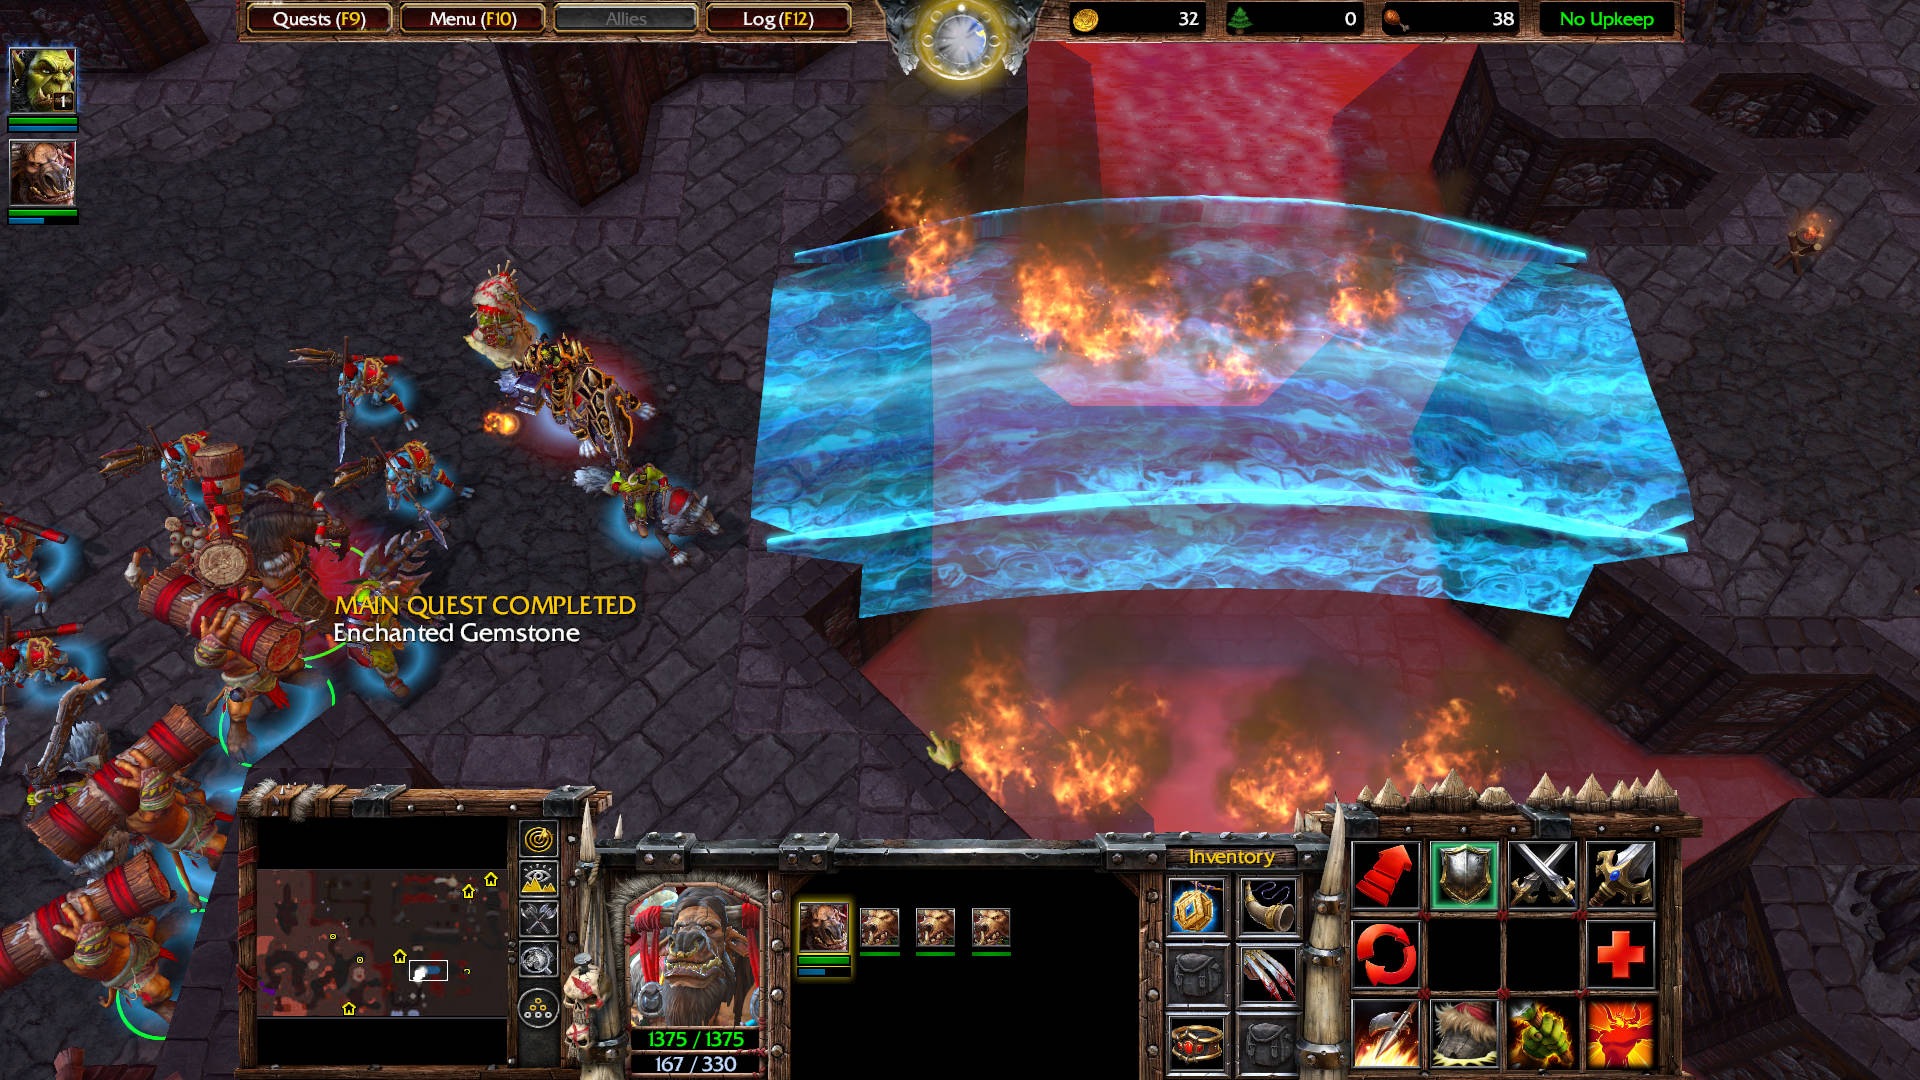
MAIN QUEST COMPLETED
The Enchanted Gemstone
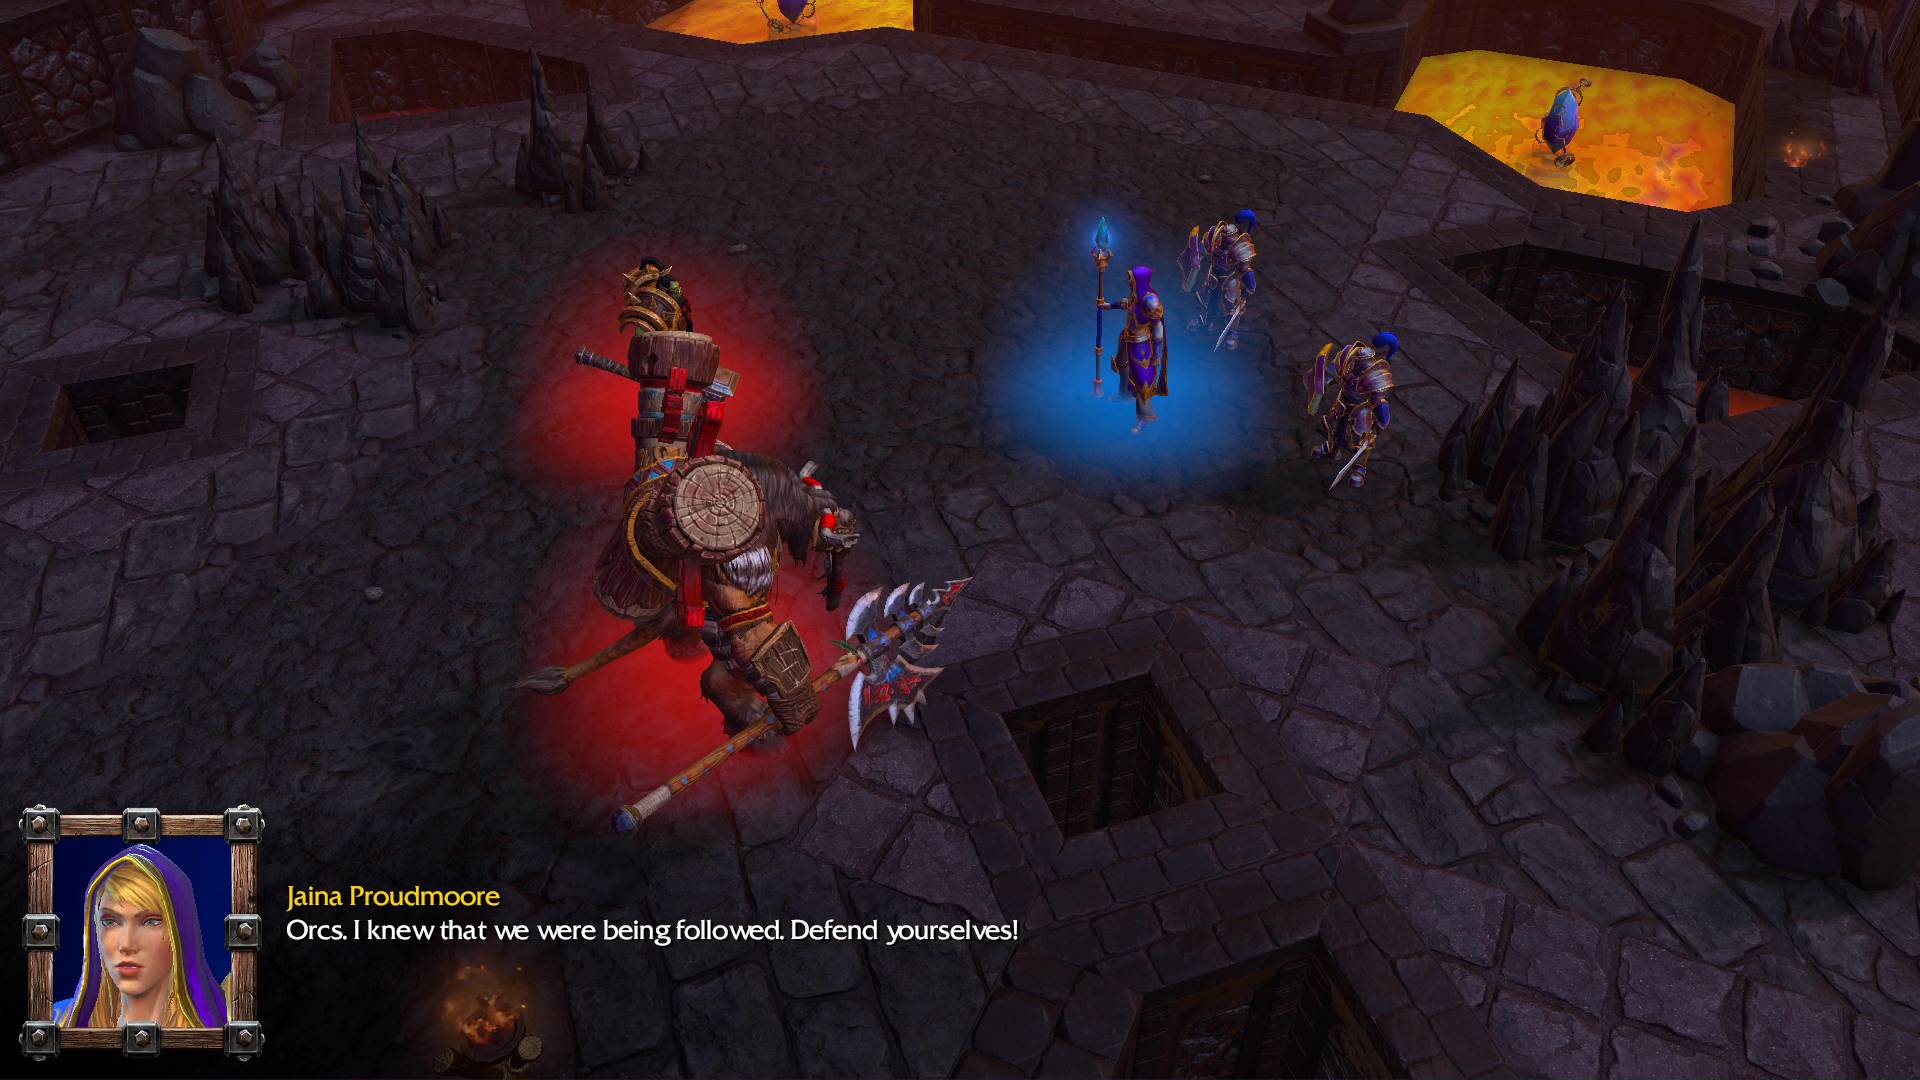
CUTSCENE
Jaina Proudmoore: Orcs. I knew that we were being followed. Defend yourselves!
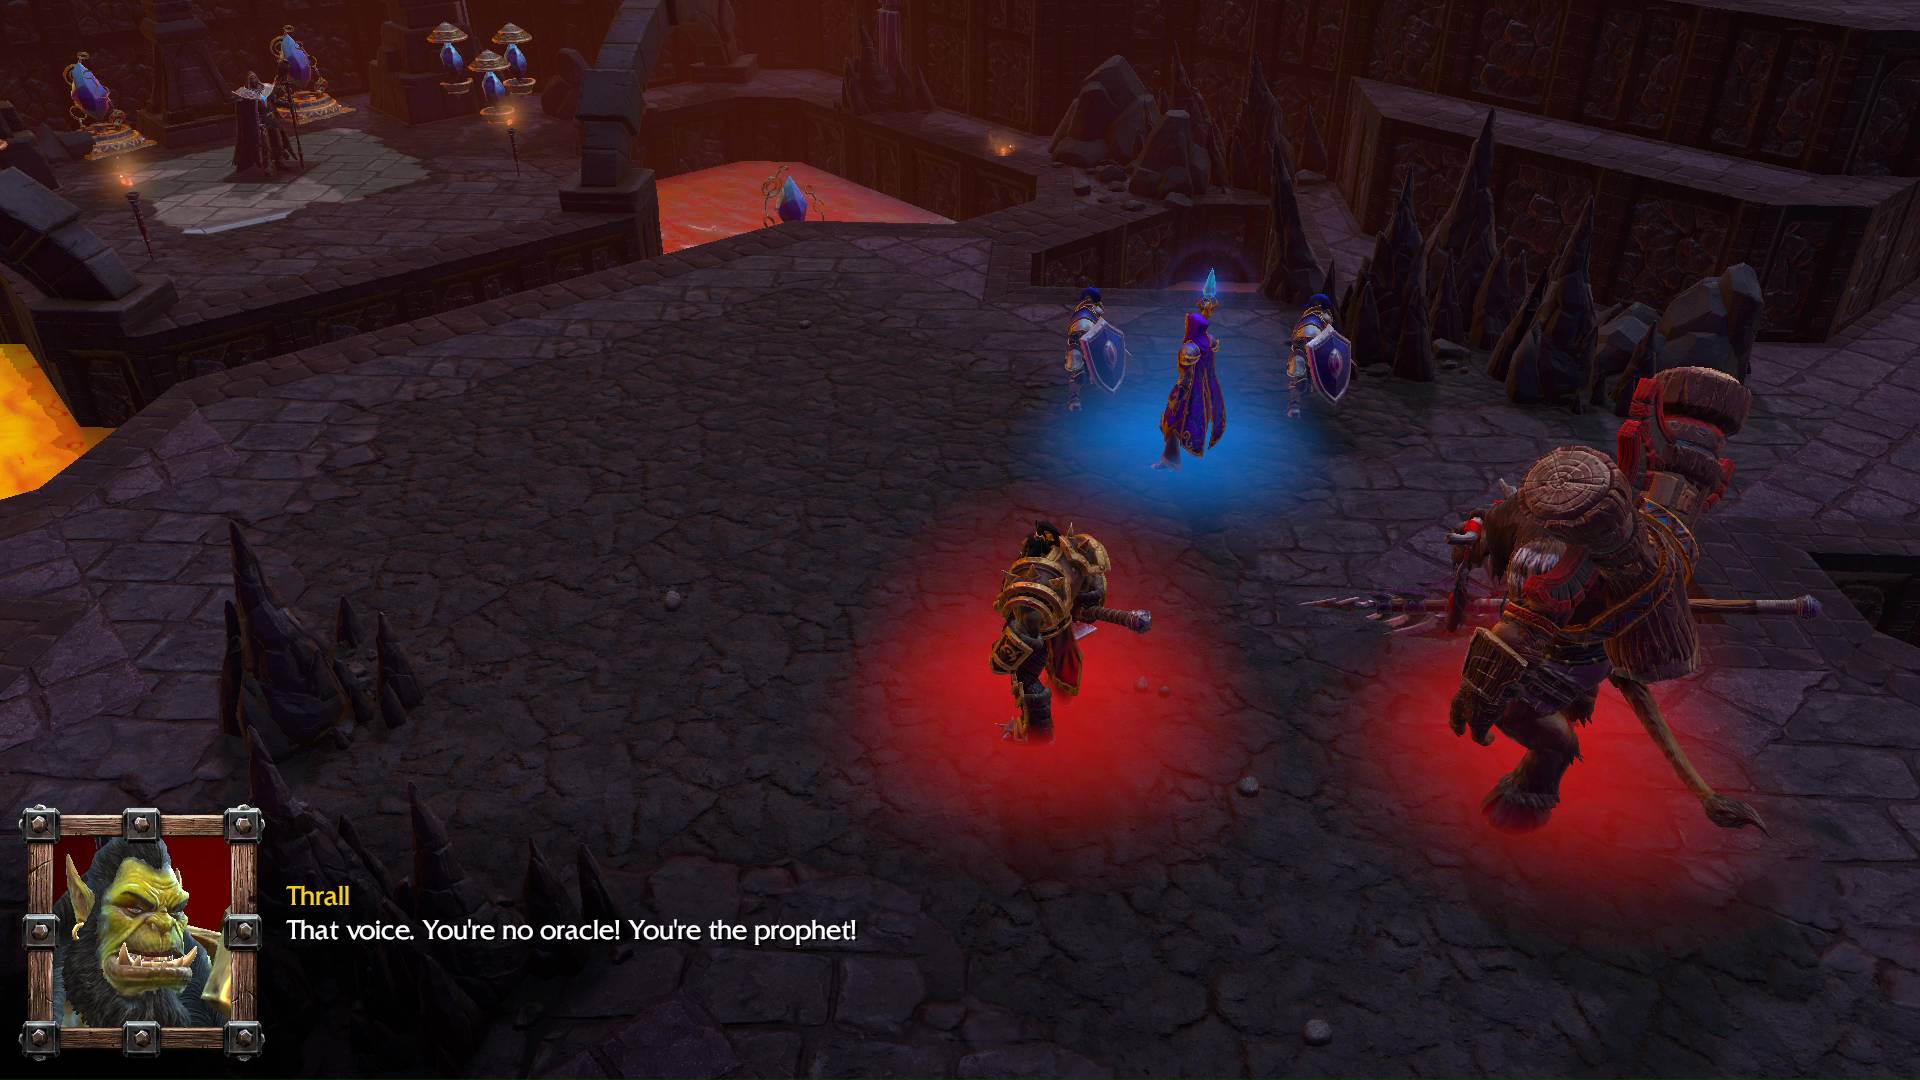
The Prophet: Stop! There will be no violence in this place.

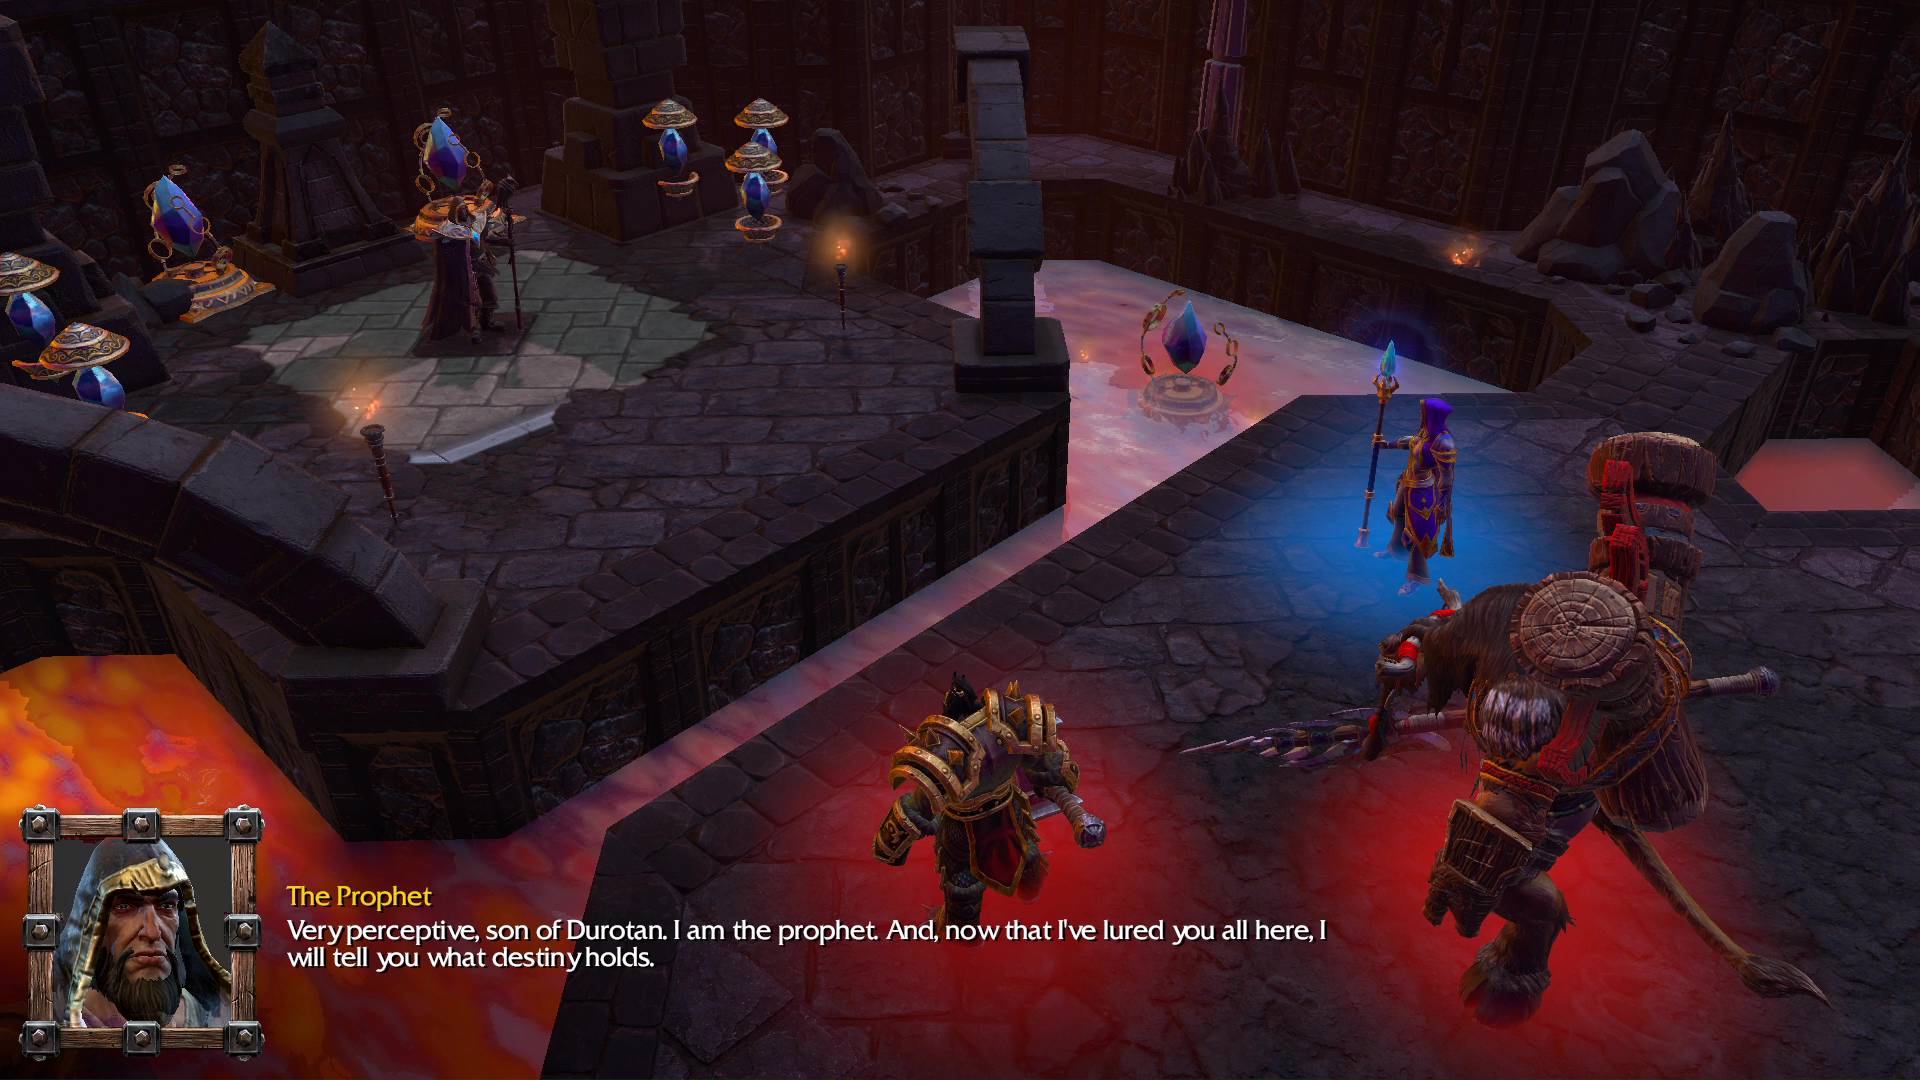
Thrall: That voice. You’re no oracle! You’re the prophet!
The Prophet: Very perceptive, son of Durotan. I am the prophet. And, now that I’ve lured you all here, I will tell you what destiny holds.
Thrall: What the hell is going on here?
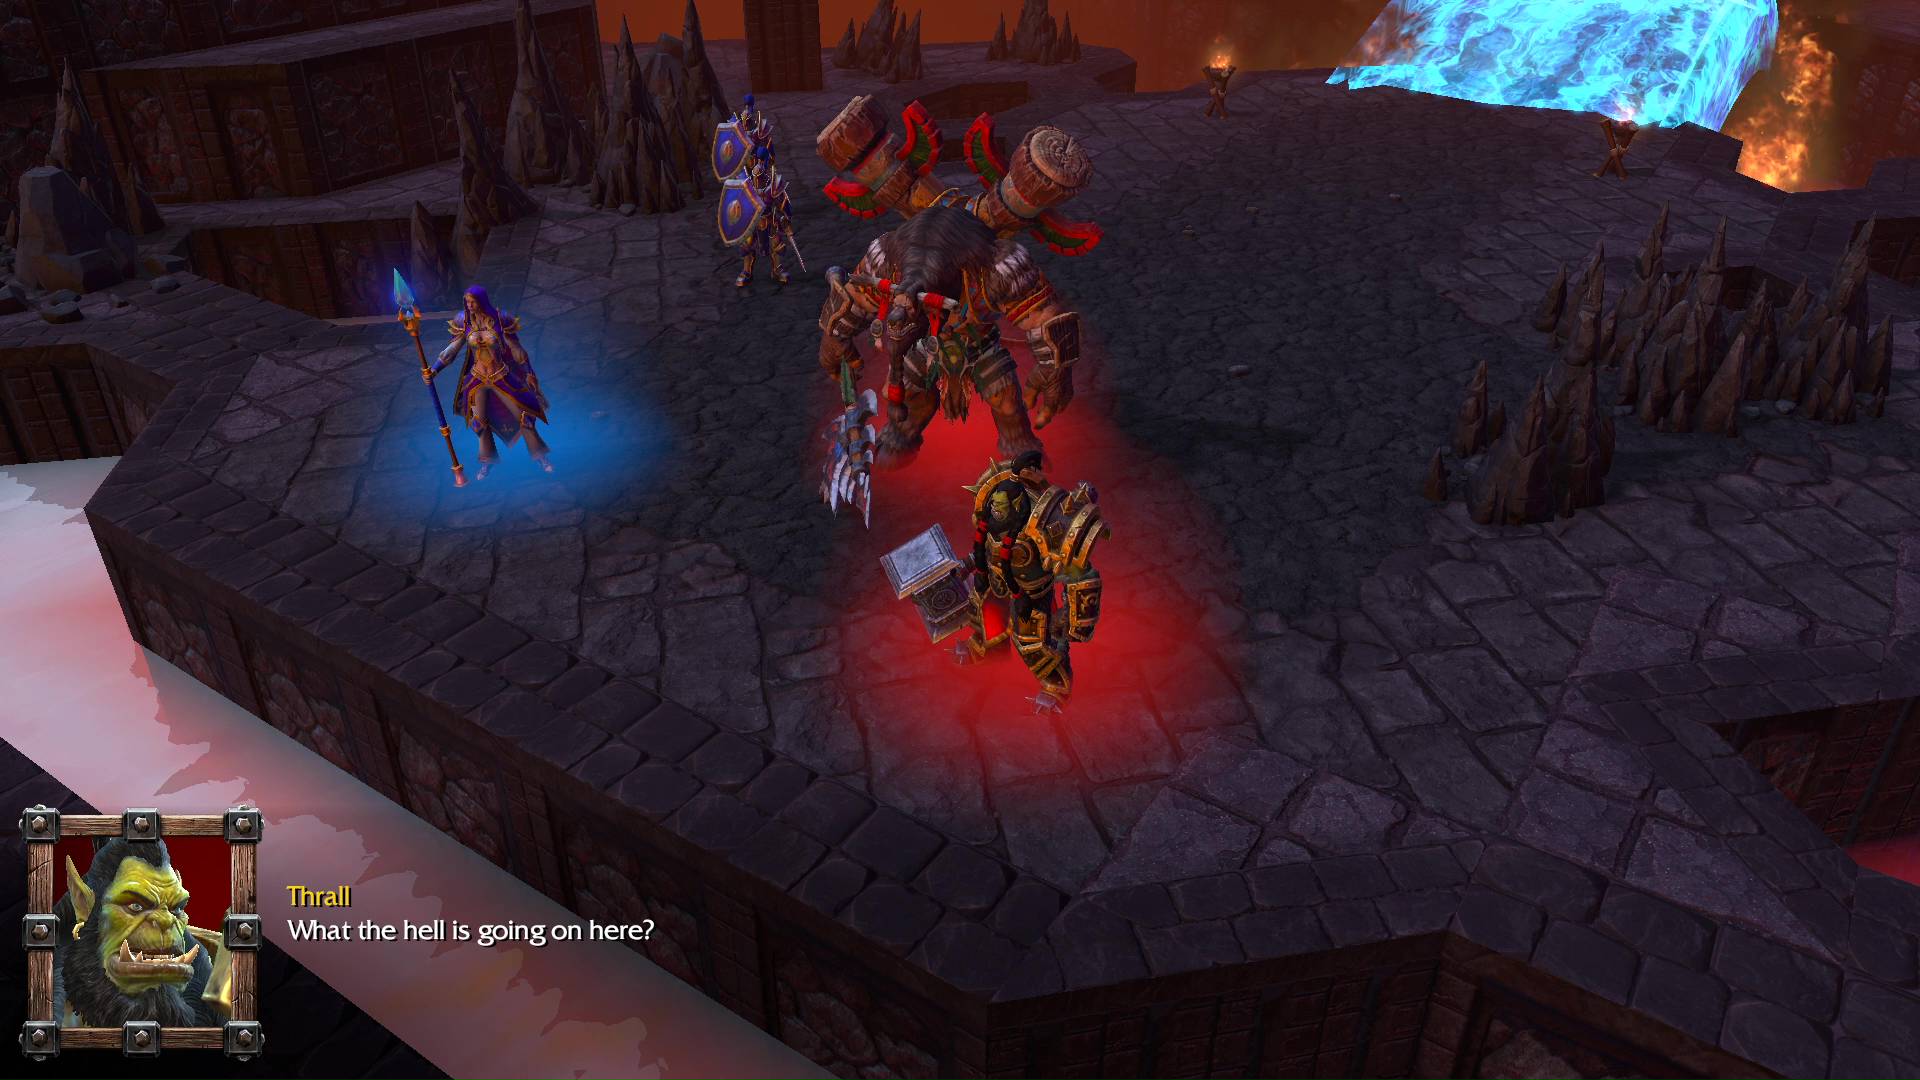
The Prophet: Thrall, this is Jaina Proudmoore, leader of the survivors of Lordaeron.
Thrall: Survivors? What are you talking about?
Prophet: The invasion of the Burning Legion has begun! Lordaeron has already fallen, and now the demons come to invade Kalimdor! Only together, united against the shadow, will you be able to save this world from the flame.

Jaina Proudmoore: Unite with them? Are you mad?
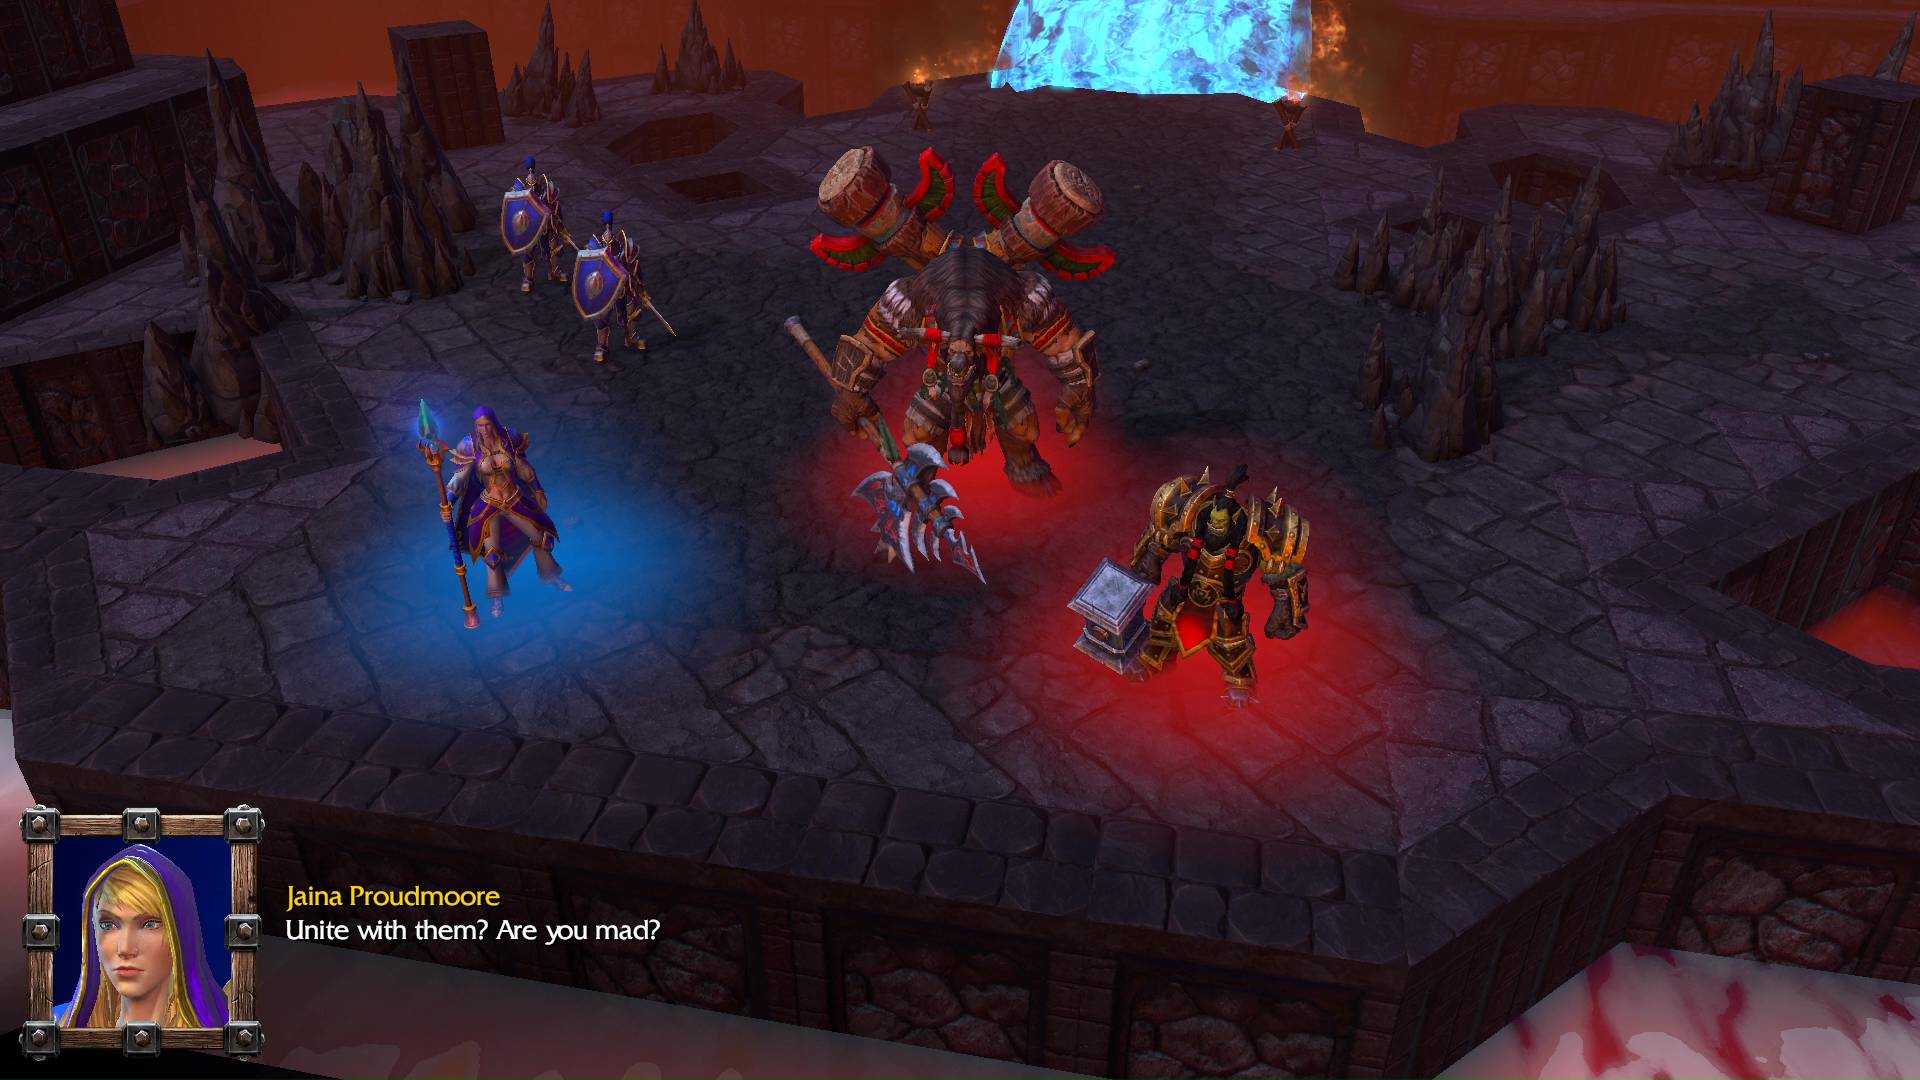
The Prophet: Have you heard nothing that I’ve said? The Legion comes to undo history and end all life! Thrall, your friend Hellscream has already fallen under the demons’ influence. Soon he and your whole race will be lost forever!
Thrall: No… I’ll die before I let that happen!
Prophet: Then you must rescue him immediately! He is the key to the destiny I promised you. However, you will need help.
Jaina Proudmoore: Wait! This is insane! You can’t possibly expect me to–
The Prophet: Destiny is at hand, young sorceress. The time to choose has come. For the fate of all who live, humanity must join forces with the Horde.
VICTORY
BESTIARY
- Crate — drops Potion of Healing: Heals 250 hit points when used.
- Burning Archer level 3. Skeleton Warrior (2) — drops Tome of Retraining: Unlearns all of the Hero’s spells, allowing the Hero to learn different skills.
- Burning Archer level 3.
- Fire Revenant level 3. Burning Archer level 3 (2). Skeleton Warrior (2).
- Dungeon Gate.
- Burning Archer level 3 (4) — treasure chest contains Mantle of Intelligence: Increases the intelligence of the Hero by 3 when worn.
- Heretic level 5. Fallen Priest level 1.
- Sludge Monstrosity level 5. Sludge Minion level 1 (2) — destroy the Dungeon Gate to get to them — drops Ring of Regeneration: Increases the Hero’s hit point regeneration by 2 hit points per sec.
- Skeleton Warrior (2). Destroy the crates. One spawns a Wraith level 6 and a treasure chest that contains Scroll of Healing: Heals 150 hit points to all friendly non-mechanical units around the Hero when used; and a Potion of Greater Mana: Restores 300 mana when used.
- Fire Revenant level 3. Destroy all the crates in that room. They drop Scroll of Animate Death: Raises 6 nearby dead units to fight for 40 sec.; and a Tome of Agility: Permanently increases Agility by 1.
- Lightning Revenant level 6. Burning Archer level 3 (2). Skeleton Warrior (3) — drops Orb of Fire: Adds 5 bonus fire damage to the attack of a Hero when carried. The Hero’s attacks also become ranged when attacking air and do splash damage to nearby enemy units. Destroy the crates behind the Revenant. These drop Potion of Greater Healing: Heals 500 hit points when used; and Potion of Greater Mana: Restores 300 mana when used.
- Fallen Priest level 1 (2). Tome of Intelligence: Permanently increases intelligence by 1.
- Burning Archers level 3 (2). They are invisible until you get there.
- Death Revenant level 9. Two Burning Archer level 3 spawn.
- Skeleton Lord. Skeleton Warrior (4).
- Salamander Vizier level 7. Loot the Blood Key.
- Open the Iron Gate and loot the Crown of Kings: Increases the Strength, Intelligence, and Agility of the Hero by 5 when worn. Destroy the crates — drop Scroll of Healing: Heals 150 hit points to all friendly non-mechanical units around the Hero when used; Scroll of Protection: Increases the armor of all friendly units in an area around your Hero by 2 for 30 sec.; and Scroll of Mana: Restores 100 mana to all friendly units in an area around your Hero.
- Way Gate.
- Way Gate (destination).
- Enchanted Gemstone Obelisk.
- Elven Gate.
- Peasant (3).
- Kobold Taskmaster level 5. Captive Headhunter (3) — trolls join your team.
- Destroy the Dungeon Gate at the lava pit. A Salamander Lord level 10 spawns — drops Sobi Mask: Increases the Hero’s rate of mana regeneration by 50% when worn.
- Several crates — drop Scroll of Mana: Restores 100 mana to all friendly units in an area around your Hero; Scroll of Healing: Heals 150 hit points to all friendly non-mechanical units around the Hero when used; Potion of Greater Mana: Restores 300 mana when used.
- Sorceress (2). Sheep (4) — after a dialogue, the sheep transform into Footmen.
- Burning Archer level 3 (3). Prison cells: Headhunter (2) join your team. Destroy the crates in the back (north) to loot Scroll of Resurrection: Brings 6 of your nearby friendly dead units back to life.
- Way Gate.
- Kobold Taskmaster level 5. Kobold Tunneler level 3. Kobold level 1 (4) — drops Scroll of Healing: Heals 150 hit points to all friendly non-mechanical units around the Hero when used. Destroy the nearby crate — drops Potion of Greater Mana: Restores 300 mana when used.
- Destroy the Rock Chunks. That will spawn a Granite Golem level 9 — drops Healing Salve: Non-Combat Consumable – Regenerates a target unit’s hit points by 400 over 45 sec when used. Contains 3 charges.
- Rifleman. Footman (3). Most run toward the pit of skulls where they get impaled by spikes. Only one stays.
- Sorceress. Footman (3) — drops Tome of Strength: Permanently increases Strength by 1. Destroy the crates to loot: Potion of Mana: Restores 150 mana when used; and Scroll of the Beast: Gives friendly nearby units a 25% bonus to damage for 45 sec. The Kobold Taskmaster drops drops Talisman of Evasion: Causes attacks against the wearer to miss 15% of the time. Does not stack with Evasion or Drunken Brawler.
- Hungry Hungry Lizard – don’t kill it. Let it eat a path of mushrooms until Cairne is able to get to the other side. If at the end, the lizard body blocks you, kill it and move through to the other side. Loot The Lion Horn of Stormwind: Grants the Hero and friendly nearby units 1 bonus armor. Does not stack with Devotion Aura.
- The Lion Horn of Stormwind (treasure chest).
- Burning Archer level 3 (2). Skeleton Warrior (3). Circle of Power (opens the invulnerable gate).
- Circle of Power (Move Cairne to the circle to trigger the pit’s spike trap).
- Pit full of quillboar. Enchanted Gemstone.
- Fountain of Health (optional: if your units are damaged).
- Kobold Mastermind level 6 with Command Aura. Kobold Taskmaster level 5. Kobold Tunneler level 3. Kobold level 1 (3) — drops Claw of Attack: Increases the attack damage of the Hero by 12 when worn.
- Salamander Lord level 10 — drops Belt of Giant Strength: Increases the Strength of the Hero by 6 when worn.
- War Golem level 6 (2) — drops Healing Wards: Summons an immovable ward that heals 2% of nearby friendly non-mechanical unit’s hit points per sec. Contains 3 charges. Lasts 30 sec.
- Siege Golem level 9 — drops Ghost Key: The key is rather unsubstantial.
- Cutscene with Jaina and The Oracle.
GALLERY


Hope you enjoyed this article. Please, support Blizzplanet via PayPal or Patreon, and follow us on Twitter, Facebook, YouTube, and Twitch for daily Blizzard games news updates. |
 |


