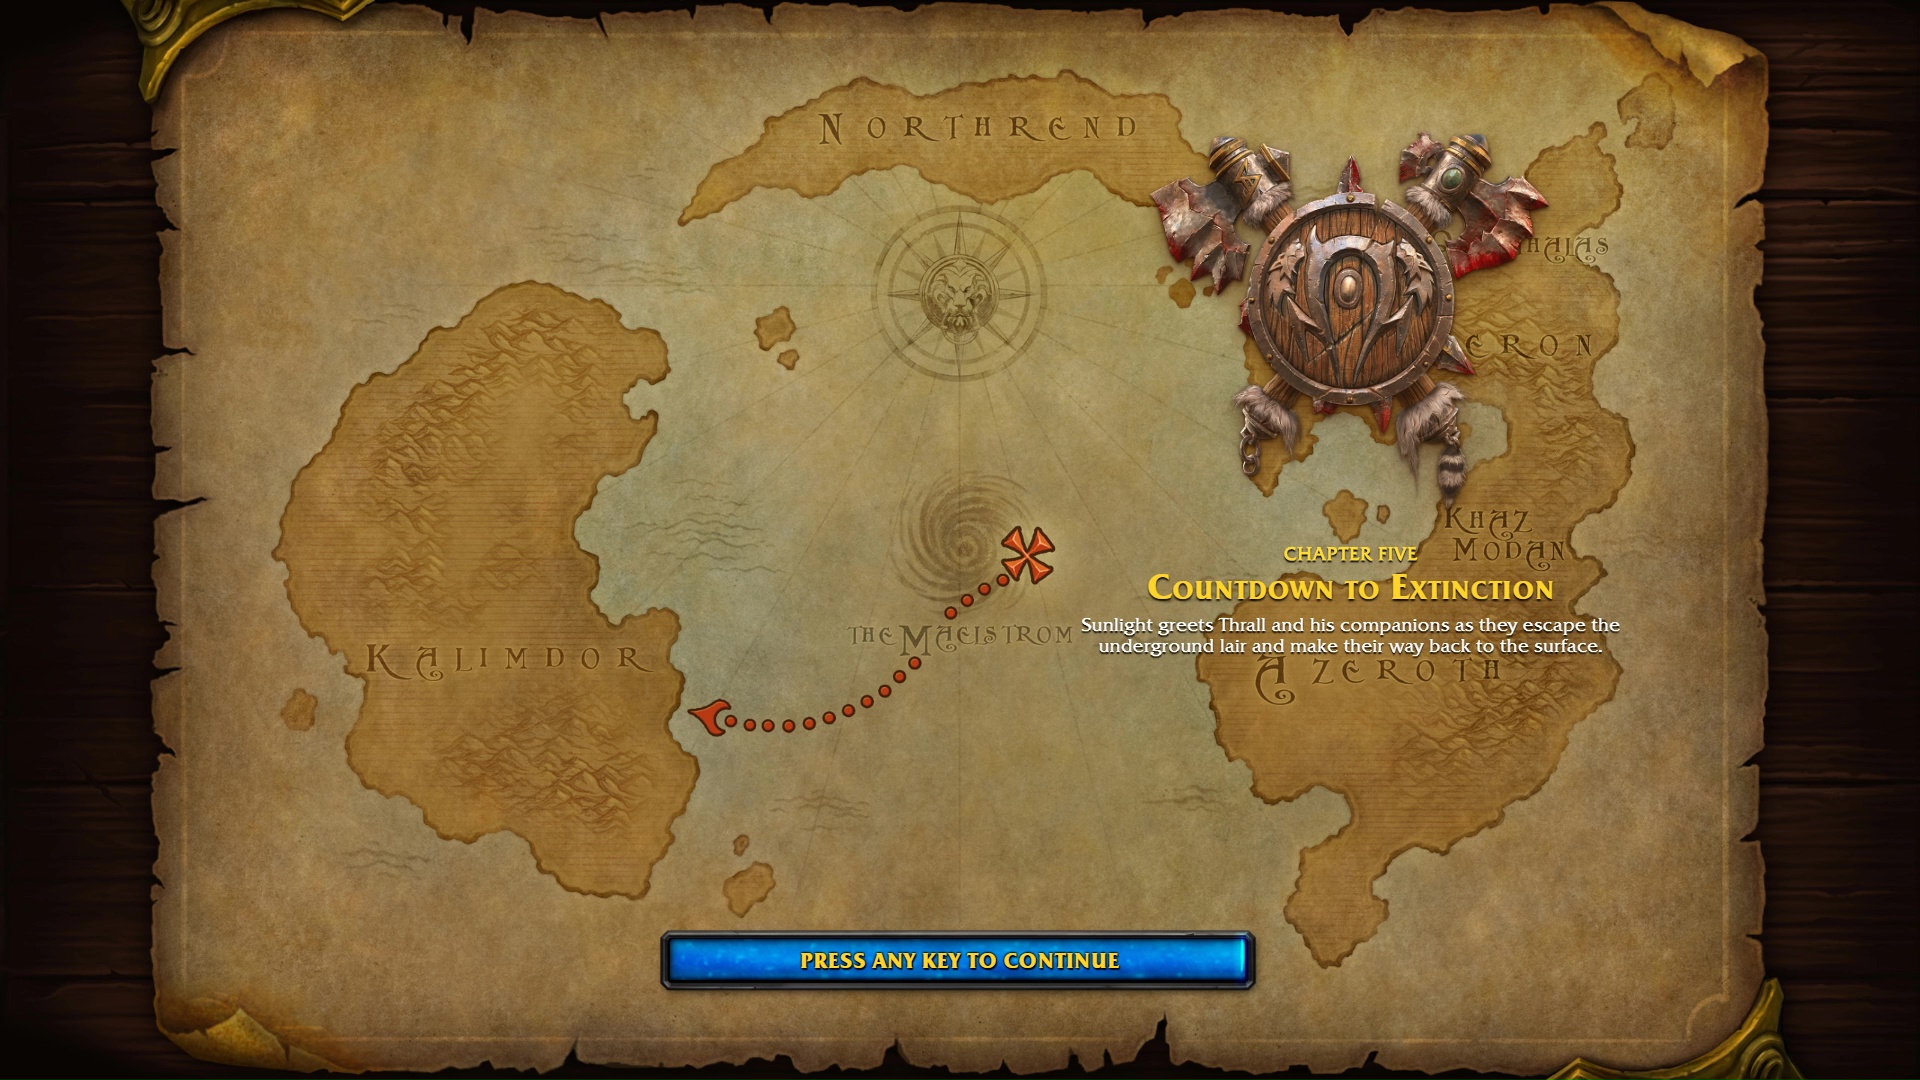
Sunlight greets Thrall and his companions as they escape the underground lair and make their way back to the surface.
YOUTUBE VIDEO
CUTSCENE
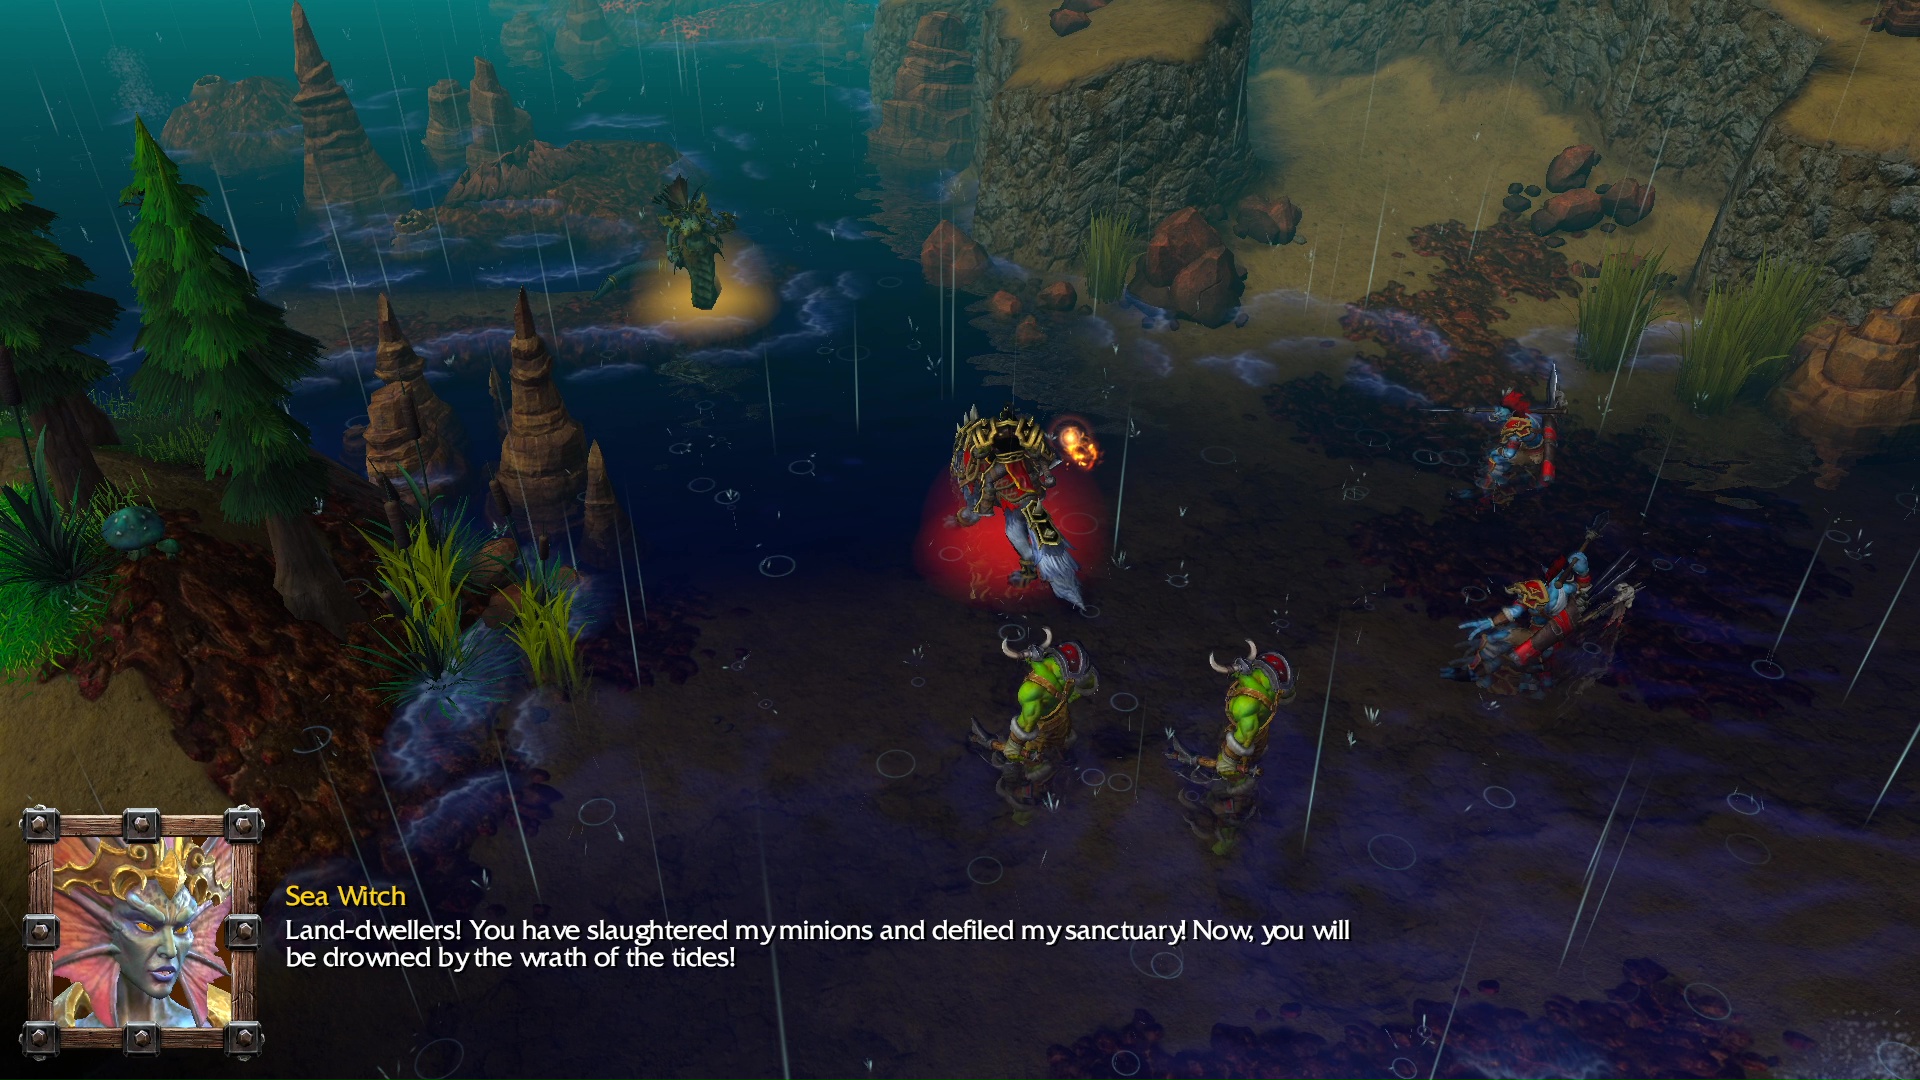
Sea Witch: Land-dwellers! You have slaughtered my minions and defiled my sanctuary! Now, you will be drowned by the wrath of the tides!
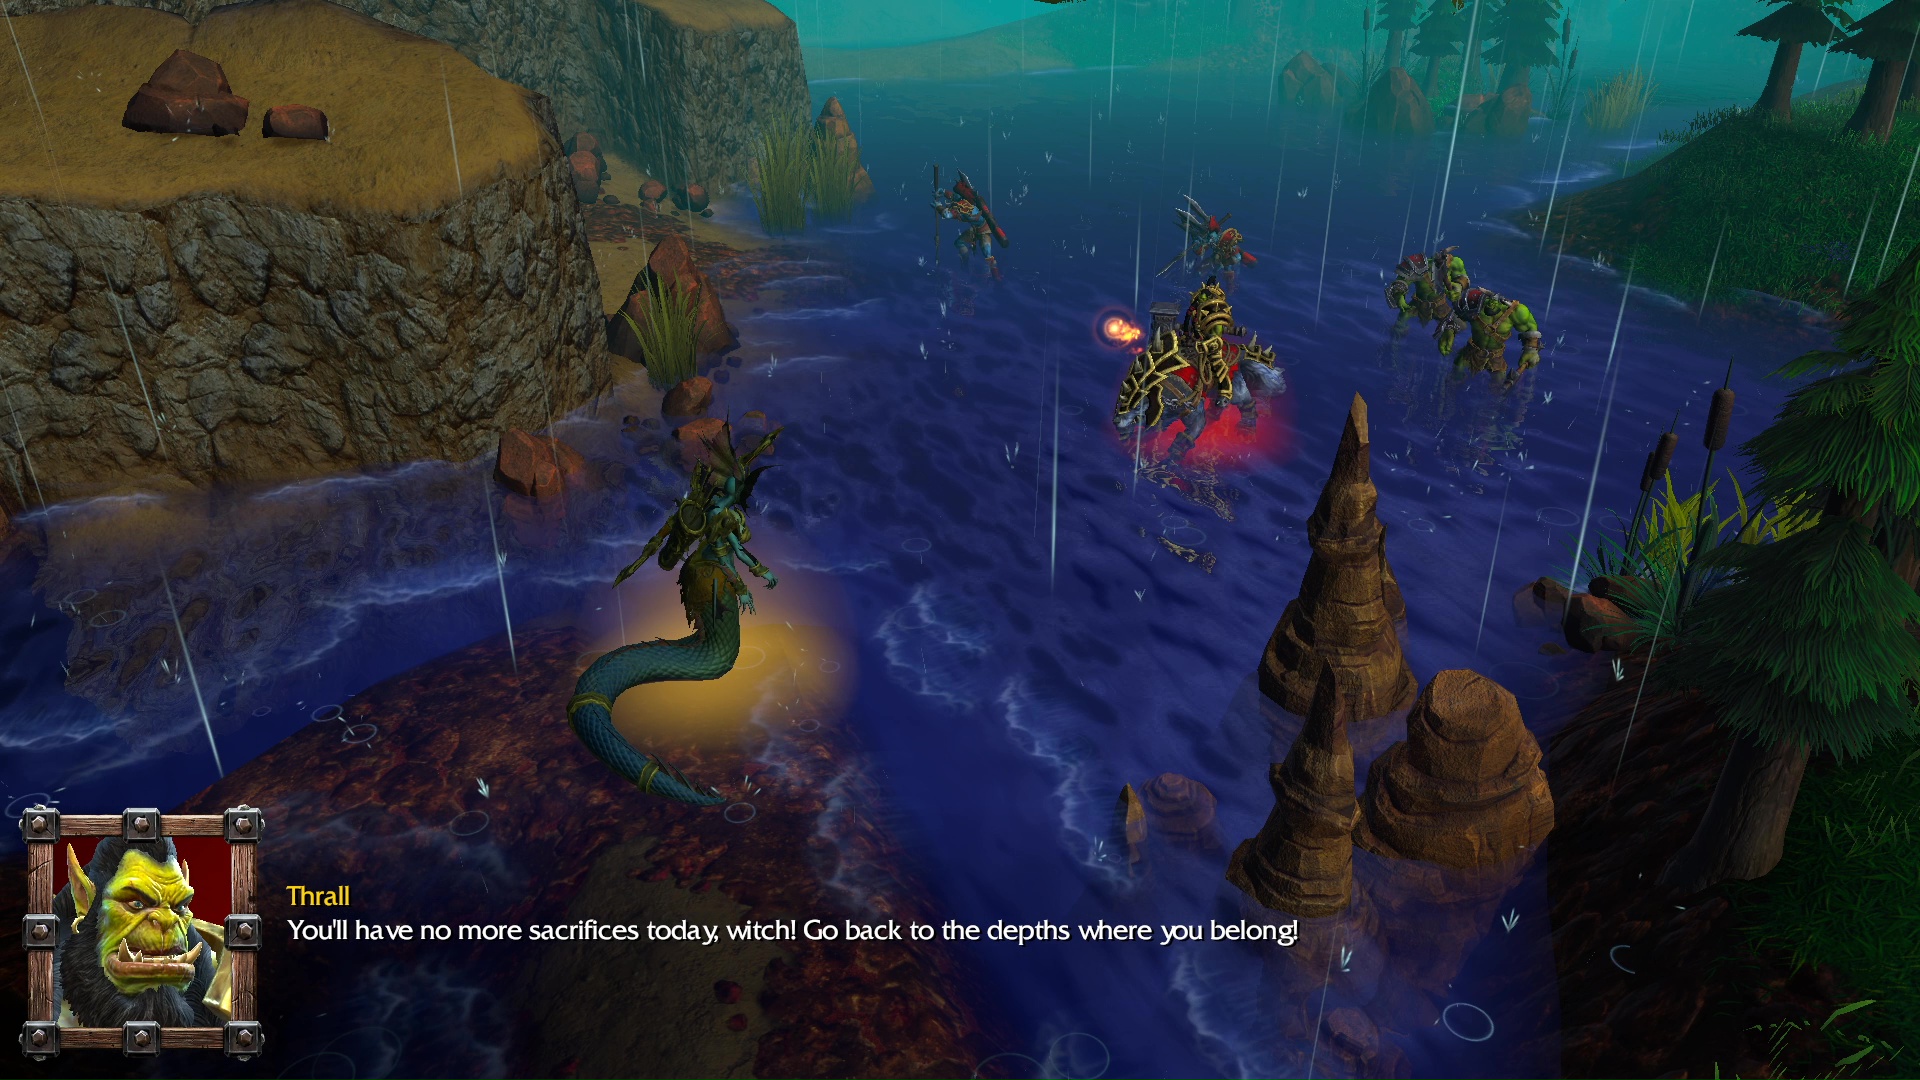
Thrall: You’ll have no more sacrifices today, witch! Go back to the depths where you belong!
Sea Witch: Very well, your choice is made! The air you breathe now will be your last!
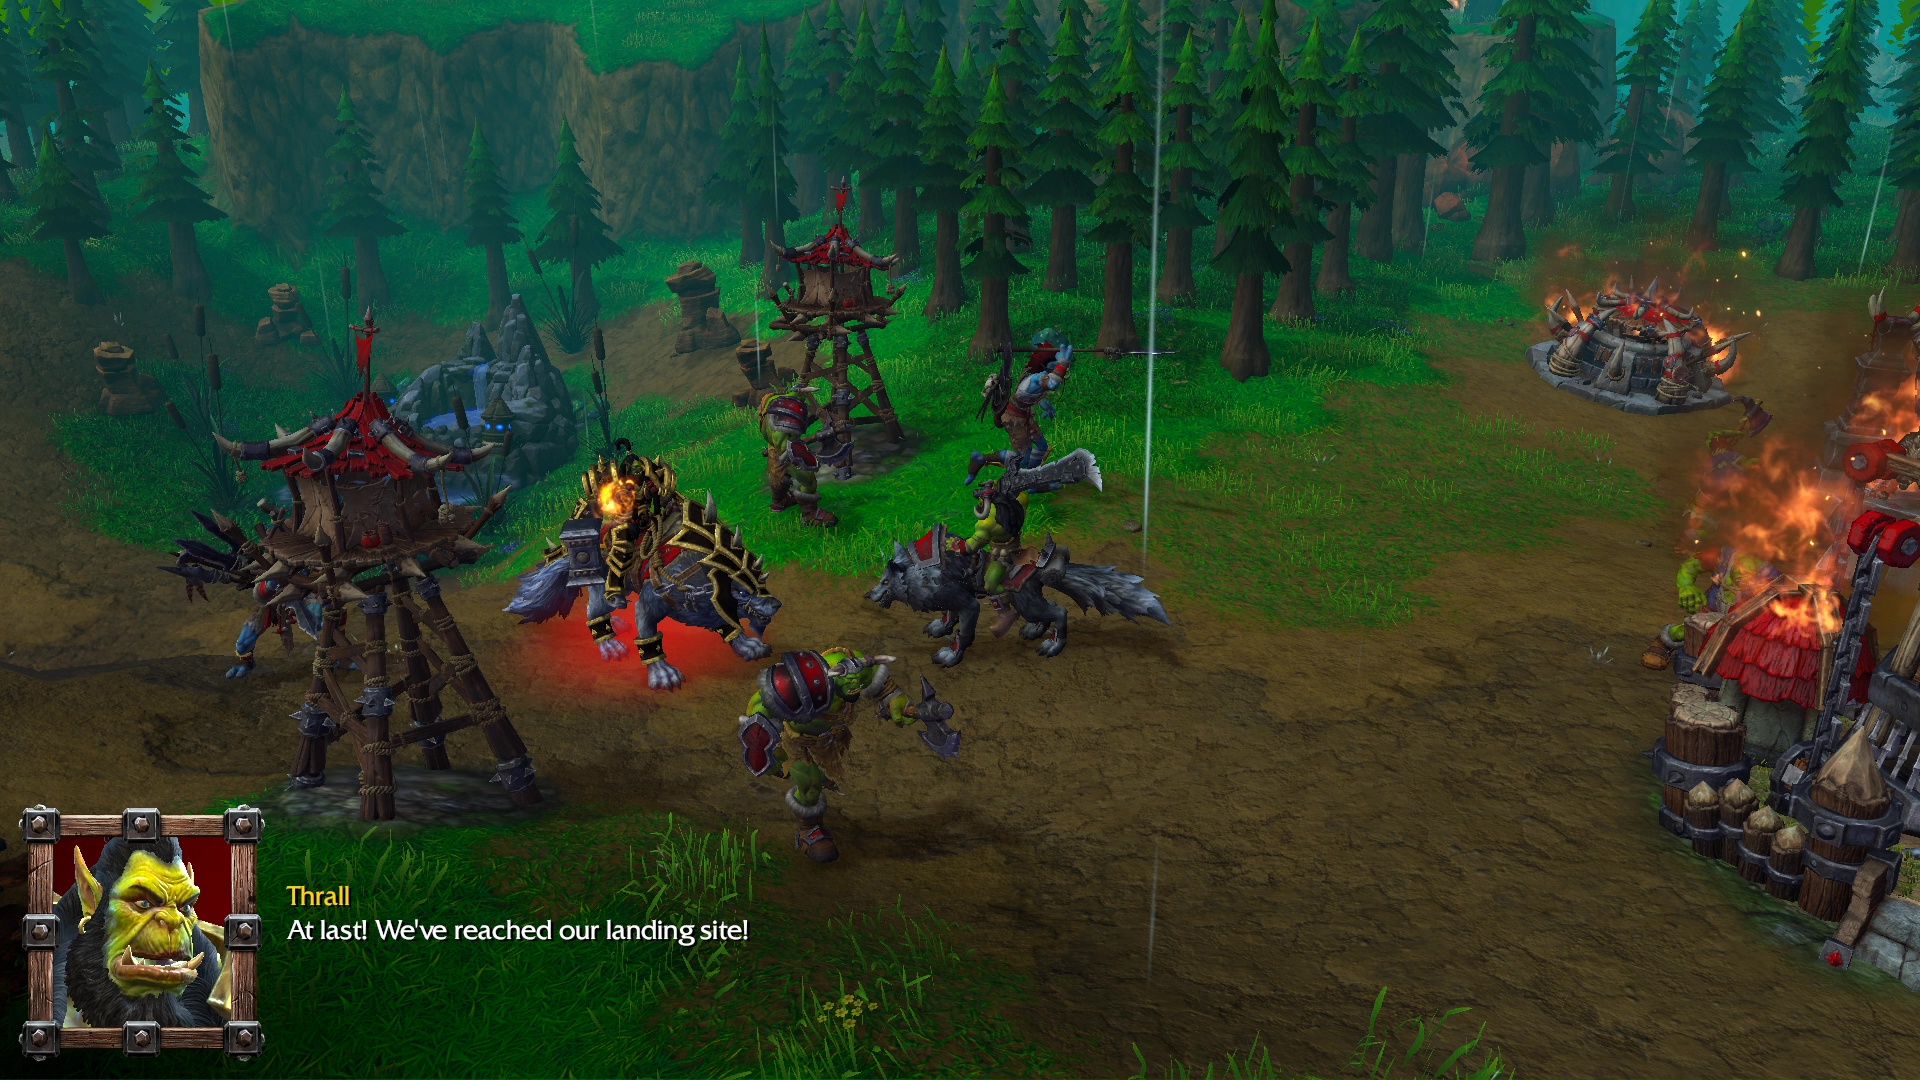
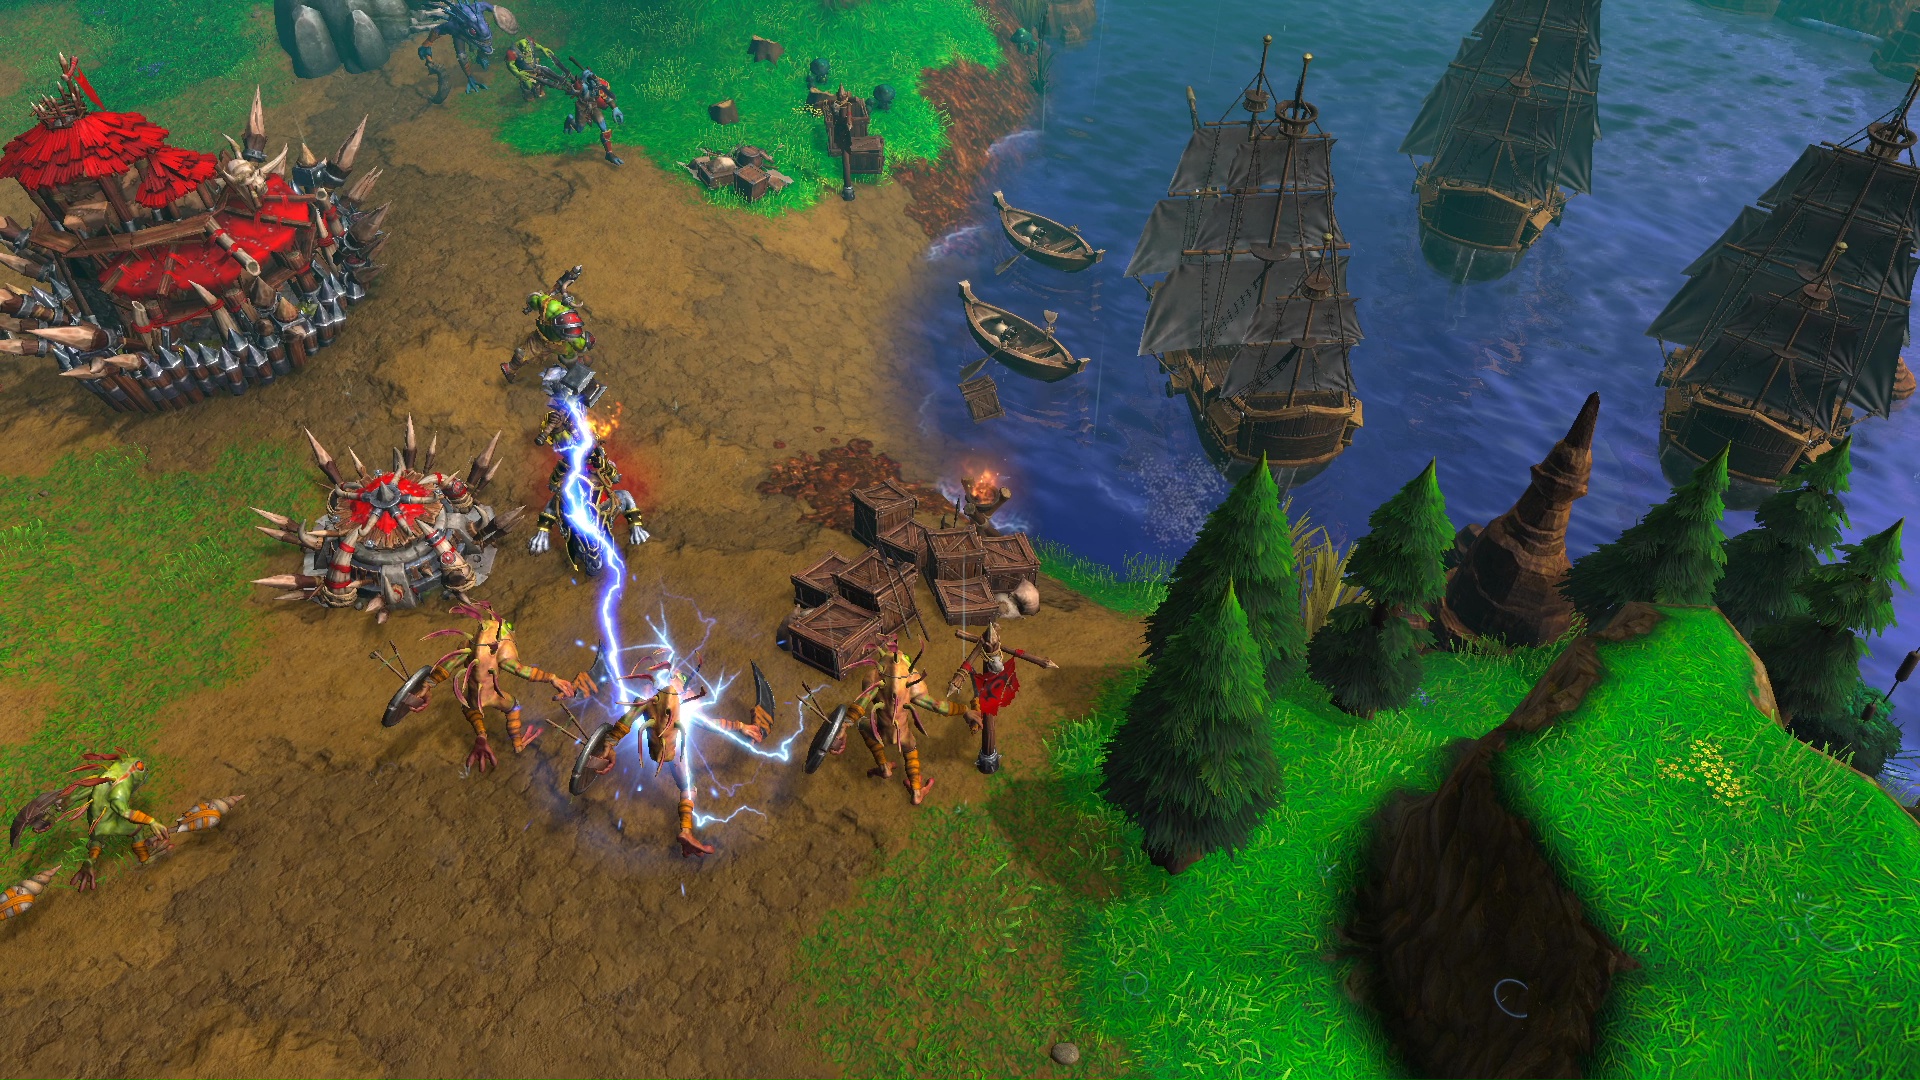
Thrall: At last! We’ve reached our landing site!
Raider: Warchief! While you were gone, the nearby volcano erupted! This entire island has begun to sink!
Thrall: How long to repair the ships?
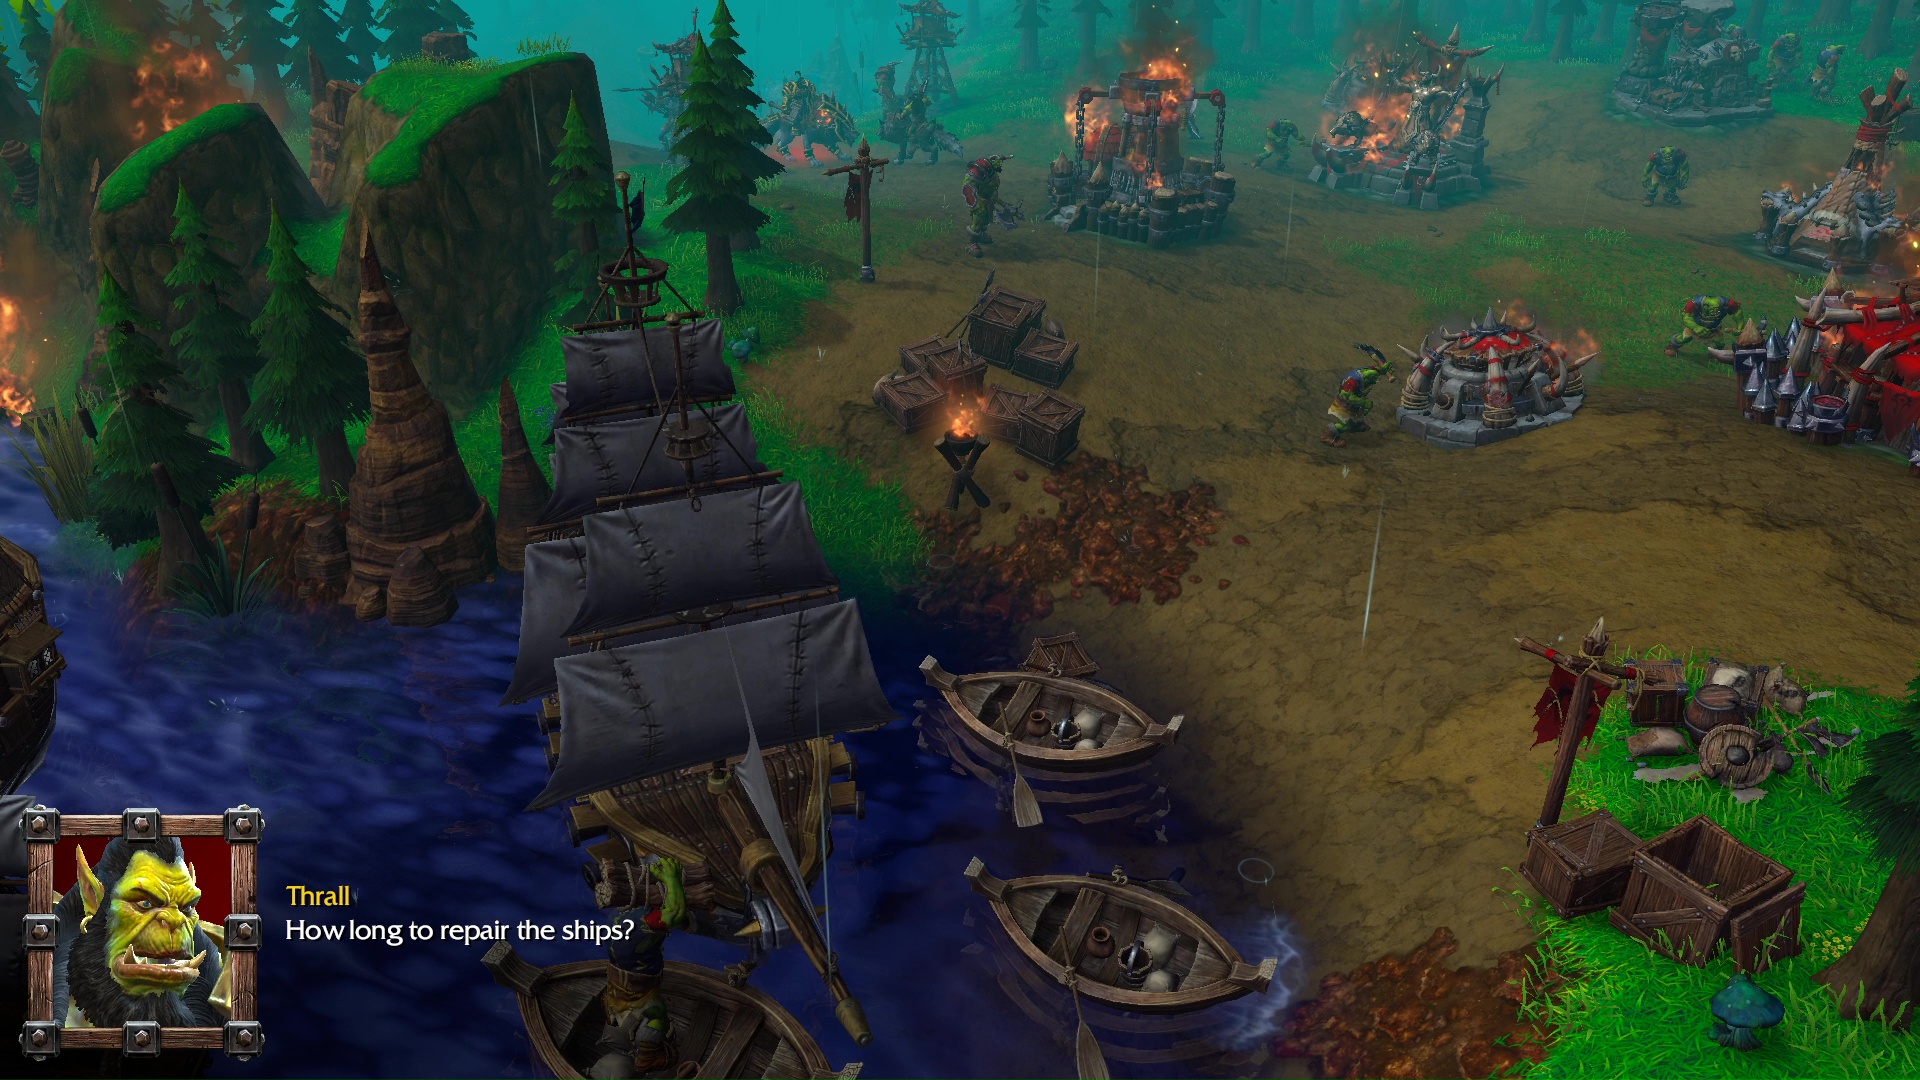
Raider: The repairs are nearly done, Warchief.
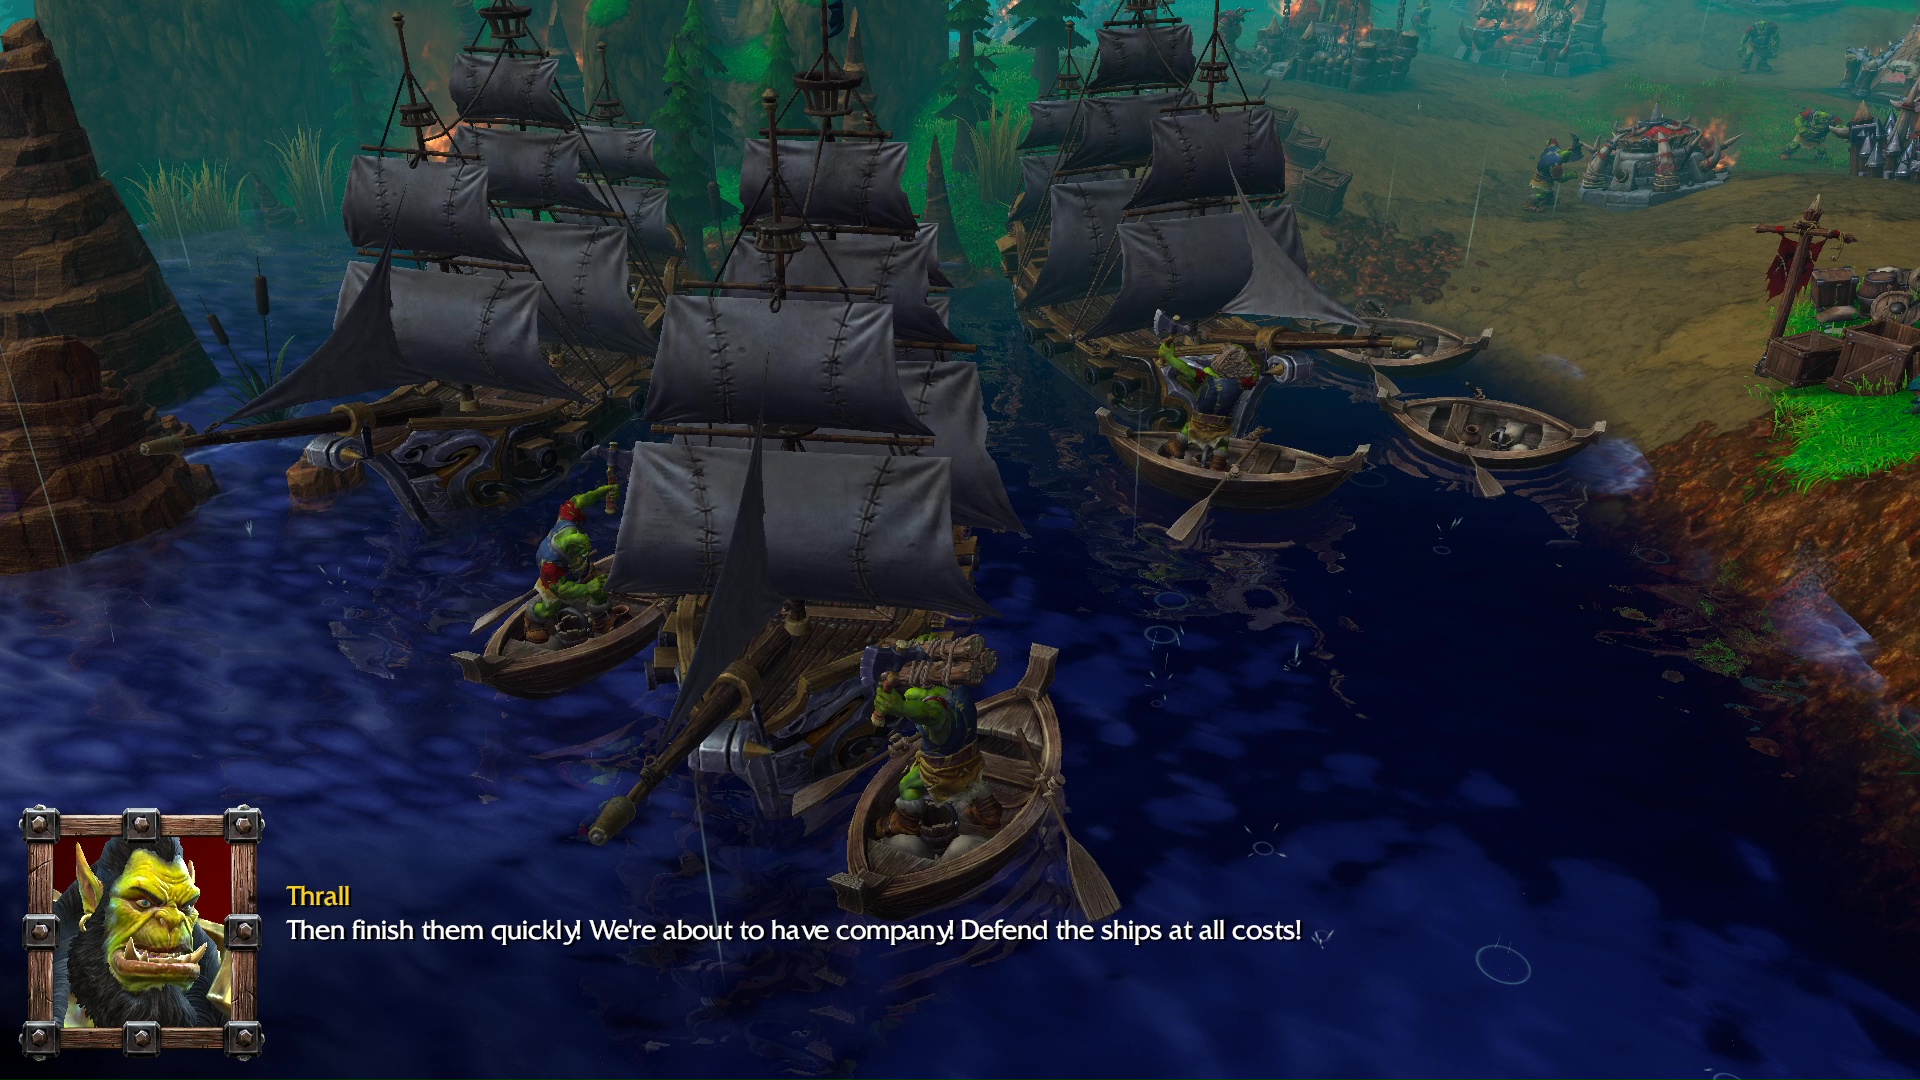
Thrall: Then finish them quickly! We’re about to have company! Defend the ships at all costs!
RESOURCES
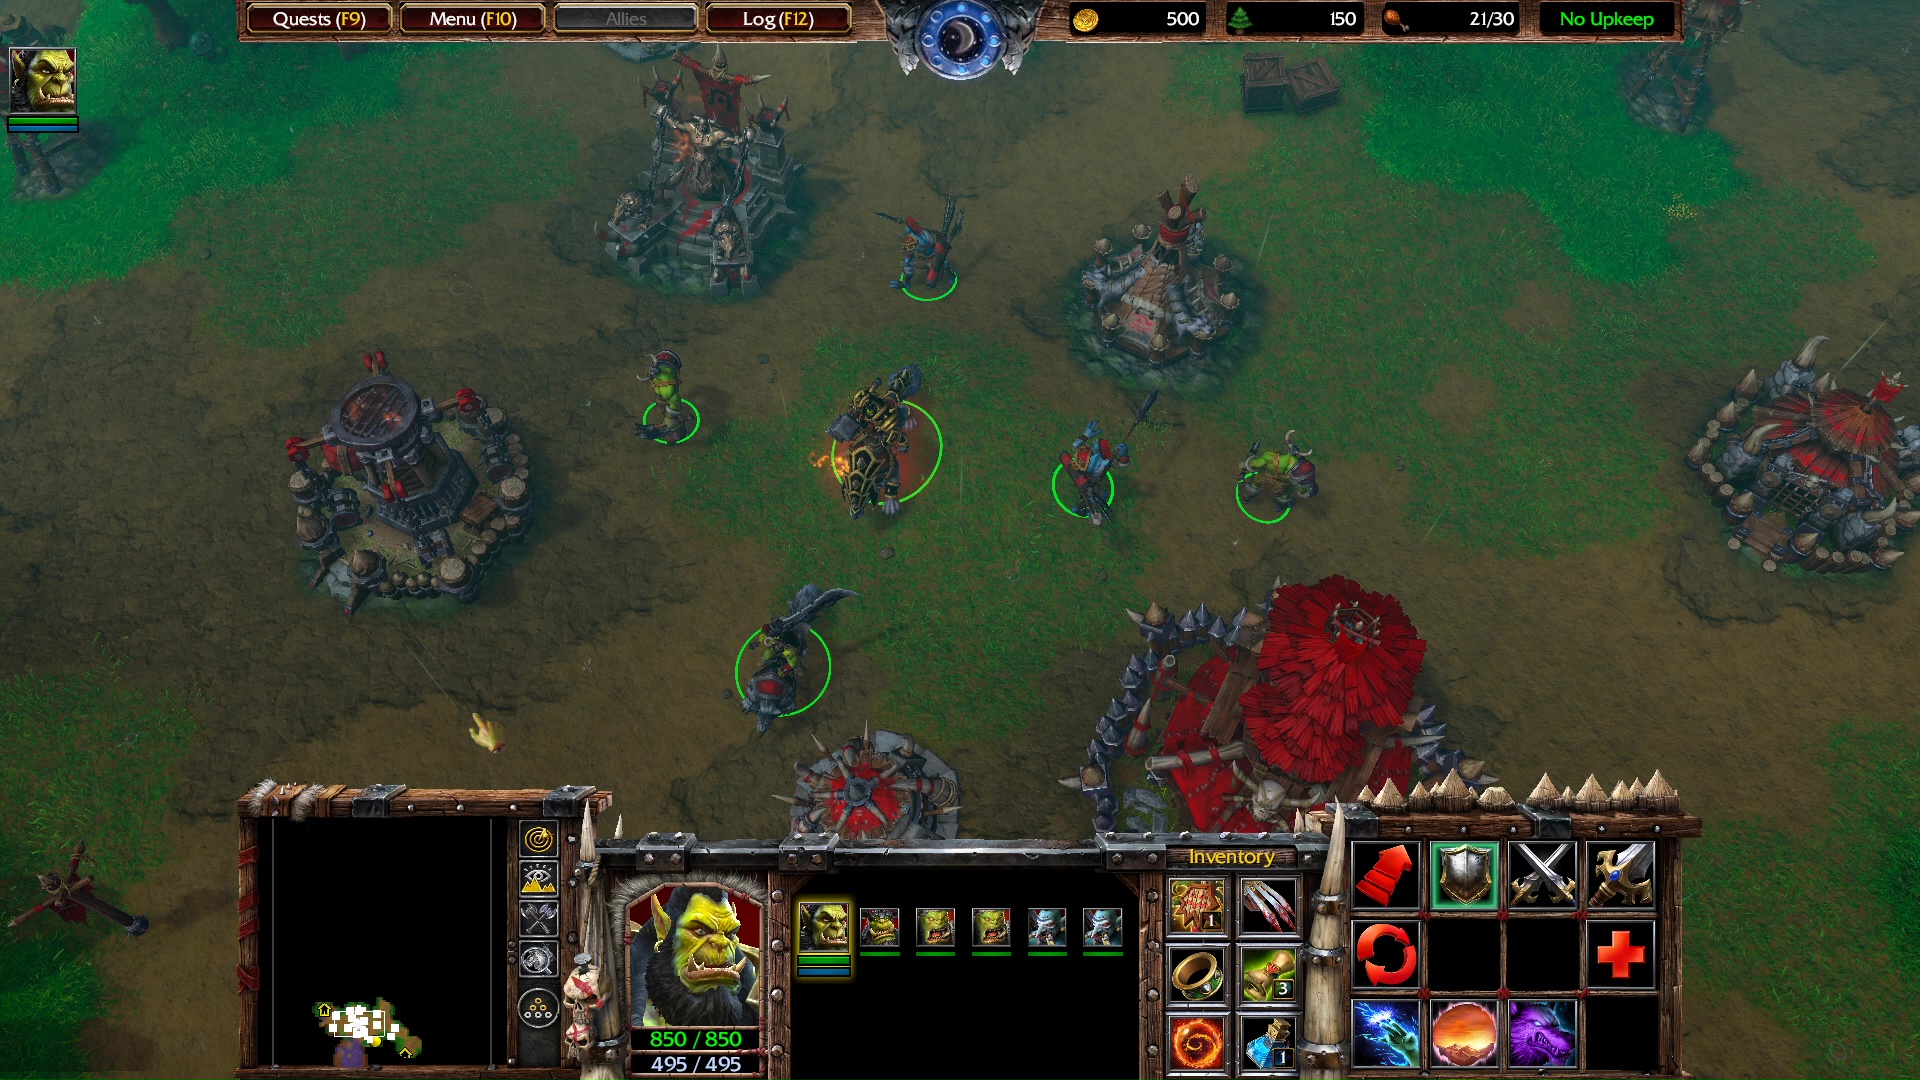
You start with 8 Peons. Five on minerals and 3 on wood. A Raider, two Grunts, two Headhunters and Thrall.
500 gold – 150 wood – 21/30 upkeep.
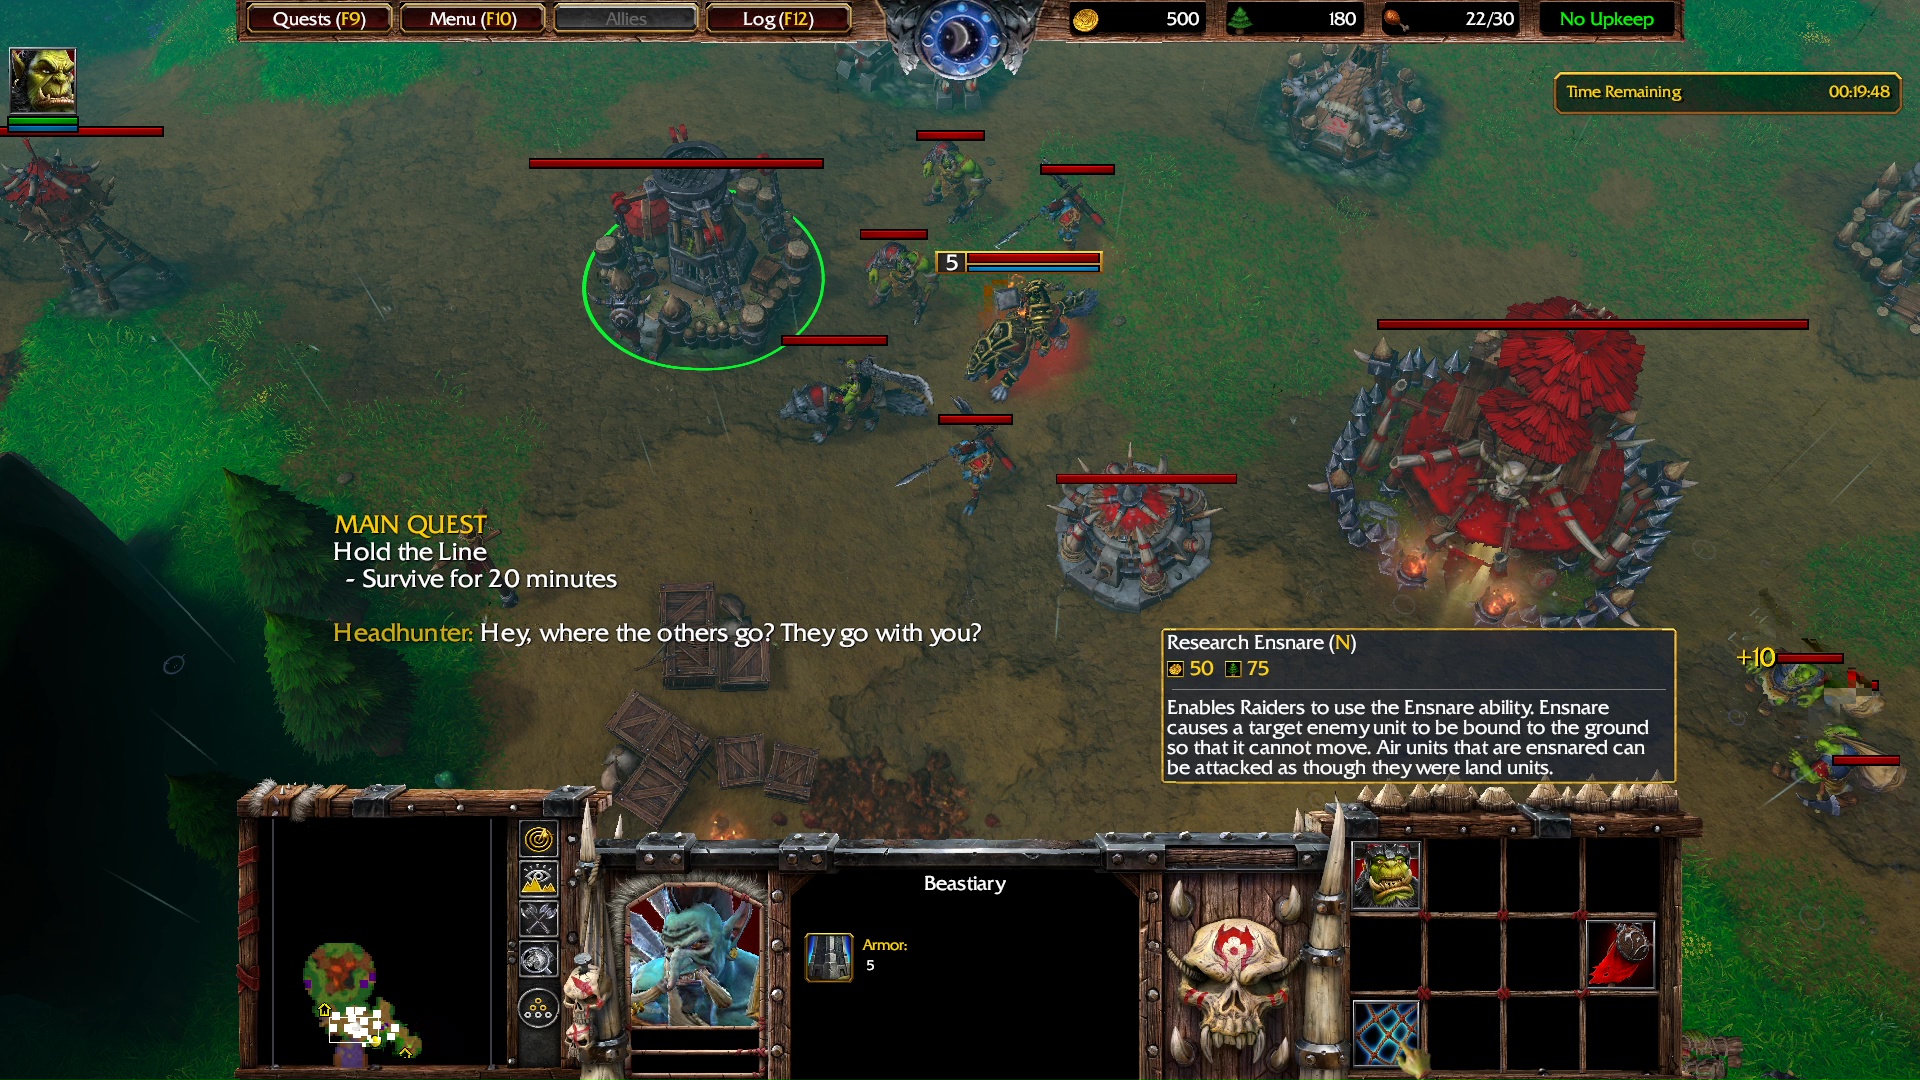
MAIN QUEST
Hold the Line
- Survive for 20 minutes
INTRO
Headhunter: Hey, where the others go? They go with you?
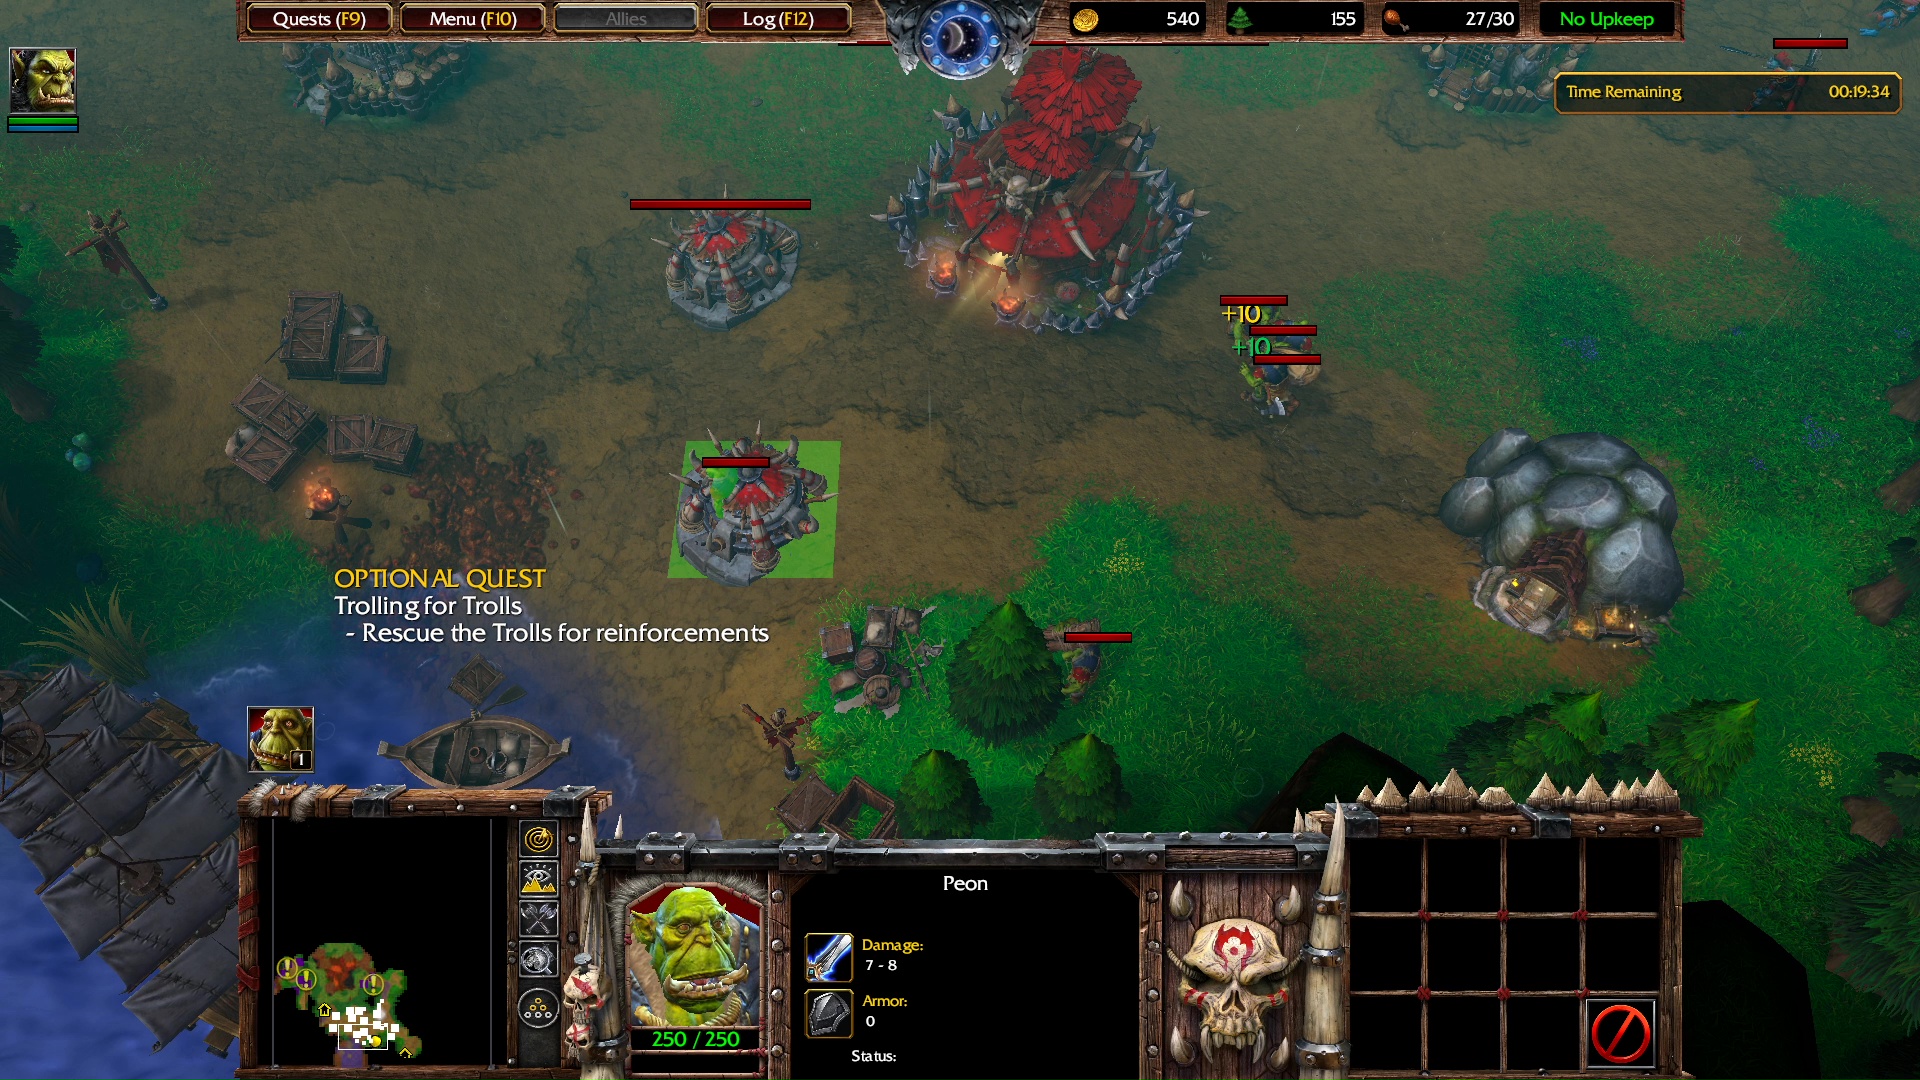
OPTIONAL QUEST
Trolling for Trolls
- Rescue the Trolls for reinforcements
SECRET TIP
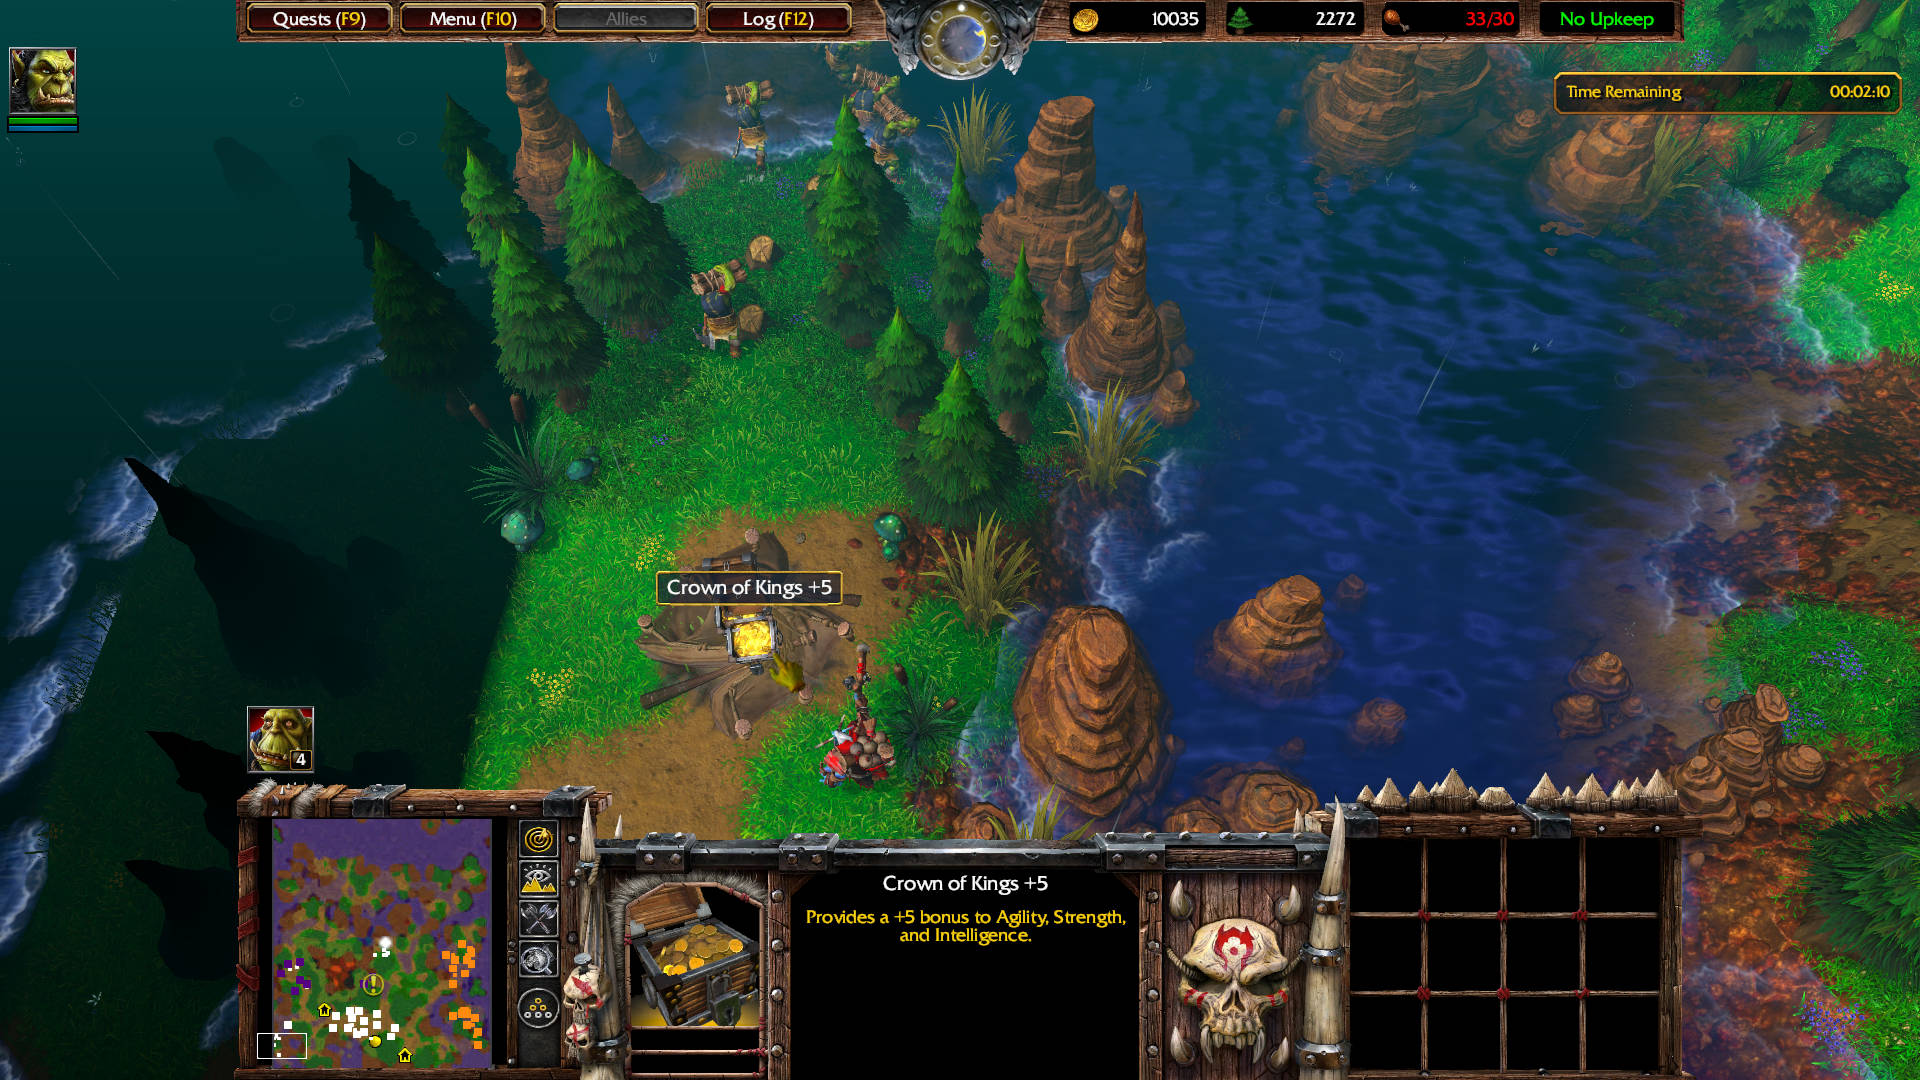
If you build a War Mill near this location…
then set a few Peons to harvest 3 specific trees from this location, you can open a path to a hidden Kul Tiras tent. Bring Thrall to loot two chests.
- Crown of Kings +5: Increases the Strength, Intelligence, and Agility of the Hero by 5 when worn.
- Scroll of Restoration: Restores 300 hit points and 150 mana of friendly non-mechanical units in an area around your Hero.
STRATEGY
Select the Stronghold. Build 2 Peons (P).
Select two of the peons from the Mine and send them to chop wood instead.
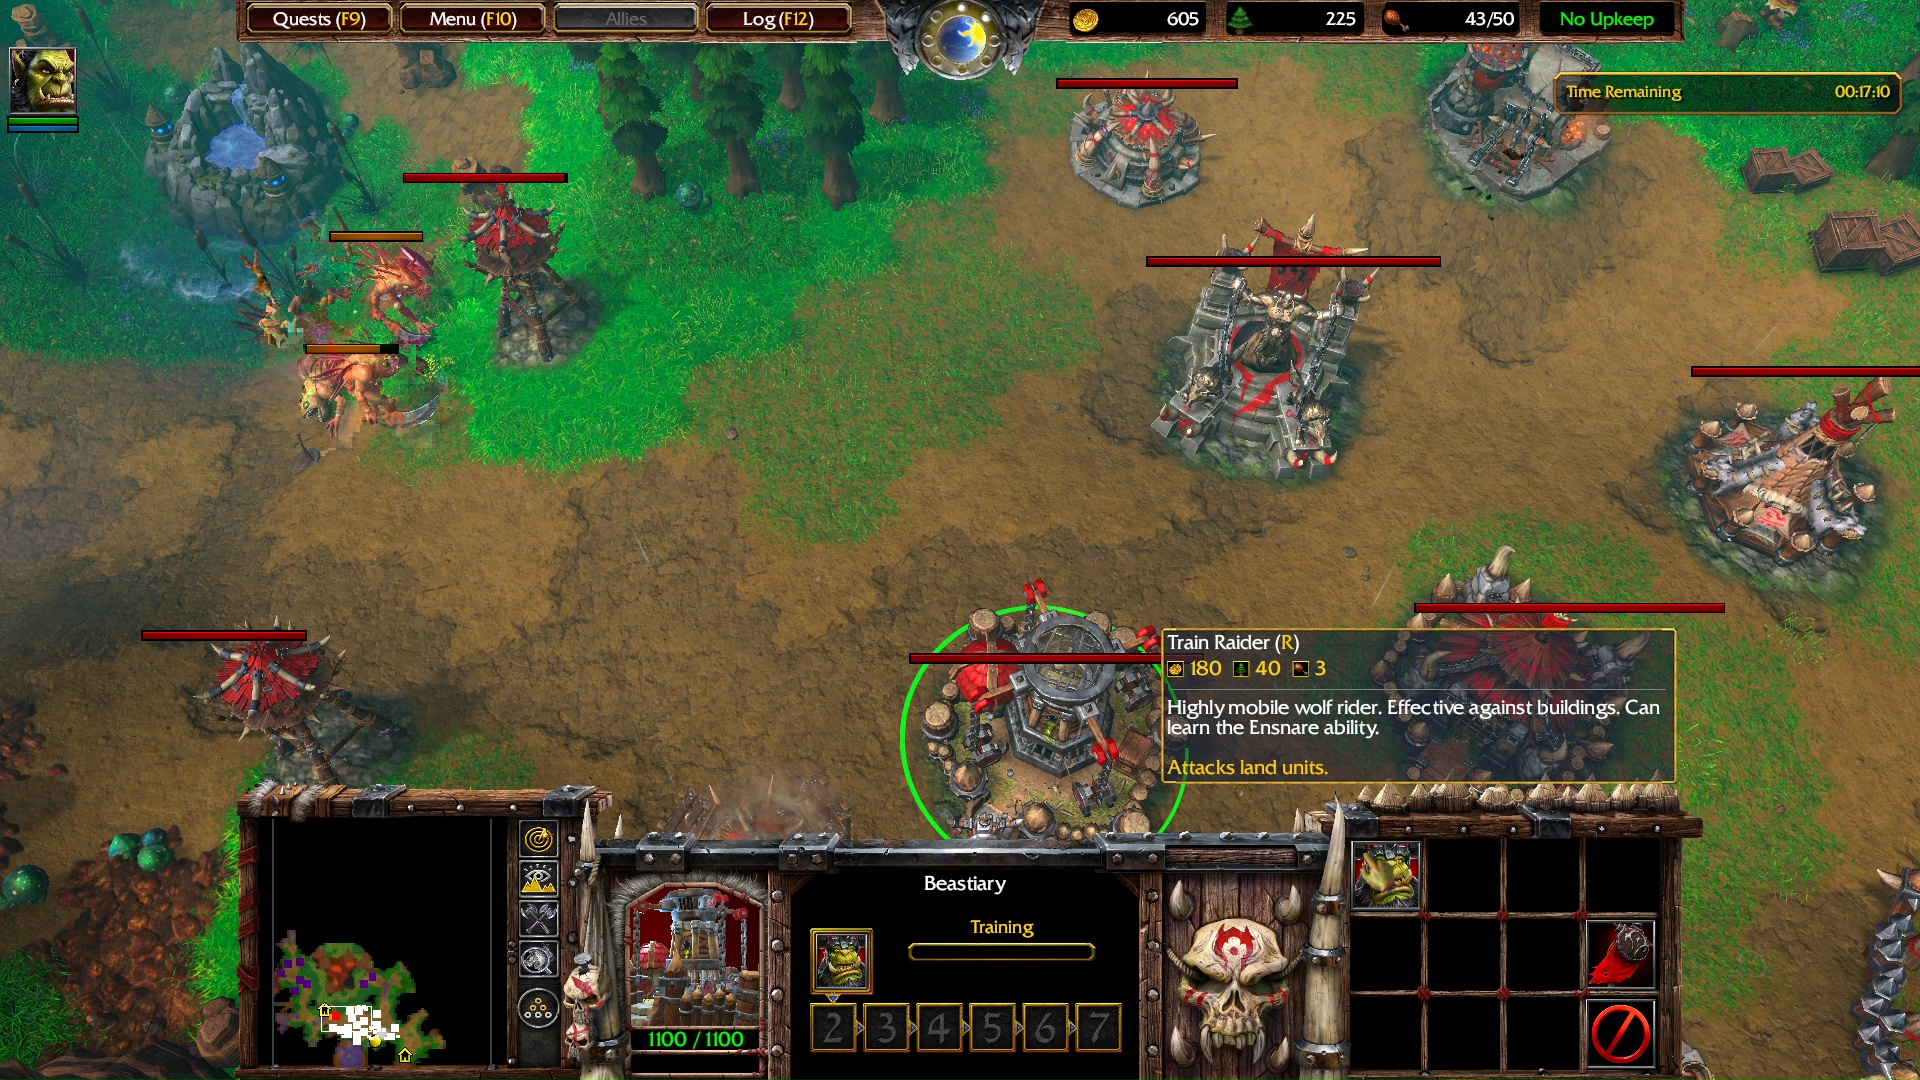
Select the Bestiary. Research Ensnare (N) — Enables Raiders to use the Ensnare ability.
Build a Burrow (O).
Build a Peon (P).
There is a crate on the right side of the War Mill. Command Thrall to destroy the crate to find a Bundle of Lumber within, which grants Thrall +248 wood.
To complete the Optional Quest, all you have to do is to move Thrall to each of the three yellow exclamation marks shown on the mini map. Those are troll buildings. When you get near those, Headhunter trolls spawn and join your team. The right-most yellow exclamation mark spawns a Headhunter and a Witch Doctor (with the Sentry Ward (W) ability enabled).
Headhunter: We don’t have much time!
NEW UNITS AVAILABLE — Witch Doctor – You may now build Witch Doctors from the Spirit Lodge.
Build a second Barracks (B).
TIP – The left-most yellow house icon in the mini-map is a Fountain of Health, which heals your damaged units.
TIP – there is a yellow house icon in the mini map southeast of your base. It is a Goblin Merchant building with Scroll of Protection, Scroll of Mana, Potion of Healing, Potion of Mana, and Wand of Negation.
Build a Burrow (O).
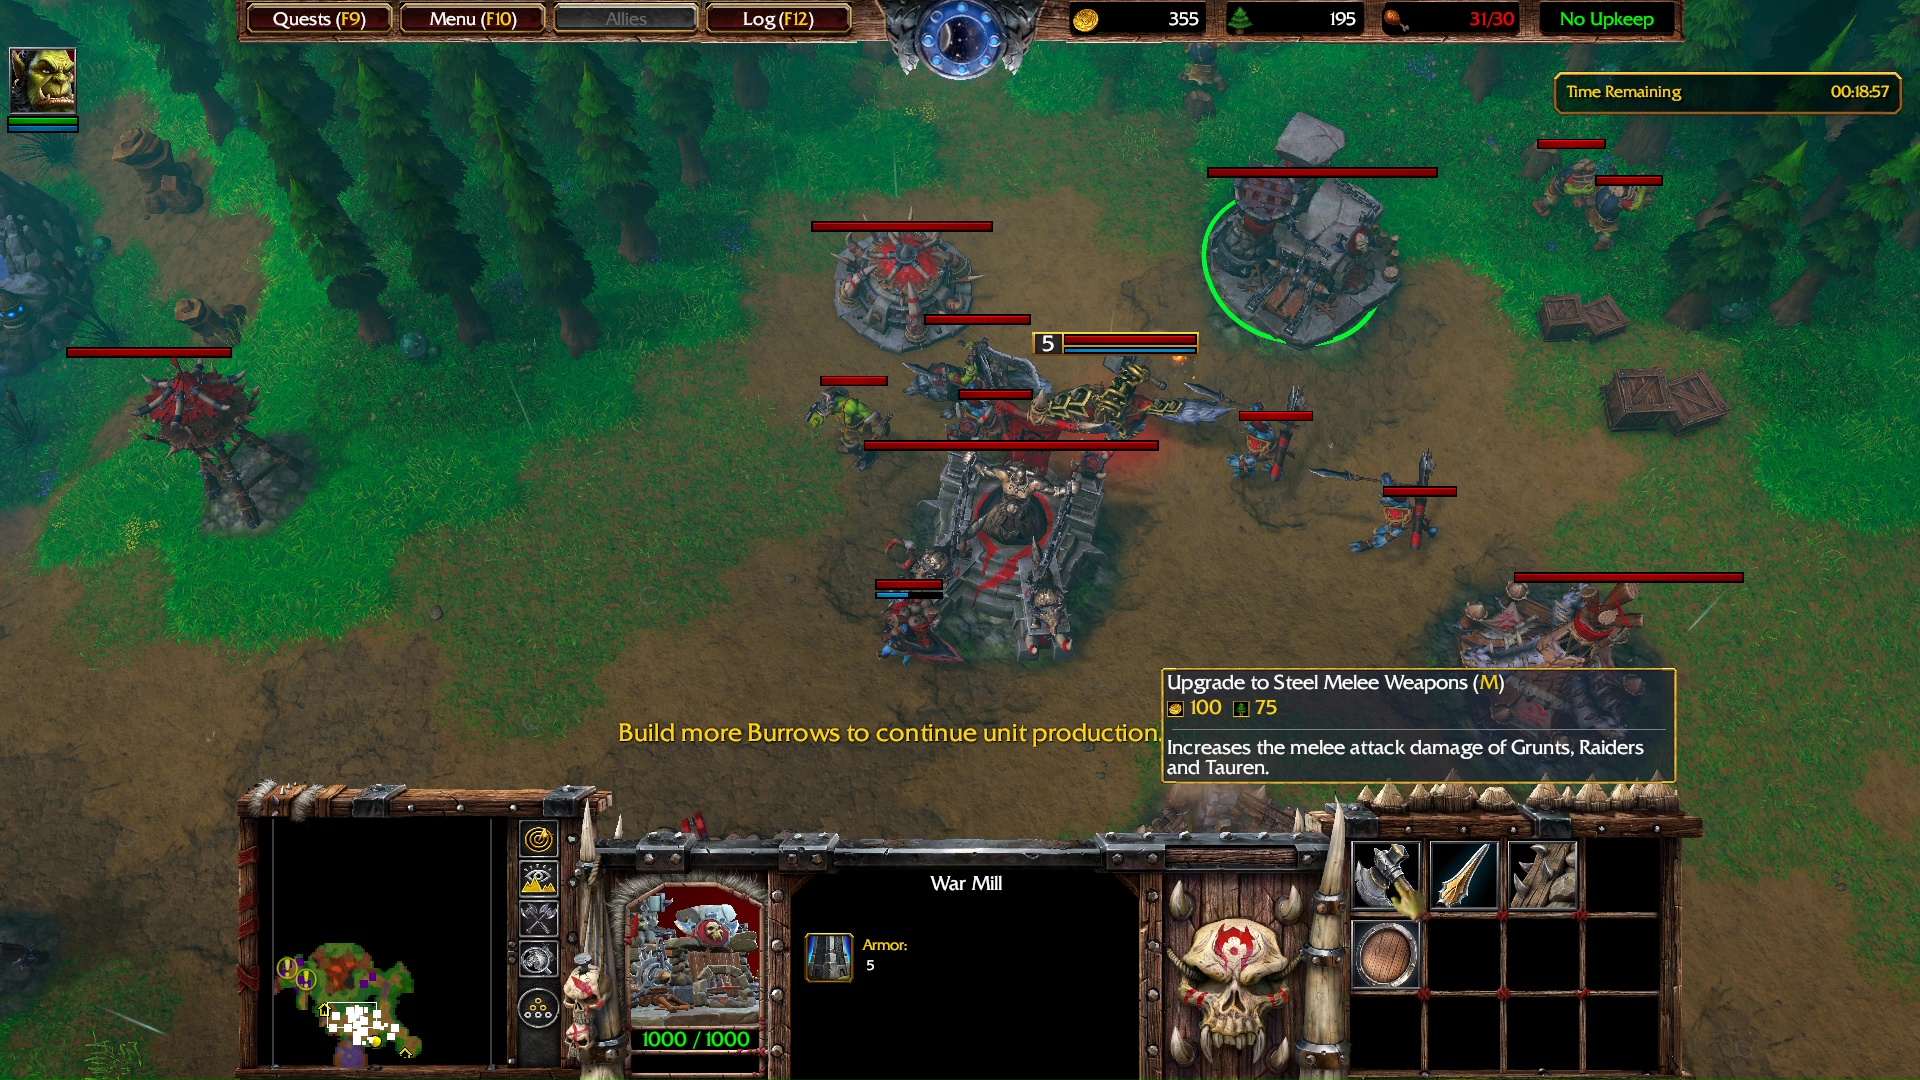
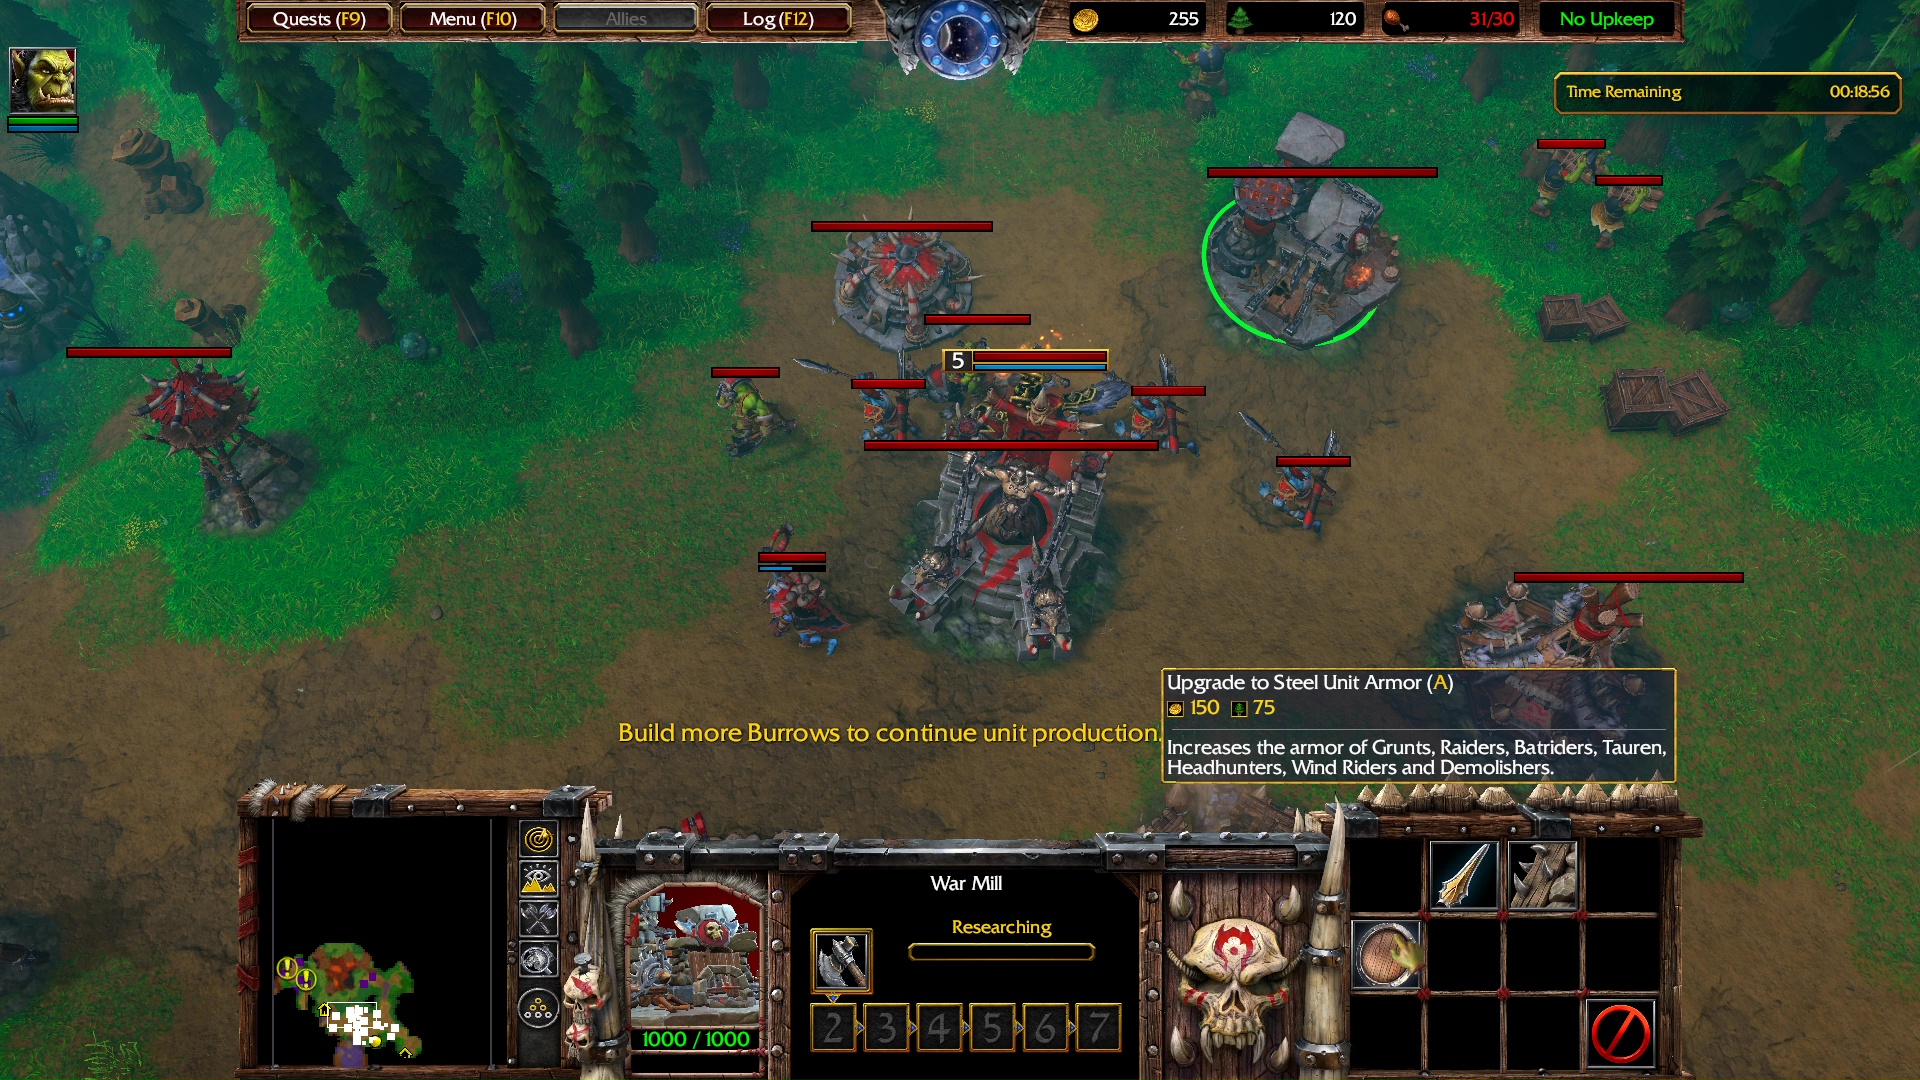
Select the War Mill. Research Steel Melee Weapons (W).
Select the War Mill. Research Steel Unit Armor (A).
Move any unit to the first yellow exclamation mark northwest. A new Headhunter and a Witch Doctor spawn to join your team.
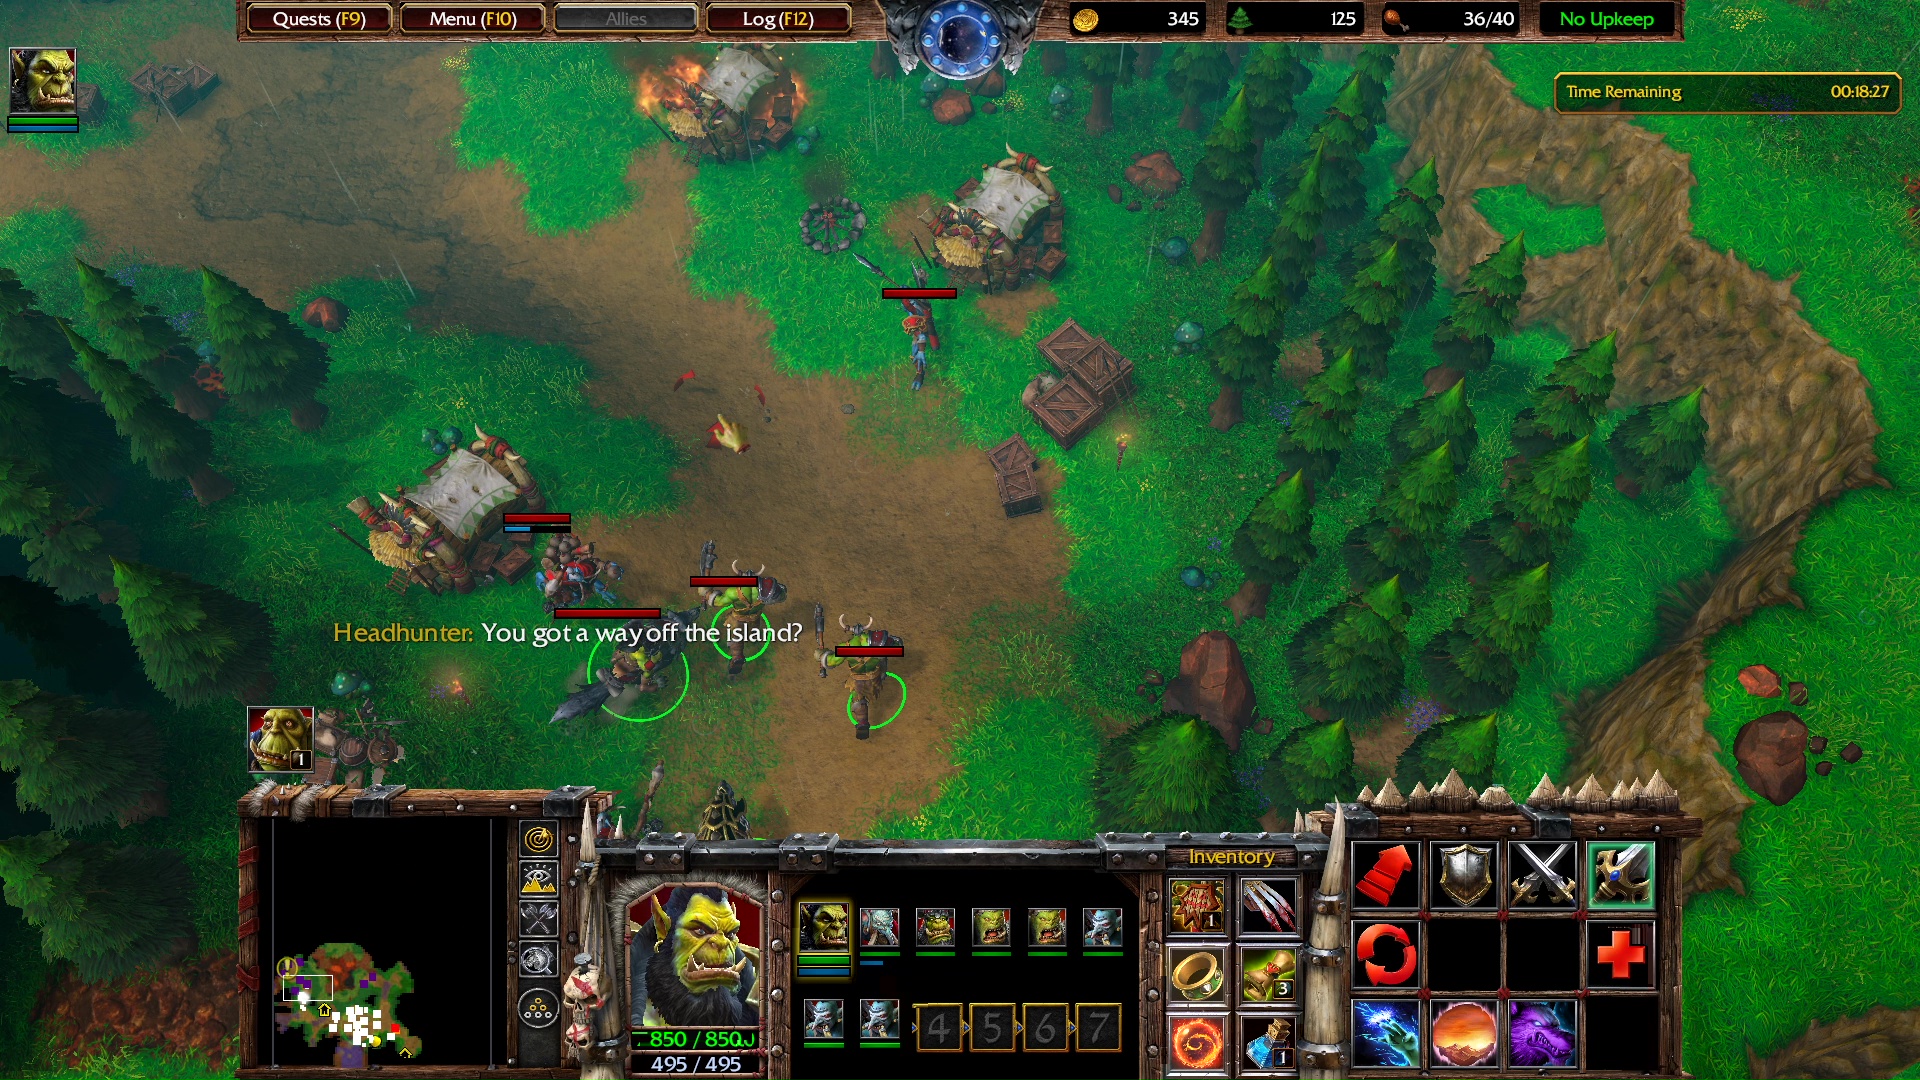
Headhunter: You got a way off the island?
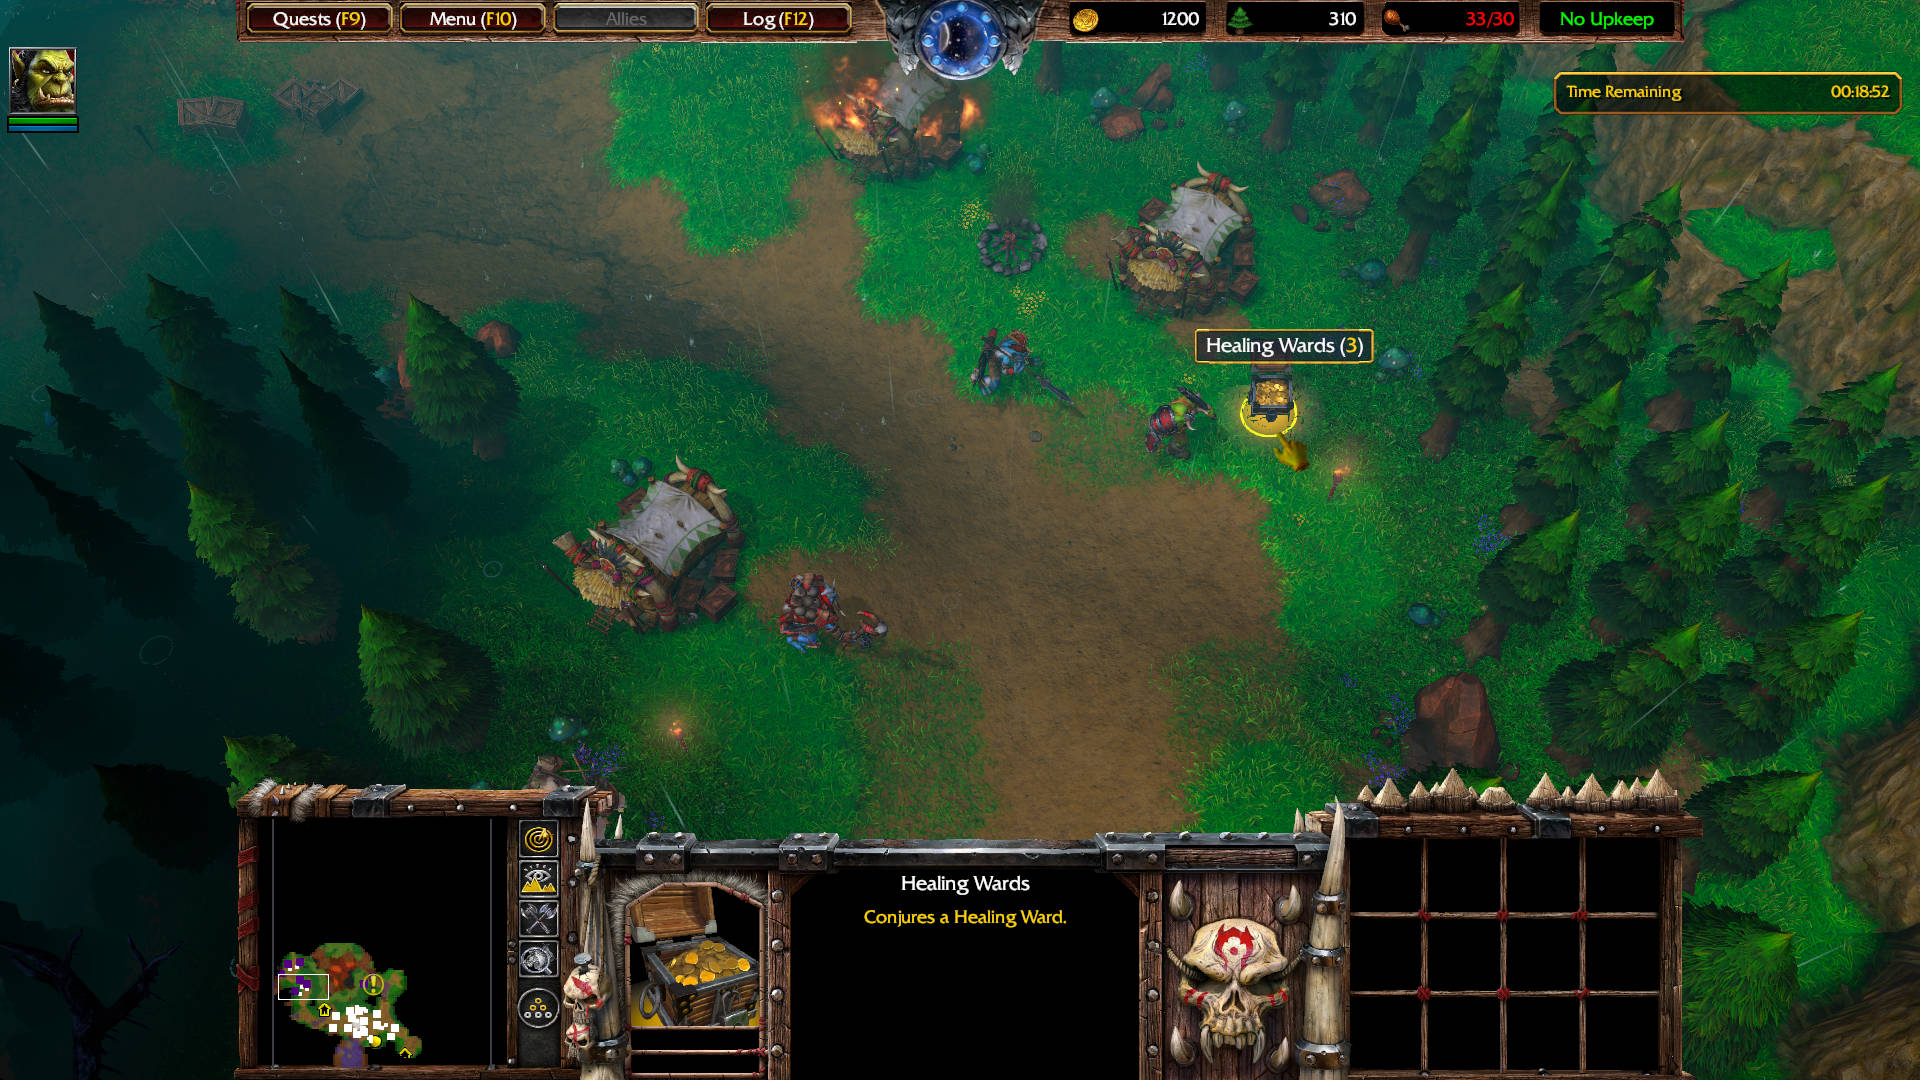
Destroy the crates there. It spawns a Healing Wards x3 which Thrall can add to his inventory for later.
Healing Wards: Summons an immovable ward that heals 2% of nearby friendly non-mechanical unit’s hit points per sec. Contains 3 charges. Lasts 30 sec.
Move Thrall to the last yellow exclamation mark in the mini map to complete the Optional Quest. Two new Headhunters spawn to join your team.
Headhunter: This island be sinkin’ quick! We come with you, mon!
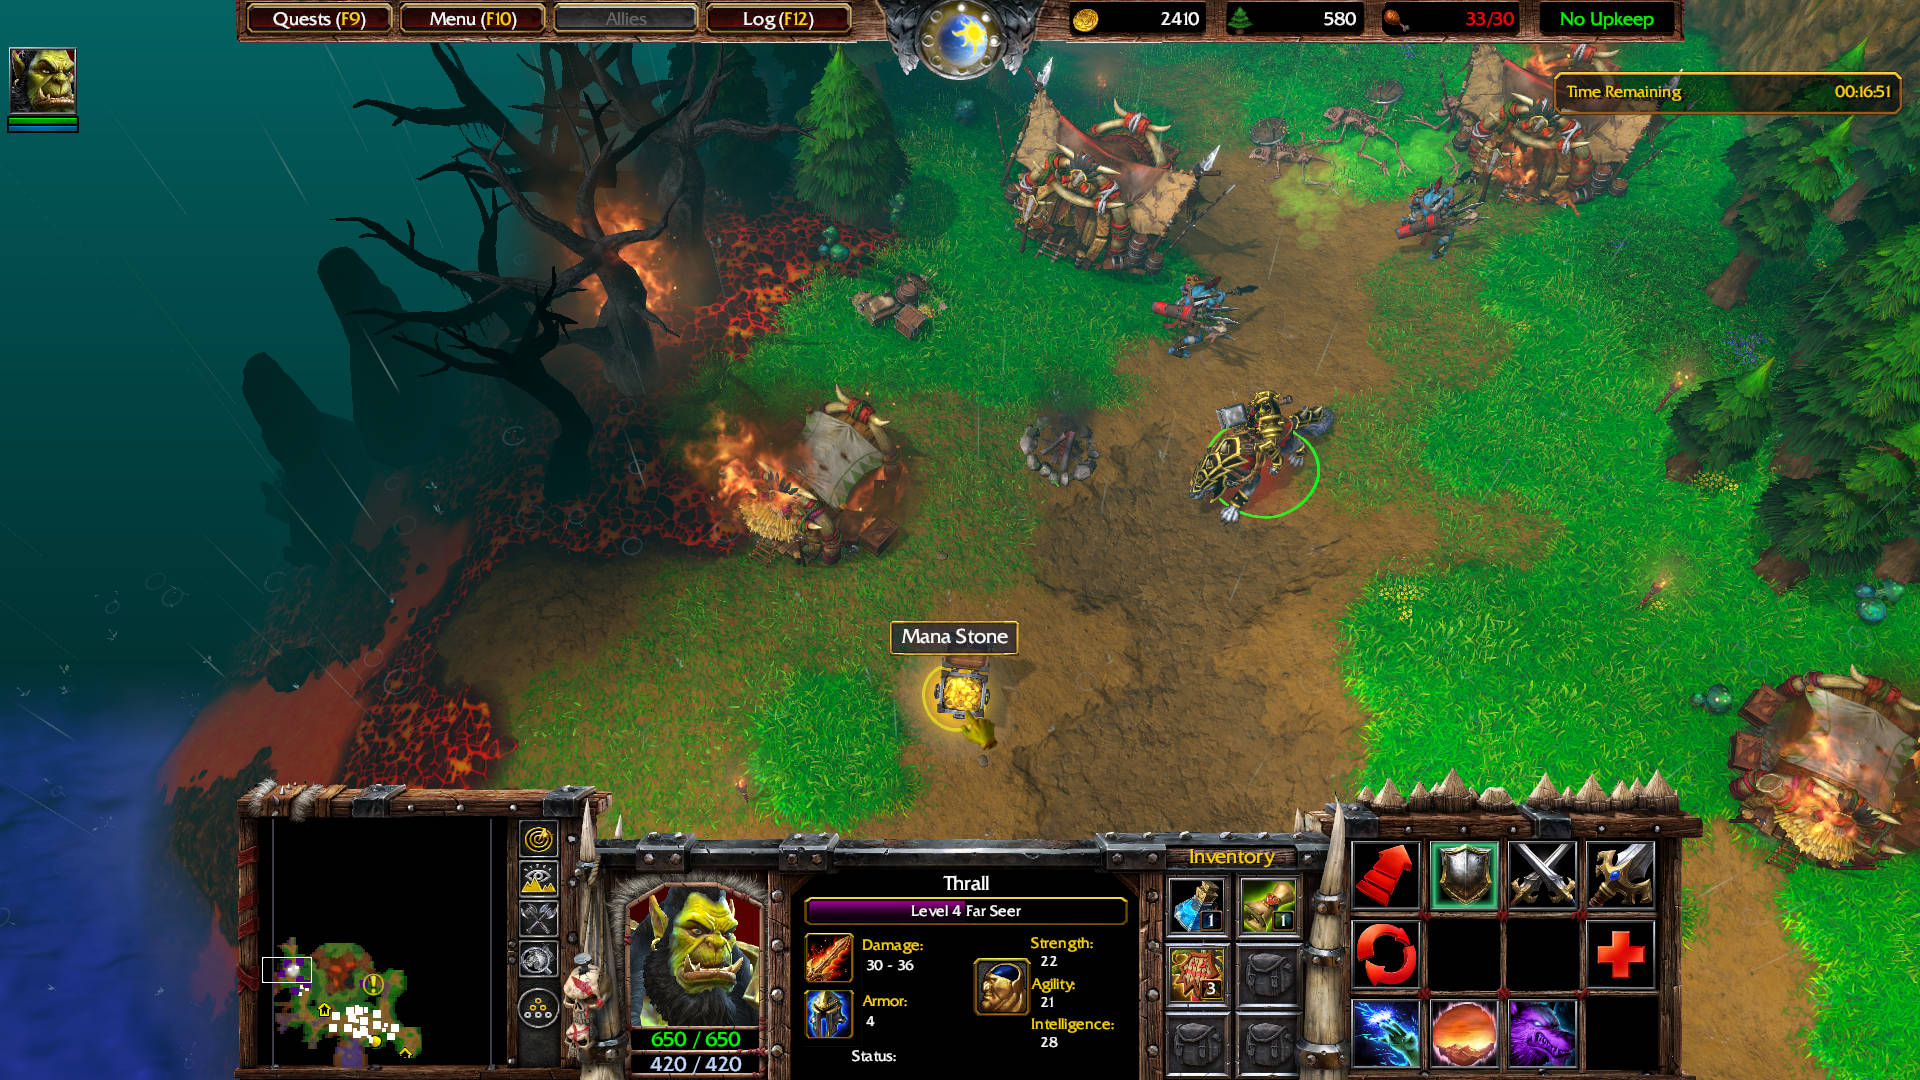
Destroy the crates here to spawn a Mana Stone that Thrall can add to his inventory for later.
Mana Stone: Increases the mana regeneration rate of the Hero by 25% when worn. Can be consumed for 300 mana.
Build a Burrow (O).
OPTIONAL QUEST COMPLETED
Trolling for Trolls.
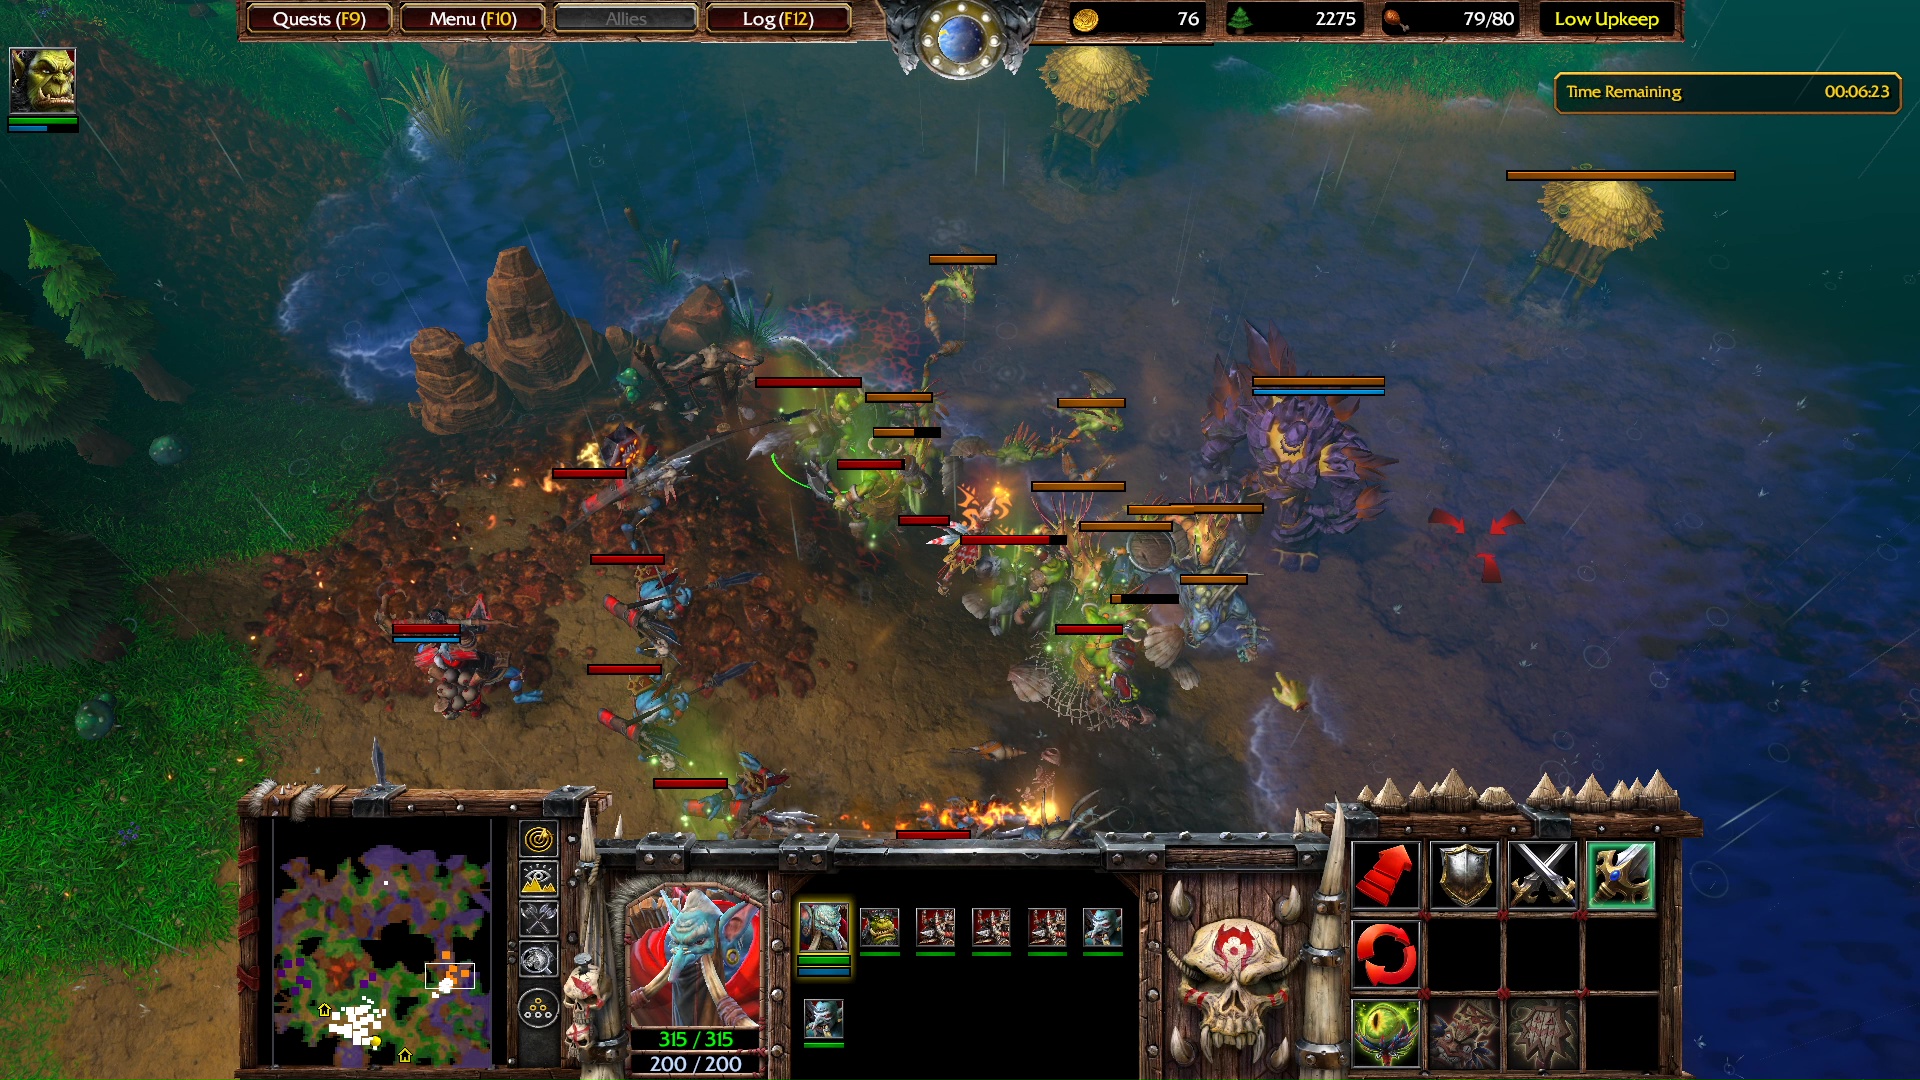
17:35 — Three murloc tiderunners attack the eastern Watch Tower.
Move Thrall to this location — south of your Bestiary. Destroy the crates. One of them has a Potion of Mana: Restores 150 mana when used.
17:14 — 3 murlocs attack your western Watch Towers.
Select the Bestiary. Build a Raider.
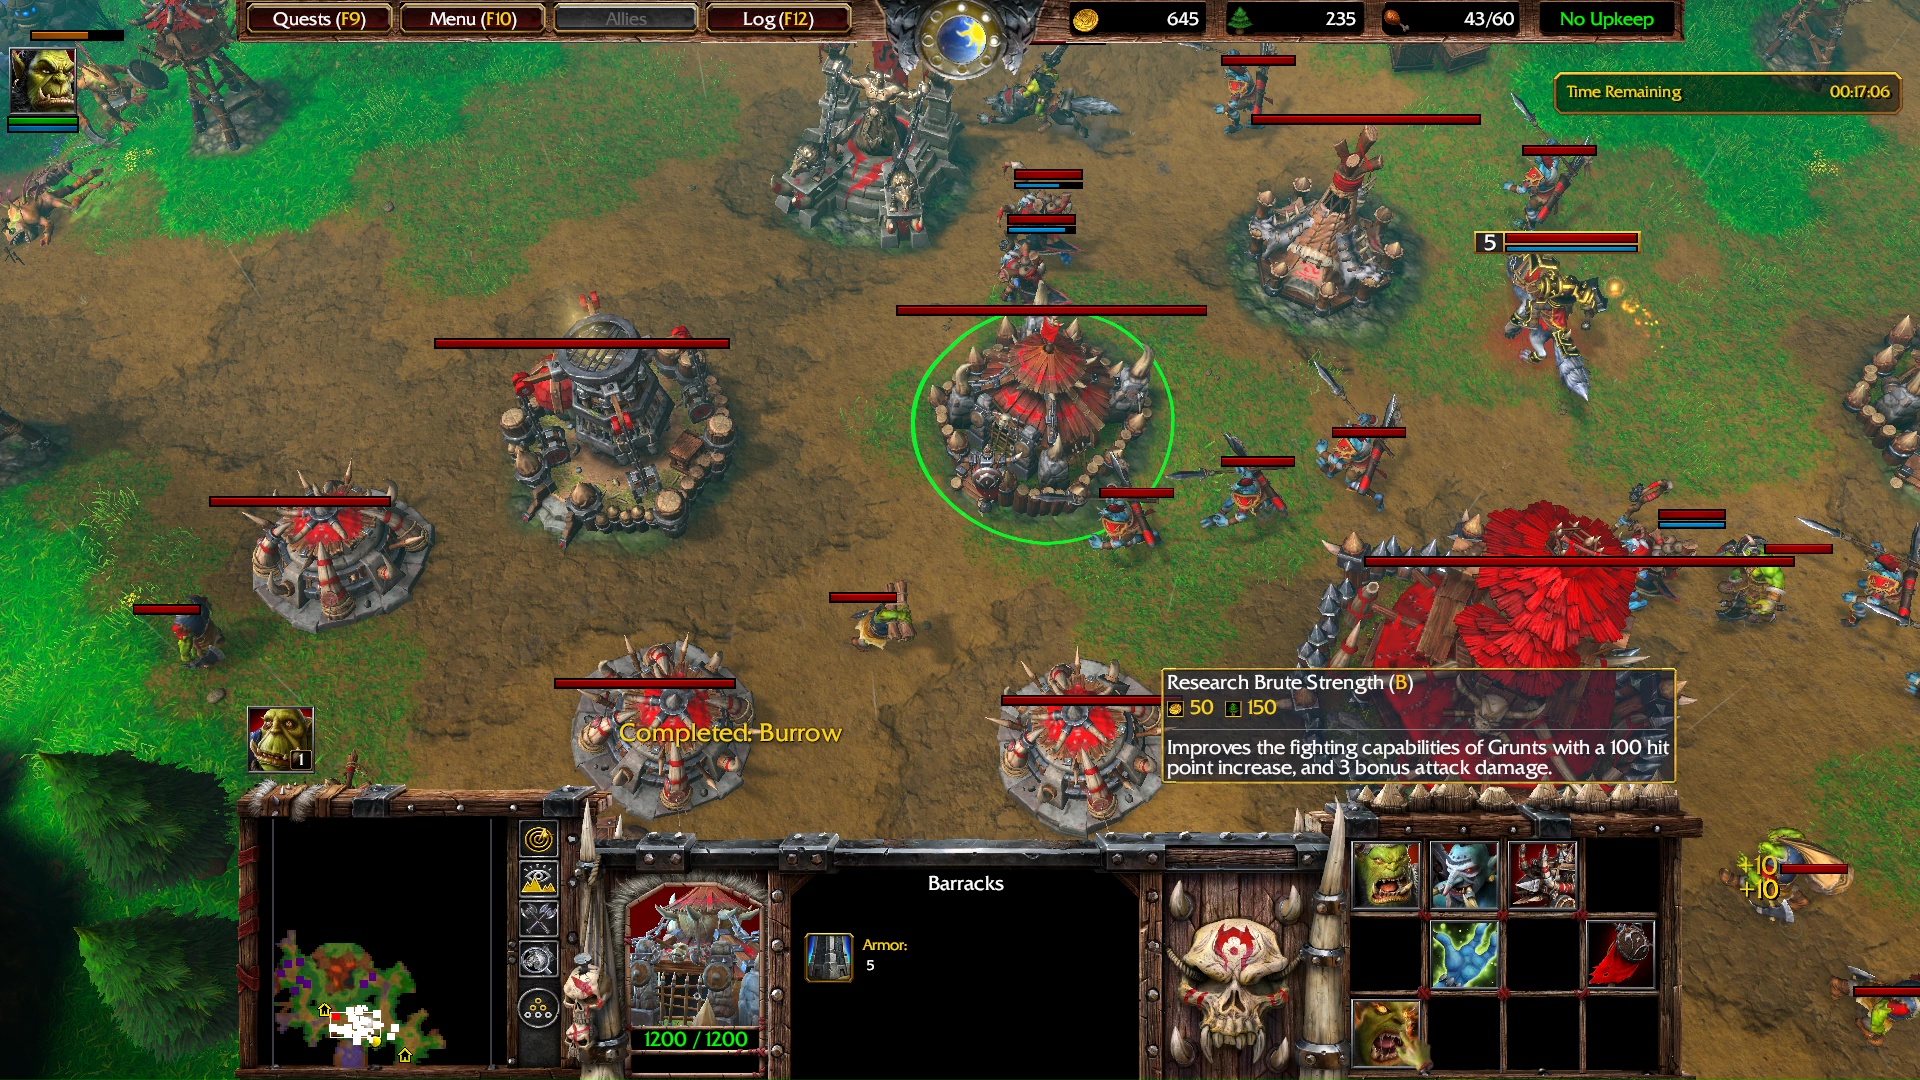
Select the Barracks. Research Brute Strength (B) — improves the fighting capabilities of Grunts with a 100 hit point increase, and 3 bonus attack damage.
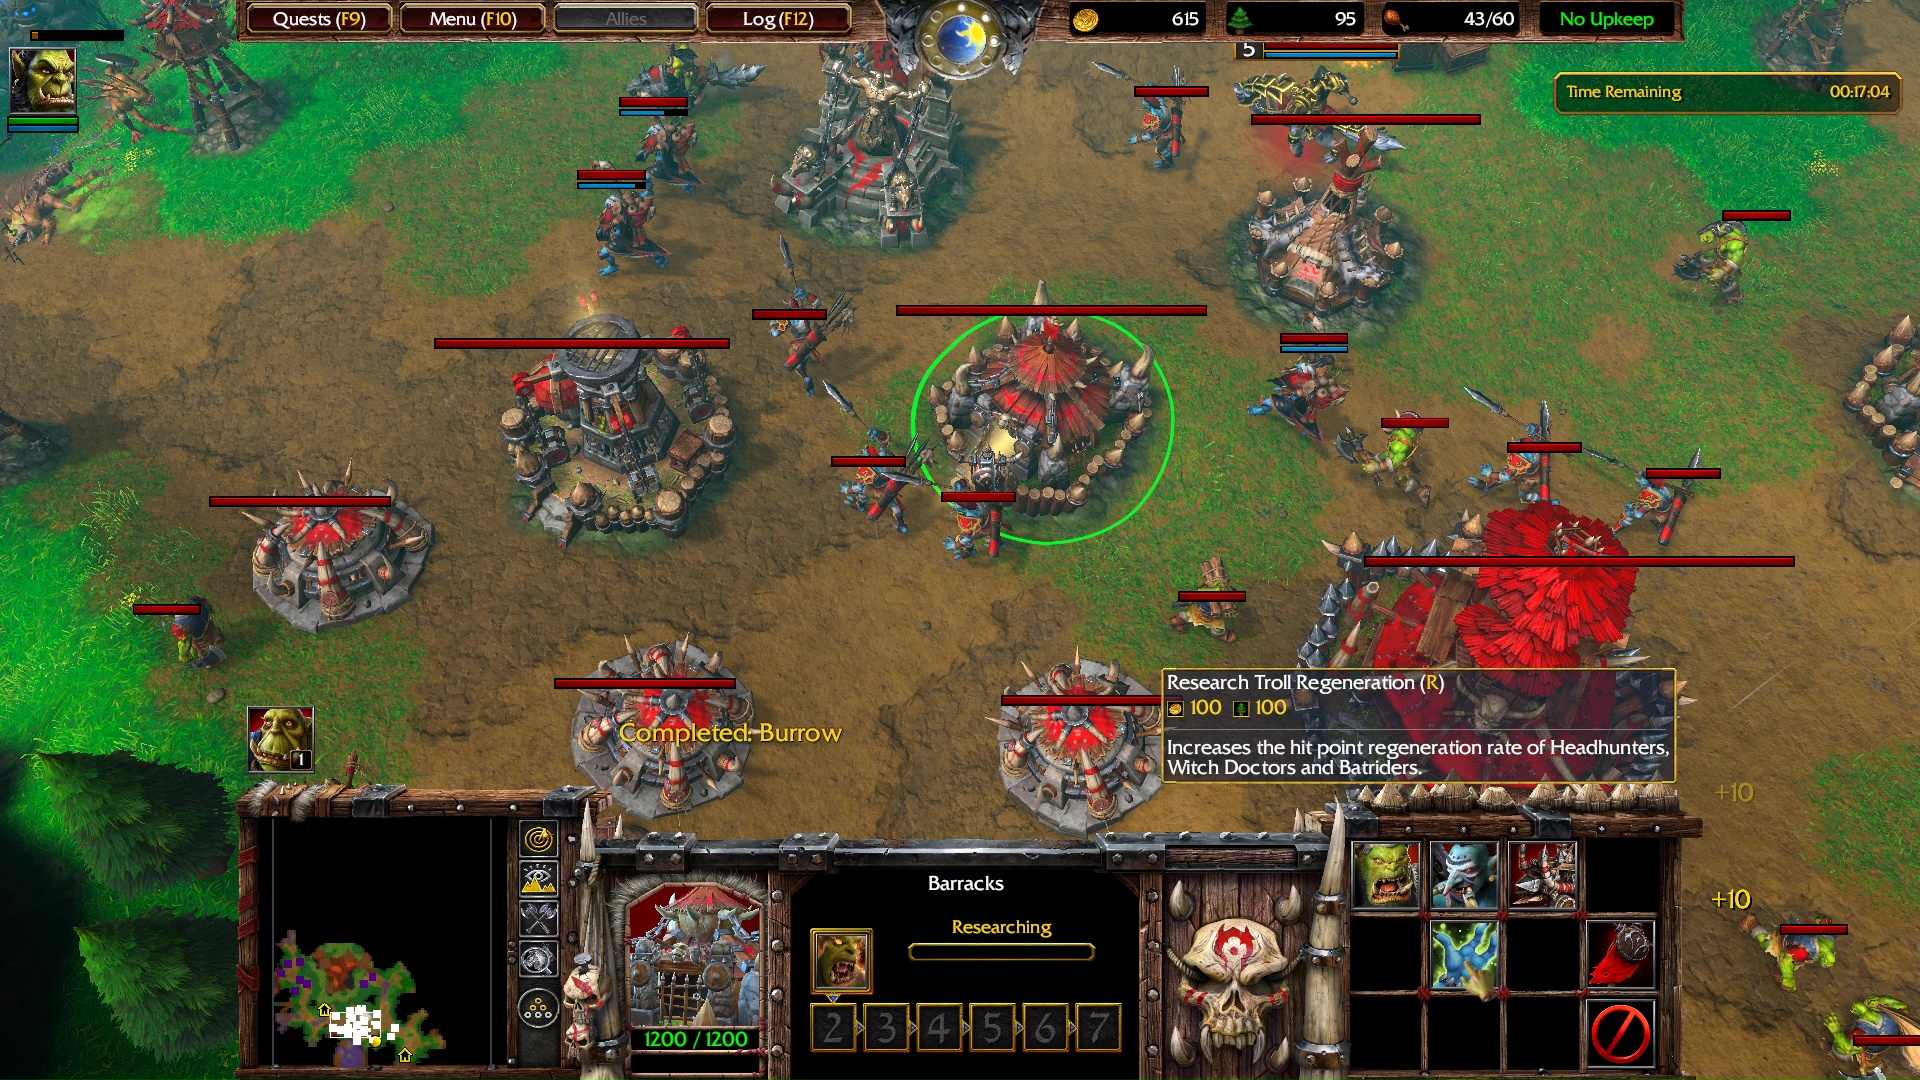
Select the Barracks. Research Troll Regeneration (R): Increases the hit point regeneration rate of Headhunters, Witch Doctors and Batriders.
Send all idle Peons to harvest wood.
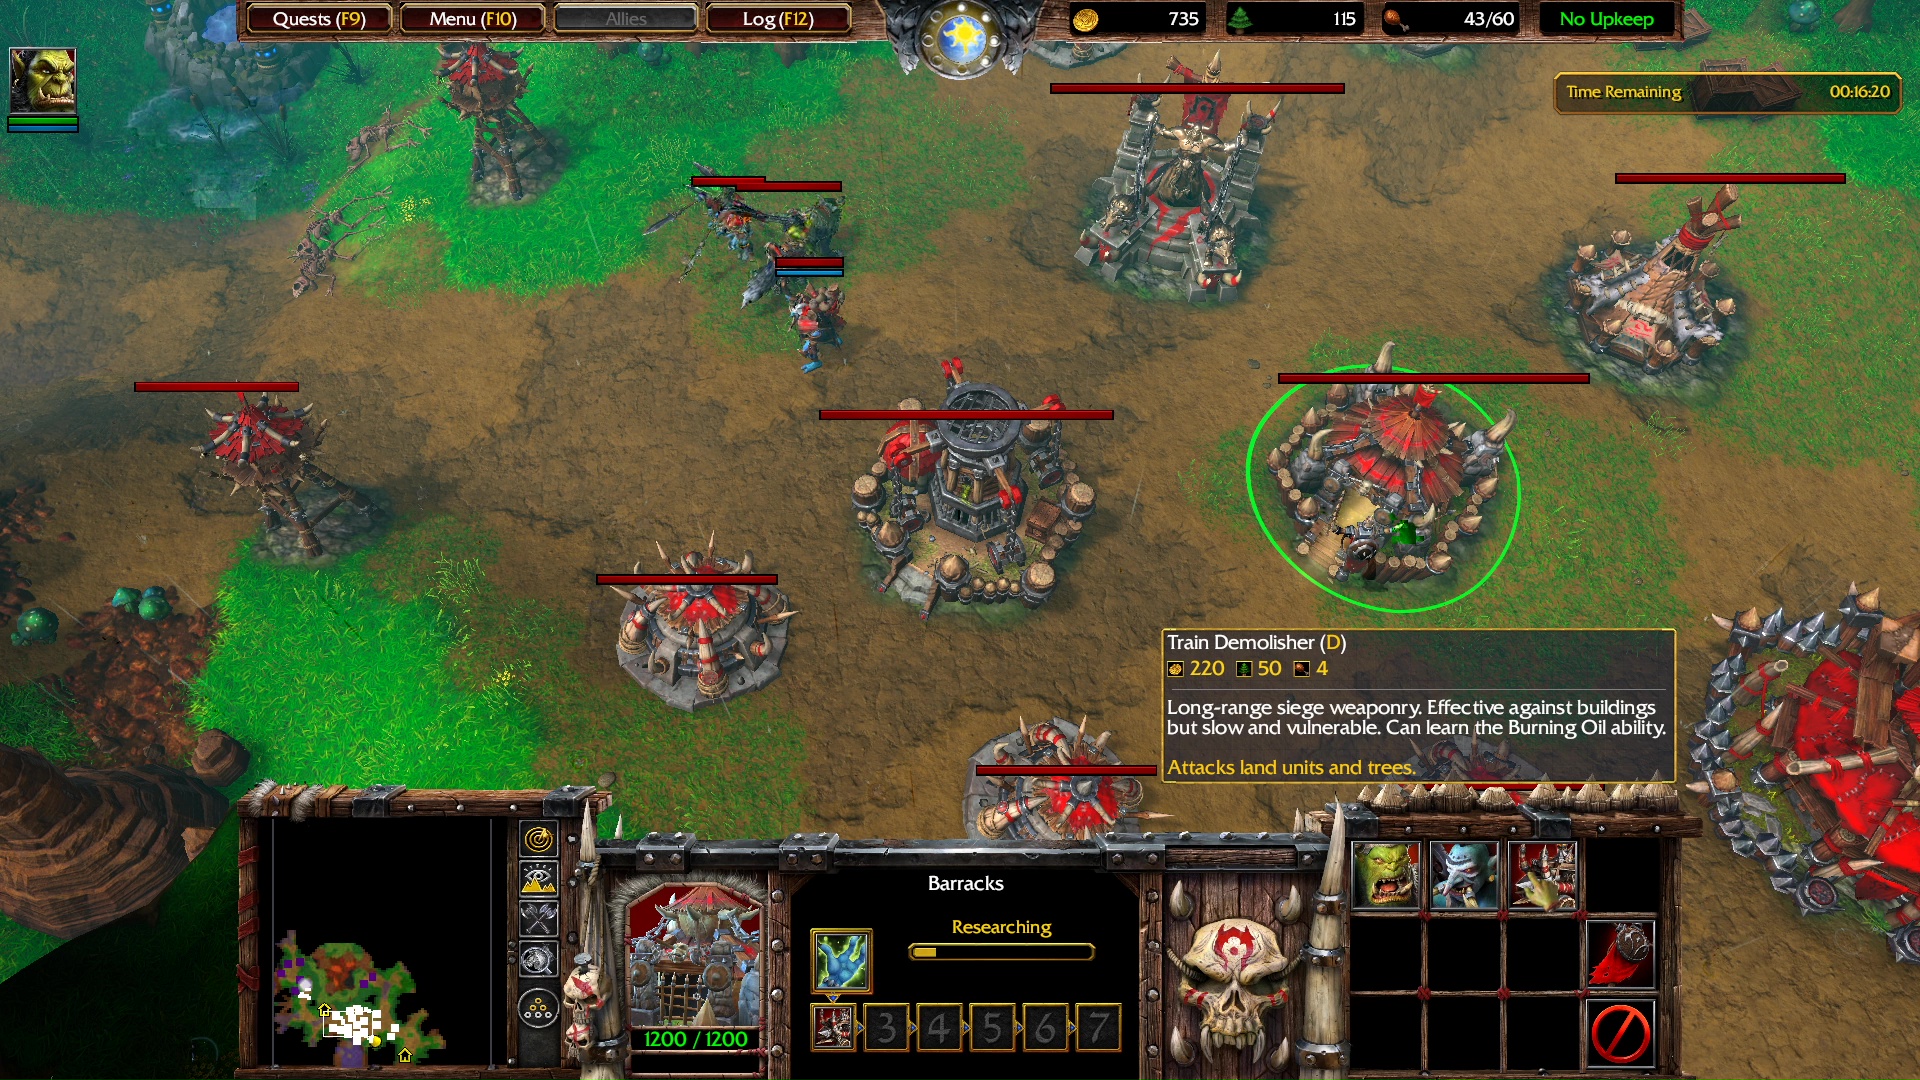
Select the Barracks. Train a Demolisher (D): Long-range siege weaponry. Effective against buildings but slow and vulnerable. Can learn the Burning Oil ability.
Train a Peon (P) at the Stronghold.
Build a second Bestiary (E).
Command two peons to build a Burrow (O) each (2 total).
Send the Peon from the Stronghold to harvest wood.
Build a Peon (P).
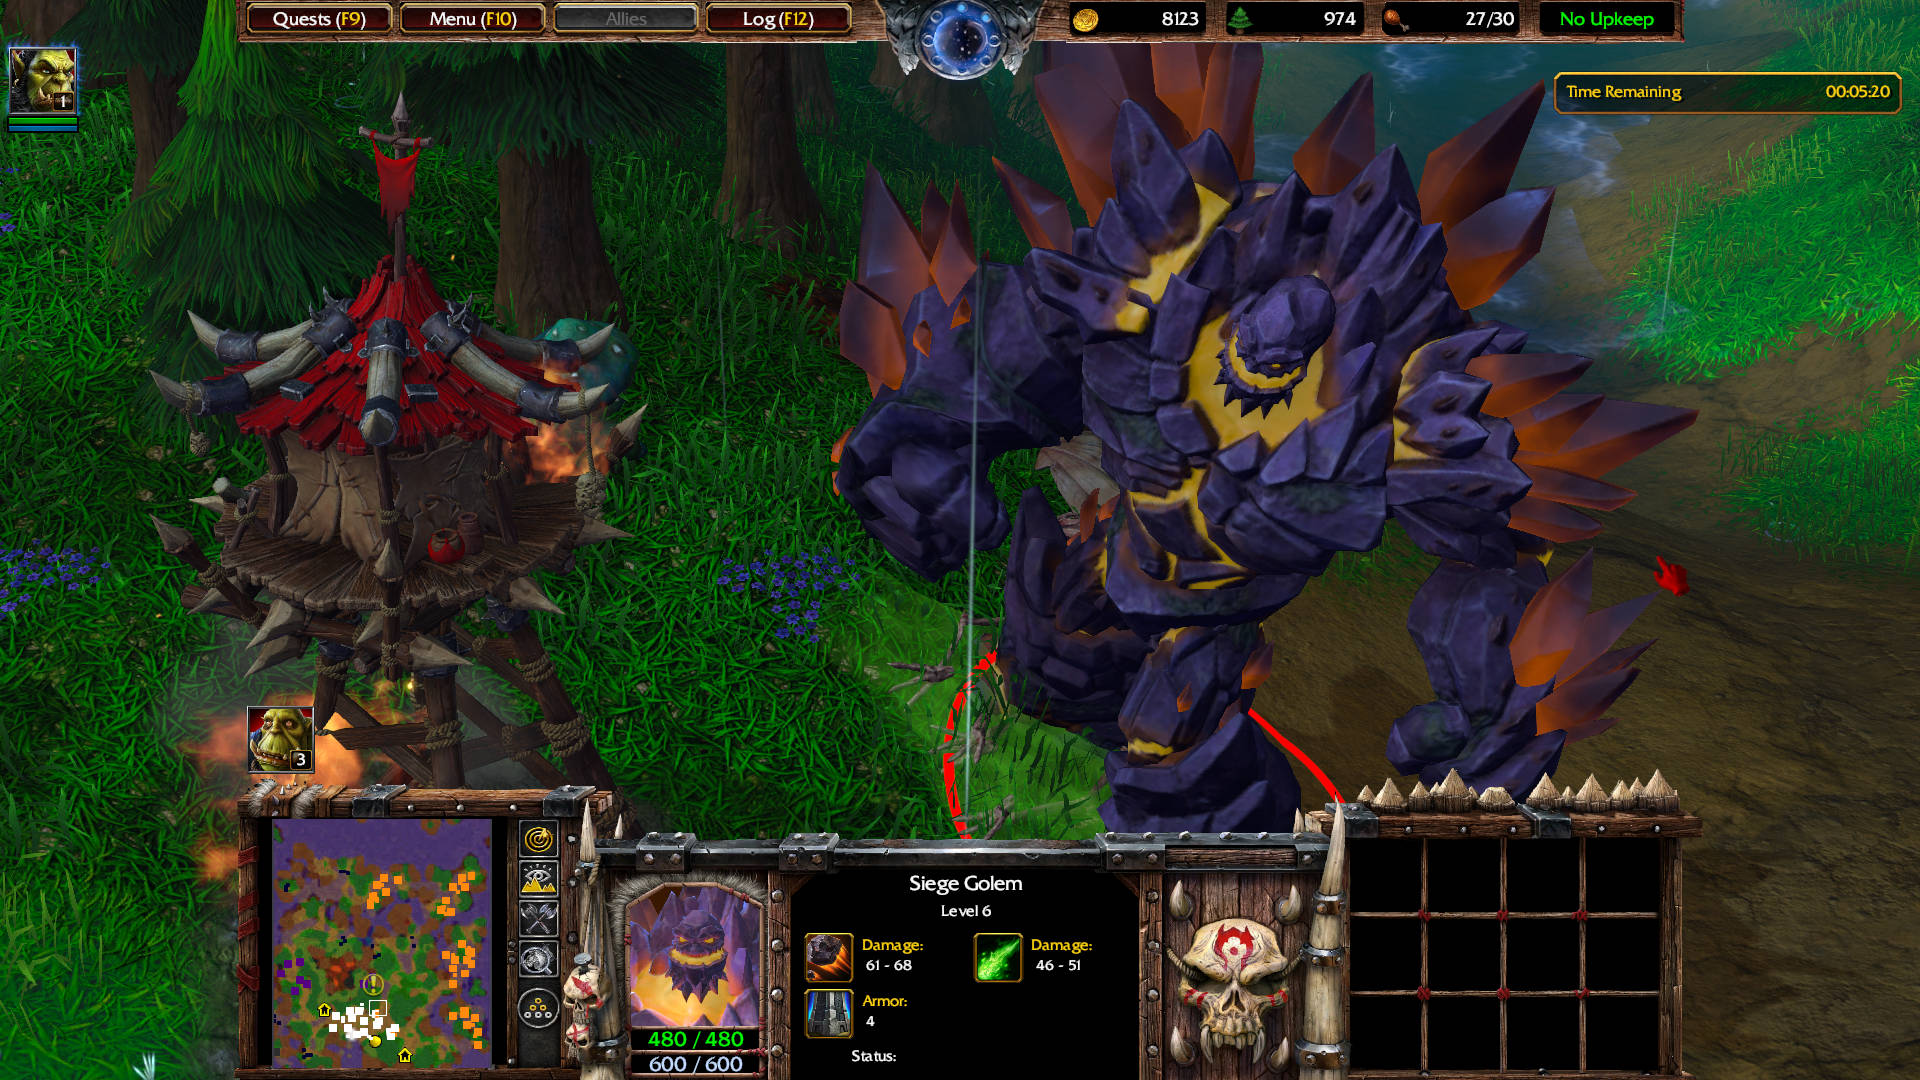
15:31 — 3 murlocs attack the Watch Towers to the east. Another batch of 5 murlocs and a massive Siege Golem attack the northeastern Watch Towers — these Siege Golem does 61-68 siege damage and 46-51 chaos damage. They have 480 hit points and 600 mana. A single Siege Golem can destroy a Watch Tower.
Build a Burrow (O).
Send idle Peons to harvest wood.
Build a Demolisher (D).
In the second Barracks, build a Headhunter (T).
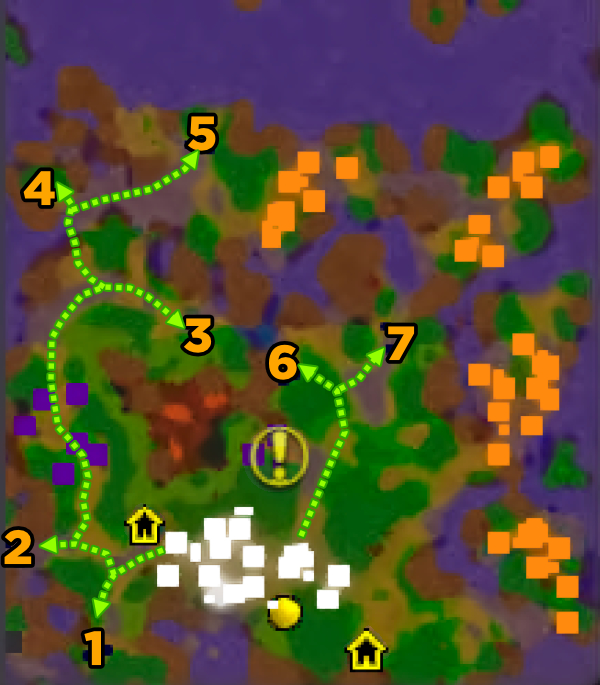
You can begin creeping. At the bottom of the page I show the location and composition of all the Bestiary creatures throughout the map — mostly wolves and lightning lizards.
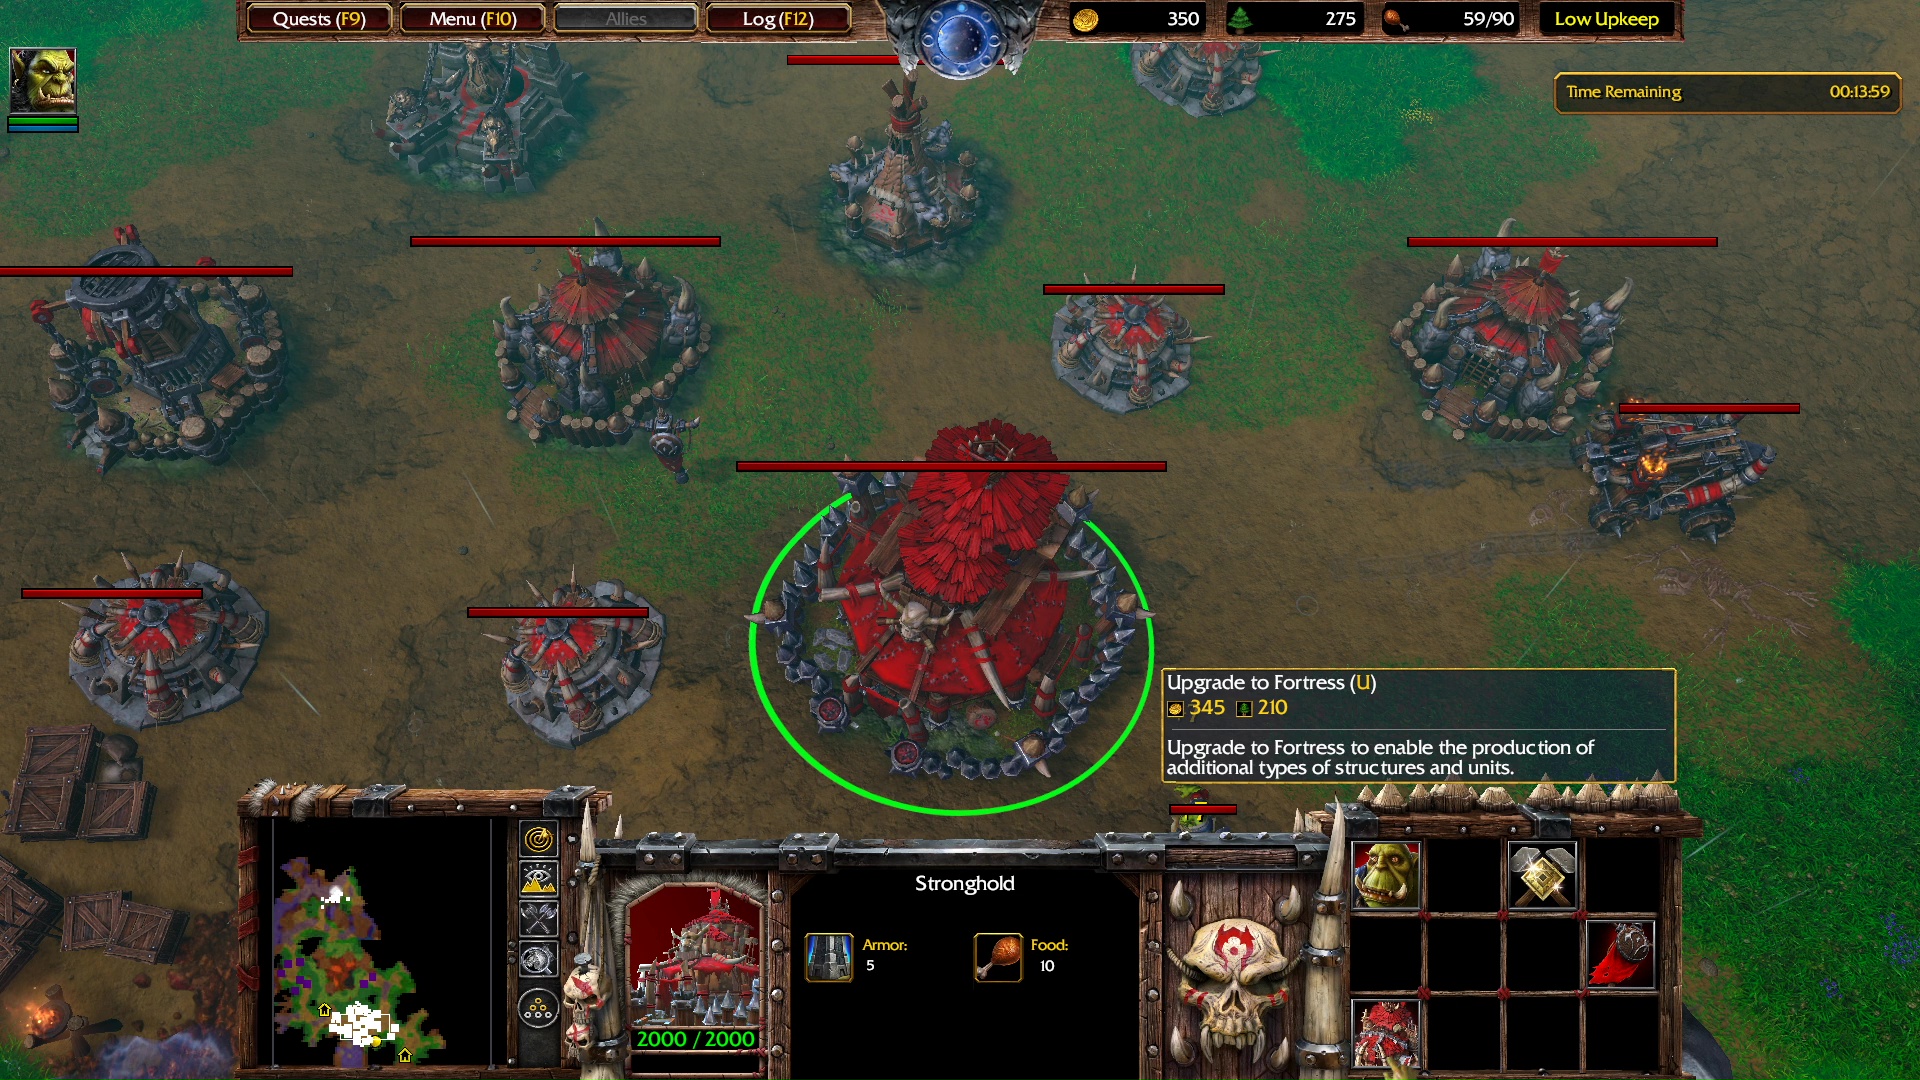
Select the Stronghold. Upgrade to Fortress (U).
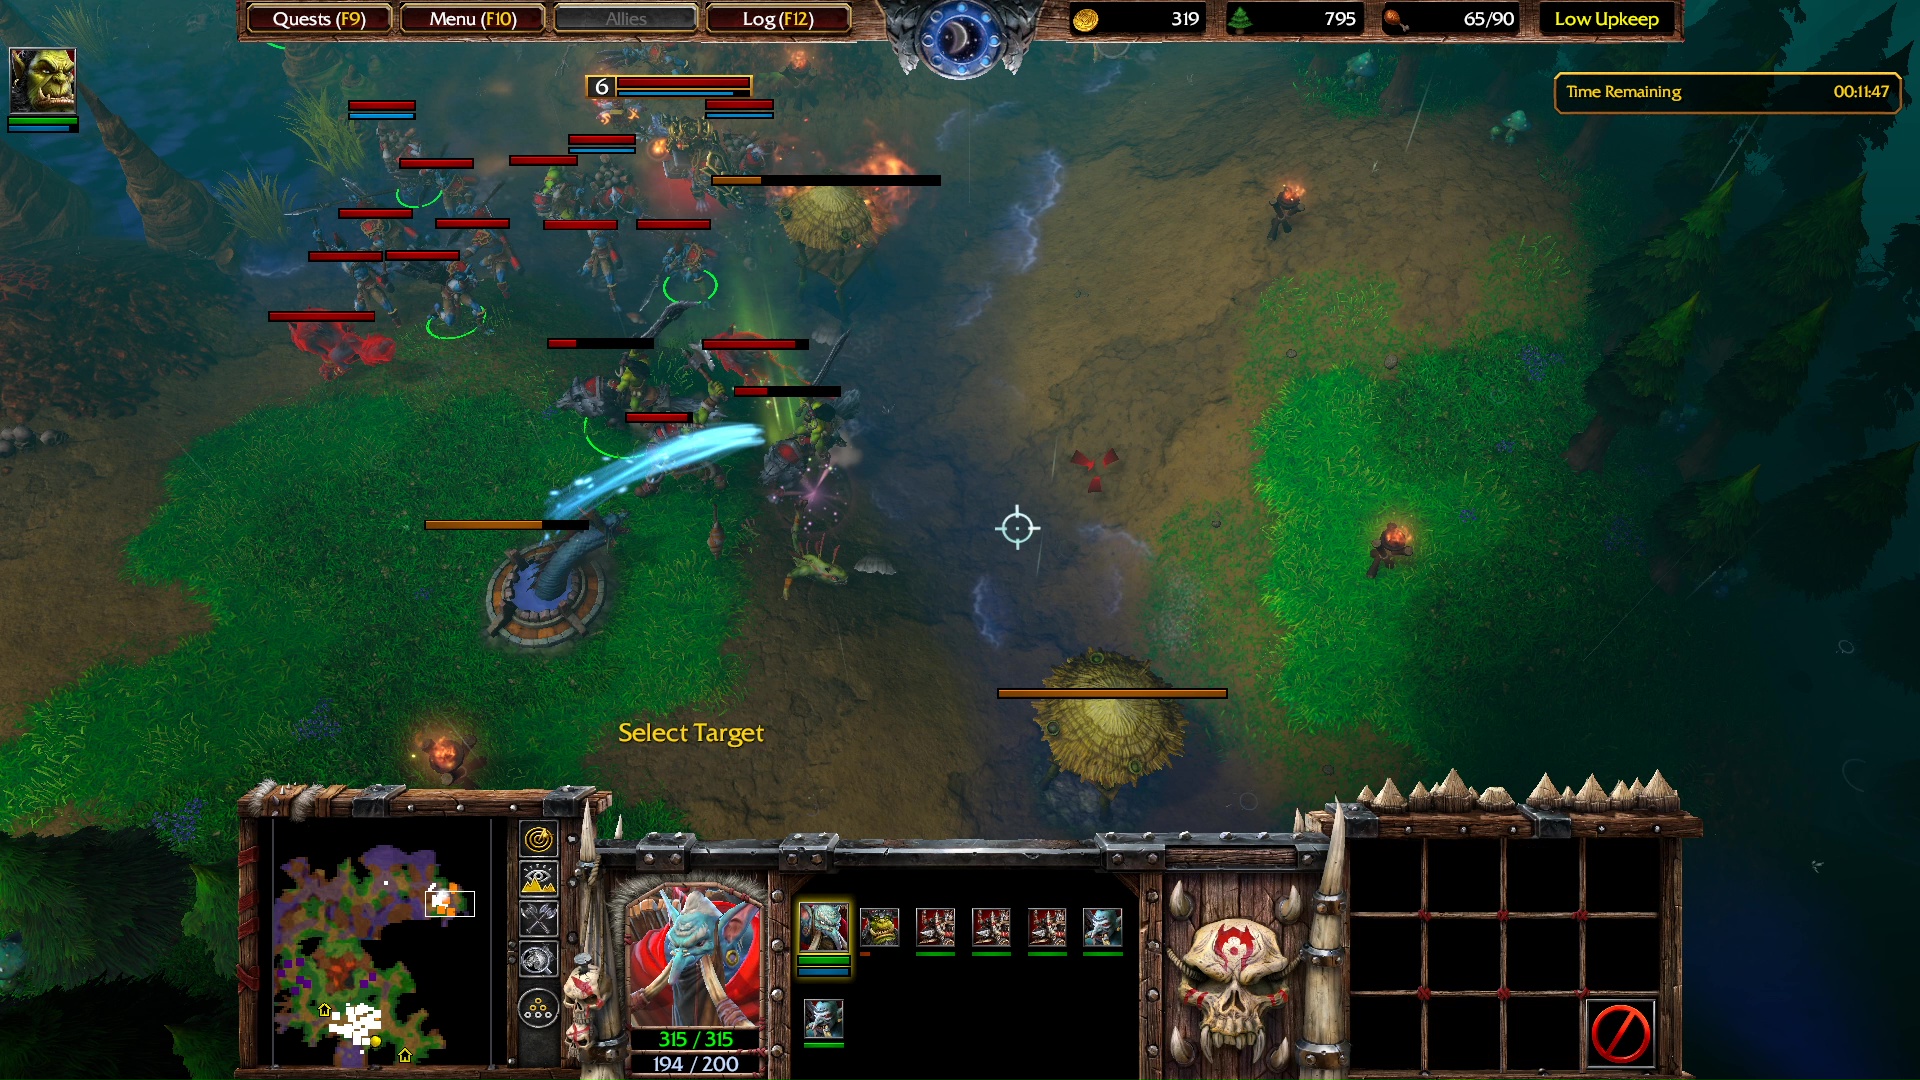
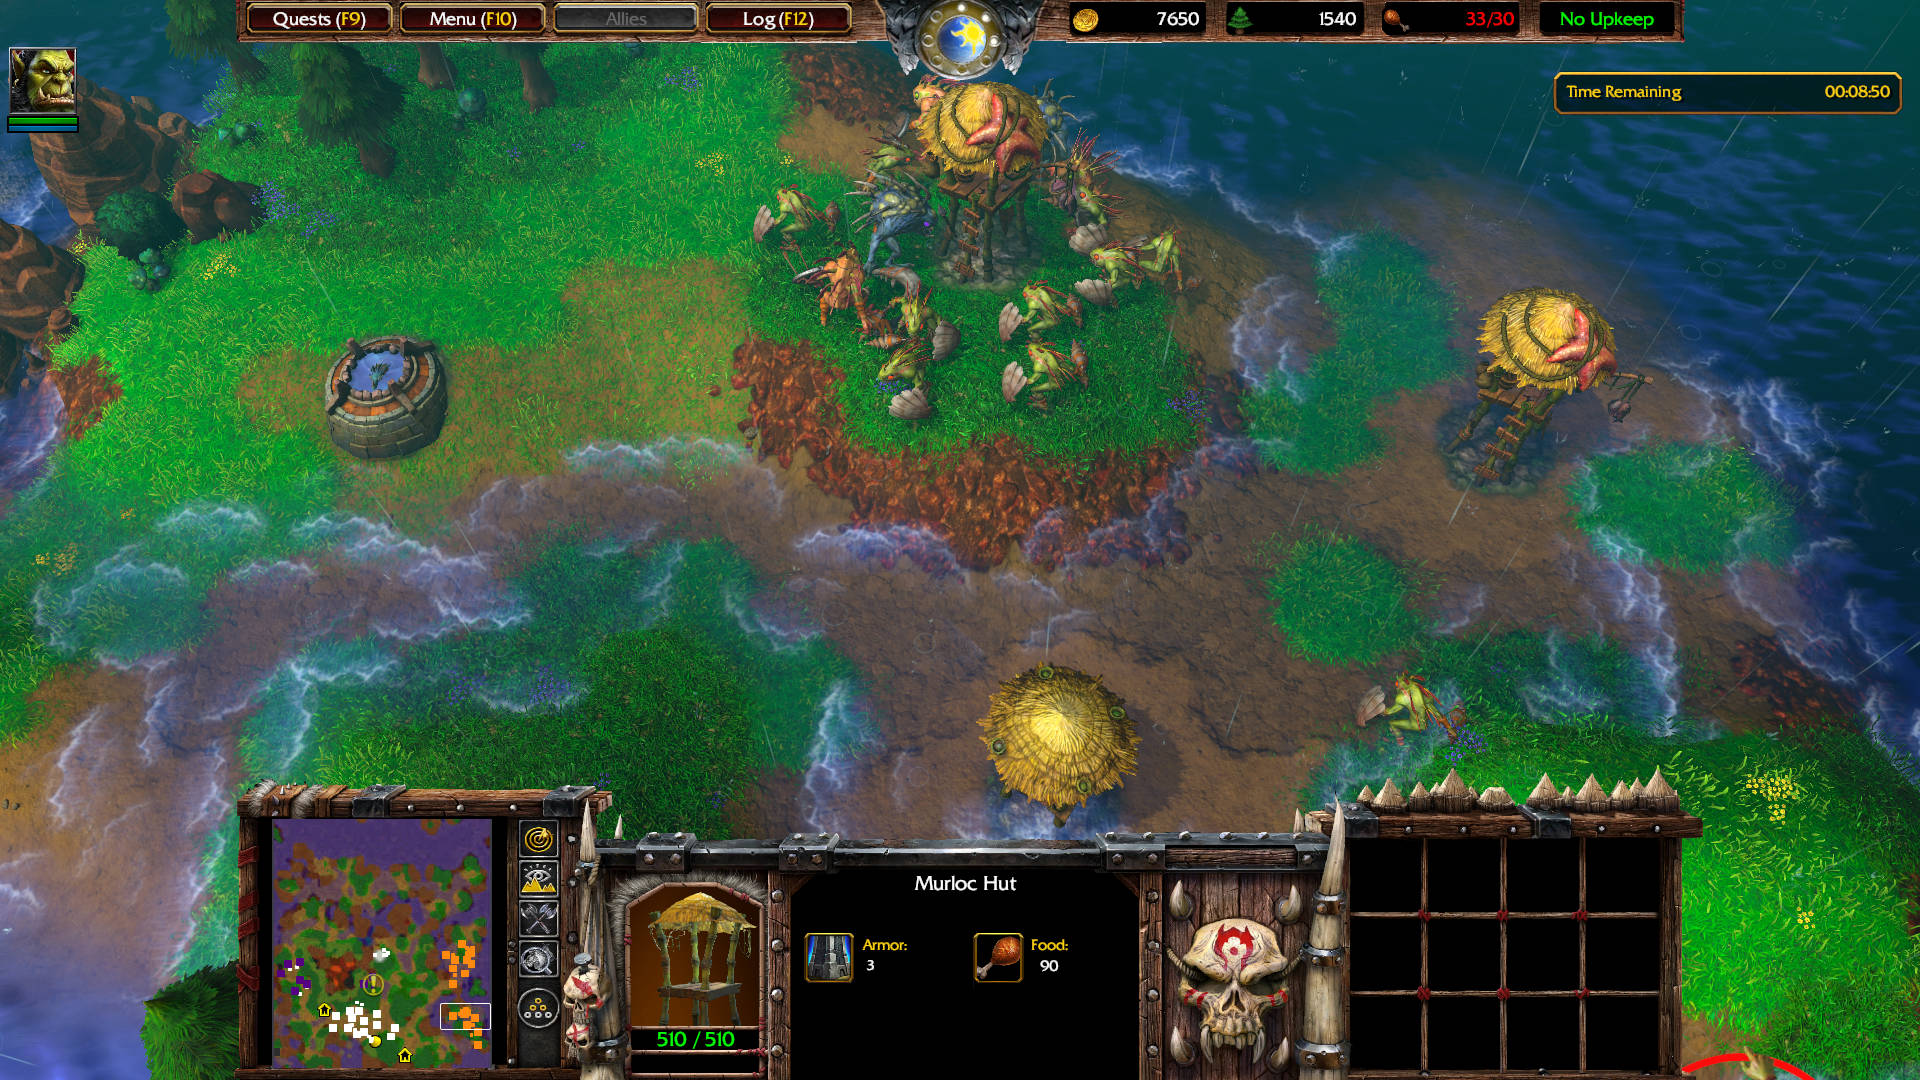
13:55 — Send Thrall and troops (including 3 Demolishers) to destroy this murloc village.
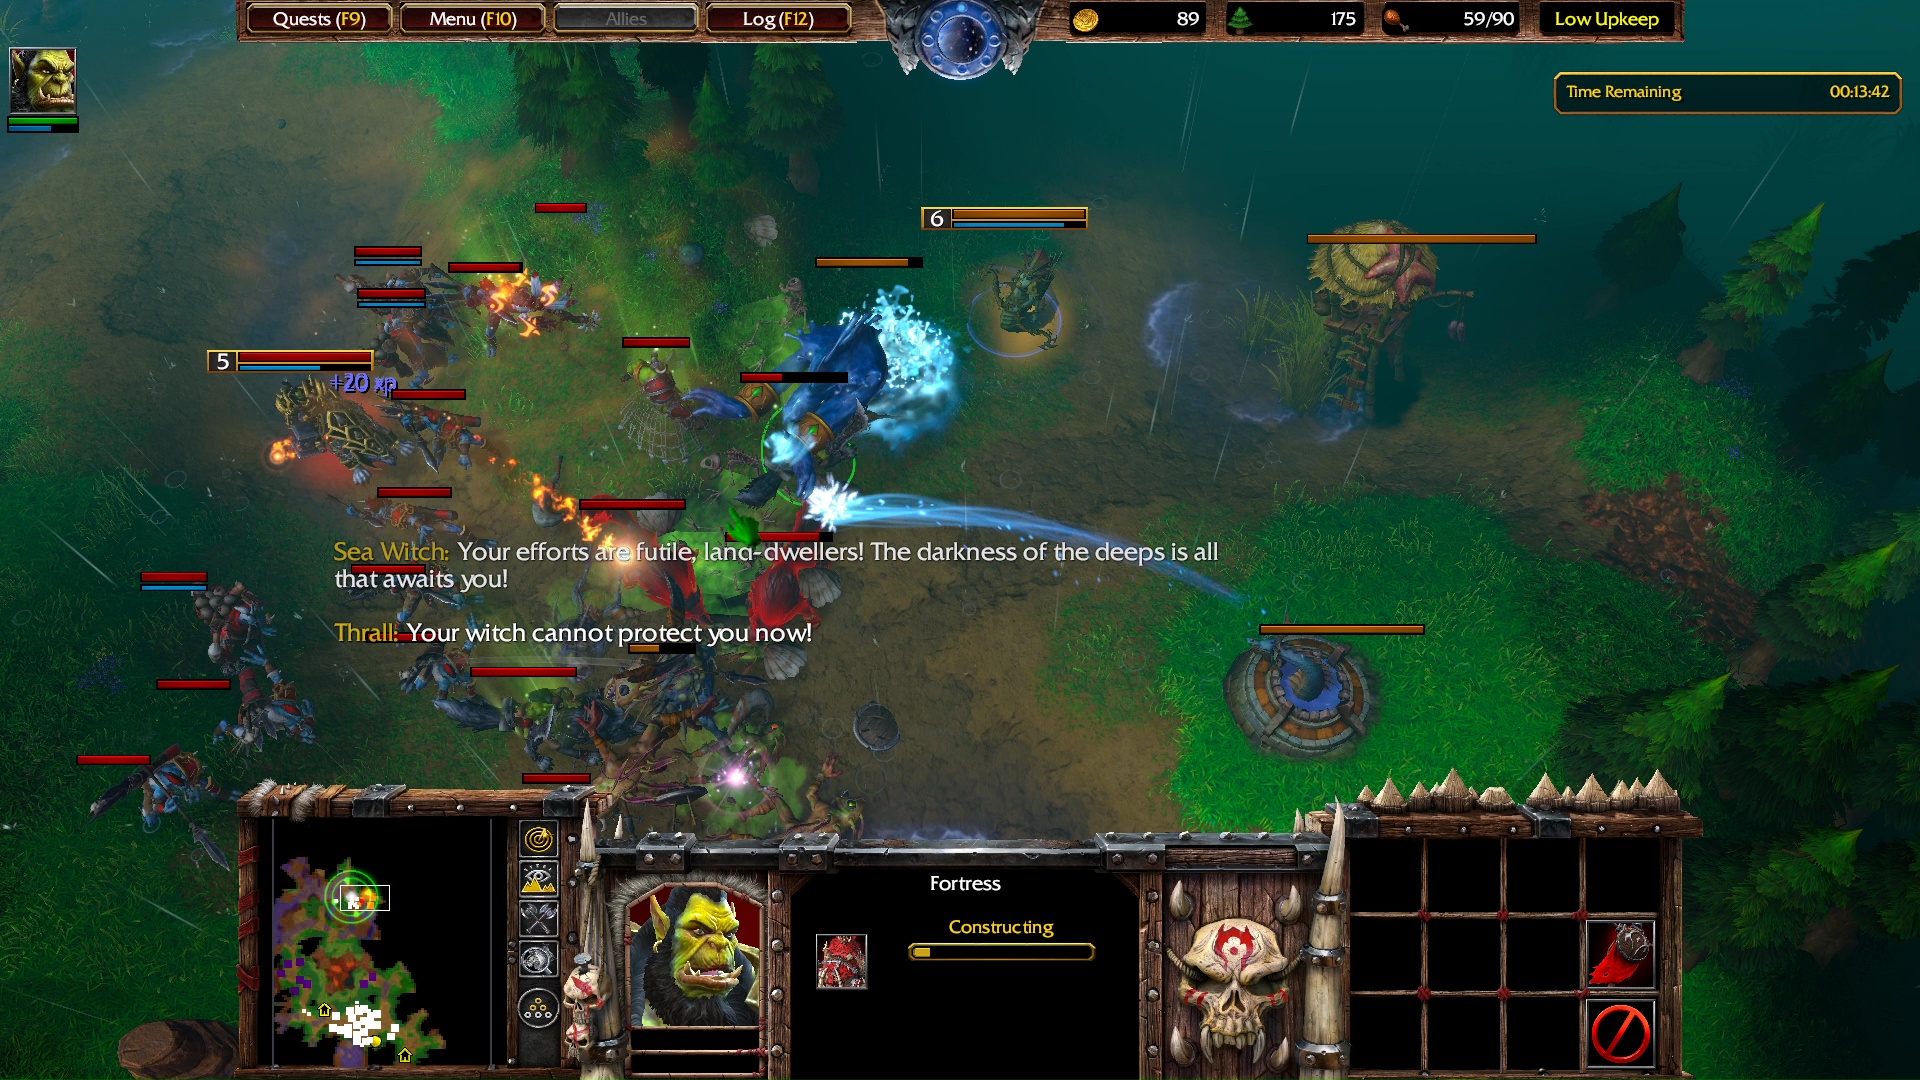
Sea Witch: Your efforts are futile, land-dwellers! The darkness of the deeps is all that awaits you!
Thrall: Your witch cannot protect you now!
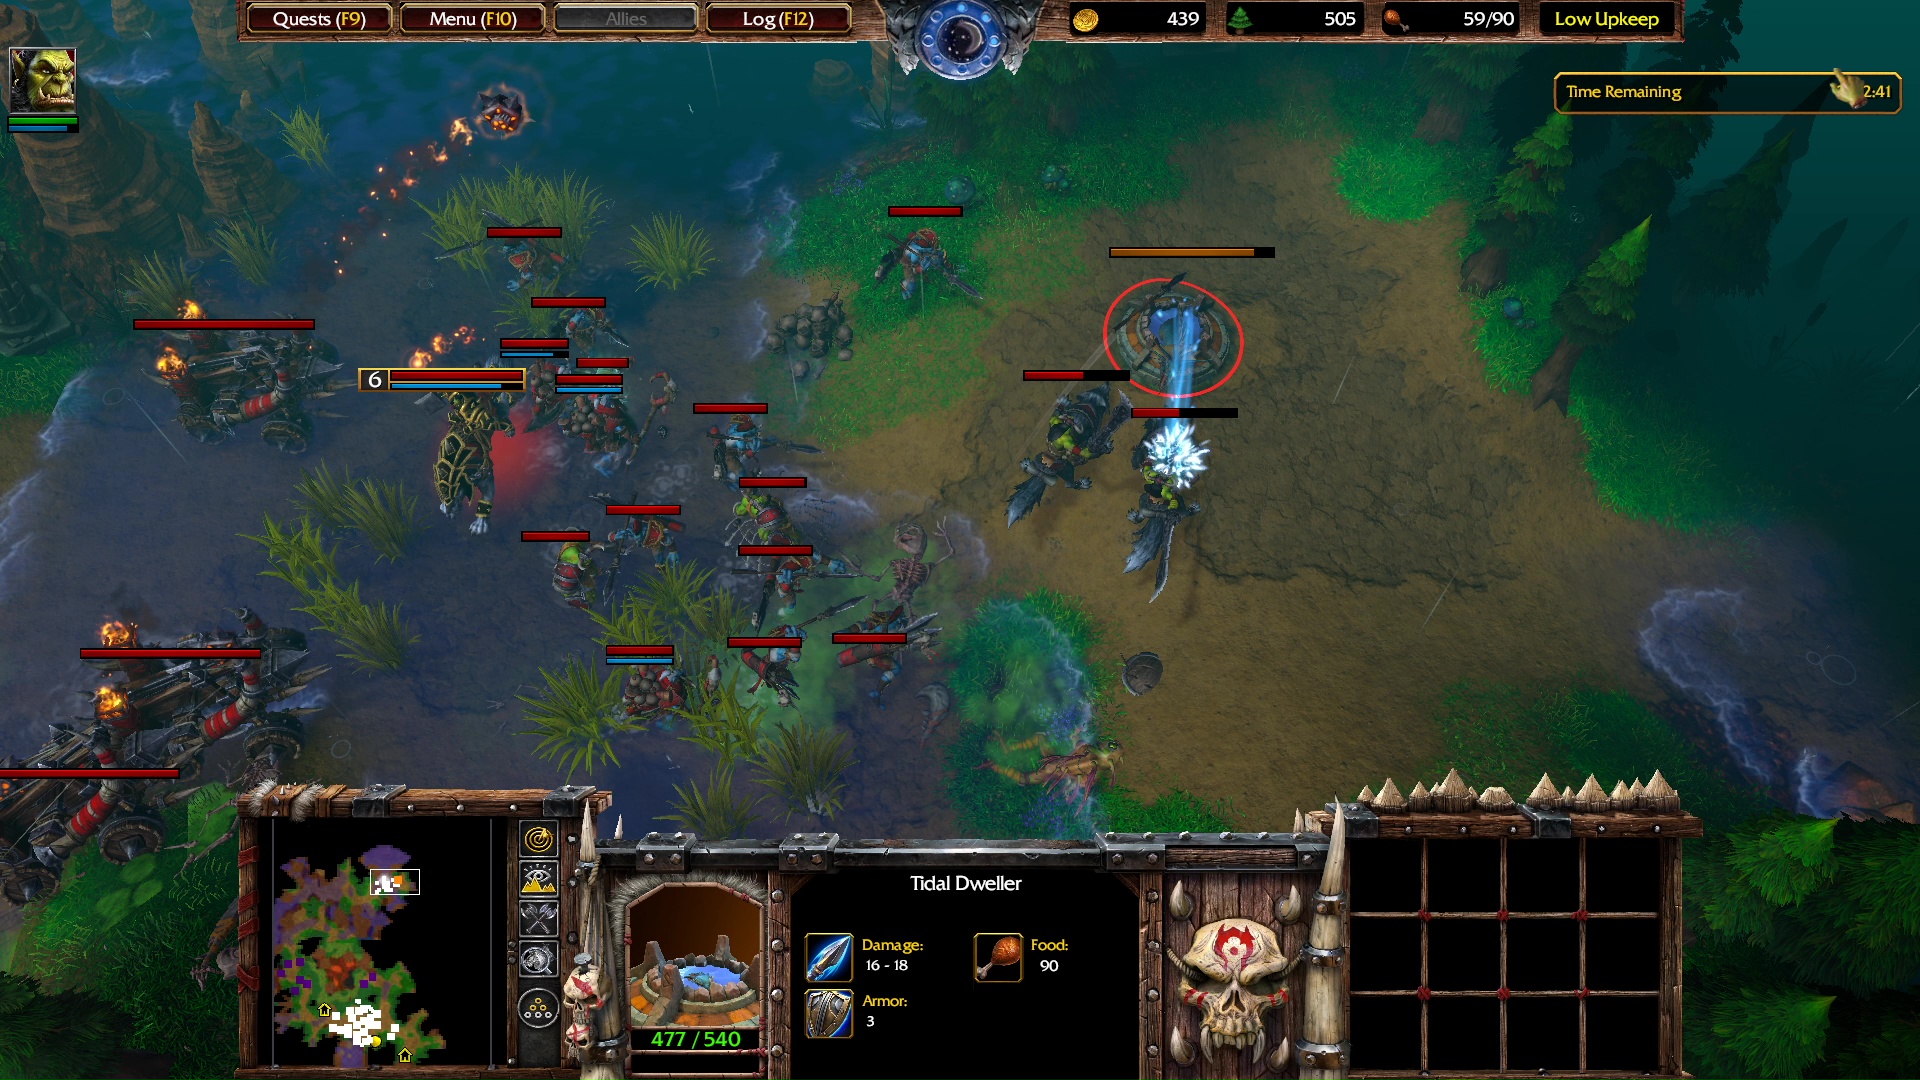
Destroy this Tidal Dweller and surrounding buildings. Functions like a Watch Tower, but it is an eel that spits water at a fast rate.
Continue heading east of the previous location. More murlocs continue to attack your troops.
12:30 — a Siege Golem and 5 murlocs attack from your eastern Watch Towers. If you don’t have units to defend, you can always send your Peons into the nearby Burrow as a bunker until you can build new units and new Watch Towers. Always repair your watch towers, by the way.
Build a Grunt (G).
There is another Tidal Dweller at this location.
Select a Bestiary. Build a Raider (R)
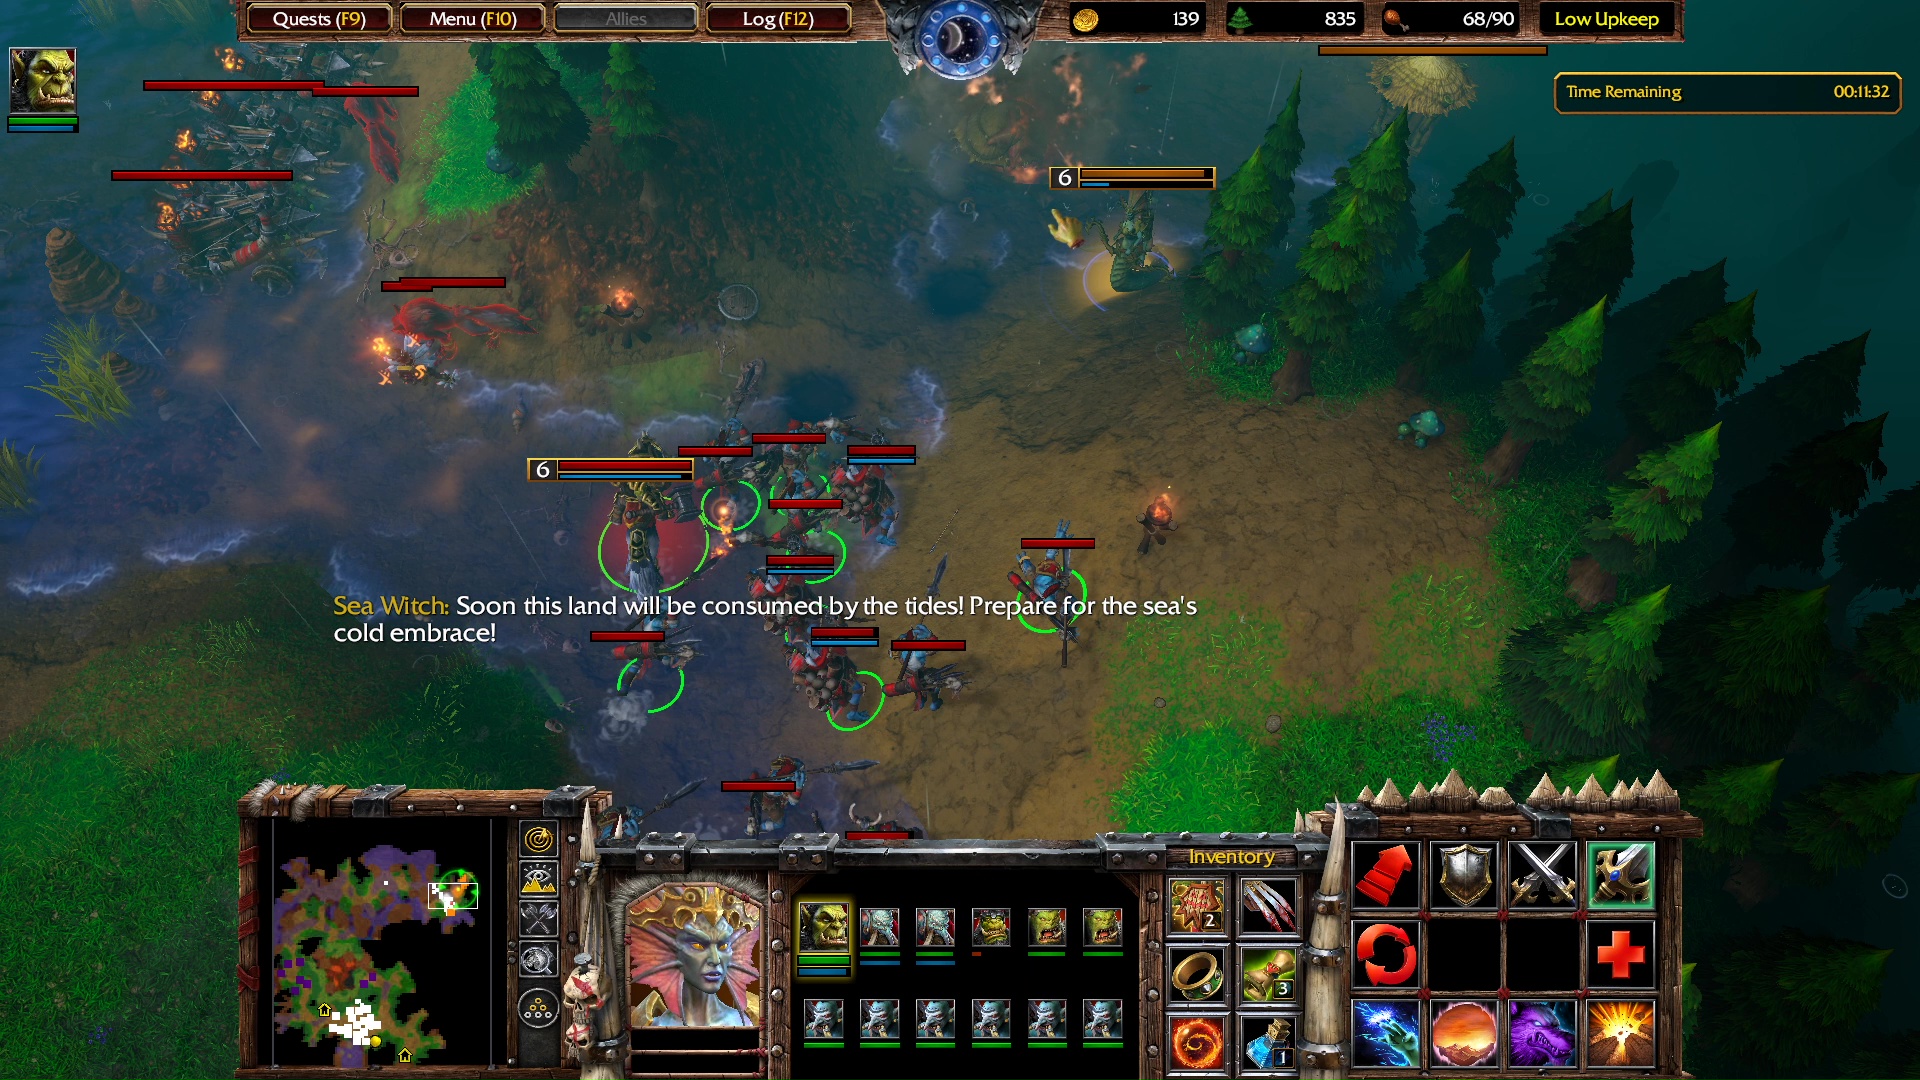
As you head further east from the previous Tidal Dweller, the Sea Witch respawns.
Sea Witch: Soon this land will be consumed by the tides! Prepare for the sea’s cold embrace!
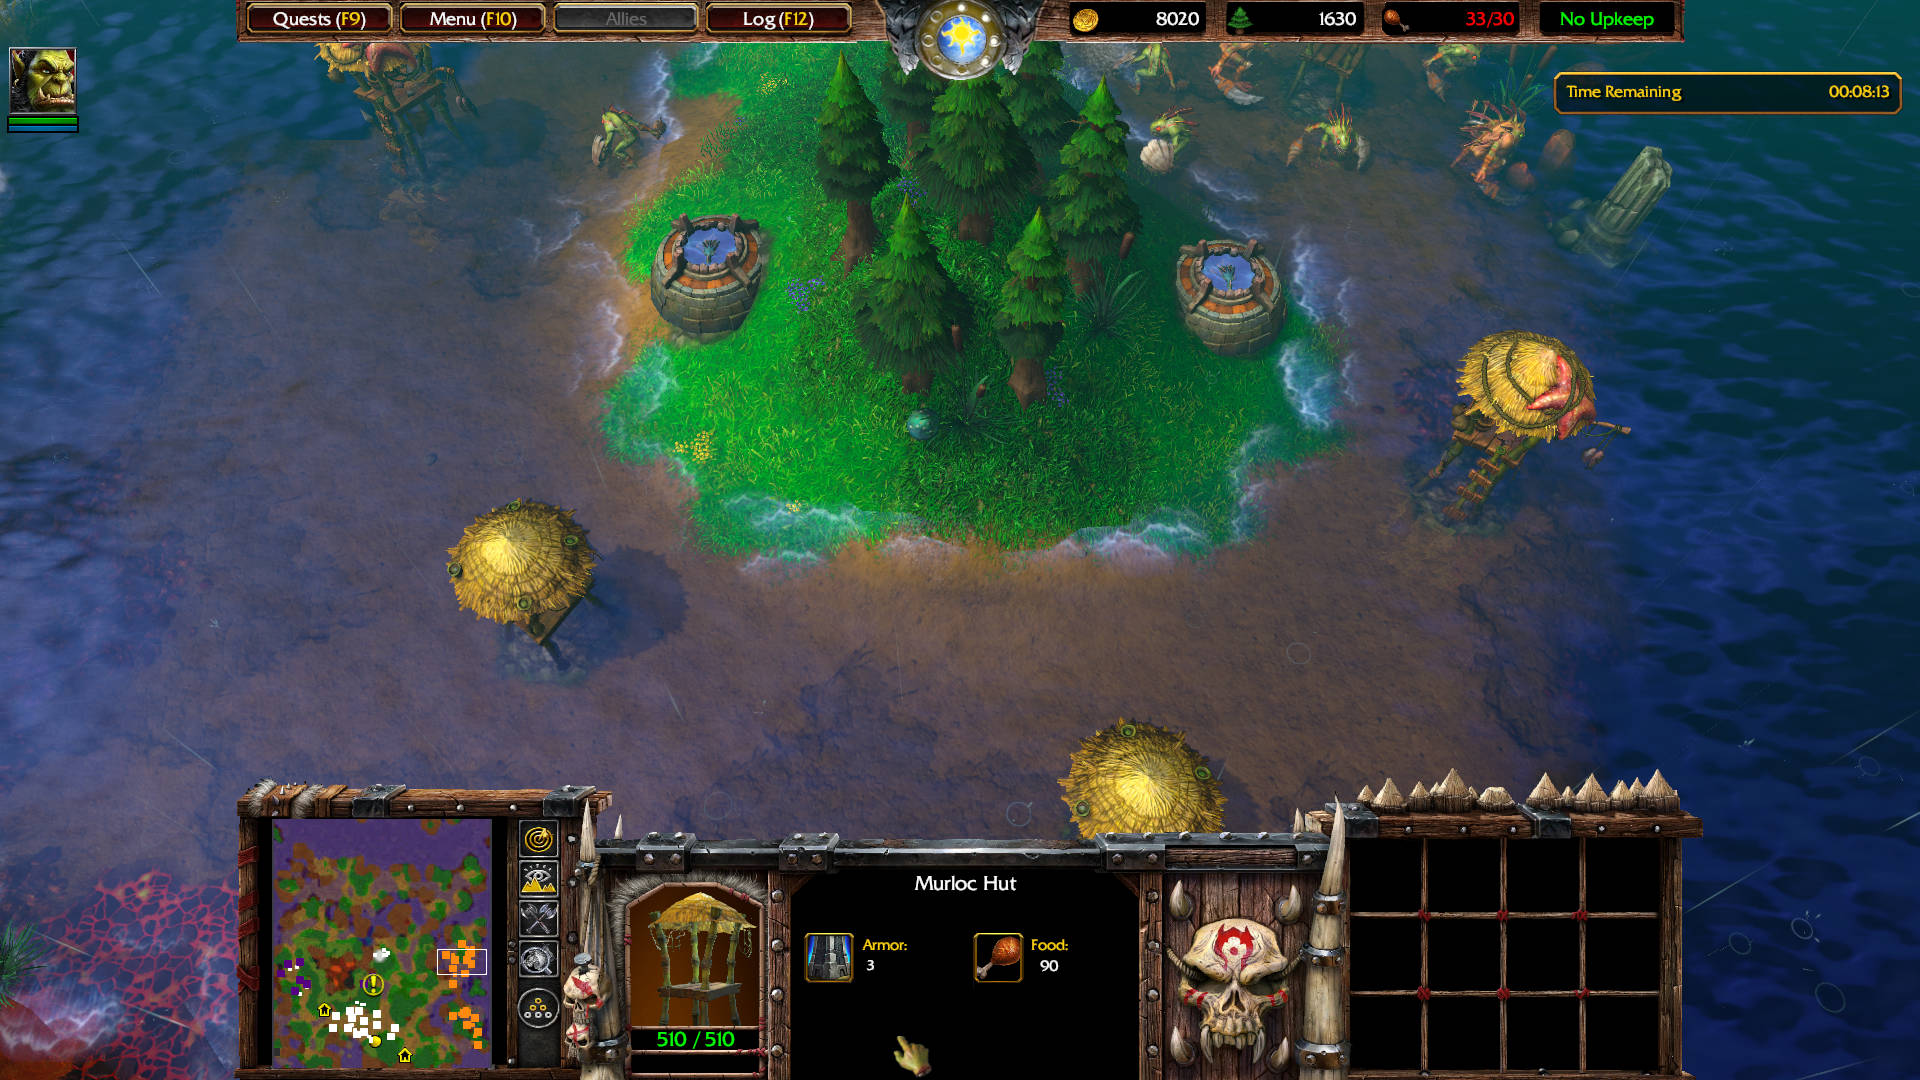
The reason you are currently destroying these murloc huts and Tidal Dwellers is to reach the Sea Witch Altar — this is what allows her to respawn. It functions like the Altar of Storms.
This is the Altar of the Deep that resurrects or respawns the Sea Witch.
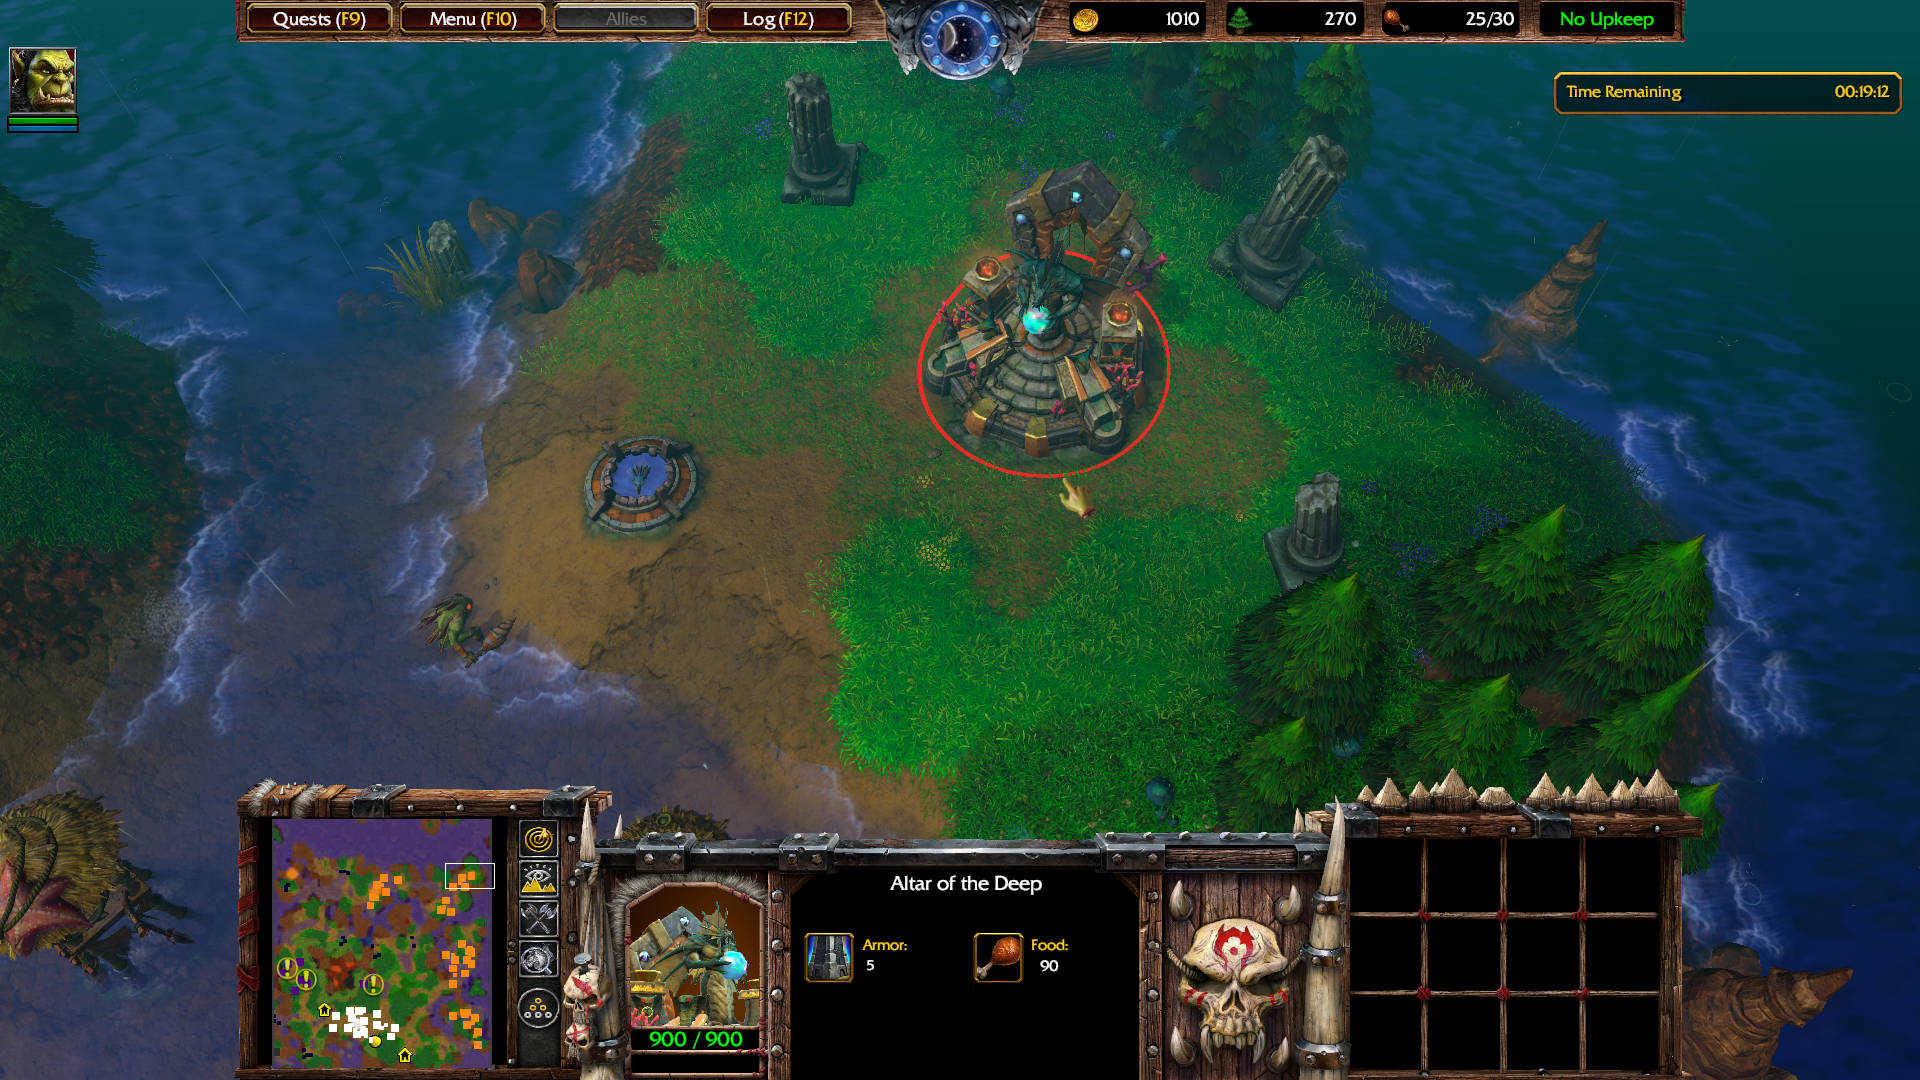
This is the path how to get to the Altar of the Deep.

With the Altar of the Deeps and those huts destroyed, you need to only worry about building Watch Towers and a defense on the northeast and east entrances of your base.
Send Thrall and all your troops back to your base. There is no alternate paths at the Altar of the Deeps.
10:00 — Grunt: We still need more time to finish the repairs, Warchief!
MAIN QUEST UPDATE
Hold the Line
- 10 minutes until ship repairs are finished
Build a Headhunter (T)
Build a Grunt (G).
9:33 — from the east another wave of 15 murlocs and a Siege Golem attack your Watch Towers.
TIP – You can command a Raider to Ensnare the Siege Golem, and kill it with Headhunters and Demolishers from range. Ensnare lasts about 10 seconds, so it is ideal to have a few Raiders at hand to re-cast Ensnare.
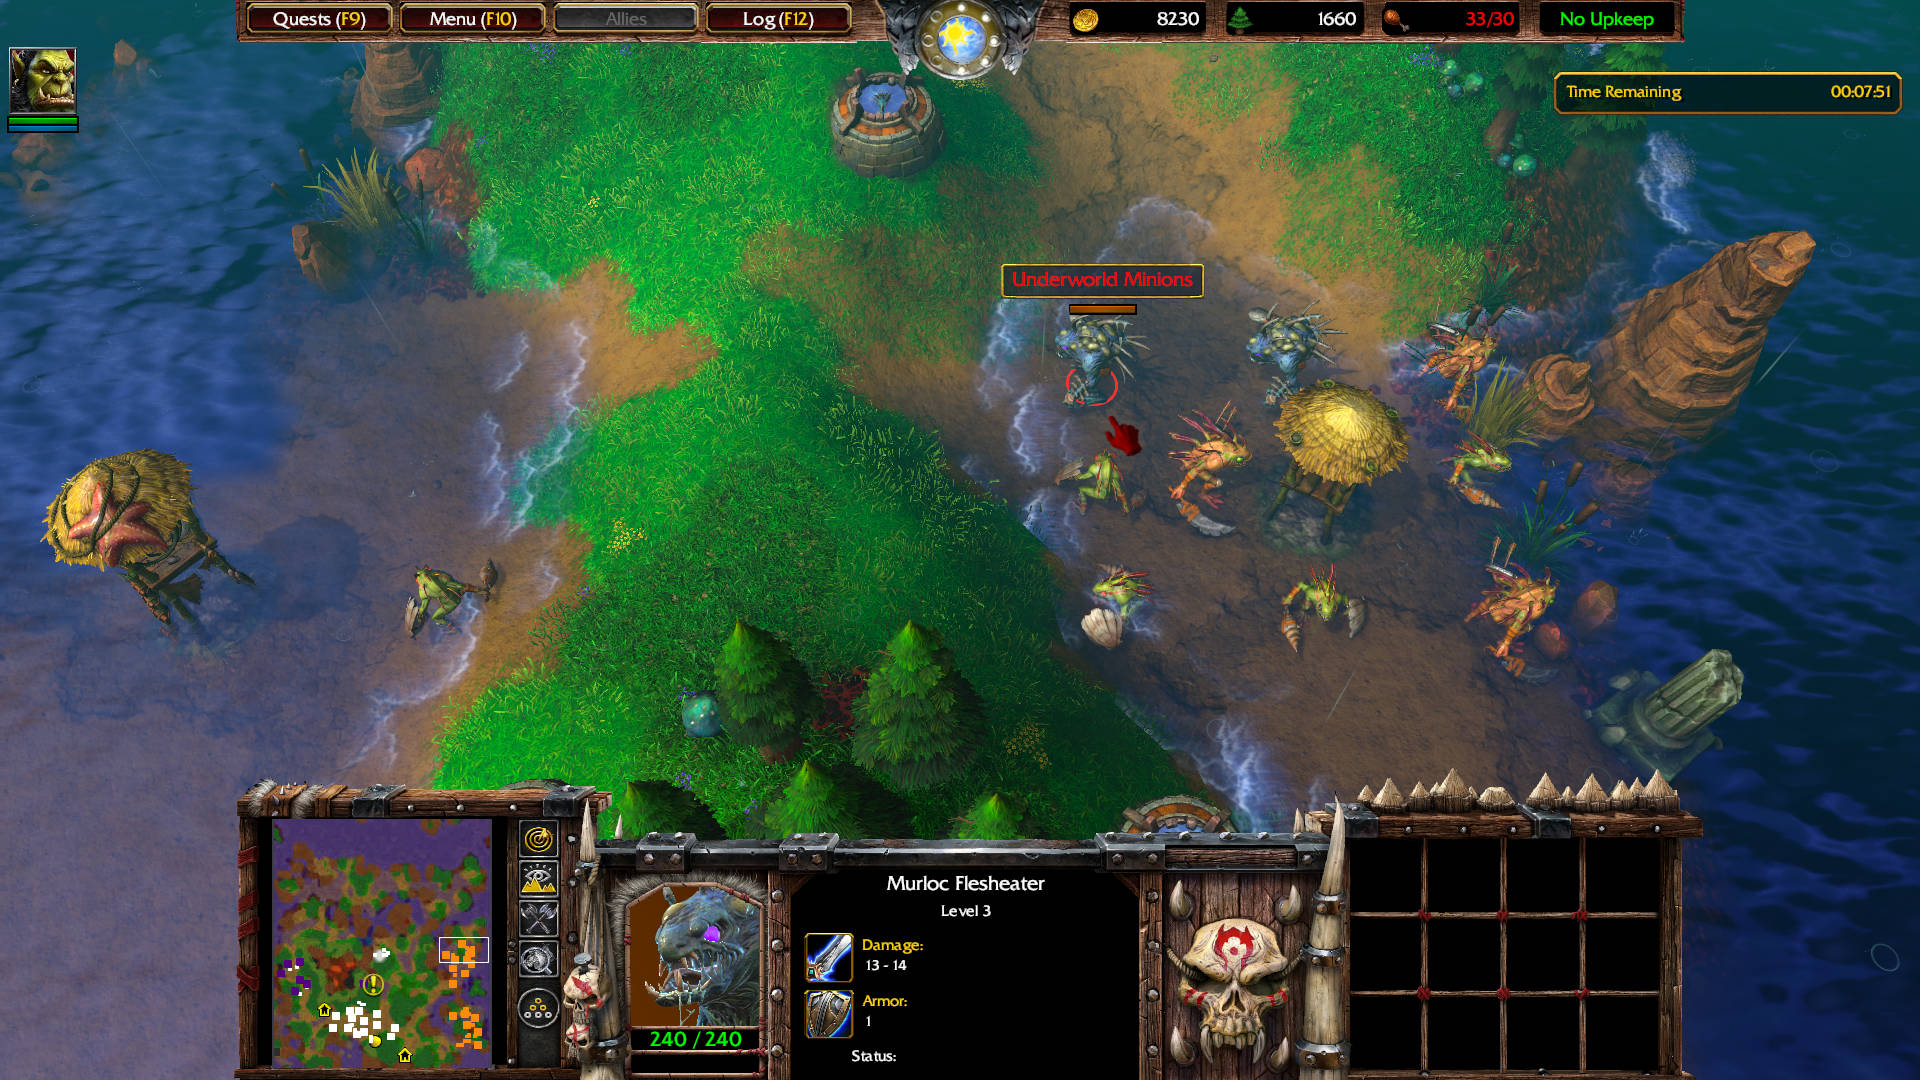
Send your troops to destroy this Tidal Dweller.
Prepare to engage over 10 murlocs that aggro from the north of the Tidal Dweller.
There are 4 additional huts and another Tidal Dweller north of the previous one.
Build a Peon (P) and send it to harvest gold.
Build a Shaman (S) at the Spirit Lodge.
You can now go back to the crossroads near your base. Take the diagonal path to the northeast. You will find the last village of murloc huts there.
The Siege Golems are built in this village, so prepare to get aggro from one of them when attacking this village. Remember to use your Raiders to cast Ensnare (E) on them.
Using this build order, all the murloc huts were destroyed when the countdown was still at 5:17.
If you do not destroy all the huts by the time the countdown reaches 0:00 your base is overwhelmed by countless waves of murlocs.
However, when you destroy all the murloc huts and the Altar of the Deeps nothing else attacks your base. All you have to do is wait for the countdown to reach 0:00 to complete the mission.
5:00 — Grunt: It won’t be much longer now, Warchief. The ships are nearly ready.
MAIN QUEST UPDATE
Hold the Line
- 5 minutes until ship repairs are finished
00:45 — Thrall: Hold the line, my warriors! Our freedom is at hand!
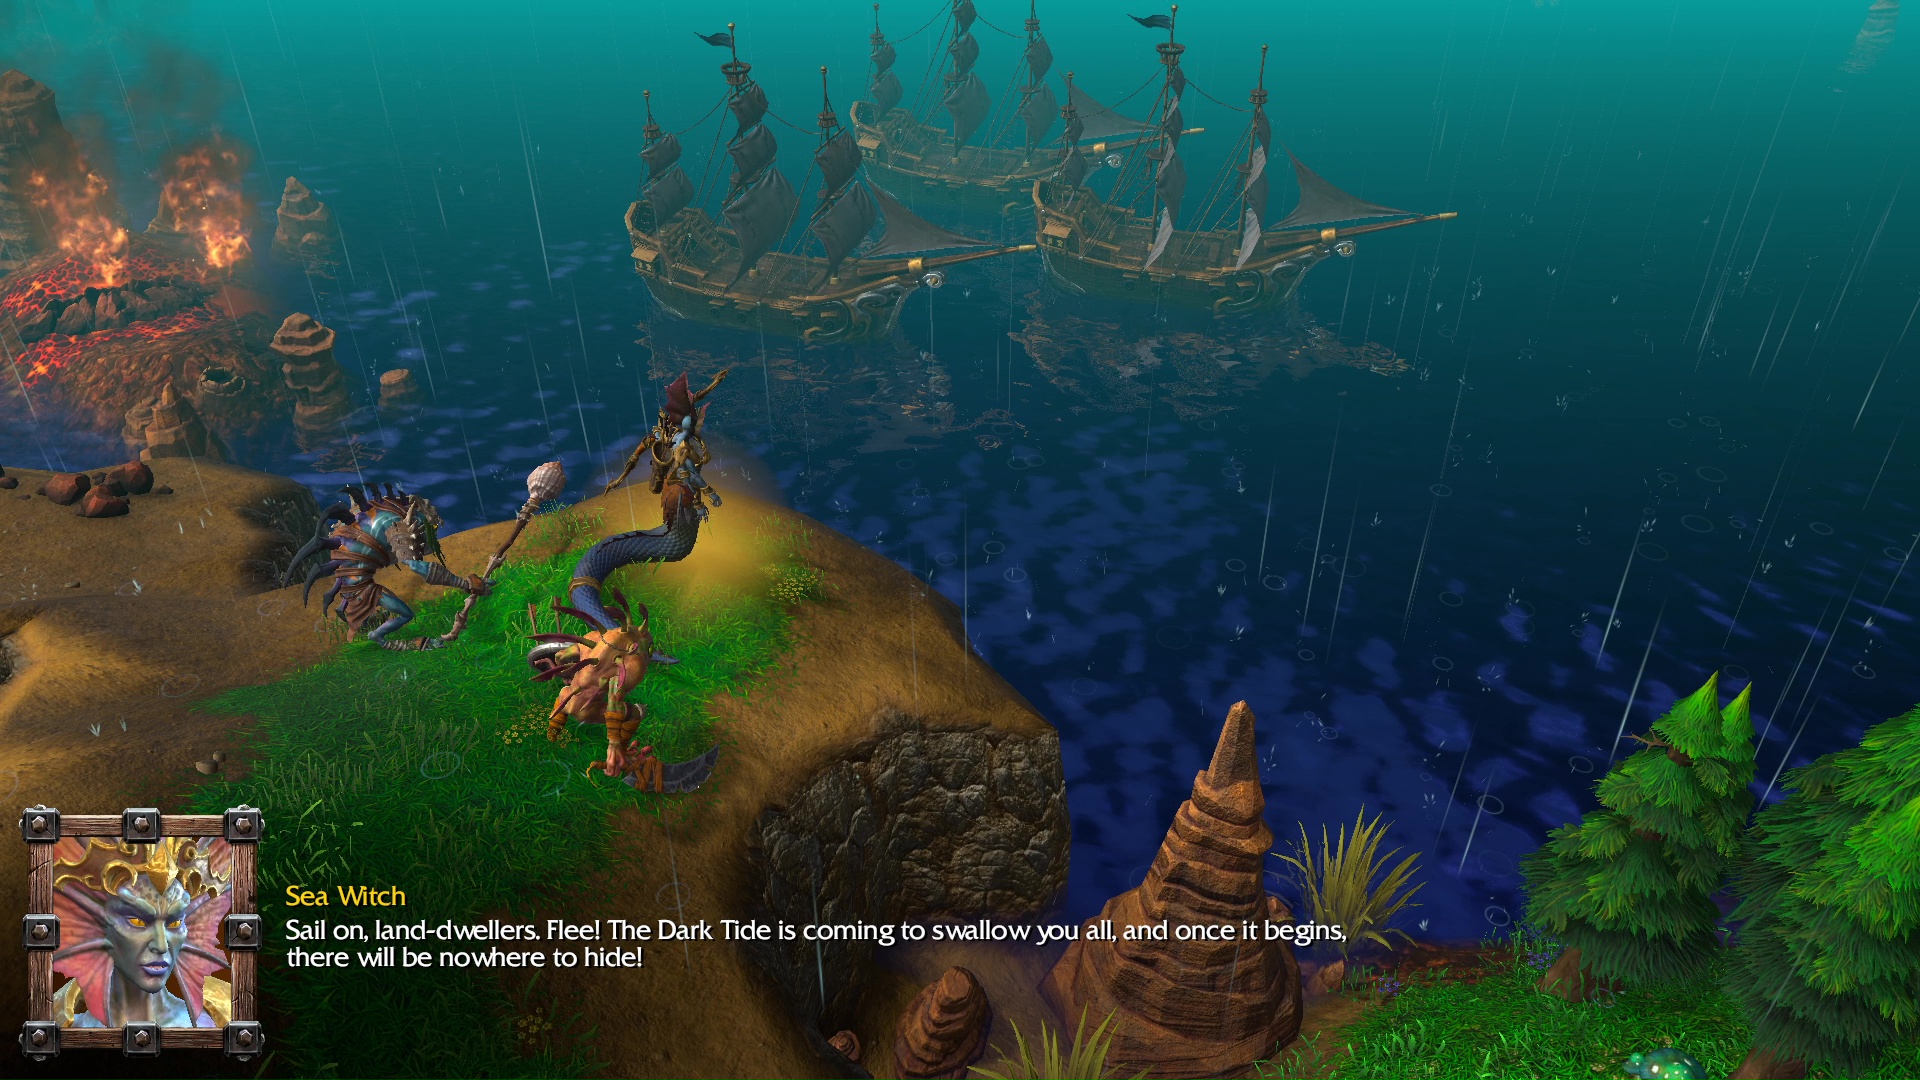
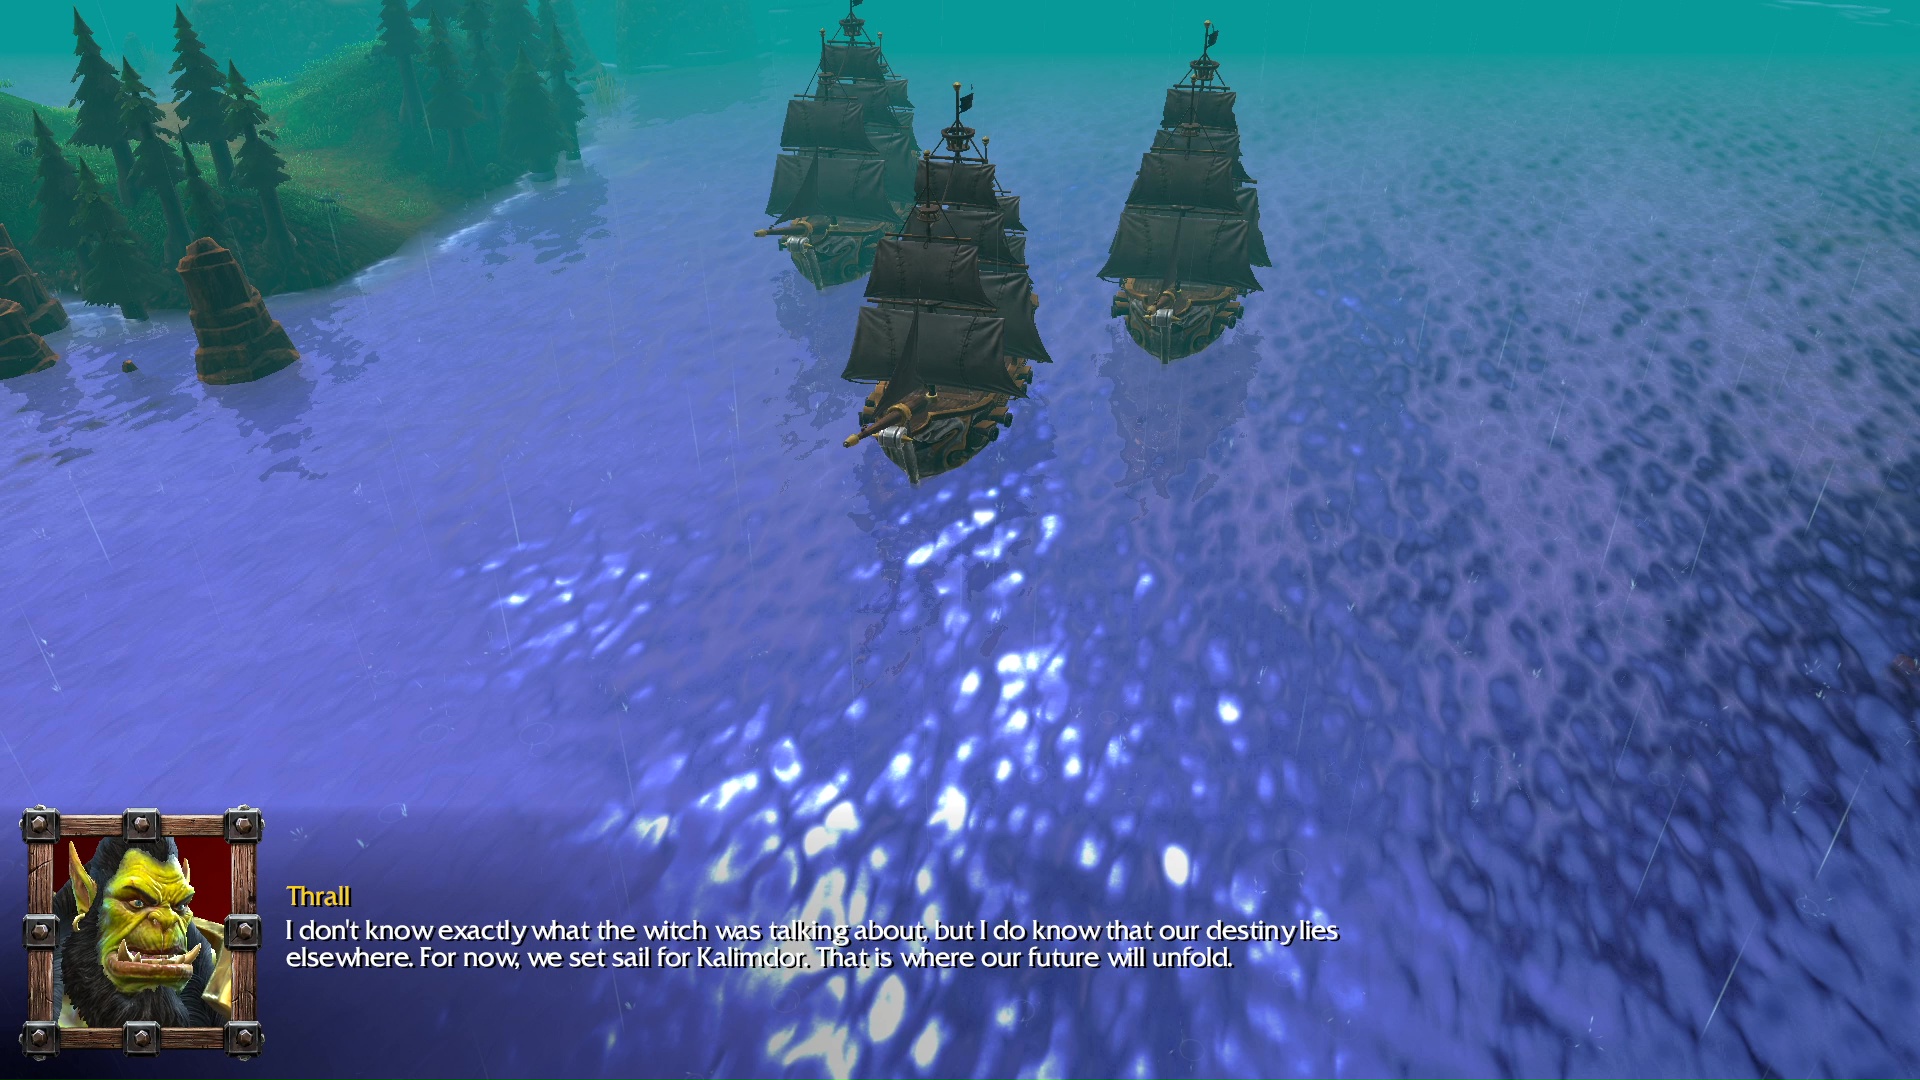
CUTSCENE
Sea Witch: Sail on, land-dwellers. Flee! The Dark Tide is coming to swallow you all, and once it begins, there will be nowhere to hide! (long maniacal laughter)
Thrall: I don’t know exactly what the witch was talking about, but I do know that our destiny lies elsewhere. For now, we set sail for Kalimdor. That is where our future will unfold.
BESTIARY
- Giant Wolf level 4. Timber Wolf level 2 (3) — Drops Claws of Attack +6: Increases the attack damage of the Hero by 6 when worn.
- Dire Wolf level 6. Timber Wolf level 2 (2).
- Dire Wolf level 6. Timber Wolf level 2 (2). Drops Ring of Protection +4: Increases the armor of the Hero by 4 when worn.
- Dire Wolf level 6. Timber Wolf level 2 (2). Drops Talisman of Evasion: Causes attacks against the wearer to miss 15% of the time. Does not stack with Evasion or Drunken Brawler.
- Dire Wolf level 6. Timber Wolf level 2 (2). Drops Scroll of Healing: Heals 150 hit points to all friendly non-mechanical units around the Hero when used.
- Storm Wyrm level 9. Lightning Lizard level 2 (2). Drops Gloves of Haste: Increases the attack speed of the Hero by 15% when worn.
- Lightning Lizard level 2 (2).


Hope you enjoyed this article. Please, support Blizzplanet via PayPal, and follow us on Twitter, Facebook, YouTube, and Twitch for Blizzard games news updates. |
 |